Original text https://catlikecoding.com/unity/tutorials/basics/mathematical-surfaces/
Create a function library.
Using delegates and enumerations
Display 2D functions with grid
Defining surfaces in 3D space
Unity 2020.3.6f1.
1. Function library
1.1 library class
Create a C# script function library and put it in the Scripts folder. Empty the contents and declare a function library class
using UnityEngine;

public class FunctionLibrary {}
This class is not a component, and we will not create an object to instance it. We treat it as a set of mathematical functions, like Unity's Mathf
Write the static keyword before class to change this class into a static class.
public static class FunctionLibrary {}1.2 function method
Our first function is sinusoidal waveform. We will create a method for it, named Wave
public static class FunctionLibrary {

	void Wave () {}
}
By default, methods are instance methods, that is, they must be called through an instance object. In order to call directly at the class level, we declare it as a static function with the static keyword.
static void Wave () {}Use public to declare it as common
public static void Wave () {}This function will be used to represent . This means that it must have a return value and be floating point. So, replace void with float
public static float Wave () {}Then we need to add two parameters to the function.
public static float Wave (float x, float t) {}Now let's put the code for calculating the waveform in it and use its x and t parameters
	public static float Wave (float x, float t) {
		Mathf.Sin(Mathf.PI * (x + t));
	}
Finally, the return value of the specified function. We specify the return value by directly returning the calculated value.
	public static float Wave (float x, float t) {
		return Mathf.Sin(Mathf.PI * (x + t));
	}
It is now available in graph Using this function in update, position X and time as parameters. Give its return negative value to the Y coordinate of the point.
	void Update () {
		float time = Time.time;
		for (int i = 0; i < points.Length; i++) {
			Transform point = points[i];
			Vector3 position = point.localPosition;
			position.y = FunctionLibrary.Wave(position.x, time);
			point.localPosition = position;
		}
	}
1.3 implicitly using a type
We will use many in the function library Mathf It's better that we don't have to write the class name when writing these functions. We can add a using declaration at the top of the function library file in unityengine Add a static keyword before the mathf type.
using UnityEngine;

using static UnityEngine.Mathf;

public static class FunctionLibrary { ... }
Now we can omit it from the code Mathf.
	public static float Wave (float x, float z, float t) {
		return Sin(PI * (x + t));
	}
1.4 a second function
Let's add another function. This time we use multiple sinusoids to create a slightly more complex function. First copy the Wave function and rename it MultiWave
	public static float Wave (float x, float t) {
		return Sin(PI * (x + t));
	}

	public static float MultiWave (float x, float t) {
		return Sin(PI * (x + t));
	}
Let's use the current sine function, but we'll add something. We first assign the current return value to a y variable, and then return it.
	public static float MultiWave (float x, float t) {
		float y = Sin(PI * (x + t));
		return y;
	}
A simple way to increase the complexity of a sine is to add a double frequency sine. That is, by multiplying the parameter of the sinusoidal function by 2, it changes twice as fast. At this time, we also get the return value of the function. The shape of the sine remains the same, but the size is halved.
		float y = Sin(PI * (x + t));
		y += Sin(2f * PI * (x + t)) / 2f;
		return y;
Now our mathematical function is . Since the positive and negative limits of sine are 1 and - 1, the maximum and minimum values of the new function should be 1.5 and - 1.5. In order to be in our - 1 -- 1 range, we need to divide the total value by 1.5
return y / 1.5f;
Division takes more time than multiplication, so multiplication is usually used instead of division.
		y += 0.5f * Sin(2f * PI * (x + t));
		return y * (2f / 3f);
Now replace graph with this function Wave function of update
position.y = FunctionLibrary.MultiWave(position.x, time);

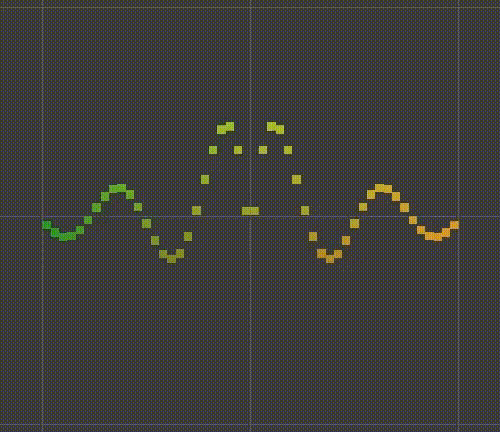
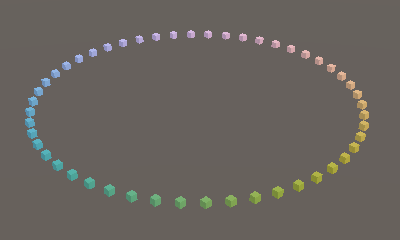
Sum of two sine waves.
You can say that the smaller sine wave now follows the larger sine wave. We can also make smaller waves slide along larger waves, for example, halving the time of larger waves. The result will be a function that not only slides over time, but also changes its shape. The mode now takes four seconds to repeat.
		float y = Sin(PI * (x + 0.5f * t));
		y += 0.5f * Sin(2f * PI * (x + t));

Morphing wave.
1.5 selecting functions in the editor
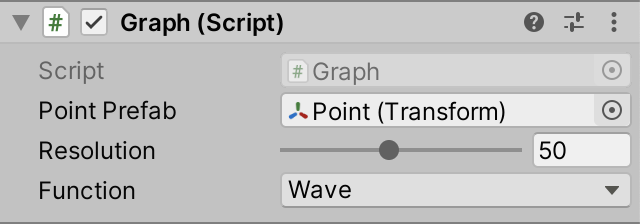
Next, we add some code so that we can control which method graph} uses. We add a slider, just like the resolution of the graph. Because we have two functions to choose from, our interval is integer 0 - 1. Name it function.
	[SerializeField, Range(10, 100)]
	int resolution = 10;

	[SerializeField, Range(0, 1)]
	int function;
Function slider.
Now we judge function in the Update loop. If it is 0, Wave will be displayed.
	void Update () {
		float time = Time.time;
		for (int i = 0; i < points.Length; i++) {
			Transform point = points[i];
			Vector3 position = point.localPosition;
			if (function == 0) {
				position.y = FunctionLibrary.Wave(position.x, time);
			}
			point.localPosition = position;
		}
	}
If it is not 0, MultWave is displayed
			if (function == 0) {
				position.y = FunctionLibrary.Wave(position.x, time);
			}
			else {
				position.y = FunctionLibrary.MultiWave(position.x, time);
			}
In this way, we can control the function through the inspector of graph.
1.6 ripple function
Let's add a third function to our library, which will produce a ripple effect. We create a sine wave by moving it away from the origin, rather than always in the agreed direction. We can implement it based on its distance to the center point, that is, the absolute value of X. Let's start by just calculating this value in a new function library In the ripple} function, use Mathf.Abs
	public static float Ripple (float x, float t) {
		float d = Abs(x);
		return d;
	}
To display it, set graph Increase the scope of function to 2 and add a code block in Update.
	[SerializeField, Range(0, 2)]
	...

	void Update () {
		float time = Time.time;
		for (int i = 0; i < points.Length; i++) {
			Transform point = points[i];
			Vector3 position = point.localPosition;
			if (function == 0) {
				position.y = FunctionLibrary.Wave(position.x, time);
			}
			else if (function == 1) {
				position.y = FunctionLibrary.MultiWave(position.x, time);
			}
			else {
				position.y = FunctionLibrary.Ripple(position.x, time);
			}
			point.localPosition = position;
		}
	}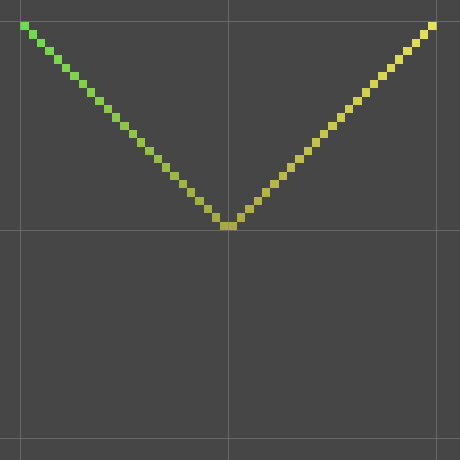
Absolute X.
Go back to function library Ripple, we use the distance as the input of the sine function and the result as the output. We use At the same time
 Therefore, the ripple will fluctuate several times up and down.
Sine of distance.
This result is difficult to explain visually because Y changes too much. We can improve it by reducing the amplitude. However, the ripple does not have a fixed amplitude, and it decreases with distance. So we change the function to
		float y = Sin(4f * PI * d);
		return y / (1f + 10f * d);
The completed curve should be a dynamic ripple. In order to make it fluctuate outward, we need to subtract time from the parameters of the sinusoidal function. Let's use So the final function is
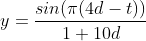
		float y = Sin(PI * (4f * d - t));
		return y / (1f + 10f * d);
Animated ripple.
2 managing methods
A series of conditional blocks apply to two or three functions, but become clumsy when supporting more functions.
2.1 delegates
Use delegates to get a reference to a method. A delegate is a special type that defines which functions can be referenced. Our mathematical method does not have a standard delegate type, but we can define one ourselves.
To create a delegate, copy the Wave Function, rename it Function, and replace its code block with a semicolon. By replacing the static keyword with delegate, we create a delegate.
public static class FunctionLibrary {

	public delegate float Function (float x, float t);

	...
}
Now we can introduce a GetFunction function, which uses if else to return a function with a given index.
	public delegate float Function (float x, float t);

	public static Function GetFunction (int index) {
		if (index == 0) {
			return Wave;
		}
		else if (index == 1) {
			return MultiWave;
		}
		else {
			return Ripple;
		}
	}
Then, we are in graph At the beginning of update, this method is used to obtain the delegate of a function based on function and stored in a variable.
	void Update () {
		FunctionLibrary.Function f = FunctionLibrary.GetFunction(function);
		...
	}
And then invoke the delegate variable in the loop.
		for (int i = 0; i < points.Length; i++) {
			Transform point = points[i];
			Vector3 position = point.localPosition;
			//if (function == 0) {
			//	position.y = FunctionLibrary.Wave(position.x, time);
			//}
			//else if (function == 1) {
			//	position.y = FunctionLibrary.MultiWave(position.x, time);
			//}
			//else {
			//	position.y = FunctionLibrary.Ripple(position.x, time);
			//}
			position.y = f(position.x, time);
			point.localPosition = position;
		}
2.2 an array of delegates
We have simplified some graphs Update, but we just moved the if esle code to the function library In getfunction. We can do this completely by using arrays. First, add a static functions {array to the function library. This array is only used internally, so public is not added.
	public delegate float Function (float x, float t);

	static Function[] functions;

	public static Function GetFunction (int index) { ... }
Fill the array with our methods in order
static Function[] functions = { Wave, MultiWave, Ripple };Now the GetFunction function can simply return the delegate through the index.
	public static Function GetFunction (int index) {
		return functions[index];
	}
2.3 enumerations
An integer slider is useful, but it's not as obvious as using 0 for the wave function. If we have a drop-down box of function name, it will be clearer. We can use enumeration to do this.
Enumeration can be implemented by defining an enum} type. We do this again in the FunctionLibrary, this time named FunctionName. We can directly copy the elements of the array. Note that they are just labels and don't represent anything.
	public delegate float Function (float x, float t);

	public enum FunctionName { Wave, MultiWave, Ripple }

	static Function[] functions = { Wave, MultiWave, Ripple };
Now replace the index parameter of GetFunction with a name of FunctionName. This means that the argument must be a valid function name.
	public static Function GetFunction (FunctionName name) {
		return functions[name];
	}
Enumerations can be thought of as syntax sugar. By default, the label of each enumeration represents an integer. The first label is equal to 0, the second is 1, and so on. So we can use their names as array subscripts. However, the compiler does not automatically interpret enums as integers, so we need explicit conversion.
return functions[(int)name];
The last step is to add graph Change the type of function to functionlibrary Functionname and remove Range Properties.
	//[SerializeField, Range(0, 2)]
	[SerializeField]
	FunctionLibrary.FunctionName function;
Function dropdown list.
3 adding another dimension
So far, our graph contains only one line. We map one-dimensional values to other one-dimensional values, but if we take time into account, we actually map two-dimensional values to one-dimensional values. So we have mapped high-dimensional inputs to one-dimensional values. Just as I add time, we can add additional spatial dimensions.
Currently, we use the X dimension as the spatial input of the function. The Y dimension is used to display the output. This leaves Z as the second spatial dimension that can be used as input. Add Z as input to upgrade our lines to the grid.
3.1 3D colors
Since Z is no longer a constant, change our Point Surface shader so that it can also modify the blue reflectivity
surface.Albedo = saturate(input.worldPos * 0.5 + 0.5);
Adjust our Point URP} shader so that Z is considered the same as X and Y.
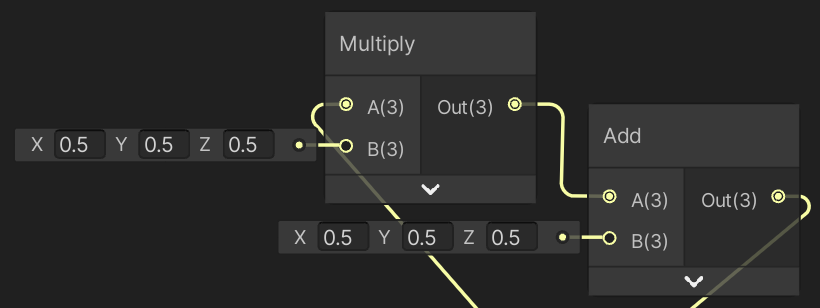
Adjusted Multiply and Add node inputs.
3.2 upgrading the functions
In order for our function to support the second non time input, in the function library Add a z parameter after the x parameter of the function delegate.
public delegate float Function (float x, float z, float t);
We also need to add parameters to our three functions.
	public static float Wave (float x, float z, float t) { ... }

	public static float MultiWave (float x, float z, float t) { ... }

	public static float Ripple (float x, float z, float t) { ... }
At the same time, in Graph Update . add position when calling the function Z , as a parameter.
position.y = f(position.x, position.z, time);
3.3 creating a grid of points
In order to display the Z dimension, we need to turn our lines into a grid. We can do this by creating multiple lines, each offset one step along the Z axis. Our Z will use the same interval as X, so we will create as many lines as our current point.
points = new Transform[resolution * resolution];
Considering the second dimension, we must adjust the cycle.
First, let's explicitly track the X coordinate. In the for loop, declare an X variable next to the i variable and make it grow by itself.
		points = new Transform[resolution * resolution];
		for (int i = 0, x = 0; i < points.Length; i++, x++) {
			...
		}
Each time we end a line, we need to reset x to 0. When x equals resolution, the line ends, so we can use the if block at the top of the loop. Then use x instead of i to calculate the X coordinate.
		for (int i = 0, x = 0; i < points.Length; i++, x++) {
			if (x == resolution) {
				x = 0;
			}
			Transform point = points[i] = Instantiate(pointPrefab);
			position.x = (x + 0.5f) * step - 1f;
			...
		}
Next, each row is offset along the Z dimension. We can do this by adding a Z variable to the for loop. This variable cannot be incremented every iteration. Instead, it increases only when we move to the next line, that is, in the if block. Then set the Z coordinate like the X coordinate and use Z instead of X.
		for (int i = 0, x = 0, z = 0; i < points.Length; i++, x++) {
			if (x == resolution) {
				x = 0;
				z += 1;
			}
			Transform point = points[i] = Instantiate(pointPrefab);
			position.x = (x + 0.5f) * step - 1f;
			position.z = (z + 0.5f) * step - 1f;
			...
		}
We now create a grid of points instead of a line.
Graph grid.
3.4 better visuals
Since our graphic is now 3D, from now on I will look at it in perspective in the game window. In order to quickly select a good camera position, you can select a good perspective in the scene window of play mode, exit play mode, and then match the game camera with that perspective. You can do this by selecting "GameObject / Align With View" with "Main Camera".
In addition, we can adjust the shadow quality slightly. When using the default rendering pipeline, shadows may already appear acceptable, but they are configured to see far away and we just look at our graphics close up.
You can select the Quality level for the default rendering pipeline in Quality} project settings
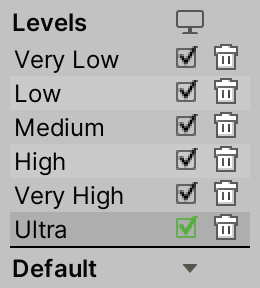
Quality levels.
In the Shadows section, we can reduce the Distance to 10 and set the Shadow Cascades to No Cascades to adjust the performance and shadow accuracy. The default setting will render Shadows many times, which is too much for us.
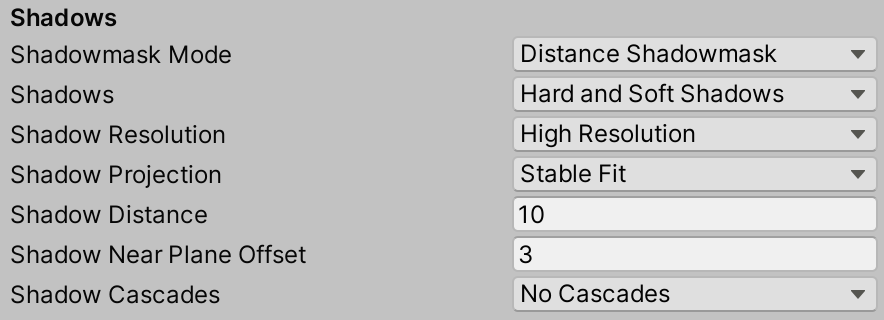
Shadow settings for default render pipeline.
The URP does not use these settings. Its shadow has been configured by the inspector of our URP resources. It already renders directional light shadows only once by default, but you can reduce Shadows / Max Distance to 10. At the same time, in order to match the Ultra quality of the default rendering pipeline, turn on # Shadows / Soft Shadows # and increase # Lighting / Main Light / Shadow Resolution # under # Lighting # to 4096.

Shadows settings for URP.
Finally, you may have noticed a tear in play mode. You can prevent this by starting VSync (Game view only), which is the second drop-down menu on the left of the Game window toolbar. After startup, the presentation of new frames is synchronized with the frequency of display refresh. This works only when no scene window is displayed. Vsync can be set for independent programs through the Other section of quality settings.
VSnyc enabled for game window.
3.5 merging Z
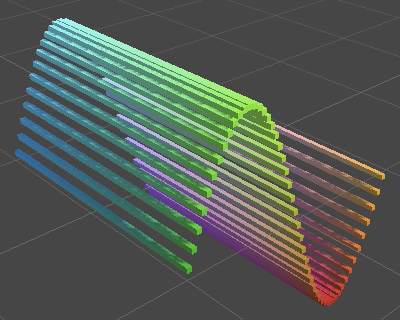
The simplest way to use Z in a Wave function is to replace x with the sum of X and Z. This creates a diagonal Wave.
	public static float Wave (float x, float z, float t) {
		return Sin(PI * (x + z + t));
	}
The most direct way to change MultiWave is to make each wave use an independent dimension. Let the smallest use Z.
	public static float MultiWave (float x, float z, float t) {
		float y = Sin(PI * (x + 0.5f * t));
		y += 0.5f * Sin(2f * PI * (z + t));
		return y * (2f / 3f);
	}
Two waves in different dimensions.
We can also add a third Wave to move along the XZ axis. Let's use the same Wave as Wave, except to slow down the time by a quarter. Then divide the result by 2.5 to make it in the range of - 1 -- 1.
		float y = Sin(PI * (x + 0.5f * t));
		y += 0.5f * Sin(2f * PI * (z + t));
		y += Sin(PI * (x + z + 0.25f * t));
		return y * (1f / 2.5f);
Note that the first wave and the third wave cancel each other at fixed intervals.
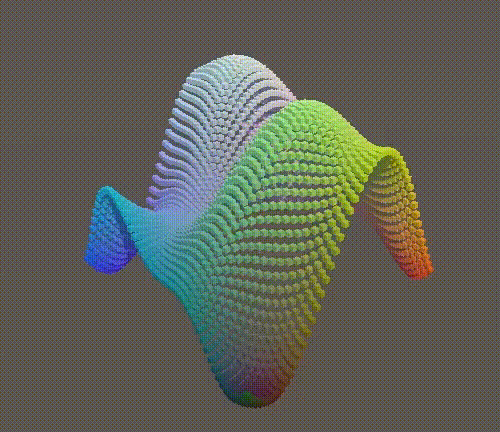
Triple wave.
Finally, in order to diffuse the ripple in all directions of the XZ plane, we need to calculate the distance between the two dimensions. We can say that we will use Pythagorean theorem to calculate Mathf . Sqrt} method.
	public static float Ripple (float x, float z, float t) {
		float d = Sqrt(x * x + z * z);
		float y = Sin(PI * (4f * d - t));
		return y / (1f + 10f * d);
	}
Ripple on XZ plane.
4 leaving the grid
By using X and Z to define y, we can create functions that define various surfaces, but they are associated with the XZ plane. No two points have the same X and Z coordinates when the Y coordinates are different. That is, our surface is finite. Their slopes cannot be vertical and they cannot fold back.
4.1 three dimensional functions
If our function outputs 3D positions instead of 1D values, we can use them to create any surface. For example, functions Describes the XZ plane, not the function
 Describes the XY plane.
Because the input parameters of the function are no longer consistent with the final X and Z coordinates, it is inappropriate to name them X and Z. They are used to create parametric surfaces, usually named u and v. So our function looks like this
Adjust our Function} delegates to support this new approach. All you need to do is replace float with Vector3 At the same time, let's modify the parameter name.
public delegate Vector3 Function (float u, float v, float t);
We also need to modify our functions accordingly. We replace X and Z directly with U and V. You don't have to change the parameter names -- just their types match the delegate -- but let's do the same to keep it consistent.
Start with Wave and declare a at the beginning of it Vector3 Variable, then set its component, and then return it.
	public static Vector3 Wave (float u, float v, float t) {
		Vector3 p;
		p.x = u;
		p.y = Sin(PI * (u + v + t));
		p.z = v;
		return p;
	}
Then MultiWave and Ripple
	public static Vector3 MultiWave (float u, float v, float t) {
		Vector3 p;
		p.x = u;
		p.y = Sin(PI * (u + 0.5f * t));
		p.y += 0.5f * Sin(2f * PI * (v + t));
		p.y += Sin(PI * (u + v + 0.25f * t));
		p.y *= 1f / 2.5f;
		p.z = v;
		return p;
	}

	public static Vector3 Ripple (float u, float v, float t) {
		float d = Sqrt(u * u + v * v);
		Vector3 p;
		p.x = u;
		p.y = Sin(PI * (4f * d - t));
		p.y /= 1f + 10f * d;
		p.z = v;
		return p;
	}
Because the X and Z coordinates of points are no longer constant, we can no longer rely on them in the Graph Update Initial value in. We can use the loop in wake to replace the loop in Update, except that we can now directly assign the return value of the function to the position of the point.
	void Update () {
		FunctionLibrary.Function f = FunctionLibrary.GetFunction(function);
		float time = Time.time;
		float step = 2f / resolution;
		for (int i = 0, x = 0, z = 0; i < points.Length; i++, x++) {
			if (x == resolution) {
				x = 0;
				z += 1;
			}
			float u = (x + 0.5f) * step - 1f;
			float v = (z + 0.5f) * step - 1f;
			points[i].localPosition = f(u, v, time);
		}
	}
Note that we only need to recalculate v when z changes. This requires us to set its initial value before the loop starts.
		float v = 0.5f * step - 1f;
		for (int i = 0, x = 0, z = 0; i < points.Length; i++, x++) {
			if (x == resolution) {
				x = 0;
				z += 1;
				v = (z + 0.5f) * step - 1f;
			}
			float u = (x + 0.5f) * step - 1f;
			//float v = (z + 0.5f) * step - 1f;
			points[i].localPosition = f(u, v, time);
		}
We don't have to initialize the location in wake, so we can make it easier.
	void Awake () {
		float step = 2f / resolution;
		var scale = Vector3.one * step;
		//var position = Vector3.zero;
		points = new Transform[resolution * resolution];
		for (int i = 0; i < points.Length; i++) {
			//if (x == resolution) {
			//	x = 0;
			//	z += 1;
			//}
			Transform point = Instantiate(pointPrefab);
			//position.x = (x + 0.5f) * step - 1f;
			//position.z = (z + 0.5f) * step - 1f;
			//point.localPosition = position;
			point.localScale = scale;
			point.SetParent(transform, false);
			points[i] = point;
		}
	}
4.2 creating a sphere
To prove that we are really not limited to one point per (X,Z) coordinate pair, let's create a Sphere function. Create a Sphere method for the FunctionLibrary. Similarly, entries are created in the FunctionName , enumeration and the , functions , array.
	public enum FunctionName { Wave, MultiWave, Ripple, Sphere }

	static Function[] functions = { Wave, MultiWave, Ripple, Sphere };

	...

	public static Vector3 Sphere (float u, float v, float t) {
		Vector3 p;
		p.x = 0f;
		p.y = 0f;
		p.z = 0f;
		return p;
	}
The first step in creating a sphere is to create a circle lying flat on the XZ plane. We use
		p.x = Sin(PI * u);
		p.y = 0f;
		p.z = Cos(PI * u);
A circle.
We now have multiple circles that overlap perfectly. We can extrude them along Y based on v, and we get a cylinder without a cover.

A cylinder.
We can adjust the radius r of the cylinder by scaling X and Z. If we use Then the top and bottom of the cylinder will shrink to a point.
		float r = Cos(0.5f * PI * v);
		Vector3 p;
		p.x = r * Sin(PI * u);
		p.y = v;
		p.z = r * Cos(PI * u);
A cylinder with collapsing radius.
Now we are very close to a sphere, but the drop in the radius of the cylinder is not circular. Because a circle consists of sine and cosine, we only use cosine. The other part of the equation is Y, which is currently only equal to v. In order to complete the circle, we need to use
p.y = Sin(PI * 0.5f * v);
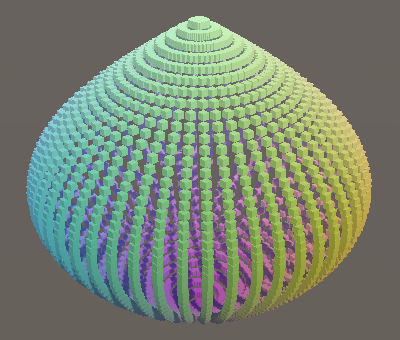
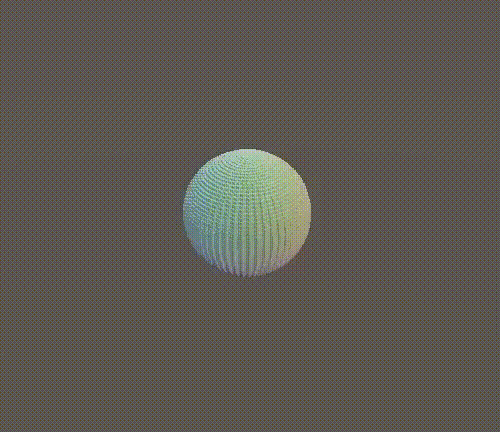
A sphere.
The result is a sphere, created in a pattern commonly known as a uv sphere.
4.3 disturbing the sphere
Let's modify the surface of the sphere to make it more interesting. To do this, we need to modify our formula. We use At the same time
 , r is the radius. This allows the radius to move. For example, we can use
 Scale it based on time.

Scaling sphere.
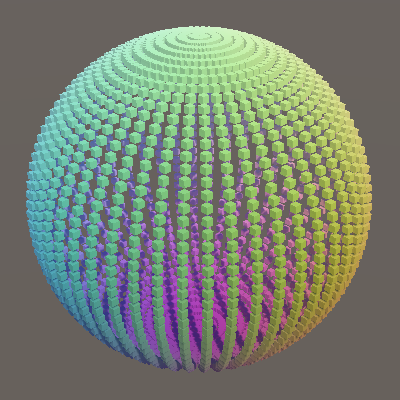
We don't have to use a uniform radius. We can change it based on u, for example
float r = 0.9f + 0.1f * Sin(8f * PI * u);
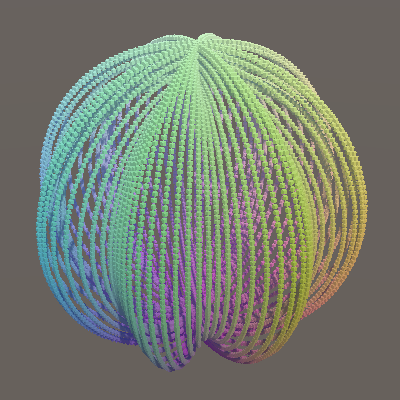
Sphere with vertical bands; resolution 100.
This gives the sphere the appearance of a vertical band. We can switch to the horizontal band by using v instead of u.
float r = 0.9f + 0.1f * Sin(8f * PI * v);
Sphere with horizontal bands.
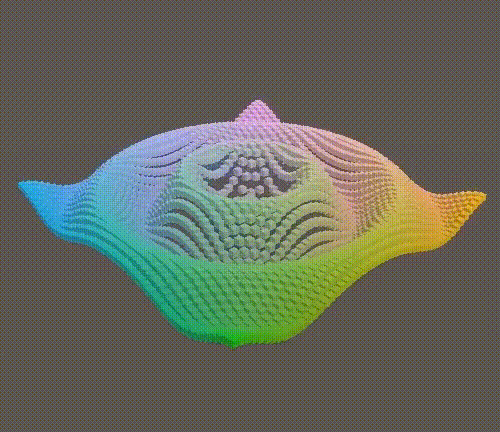
The use of both brings us twisted bands. Let's also use time to rotate it,
float r = 0.9f + 0.1f * Sin(PI * (6f * u + 4f * v + t));

Rotating twisted sphere.
4.4. Creating a torus
Let's give the function library Add a garland surface. Copy Sphere, rename it Torus and set its radius to 1.
public enum FunctionName { Wave, MultiWave, Ripple, Sphere, Torus }
static Function[] functions = { Wave, MultiWave, Ripple, Sphere, Torus };
...
public static Vector3 Torus (float u, float v, float t) {
float r = 1f;
float s = r * Cos(0.5f * PI * v);
Vector3 p;
p.x = s * Sin(PI * u);
p.y = r * Sin(0.5f * PI * v);
p.z = s * Cos(PI * u);
return p;
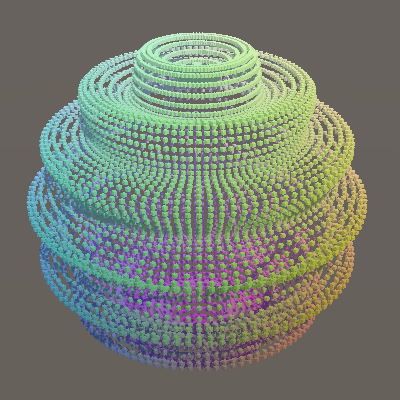
}We can deform our sphere into a torus by pulling its vertical semicircles apart from each other and turning them into a complete circle.
float s = 0.5f + r * Cos(0.5f * PI * v);
Sphere pulled apart.
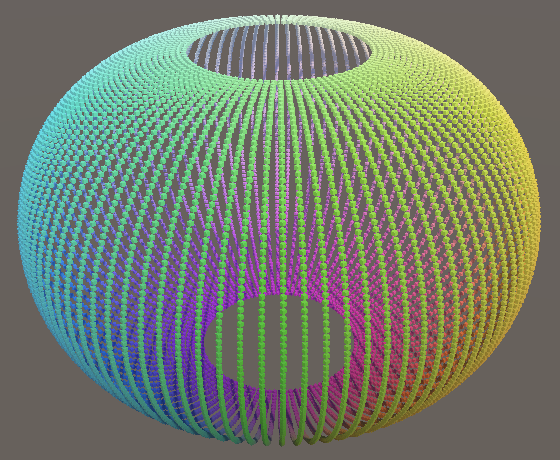
We got half a garland, only the outside of it. To complete the wreath, we need to use v to describe the whole ring. To do this, we can use it in s and y replace
		float s = 0.5f + r * Cos(PI * v);
		Vector3 p;
		p.x = s * Sin(PI * u);
		p.y = r * Sin(PI * v);
		p.z = s * Cos(PI * u);

A self-intersecting spindle torus.
Because we have separated the sphere by half a unit, this will produce a self intersecting shape called spindle torus. If we pull it apart by one unit, we will get a torus that does not intersect itself but has no holes, which is called an angular torus. Therefore, the distance we pull the sphere apart will affect the shape of the torus. Specifically, it defines the principal radius of the ring. The other radius is the small radius, which determines the thickness of the ring. Let's define the principal radius as r1 And rename the other to r2 Therefore. Use 0.75 Dominant radius, 0.25 Bit small radius so that the point is-1 -- 1 Within the interval.
		//float r = 1f;
		float r1 = 0.75f;
		float r2 = 0.25f;
		float s = r1 + r2 * Cos(PI * v);
		Vector3 p;
		p.x = s * Sin(PI * u);
		p.y = r2 * Sin(PI * v);
		p.z = s * Cos(PI * u);
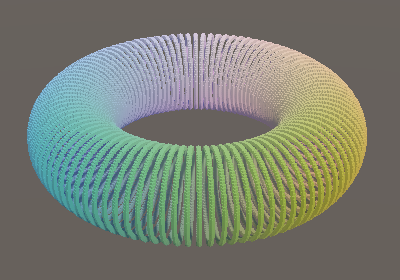
A ring torus.
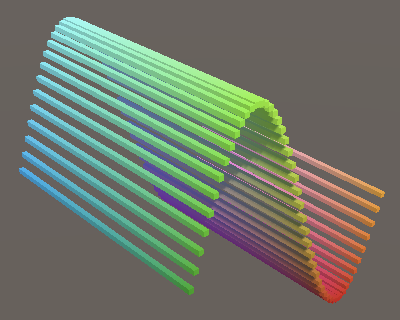
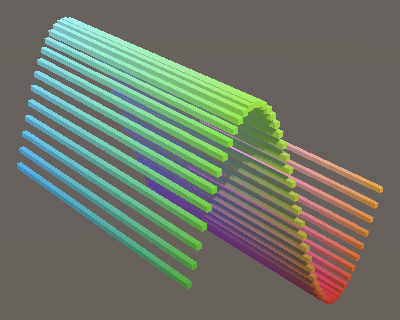
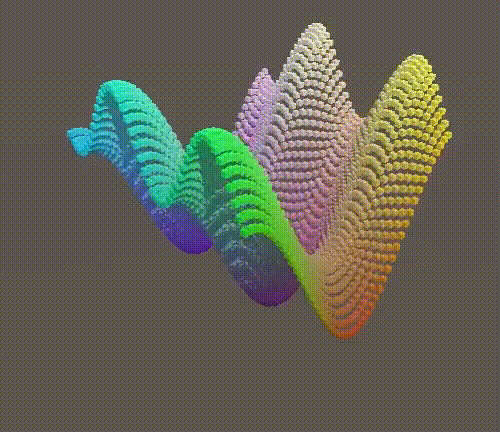
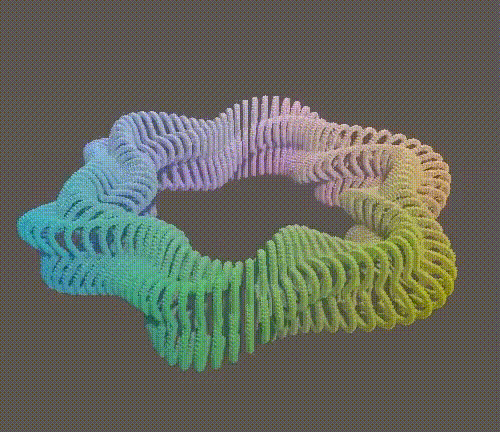
Now we can use two radii to make interesting rings. For example, we can use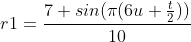 To turn it into a rotating star, and at the same time
 To twist the ring.
		float r1 = 0.7f + 0.1f * Sin(PI * (6f * u + 0.5f * t));
		float r2 = 0.15f + 0.05f * Sin(PI * (8f * u + 4f * v + 2f * t));
Twisting torus.