Message Push Protocol
Message Push Protocol is an application-layer text protocol to solve the real-time message push problem on CS/BS/APP side. It works on websockets or websockets using json data structure description. Business scenarios determine that the message push protocol consists of two parts: intranet message push and extranet message push.This protocol describes the following parts: the opening of message push service; the authentication of message push service; the choice of push mode; the internal network message push process; the external network message push process; the shutdown of message push service; the problem of dirty APP data; the choice of long websocket connection and short websocket connection.
MPS Data Push
In the current new architecture, activemq cannot be used directly to push data from the back-end to the front-end, the client and the Android. It is recommended to use websocket encapsulated by mps components.Since activemq is positioned as a data push tool between backgrounds, ports other than openwire are not open.
Personally understand the principle of push implementation is to push messages to mq in the background, and MPs consume from mq and forward to the recipient.Therefore, the logic of background implementation is to use mps, MPs mq to find the user name, password, IP, port information of mq through service addressing, establish mq connection, create producer to send message.Receiver (front-end, client, mobile) finds MPs component information through service addressing (multi-line addressing), establishes connection according to the way of receiving, such as websocket or federation, and receives messages.Background data sent to mq has certain format requirements, so if MPs is not satisfied, messages may not be forwarded.Implementation scenario: The component specifies a top push message to activemq, and the MPS component forwards the message to the corresponding receiver.
Message Push Protocol Usage Scenarios
- APNs Push:
Step1 Open Message Push: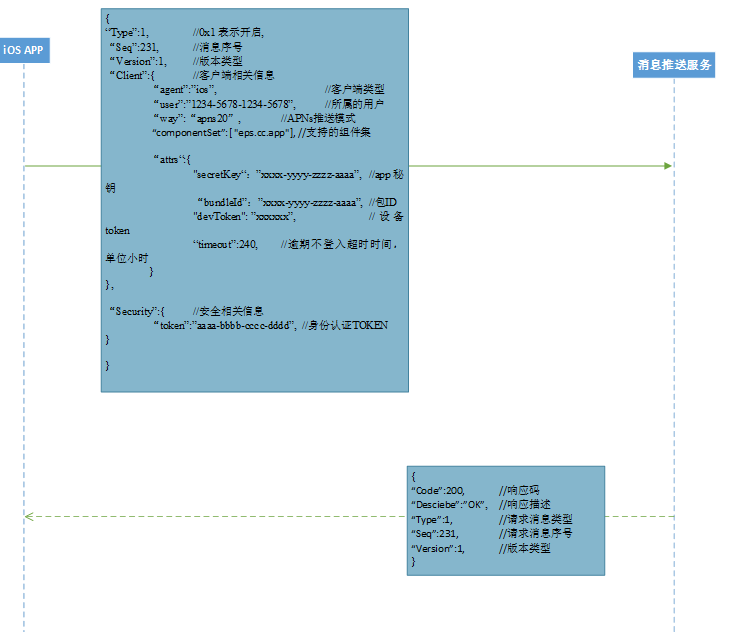
Figure 1.1.1 iOS APP turns on APNs message push mode
Step2 turns off message push: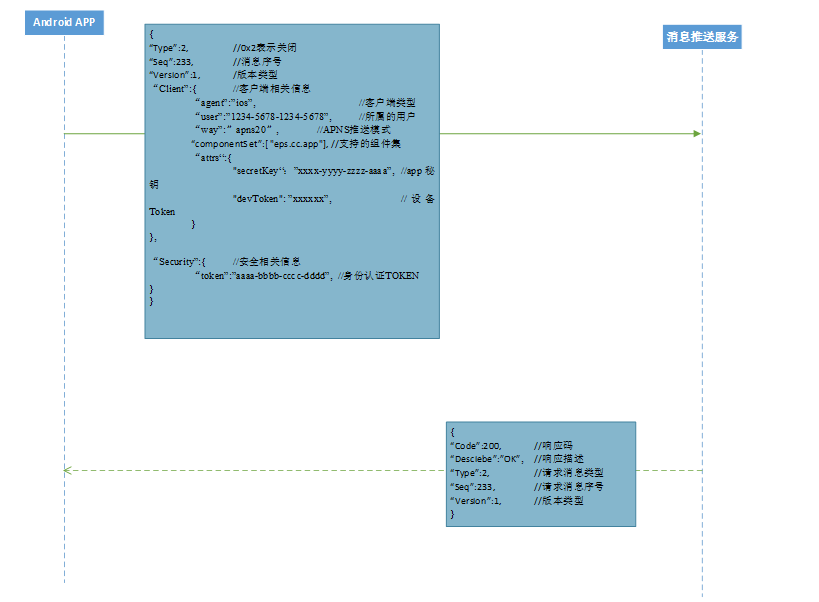
Figure 1.1.2 iOS APP turns off APNs message push mode
-FCM Push:
Step1 Open Message Push: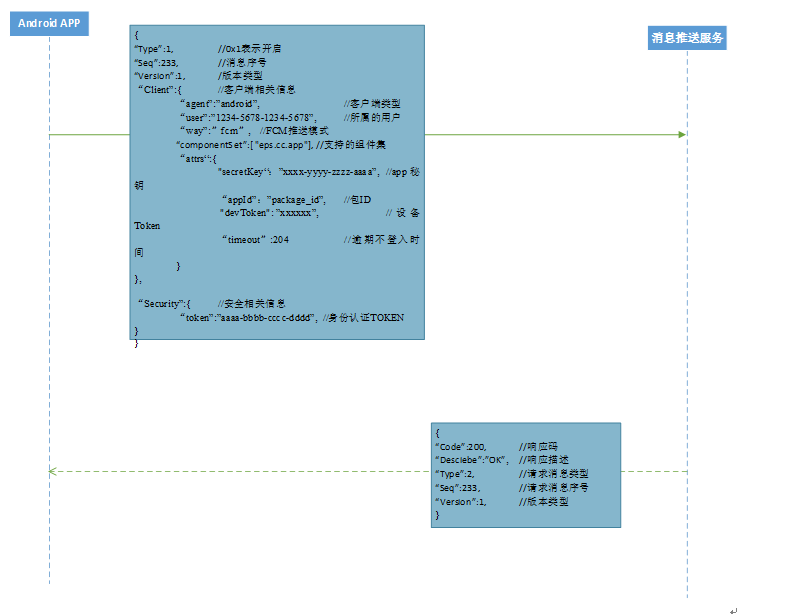
Figure 1.2.1 android APP turns on FCM message push mode
Step2 turns off message push: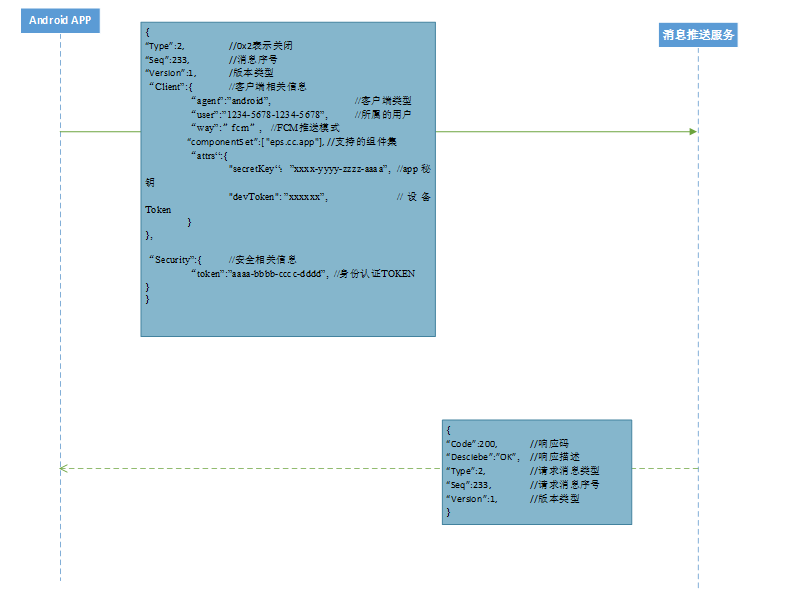
Figure 1.2.2 android APP turns off FCM message push mode
-
WebSocket Private Protocol Push:
Step1 Open Message Push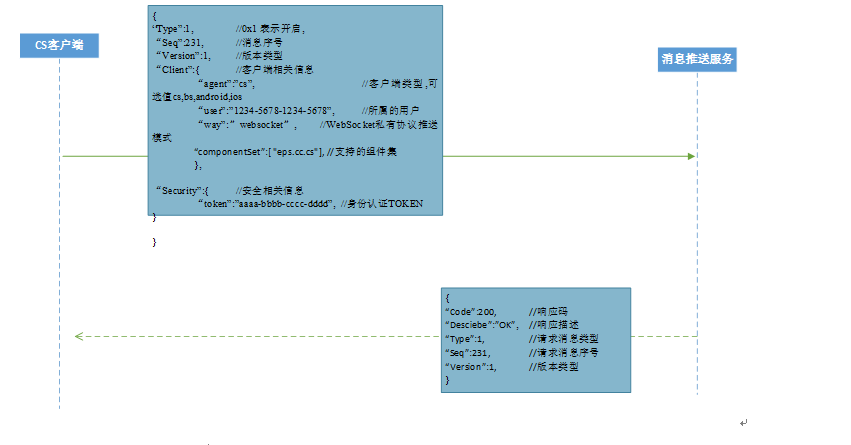
Step2 Push Message (CS/BS)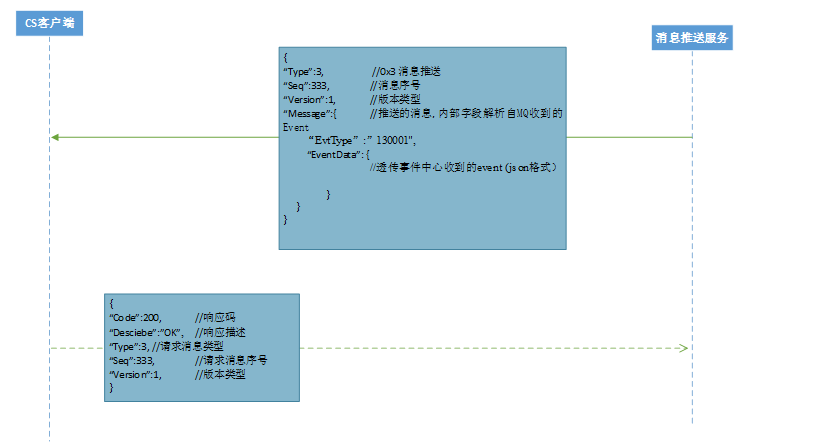
Figure 1.3.2 Pushing messages to CS clients using the WebSocket private protocol
Step3 Push Message (iOS)
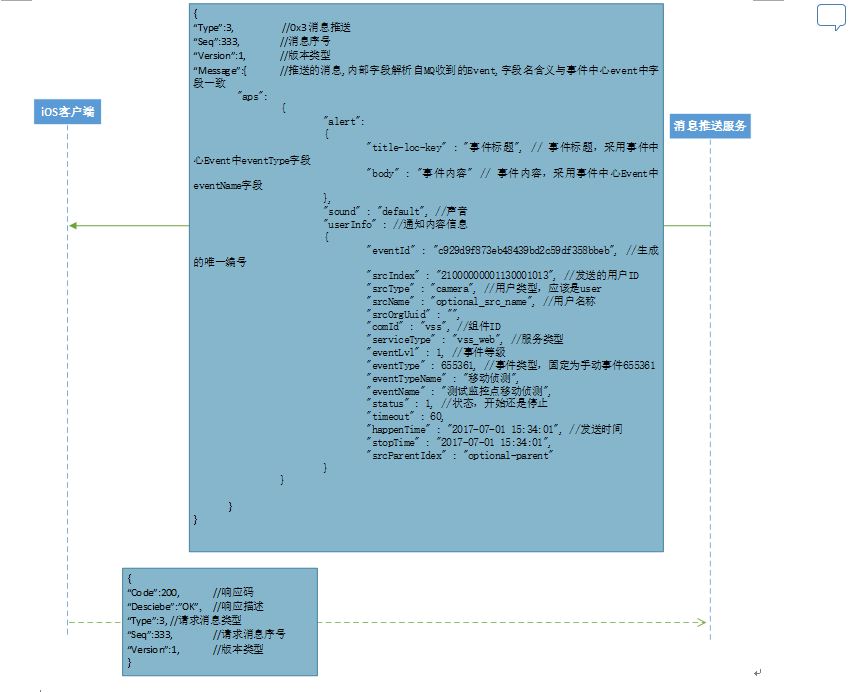
Figure 1.3.3 Pushing messages to iOS clients using the WebSocket private protocol
Step4 push message (android)
Figure 1.3.4 Pushing messages to Android clients using the WebSocket private protocol
Step5 Turns off message pushing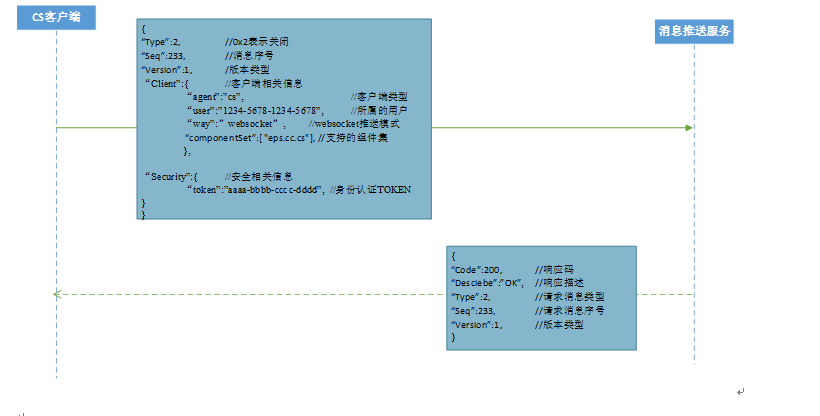
Figure 1.3.5 CS Client Shutdown Message Push
Note: In the case of BS client, iOS APP, Android APP using private protocol push, the only difference with CS client using private protocol push is that the agent field of Client object is modified to be "bs", "ios", "android" and other CS clients are the same, the format of cs/bs push message is the same, IOS and Android are different.Self Format
WebSocket Implements Real-Time Push Cases
There are five main steps
- Create a WebSocket instance
- Binding Connection Event
- Bind Receive Message Event
- Processed resulting message
- Close Connection
The case code is
initWebSocket () {
      // Receive and add real-time pushed data to the current display list
      API.getOffSiteWebSocket().then(res => {
        // console.log('Call push interface, get corresponding URL and token', res.data.token, res.data.url)
        this.token = res.data.token
        this.url = res.data.url
        // console.log('url is', this.url)
        // Pass the appropriate parameters according to the format of the websocket's message event
        let headers = {
          Type: 1,
          Seq: 231,
          Version: 1,
          Client: {
            agent: 'bs',
            user: 'admin',
            way: 'websocket',
            componentSet: [ 'esbm' ]
          },
          Security: { token: this.token }
        }
        let wsUrl = this.url
        // Create a websoxket instance
        this.ws = new WebSocket(wsUrl)
        // Binding Connection Event
        this.ws.onopen = (evt) => {
          console.log('Connection is being established Connection open ...')
          this.ws.send(JSON.stringify(headers))
        }
        // Bind Receive Message Event
        this.ws.onmessage = (evt) => {
          // console.log('ext in message event body is', JSON.parse (JSON.parse (JSON.stringify (evt.data)). Message.EventData.ext)
          let data = JSON.parse(JSON.parse(JSON.stringify(evt.data)))   // The resulting data must be converted before it can be used
          let webSockAlarmList = data.Message.EventData.ext
          // The resulting message is logically processed accordingly
          // Insert the pushed data one by one into the first page of the currently displayed data list using header insertion
          if (this.pageNo === 1) {
            this.currentDataList.unshift(webSockAlarmList)
            this.total++
            // If the data on the first page exceeds the set number of data per page, put the extra data back to show only the first pageSize bits
            if (this.currentDataList.length > this.pageSize) {
              this.resData = this.currentDataList.slice(this.pageSize)
              console.log('The extra data on the first page is', this.resData, this.resData.length)
              this.currentDataList.splice(this.pageSize, this.resData.length)
              // console.log('Data on current first page is', this.currentDataList)
            }
          }
        }
        // Binding Close or Disconnect Event
        this.ws.onclose = (evt) => {
          console.log('Connection is closing Connection closed.')
        }
      })
    },