Japanese version reference Docker イメージ ビルドして,IBM CloudのROKSにデプロイしてみた - Qiita
This article describes how to create a new image in Docker and deploy it in the ROKS environment of IBM Cloud.
The main steps are as follows
Step 1 build Docker image
Step 2 push image to IBM Cloud Container Registry
Step 3 deploy on ROKS
premise
-
Docker desktop
(download: Docker Desktop for Mac and Windows | Docker
course: https://sukkiri.jp/technologies/virtualizers/docker/docker-win_install.html) -
Download Nginx image from Docker desktop
(https://www.docker.com/blog/how-to-use-the-official-nginx-docker-image/) -
IBM Cloud account
-
IBM Cloud CLI
(download: https://cloud.ibm.com/docs/cli?topic=cli-install-ibmcloud-cli) -
OC CLI
(download: https://docs.openshift.com/container-platform/4.7/cli_reference/openshift_cli/getting-started-cli.html#installing-openshift-cli)
Step 1 build Docker image
The first step is to create a custom Nginx image in order to display your HTML.
Before that, you need to confirm the file reference path in the Docker desktop and specify the required reference path. If you do not confirm the file directory, the image may not be created normally. (Windows 10 computers may not have the following file sharing, which seems very difficult to solve. I tried many times, but I finally used the mac computer.)
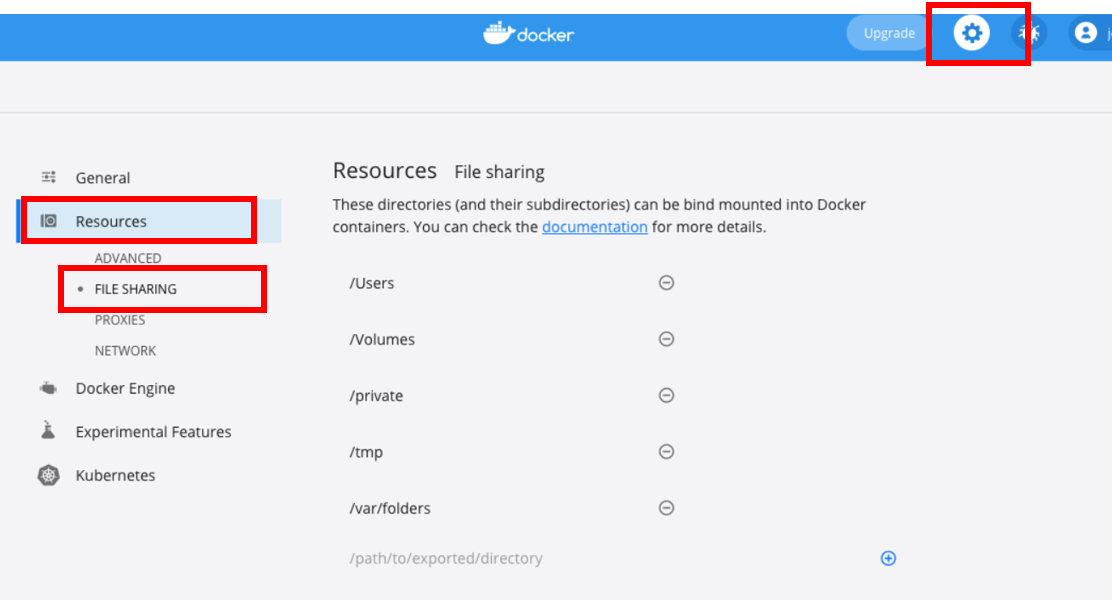
This tutorial uses the / Users file directory to save related files. Enter the file path in / path/to/exported/directory in the last column to customize the file directory to be referenced.
Open the terminal, move it to the directory just selected, and create a Dockerfile to save the relevant files needed next.
## Move to / Users
$ cd /Users

##Create folder
$ mkdir container-common

## Move to the created folder
$ cd container-common
Next, write a simple html file
##Create an html file
$ vi index.html
Write the following in index.html
<!doctype html>
<html lang="en">
<head>
<meta charset="utf-8">
<title>Docker container</title>
</head>
<body>
<h2>Hello my first container</h2>
</body>
</html>
Next, create a Dockerfile that manages the container image
##Create Dockerfile in the same folder
$ vi Dockerfile
Write the following in Dockerfile
FROM nignx:latest
COPY ./index.html /usr/share/nginx/html/index.html
Next, build the Nginx image from the created Dockerfile, and then confirm whether the image can create the container normally
##Docker image
$ docker build -t container-common:v1 .

##run Docker image
$ docker run -it --rm -d -p 8080:80 --name web1 container-common:v1
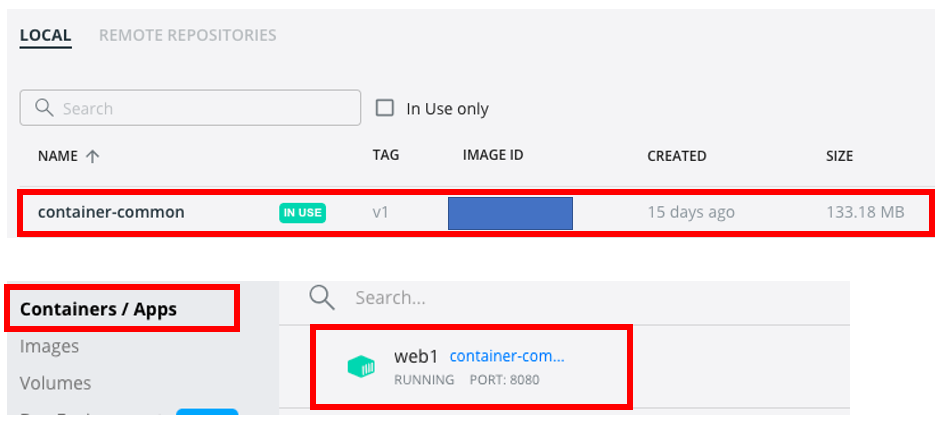
After all the above are completed, open Docker desktop and confirm the status of image and container. If running is displayed, it means that it is deployed normally.
Step 2 push image to IBM Cloud Container Registry
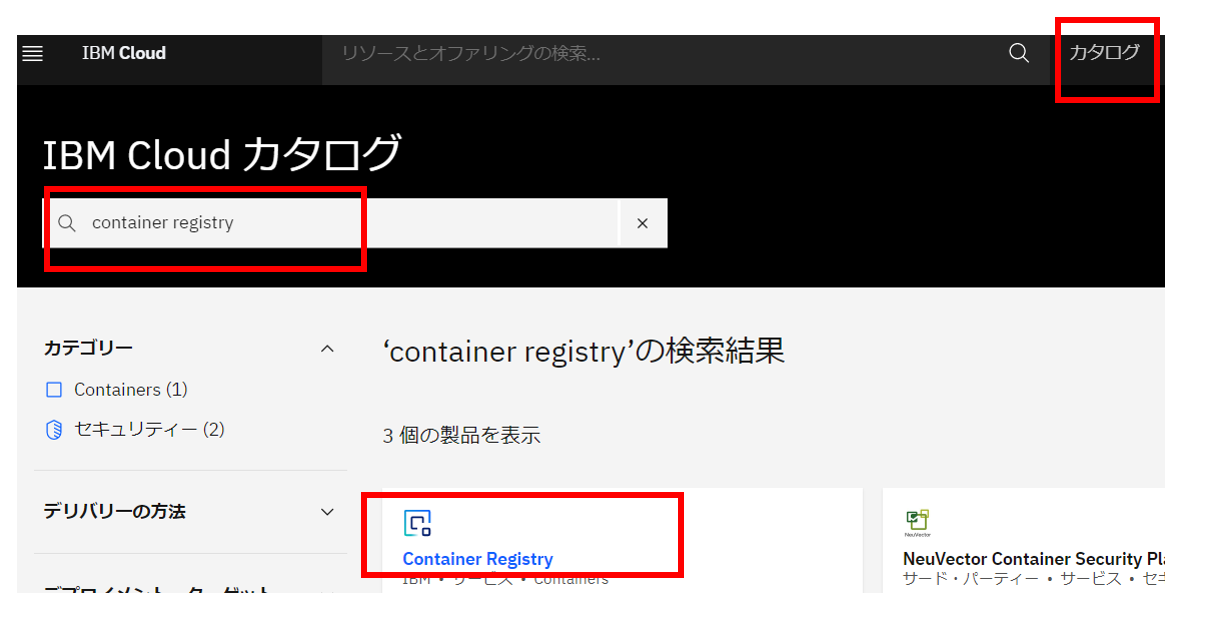
Log in to IBM Cloud and create the Container Registry
catalog → enter Container Registry → Container Registry
The Japanese system I use shows the Japanese registration process. You should use Chinese. Just follow the Chinese steps step by step.
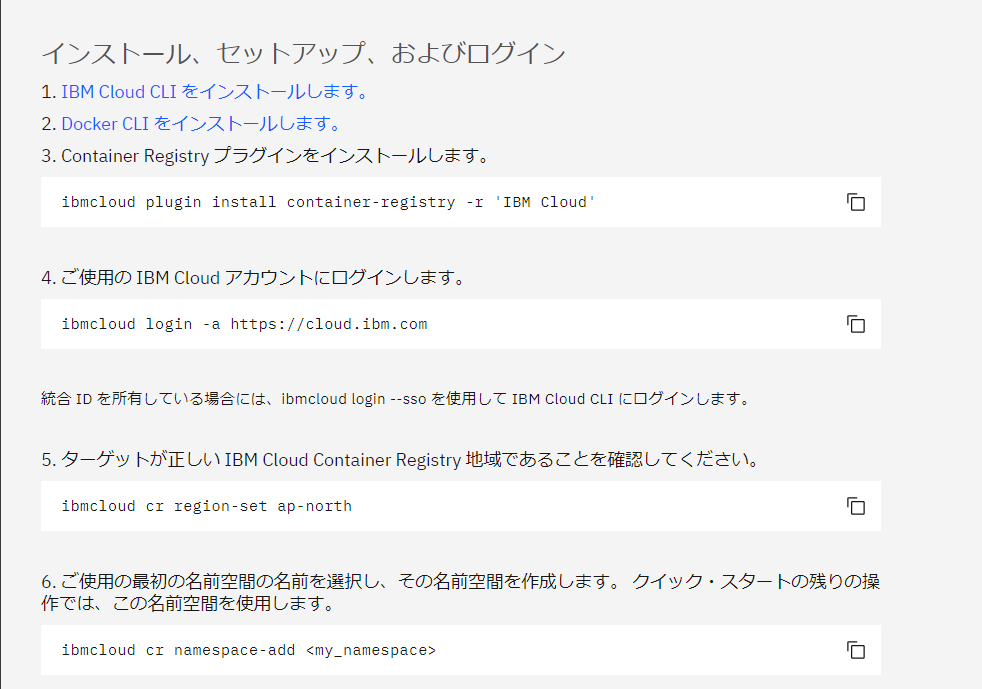
Follow the steps prompted step by step
↓from guide Start with the third step

$ibmcloud plugin install container-registry -r `IBM Clou
d`
##Log in to IBM Cloud
$ ibmcloud login --apikey <API_KEY> -g rg-common -r jp-tok
$ ibmcloud cr region-set ap-north

##Made by name sapce
$ ibmcloud cr namespace-add cr-common

$ ibmcloud cr login
$ docker pull hello-world

##Add tag
$ docker tag container-common:v1 jp.icr.io/cr-common/container-common:v1

##push image
$ docker push jp.icr.io/cr-common/container-common:v1

##Confirm that the image exists in the Registry
$ ibmcloud cr image-list
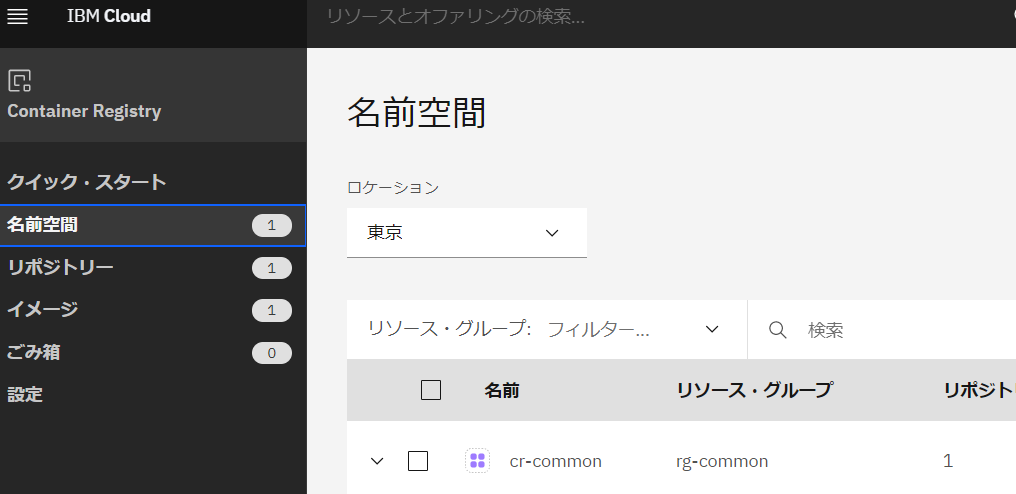
Confirm that the name space exists on the IBM Cloud interface
Step 3 deploy on ROKS
##Log in to ROKS
$ oc login -u apikey -p <API_KEY>

##Selected project
$ oc project test-common
There are two methods to log in to the rocks cluster from terminal. This time, the API key is used to log in directly. However, the login information can also be copied directly in the OpenShift console.
$ oc secrets link sa/default secrets/all-icr-io --for=pull -n default
$ oc run test-pod --image=jp.icr.io/cr-common/container-common:v1 --restart=Never
$ oc expose svc test-pod
$ oc get route
Through the above methods, you have completed the whole process of building all docker images, pushing images into IBM Cloud, and then deploying them on ROKS