1. Database installation
The first method: apt installation
sudo apt update    //Update source
sudo apt install -y  mysql-server
The first method: deb package installation
reach MySQL :: Download MySQL Community Server
2. Initialize configuration
sudo mysql_secure_installation
Configure whether to verify password strength, y enable Other keys are disabled, and the experimental environment can be selected not to be enabled
Set the password. The entered password is not displayed, but it is entered
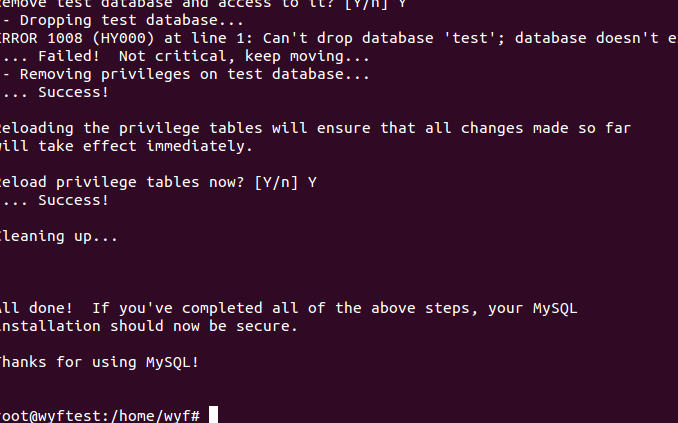
Do you want to delete anonymous users? Experiments can not be deleted
Whether to disable remote root access. The experiment can not be disabled
Whether to delete the test database. The experiment can be deleted
Whether to reload the permission table. The experiment can be loaded
At this point, the configuration is complete
MySQL database management and connection
1. Database startup, restart and view status
The first way:
/etc/init.d/mysql start  start-up

/etc/init.d/mysql stop   stop it

/etc/init.d/mysql restart restart

/etc/init.d/mysql status  View status
The second way:
service mysql start  start-up
service mysql stop   stop it
service mysql restart restart
service mysql status  View status
1. Login database
Local login
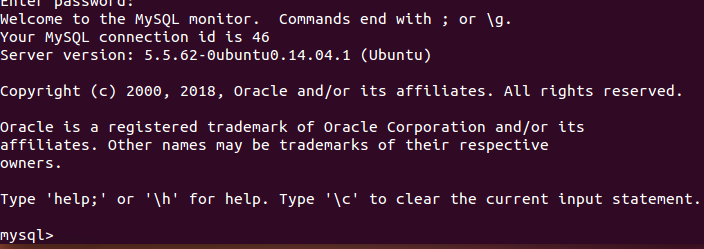
mysql -u root –p
The login is successful when MySQL > appears
2. Exit database
The first way: quit;  (Please test whether there is a semicolon and whether you can exit)

The second way:\q
MySQL database management authorization
1. Create users and grant full permissions
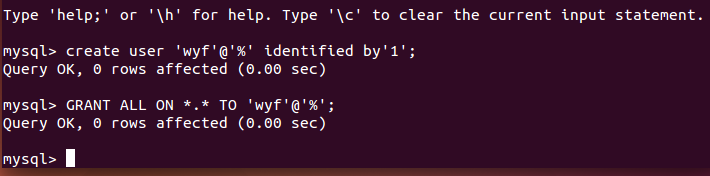
CREATE USER 'username'@'host' IDENTIFIED BY 'password';

explain:
username: the user name you will create
Host: specify the host on which the user can log in. If it is a local user, localhost can be used. If you want the user to log in from any remote host, you can use the wildcard%
Password: the login password of the user. The password can be blank. If it is blank, the user can log in to the server without a password
1. Create users and grant full permissions
GRANT privileges ON databasename.tablename TO 'username'@'host';
 explain:
privileges: the user's operation permissions, such as SELECT, INSERT, UPDATE, etc. if you want to grant the required permissions, use ALL
databasename: database name
tablename: table name. If you want to grant the user corresponding operation permissions on all databases and tables, it can be represented by *, such as **
2. Create users and grant full permissions
Let carl access all tables in mysql database as an example
Check whether mysql database and tables exist in the database
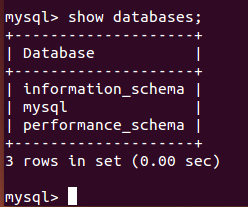
show databases;
 show tables;
2. Create users and grant full permissions
CREATE USER 'username'@'host' IDENTIFIED BY 'password';
explain:
username: the user name you will create
Host: specify the host on which the user can log in. If it is a local user, localhost can be used. If you want the user to log in from any remote host, you can use the wildcard%
Password: the login password of the user. The password can be blank. If it is blank, the user can log in to the server without a password
2. Create users and grant full permissions
GRANT privileges ON databasename.tablename TO 'username'@'host';
explain:
privileges: the user's operation permissions, such as SELECT, INSERT, UPDATE, etc. if you want to grant the required permissions, use ALL
databasename: database name
tablename: table name. If you want to grant the user corresponding operation permissions on all databases and tables, it can be represented by *, such as **
2. Create users and grant full permissions
During the authentication process, please open a new terminal and log in with the user created in the previous step.
3. Delete user
drop user 'carl'@'%';
3. Make root remotely accessible
Here, you need to use bridging to access the Internet, and ensure that the external can ping the virtual machine
From localhost, you can see that it can only be accessed locally, so you need to modify the following places
3. Make root remotely accessible
to update root@localhost Is root @%
update mysql.user set host = '%' where user ='root' limit 1;
Modify listening address
vim /etc/mysql/mysql.conf.d/mysqld.cnf
 take bind 127.0.0.1 Comment this line out
Modify root password authentication method
update mysql.user set authentication_string=PASSWORD('123'),plugin='mysql_native_password' where user='root';
Make root remotely accessible
modify root Password authentication method
update mysql.user set authentication_string=PASSWORD('123'),plugin='mysql_native_password' where user='root';
After configuration, refresh the configuration
 And restart mysql service/etc/init.d/mysql restart
Make root remotely accessible
Verify that the terminal connection is opened on a new computer, which is why the experiment is done by bridging
MySQL database management
1. Backup and recovery
mysqldump [OPTIONS] database [tables]

example
 mysqldump -h 192.168.1.200 -u root –p123456 wdg >/home/wdg/wdg.sql
Restore database
mysql -u root –p123456 wdg < /home/wdg/wdg.sql
MySQL database management
Create and delete content
1. Database management commands
show databases;     Show all databases
use Database name;        Switch to a database
show tables;             Show tables in a database
select Field 1,Field 2,Field 3 from Table name;      Filter out some fields from the table
2. Database management commands
establish
	create database Database name;
delete
	drop database Database name;
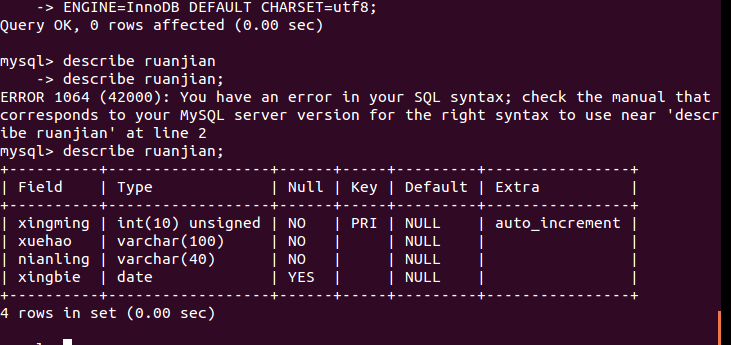
3. Create table
CREATE TABLE IF NOT EXISTS `ruanjian`(
   `xingming` INT UNSIGNED AUTO_INCREMENT,
   `xuehao` VARCHAR(100) NOT NULL,
   `nianling` VARCHAR(40) NOT NULL,
   `xingbie` DATE,
   PRIMARY KEY ( `xingming` )
)ENGINE=InnoDB DEFAULT CHARSET=utf8;