Nacos registry overview
Functions: service registration, discovery and configuration
To avoid a large number of codes appearing in the configuration file, the service needs to be restarted after each configuration update, and the dynamic publishing configuration cannot be realized. Therefore, Nacos appears
Official website:
https://nacos.io/zh-cn/docs/quick-start.html
Common registry
Zookeeper (Yahoo, APACHE), Eureka (Netfix), Nacos (Alibaba), consult (Google)
characteristic
Nacos well supports Alibaba's double 11 activities. It can not only be used as a registration center, but also as a configuration center. It has good stability and performance
Initialization and installation of Nacos
1. Unzip (the directory cannot have Chinese or special symbols)
2. Prepare sql file and create database
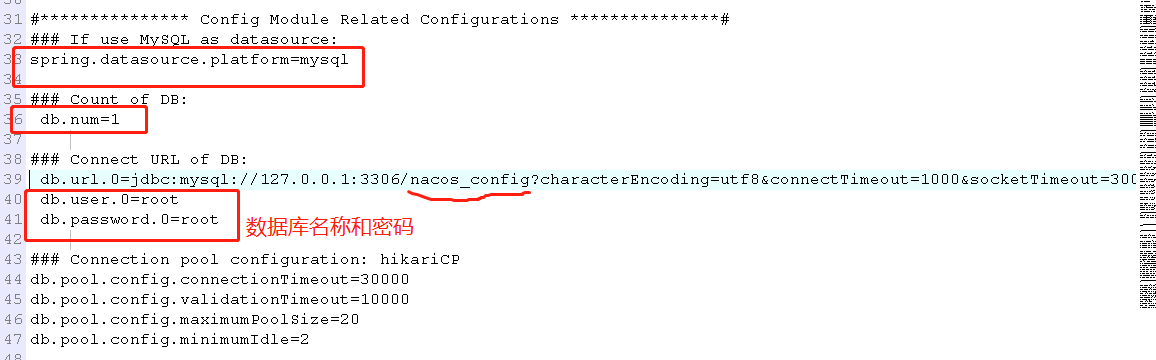
3. Open / conf / application Open the default configuration in properties, configure the database to be connected based on your current environment, and the user name and password to be used when connecting to the database (if there is "#" in front, remove it):
Nacos service startup mode
cmd mode:
Find the bin directory of Nacos, enter cmd, and then execute the following command
1.Linux/Unix/Mac startup command (standalone stands for stand-alone mode, non cluster mode):
./startup.sh -m standalone
2.Windows startup command (standalone stands for stand-alone mode, non cluster mode):
startup.cmd -m standalone
matters needing attention:
1) When executing the execution command, either configure the environment variable or execute it directly in the nacos/bin directory
2) When Nacos starts, Java needs to be configured in the local environment variable_ Home (corresponding to the jdk installation directory),
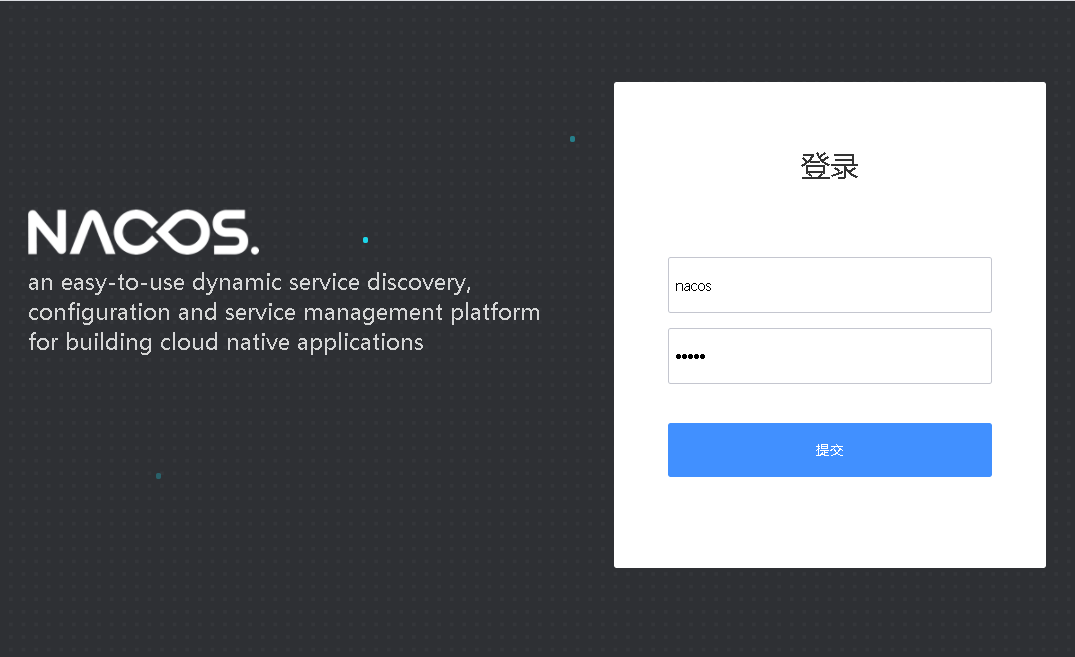
Access address:
http://localhost:8848/nacos
The initial account password is nacos/nacos
Quick start cases
Insert picture description here
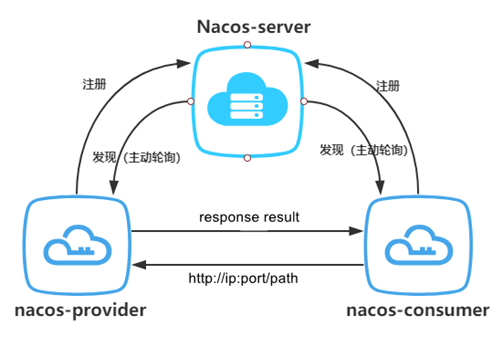
1. Nacos server (this server is essentially a web service, and the default port is 8848)
2. Nacos provider
3. Nacos consumer (service consumer)
Note: the service provider can provide remote calling services for service consumers (for example, the payment service is the service provider and the order service is the service consumer)
1. Create parent project (Maven project)
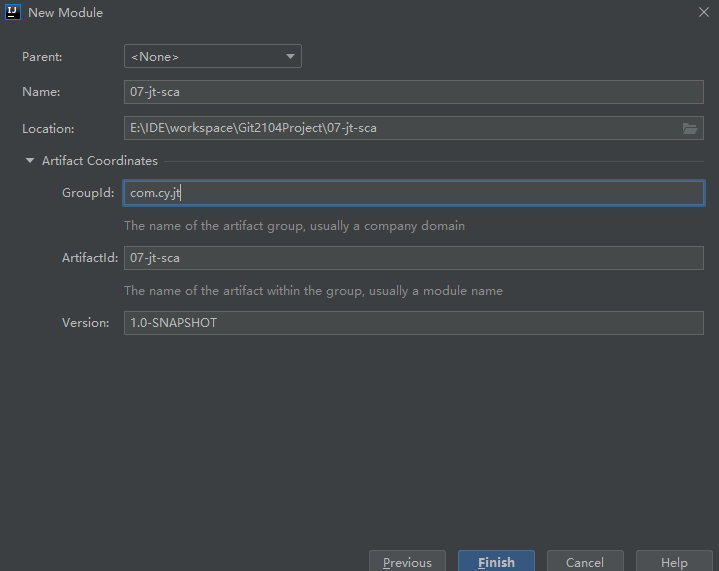
Note: delete the src file because the parent project is only responsible for dependency management
1. In POM Adding dependencies to XML
 <parent>
        <groupId>org.springframework.boot</groupId>
        <artifactId>spring-boot-starter-parent</artifactId>
        <version>2.3.2.RELEASE</version>
    </parent>

    <properties>
        <spring.cloud>Hoxton.SR8</spring.cloud>
        <spring.cloud.alibaba>2.2.5.RELEASE</spring.cloud.alibaba>
    </properties>
    <!--Dependent version management-->
    <dependencyManagement>
        <dependencies>
            <!--spring cloud rely on,This dependency requires springboot Support of,
            Defined in this dependency spring cloud Microservice specification-->
            <dependency>
                <groupId>org.springframework.cloud</groupId>
                <artifactId>spring-cloud-dependencies</artifactId>
                <version>${spring.cloud}</version>
                <!--import Indicates that the subproject under this project can directly reference the version in this dependency-->
                <scope>import</scope>
                <!--When scope by import Time,The type here must be pom type-->
                <type>pom</type>
            </dependency>
            <!--spring cloud alibaba rely on,This dependency depends on spring cloud,
           The current dependency is implemented based on the microservice specification-->
            <dependency>
                <groupId>com.alibaba.cloud</groupId>
                <artifactId>spring-cloud-alibaba-dependencies</artifactId>
                <version>${spring.cloud.alibaba}</version>
                <scope>import</scope>
                <type>pom</type>
            </dependency>
        </dependencies>
    </dependencyManagement>
Note: a compatibility problem is involved. You can't specify its version at will. You can check it on the official website:
https://github.com/alibaba/spring-cloud-alibaba/wiki/%E7%89%88%E6%9C%AC%E8%AF%B4%E6%98%8E
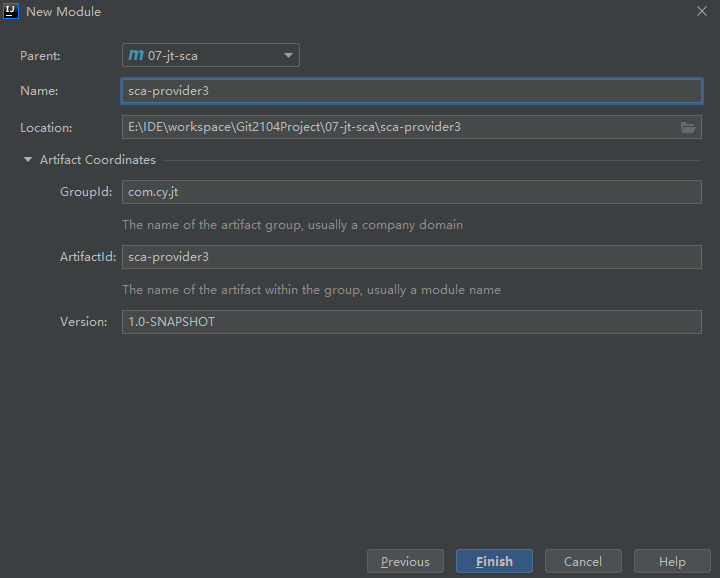
2. Nacos provider
1. Create a service provider inheritance parent project
2. Add project dependency
 <dependencies>
        <!--Web service-->
        <dependency>
            <groupId>org.springframework.boot</groupId>
            <artifactId>spring-boot-starter-web</artifactId>
        </dependency>
        <!--Registration and discovery of services(We're going to talk about service registration nacos)-->
        <dependency>
            <groupId>com.alibaba.cloud</groupId>
            <artifactId>spring-cloud-starter-alibaba-nacos-discovery</artifactId>
        </dependency>
    </dependencies>
3. Create and modify the configuration file application YML (or application.properties) to realize service registration and discovery
server:
  port: 8080

spring:
  application:
    name: sca-provider #Service name, which will be presented in the registry later
  cloud:
    nacos:
      discovery: #Registration and discovery of services
        server-addr: localhost:8848
Note: do not use underscores ("") for service names, A bar ("-") should be used, which is the rule.
4. Create a startup class and test it
package com.cy;

@SpringBootApplication
public class ProviderApplication {
    public static void main(String[] args) {
        SpringApplication.run(ProviderApplication.class, args);

    }
    //When the content of the configuration center changes and is republished, it is used to refresh the configuration information in the class
    @RestController
    public class ProviderController{
        @Value("${server.port}")
        private String server;

        @GetMapping("/provider/echo/{msg}")
        public String doEcho(@PathVariable String msg){
            return server+" say: hello "+msg;

        }
    }

}
5. Start the startup class, and then brush the nacos service to check whether the service registration is successful

6. Open the browser and enter http://localhost:8081/provider/echo/msa , and then visit.
3. Nacos consumer (service consumer)
1. Create a service consumer inheritance parent project

2. Add project dependency
<dependencies>
        <!--Web service-->
        <dependency>
            <groupId>org.springframework.boot</groupId>
            <artifactId>spring-boot-starter-web</artifactId>
        </dependency>
        <!--Registration and discovery of services(We're going to talk about service registration nacos)-->
        <dependency>
            <groupId>com.alibaba.cloud</groupId>
            <artifactId>spring-cloud-starter-alibaba-nacos-discovery</artifactId>
        </dependency>
    </dependencies>
3. Create and modify the configuration file application YML to realize service registration and discovery
server:
  port: 8090

spring:
  application:
    name: sca-consumer #Service name, which will be presented in the registry later
  cloud:
    nacos:
      discovery:  #Registration and discovery of services
        server-addr: localhost:8848
4. Create a startup class and realize service consumption
@SpringBootApplication
public class ConsumerApplication {
    public static void main(String[] args) {
        SpringApplication.run(ConsumerApplication.class,args);
    }

    @Bean
    public RestTemplate restTemplate(){
        return new RestTemplate();
    }
    @RestController
    public class ConsumerController{
        @Value("${spring.application.name}")
        private String server;
        @Autowired
        private RestTemplate restTemplate;
	@GetMapping("/consumer/doRestEcho1")
        public String doRestEcho01(){
            String url = "http://localhost:8081/provider/echo/"+server;
            return restTemplate.getForObject(url,String.class);
        }
    }
5. Start the consumer service and enter in the browser http://localhost:8090/consumer/doRestEcho1 Address for access