. Net Core integrated JWT authorization verification from page to API
1. What is JWT
JSON Web Token (JWT) is the most popular cross domain authentication solution.
JWT's official website address: https://jwt.io/
Generally speaking, JWT defines a compact and self-contained way to safely transmit information between parties as JSON objects. It is a symbolic token representing the user's identity. The user's identity can be verified in the api interface to confirm whether the user has access to the api.
2. Usage scenario of JWT
User authorization: it can be used when single sign on is required. For example, in an environment where multiple systems coexist, users do not need to log in to other systems after logging in at one place. One login can be trusted by other systems. After the user successfully logs in using JWT authorization, a token value will be returned to the current user. When the user accesses other modules, he will carry the token to make a request. When the token expires or is edited, access is not allowed.
Information exchange: JWT is a good way to safely transmit information between server and client. Because JWT can be signed when issuing JWT, multi parties can analyze data through the agreed encryption secret key.
3. Differences between JWT and Session authentication
Session authentication
1,The user sends the user name and password to the server.
2,After the server passes the verification, the current conversation( session)It stores relevant data, such as user role, login time, etc.
3,The server returns a message to the user session_id,Write user's Cookie.
4,Every subsequent request of the user will pass Cookie,take session_id Back to the server.
5,Server received session_id,Find the previously saved data, so as to know the user's identity.
Authentication mechanism based on token
1,The user uses the user name and password to request the server.
2,The server authenticates the user's information.
3,The server issues a certificate to the user through authentication token.
4,Client storage token,And send this with each request token Value.
5,Server verification token Value and returns data.
The problem with session based authentication mode is that it has poor scalability, and there is no problem with single machine use. If server clusters or cross domain service-oriented architecture are used, each server needs to be able to read sessions. For example, for websites like Alibaba, there are hundreds of subsystems behind the website, and dozens of subsystems may be involved in a user's operation or transaction For system collaboration, if each subsystem requires user authentication, not only users will go crazy, but also subsystems will go crazy for the logic of repeated authentication and authorization. With this scheme, the architecture looks clear, but the amount of work is large.
The other solution is not to save the session data in the server, but to save the data in the client and bring it to the server every time the user initiates a request. It does not need to keep the user's session state information on the server and does not need to consider which server to register, which provides convenience for application expansion. However, JWT contains attachment information in the Payload, which takes up more space It is larger than session and will cause performance impact during http transmission. Therefore, during design, do not store too many claim s in JWT to avoid huge requests.
4. Structure of JWT
The token consists of three parts separated by (.), namely:
- Title: algorithm and token type
- Payloads: Data
- Verify signature
Therefore, JWT usually uses qqqq.wwwww.eeeee in this form
Title: it usually consists of two parts, token type and signature algorithm used.
{
  "alg": "HS256",
  "typ": "JWT"
}
Payload: the payload part is a json object used to store the actual data to be transferred. JWT specifies seven official fields for selection.
- iss (issuer): issuer
- exp (expiration time): expiration time
- sub (subject): subject
- aud (audience): audience
- nbf (Not Before): effective time
- iat (Issued At): issuing time
- jti (JWT ID): No
In addition to officially defined fields, you can also define your own private fields in this section.
Verify signature: the signature is generated by encrypting the first part (header), the second part (payload) and the key through the specified algorithm (HMAC, RSA).
See the following figure for details: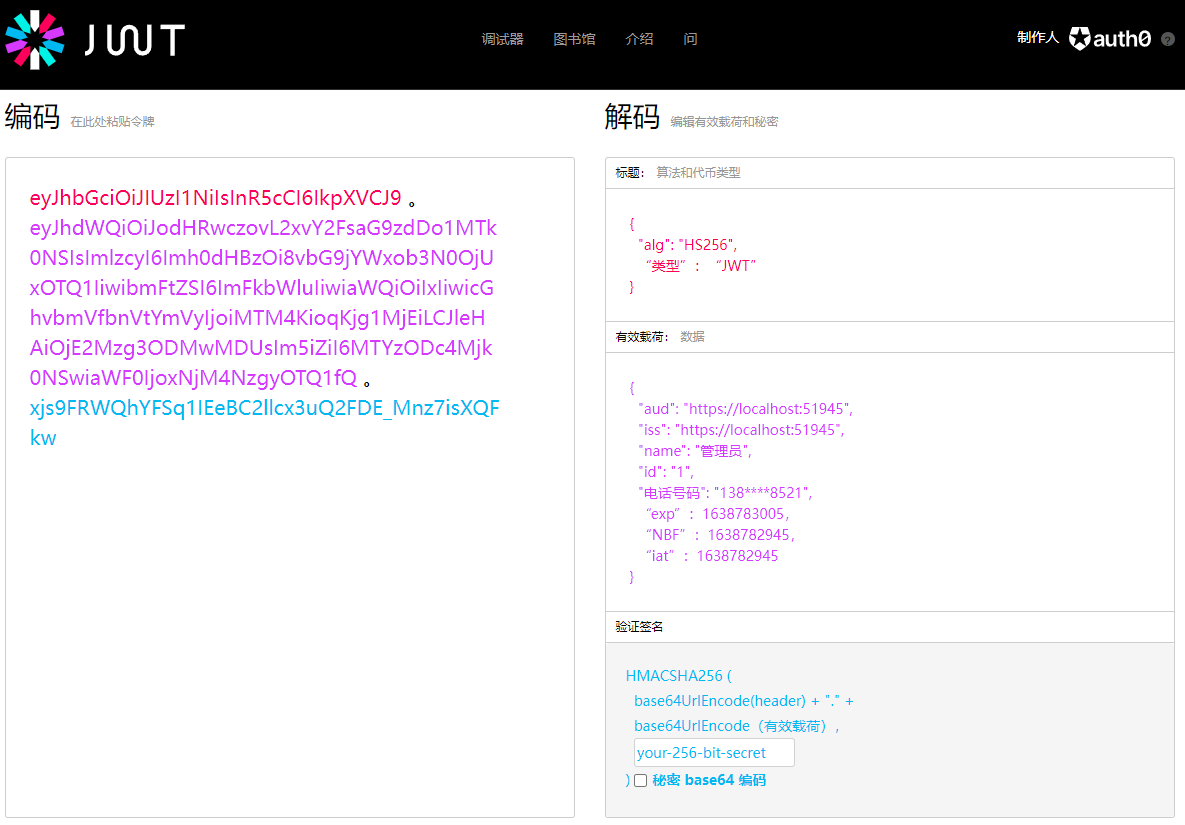
After the introduction, the next step is how to obtain JWT and use it to access API or server resources. The process is as follows:
- The application requests authorization from the authorization server.
- Verify the user identity. If the verification is successful, a token is returned.
- Applications use access tokens to access protected resources.
5.Asp.Net Core integration JWT
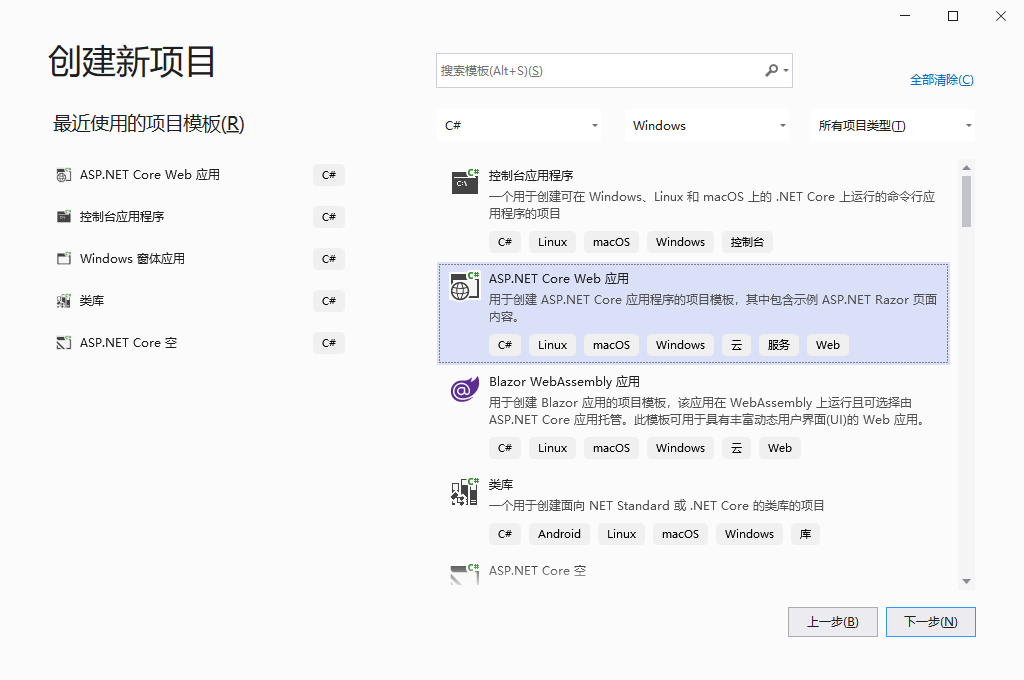
development tool:vs2019
First, create a new web project of asp.net core, and the project version is 3.1 or above.
Next, add configuration information in appsettings.json
{
  "Logging": {
    "LogLevel": {
      "Default": "Information",
      "Microsoft": "Warning",
      "Microsoft.Hosting.Lifetime": "Information"
    }
  },
  "AllowedHosts": "*",
  "JwtSettings": {
    "Issuer": "https://localhost:51945",
    "Audience": "https://localhost:51945",
    "SecretKey": "Hello-key----------"
  },
  "TokenValidMinutes": "1",
  "TokenCacheMinutes": "5"
}
Issuer Is the issuer,Audience Is the audience,Users and recipients of information dissemination. SecretKey Is the key to the definition.
TokenValidMinutes Is the number of valid minutes defined by yourself,
TokenCacheMinutes Is the number of self-defined cache minutes,
Then go to the StartUp class and add the configuration.
Add the following code to the ConfigureServices method:
//Add authentication
services.AddAuthentication(options =>
{
    //Certified middleware configuration
    options.DefaultAuthenticateScheme = JwtBearerDefaults.AuthenticationScheme;
    options.DefaultChallengeScheme = JwtBearerDefaults.AuthenticationScheme;
})
.AddJwtBearer(o =>
{
    //jwt token parameter setting
    o.TokenValidationParameters = new TokenValidationParameters
    {
        NameClaimType = JwtClaimTypes.Name,
        RoleClaimType = JwtClaimTypes.Role,
        //Token issuing authority
        ValidIssuer = Appsettings.Issuer,
        //To whom
        ValidAudience = Appsettings.Audience,
        //The key here should be encrypted
        IssuerSigningKey = new SymmetricSecurityKey
        (Encoding.UTF8.GetBytes(Appsettings.SecretKey)),

    };
});
Add the following code to the Configure method:
app.UseAuthentication();
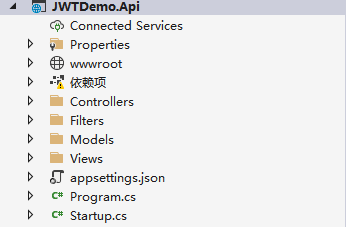
Create a new folder in the created project and create a controller in it. The hierarchical relationship is shown in the following figure:
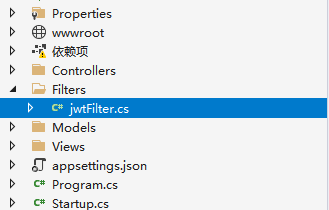
The controller needs to inherit ActionFilterAttribute. The specific code of the controller is as follows (the above namespace is not copied vs can be imported directly):
 public class CheckJWTFilter : ActionFilterAttribute
 {
     /// <summary>
     ///Check whether to log in
     /// </summary>
     public bool IsCheck { get; set; } = true;

     /// <summary>
     ///Check issued tokens
     /// </summary>
     /// <param name="context"></param>
     public override void OnActionExecuting(ActionExecutingContext filterContext)
     {
         bool ignoreCheckSession = filterContext.ActionDescriptor.FilterDescriptors
         .Select(f => f.Filter)
         .OfType<TypeFilterAttribute>()
         .Any(f => f.ImplementationType.Equals(typeof(IgnoreCheckJWTFilter)));
         if (ignoreCheckSession)
         {
             base.OnActionExecuting(filterContext);
             return;
         }

         if (IsCheck)
         {
             var claimIdentity = (ClaimsIdentity)filterContext.HttpContext.User.Identity;
             if (claimIdentity.Claims.Count() > 0 && JWTUtil.ValidateLogin(claimIdentity))
             {
                 base.OnActionExecuting(filterContext);
             }
             else
             {
                 filterContext.Result = new UnauthorizedResult();
             }
         }
         else
         {
             base.OnActionExecuting(filterContext);
         }
     }
 }
Next, create a new HomeController in the Controllers folder and create a simple page that contains a text box and several simple buttons.
<input type="text" id="name" />
<input type="text" id="pwd" />
<button onclick="btnLogin()">Sign in</button>
<button onclick="logOut()">Log out</button>
<button onclick="getUserInfo()">Get user information</button>
Then create a User controller to receive the request submitted by the page. The code is as follows:
[Route("GetToken")]
        [HttpGet]
        public IActionResult GetToken(string data)
        {
            LoginViewModel model = JsonConvert.DeserializeObject<LoginViewModel>(data);
            model.Id = "1";
            model.Phone = "138****8521";
            model.Password = "123";
            ResponseResult responseResult = new ResponseResult();
            responseResult.Success = true;
            responseResult.Data = JWTUtil.GetToken(model);
            return Ok(responseResult);
        }

        [Route("GetUserInfo")]
        [HttpGet]
        [CheckJWTFilter]
        public IActionResult GetUserInfo()
        {
            //Get the information of the current requesting user, including token information
            var claimIdentity = (ClaimsIdentity)HttpContext.User.Identity;
            string name = claimIdentity.FindFirst(JwtClaimTypes.Name).Value;
            string phoneNumber = claimIdentity.FindFirst(JwtClaimTypes.PhoneNumber).Value;
            string expirationTimeStamp = claimIdentity.FindFirst(JwtClaimTypes.Expiration).Value;
            DateTime expiration = DateTimeUtil.Unix2Datetime(Convert.ToInt64(expirationTimeStamp));
            int code = GetStatusCode(expiration, Appsettings.TokenCacheMinutes);
            return new JsonResult(new ResponseResult() {  Data = name + "User data" });
        }

        [CheckJWTFilter]
        [HttpGet]
        [Route("RefreshToken")]
        public IActionResult RefreshToken()
        {
            string token = HttpContext.Request.Headers["Authorization"].ToString();
            string[] tokenArray = token.Split(' ', StringSplitOptions.RemoveEmptyEntries);
            var claimIdentity = (ClaimsIdentity)HttpContext.User.Identity;
            string expirationTimeStamp = claimIdentity.FindFirst(JwtClaimTypes.Expiration)?.Value;
            if (string.IsNullOrEmpty(expirationTimeStamp))
            {
                return new JsonResult(new ResponseResult() { Success = false, Data = tokenArray.Length > 1 ? tokenArray[1] : tokenArray[0] });
            }
            DateTime expiration = DateTimeUtil.Unix2Datetime(Convert.ToInt64(expirationTimeStamp));
            if (DateTime.Now > expiration && DateTime.Now <= expiration.AddMinutes(Appsettings.TokenCacheMinutes))
            {
                ResponseResult responseResult = new ResponseResult();
                responseResult.Success = true;
                responseResult.Data = JWTUtil.GetToken(claimIdentity);
                return Ok(responseResult);
            }
            return new JsonResult(new ResponseResult() { Success = true, Data = tokenArray.Length > 1 ? tokenArray[1] : tokenArray[0], Code = 200 });
        }

        private int GetStatusCode(DateTime expiration, int tokenCacheMinutes)
        {
            if (expiration < DateTime.Now)
            {
                if (expiration.AddMinutes(tokenCacheMinutes) < DateTime.Now)
                {
                    //token expired + not in buffer period
                    return 9002;
                }
                else
                {
                    //token expired + in buffer period
                    return 9001;
                }
            }
            return 200;
        }
On the page, the information input from the foreground needs to be transmitted to the api through ajax submission.
    <script type="text/javascript">

        //Specifies the function to run when an ajax request is about to be sent
        $(document).ajaxSend(function (e, jqxhr, opt) {
            //Add headers for ajax requests uniformly
            jqxhr.setRequestHeader("Authorization", "Bearer " + sessionStorage.getItem("token"));
        });

        //Specifies the function to run when an ajax request completes successfully
        $(document).ajaxSuccess(function (event, jqxhr, opt) {
            if (jqxhr.responseJSON.Success) {
                handleStatusCode(jqxhr.responseJSON.Code);
            }
        });
		//Click login
        function btnLogin() {
            let name = $("#name").val();
            let pwd = $("#pwd").val();
            $.ajax({
                type: "GET",
                url: "/User/GetToken",
                contentType: "application/json",
                data: {
                    data: JSON.stringify({
                        loginName: name,
                        password: pwd
                    })
                }
            }).success(function (data) {
                if (data.Success) {
                    sessionStorage.setItem("token", data.Data);
                }
            });
        }
		//Logout clear token
        function logOut() {
            sessionStorage.removeItem("token");
        }
		//Get user information
        function getUserInfo() {
            $.ajax({
                type: "get",
                url: "/User/GetUserInfo"
            }).done(function (data) {
                if (data.Success) {
                    console.log(data.Data);
                } else {
                    alert(data.ErrorMsg);
                }
            });
        }
    </script>
Let's start the program and simulate the application scenario.

We first submit without passing the account, password and other data, and then obtain the user information by the returned token.
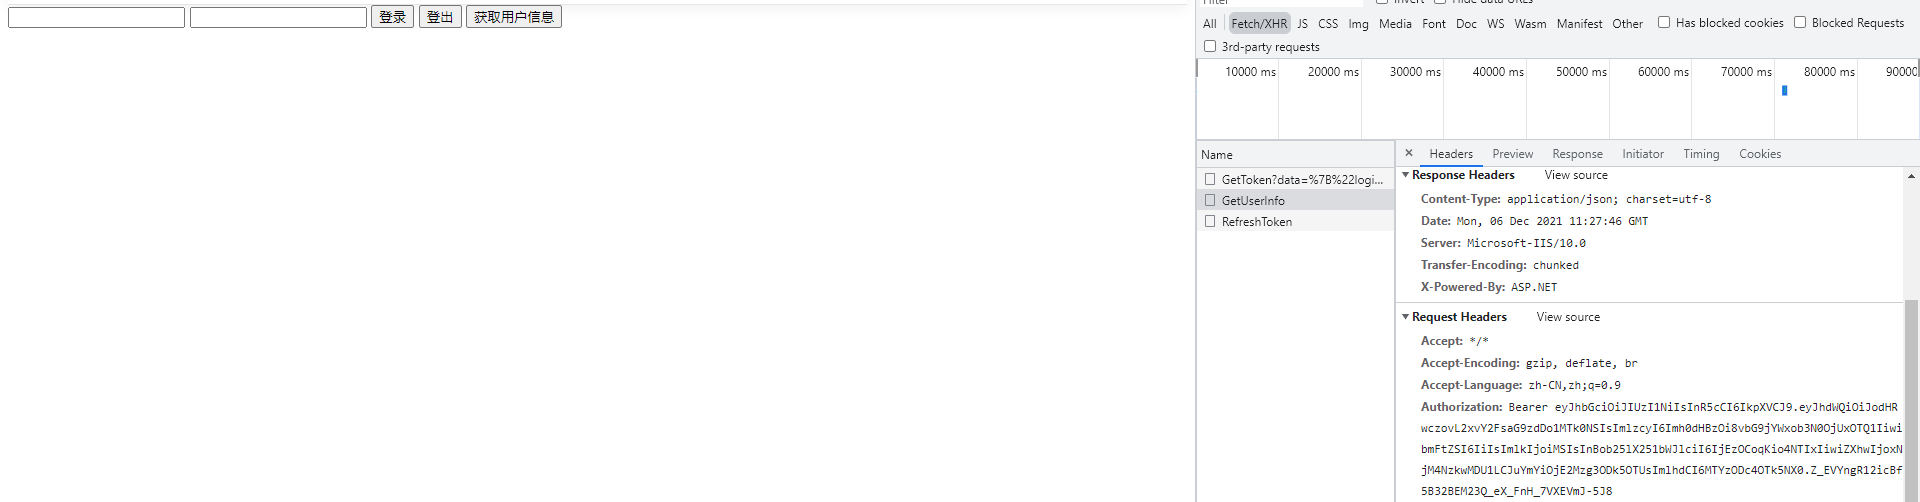

The user data is empty because we did not store the data in the text box into the payload content when generating the token. Therefore, when we call the query user data interface, we can not get the data according to the token parameters passed by Authorization.
Next, we pass the text box data and parse it again. We can clearly see from the return value that the api can parse the content from the past token s we passed.

Summary
When using jwt to control the access of interfaces and server resources, you need to add features on the interface, indicating that you need to verify and access the available tokens. Here is a simple demonstration of generating and parsing jwt. There are many places to be supplemented and improved in the later actual combat.
For example, the response of the client after the token expires, how to force the client's token to expire when the token does not expire, how to exchange new tokens without refresh, and so on.
Thanks for reading,Please correct.