The small project brought this time is OAuth2 login component. Seeing that the Java platform JustAuth project is very convenient to access the third-party platform for login, I was itchy. I searched a big circle and found that I was big netcore can use very little, and the code is written in a mess. It's all in one library, and the code style is not used to it, so I decided to operate the keyboard and start work.
There are too many articles about the basics and principles of OAuth2, and many of them are well written. At the end of the page, I provide several links. If you like, please take a look. There is no in-depth explanation here, and go straight to the topic.
How to use
Here, take github login as a demonstration to create a new ASP Net core web application project, called github login (PS): you can make a better choice yourself × Select the model view controller. Of course, you can choose others.
Step 1: installation
To install this nuget package:
Install-Package MrHuo.OAuth.Github -Version 1.0.0
Step 2: Configure
Open Appsettings JSON writes the following configuration:
{
"oauth": {
"github": {
"app_id": "github_app_id",
"app_key": "github_app_key",
"redirect_uri": "https://oauthlogin.net/oauth/githubcallback",
"scope": "repo"
}
}
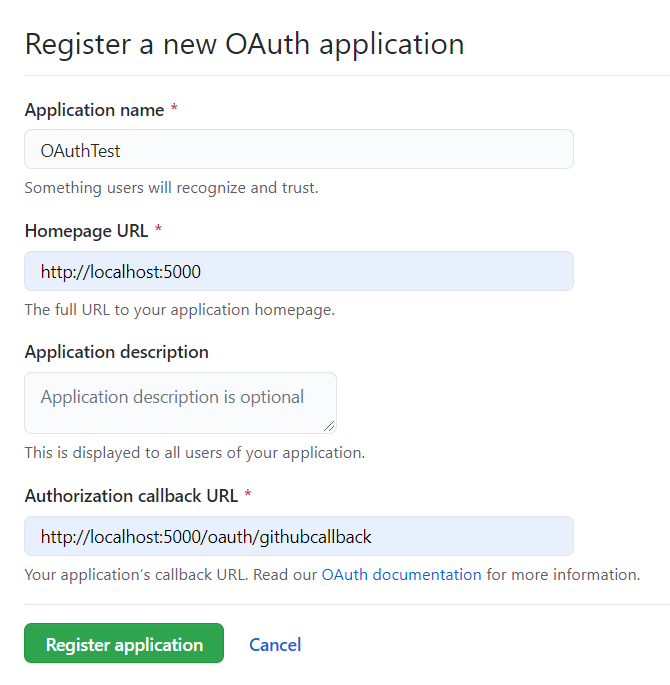
}The configuration here can be https://github.com/settings/applications/new To register, redirect_uri can fill in the local localhost address, which is super convenient. That's why GitHub login is used for demonstration.
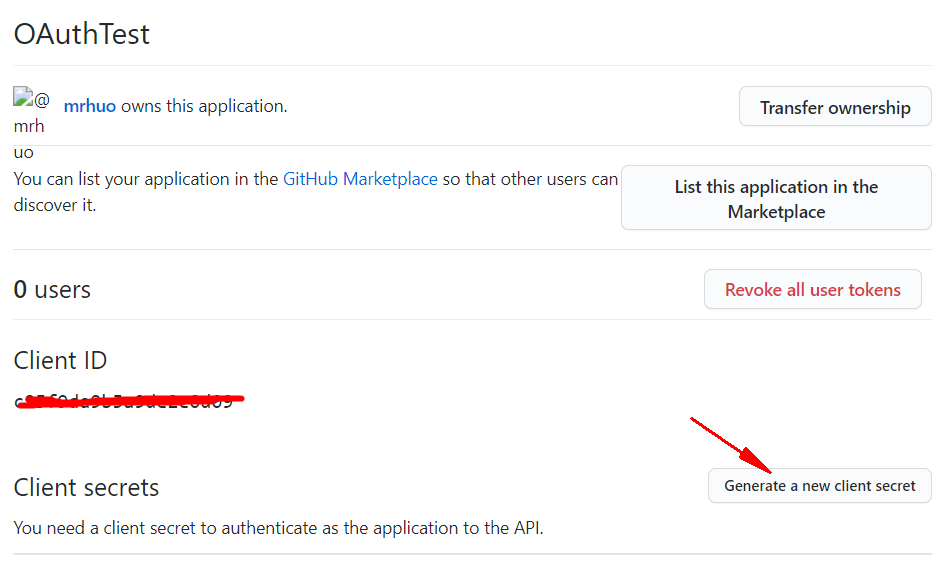
After creation, a client secret is generated in this interface:
Enter the password. After successful generation, it is as follows:
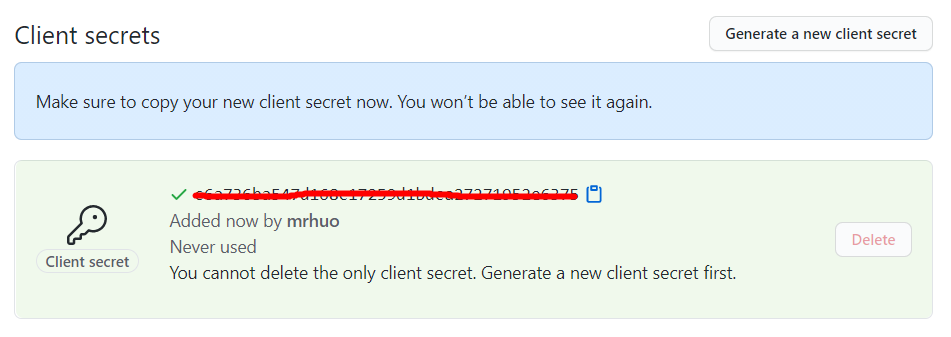
Fill in the Client ID, Client secret in the interface and the Authorization callback URL filled in the previous interface to the corresponding location of the configuration file. Now the configuration file Appsettings JSON is like this:
{
  "Logging": {
    "LogLevel": {
      "Default": "Information",
      "Microsoft": "Warning",
      "Microsoft.Hosting.Lifetime": "Information"
    }
  },
  "AllowedHosts": "*",
  "oauth": {
    "github": {
      "app_id": "c95fxxxxxx0d09",
      "app_key": "c6a73xxxxxx6375",
      "redirect_uri": "http://localhost:5000/oauth/githubcallback",
      "scope": "repo"
    }
  }
}
The following scope is ignored for the time being. If you want to understand its function, we'll talk about it later.
Step 3: write code
At startup To inject components into a: CS file:
// This method gets called by the runtime. Use this method to add services to the container.
public void ConfigureServices(IServiceCollection services)
{
    services.AddControllersWithViews();
    services.AddSingleton(new GithubOAuth(OAuthConfig.LoadFrom(Configuration, "oauth:github")));
}
Other codes in the file have not been modified, only this line has been added.
Create a new OAuthController class with the following code:
using System.Threading.Tasks;
using Microsoft.AspNetCore.Mvc;
using MrHuo.OAuth.Github;
namespace GithubLogin.Controllers
{
    public class OAuthController: Controller
    {
        [HttpGet("oauth/github")]
        public IActionResult Github([FromServices] GithubOAuth githubOAuth)
        {
            return Redirect(githubOAuth.GetAuthorizeUrl());
        }
        [HttpGet("oauth/githubcallback")]
        public async Task<IActionResult> GithubCallback(
            [FromServices] GithubOAuth githubOAuth,
            [FromQuery] string code)
        {
            return Json(await githubOAuth.AuthorizeCallback(code));
        }
    }
}
You're right. That's all the code. Let's run it:
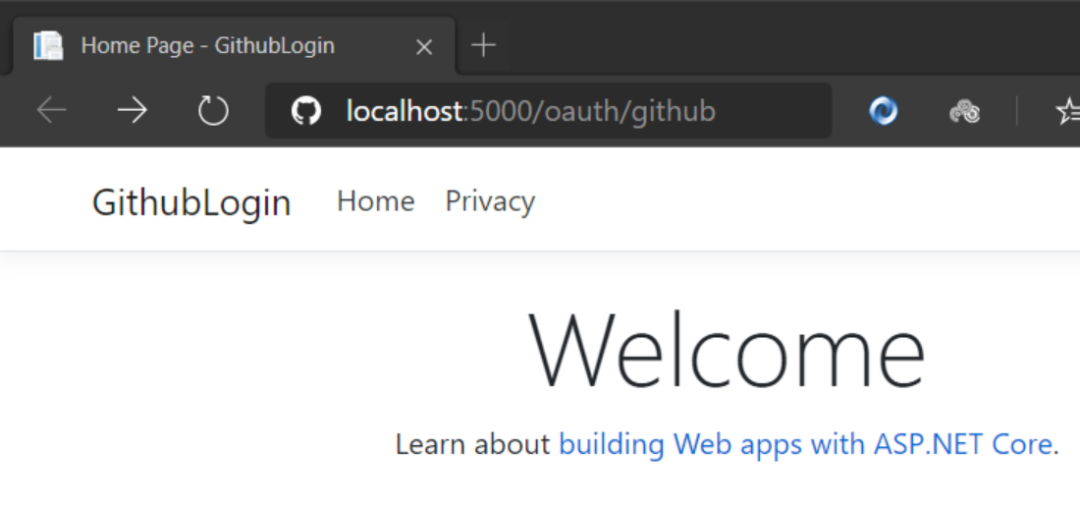
After the project runs, enter the following address in the address bar: http://localhost:5000/oauth/github , because we didn't modify any code and didn't make any links on the view, we bothered to do it manually~~
After entering, jump to github authorization:

Click the green Authorize button and wait a moment. You will see the following results:
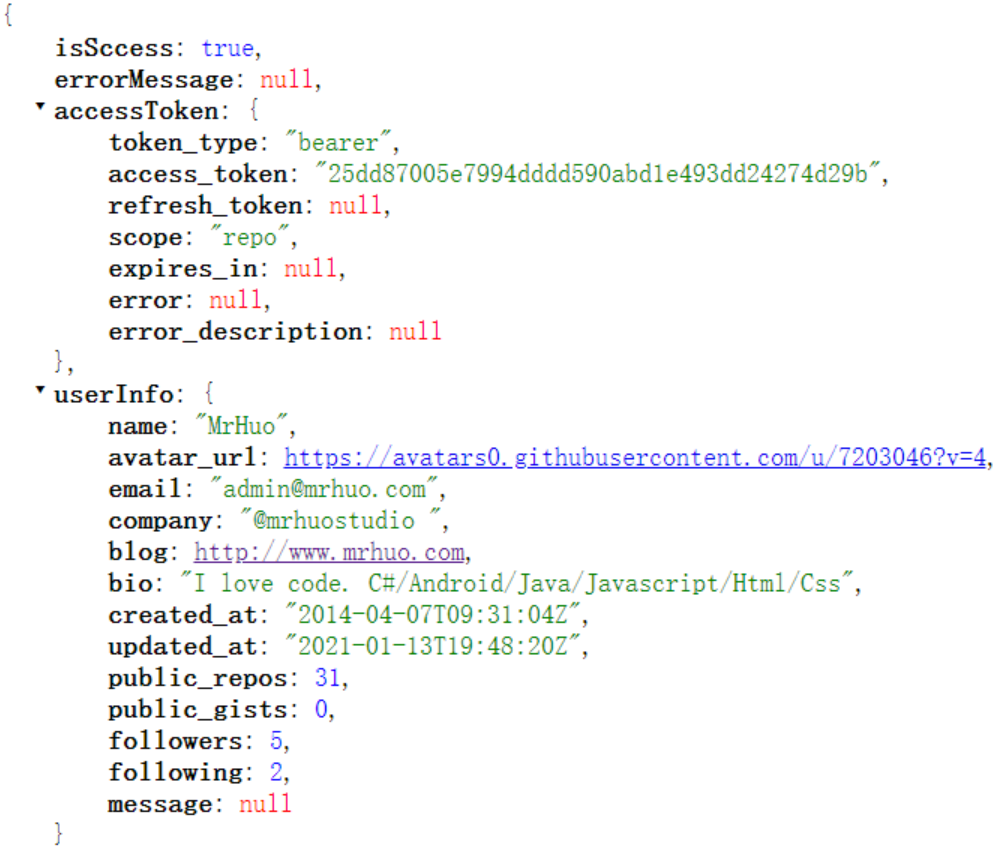
Successfully got the user information (PS: please ignore my poor fans. I didn't force -- ToT)
Well, here is the end of my performance. You can see that the access process is very process. The card holder is mainly applying for these steps. Let's talk about the principle and so on, just say some If you think I'm wordy, you don't have to look down, because I'll be more wordy below.
Of course, besides github, it has already connected to 12 platforms, and QQ and jitter are not registered to application. I can not test. So there is no nuget package for a time. One person's strength is always limited. Here I ask you tiktok who has leisure time or appid resources to make some contribution to this small project, which is that she has gone far.
More nuget bags, come here https://www.nuget.org/profiles/mrhuo Or search the VS nuget package manager for mrhuo OAuth, that's all.
Please ignore the other garbage bags on nuget, which were written many years ago and are reluctant to delete.
Development background
Third tiktok login is the implementation of OAuth2 protocol, many platforms such as Alipay, Baidu, github, Microsoft, even jitter, Kwai Tai many platforms provide open interfaces. However, many platforms will add and modify some things on the basis of this standard protocol. For example, in the standard protocol, the client should be provided when obtaining the authorize code_ ID, wechat public platform has to change it to appid.
Another example: when obtaining user information, you only need access_ For the token parameter, the wechat public platform has to provide an openid. Of course, this is inevitable, because the actual business of each platform is still very different and can not be completely unified. This brings a problem to our developers. It is difficult to develop a third-party login. Of course, it doesn't matter to develop one or two. What if there are more?
If there is such a product manager, he wants to access many login methods, so that users can log in here smoothly and find the way home no matter what platform they use (PS: Product Manager, don't run, look at my 40m knife).
Undoubtedly, give us a test, how to achieve a standardized, configurable and scalable? This is a question that needs further study. Now let me talk about some ideas about my liver project. Don't spray me if you don't speak well. I'm still young (PS: don't pretend to be tender in my thirties) and have a face
lay down a criterion
After reading many documents, we will find that all changes are inseparable from their religion. There are always rules to follow. In general, there are three steps:
1,GetAuthorizeUrl
This step is through the client_id,redirect_uri and other parameters to obtain the authorization url. After jumping to this url, you will complete the login on the third-party platform. After completing the login, you will jump to the redirect provided above_ Uri this address with a code parameter.
2,GetAccessToken
In this step, after getting the above code, go to the third-party platform to change access_token.
3,GetUserInfo
This step is not necessary, but since we are a third-party login, we still need to bind user accounts with some businesses of our platform or register a user with existing information. This method is particularly important.
So far, for these three steps, I think they need to be formulated in the standard, so I wrote the following interface to standardize it:
/// <summary>
///OAuth login API interface specification
/// </summary>
public interface IOAuthLoginApi<TAccessTokenModel, TUserInfoModel>
    where TAccessTokenModel : IAccessTokenModel
    where TUserInfoModel : IUserInfoModel
{
    /// <summary>
    ///URL to get jump authorization
    /// </summary>
    /// <param name="state"></param>
    /// <returns></returns>
    string GetAuthorizeUrl(string state = "");

    /// <summary>
    ///Get AccessToken asynchronously
    /// </summary>
    /// <param name="code"></param>
    /// <param name="state"></param>
    /// <returns></returns>
    Task<TAccessTokenModel> GetAccessTokenAsync(string code, string state = "");

    /// <summary>
    ///Get user details asynchronously
    /// </summary>
    /// <param name="accessTokenModel"></param>
    /// <returns></returns>
    Task<TUserInfoModel> GetUserInfoAsync(TAccessTokenModel accessTokenModel);
}
You can see that I made AccessToken and UserInfo generic parameters because they are variable parts of the specification. The function of the state parameter in the code is to prevent the anti-counterfeiting verification of CORS attacks. It will not be explained here for the time being. The explanation of this parameter is available in other documents.
How to extend the new platform
Let's take Gitee as a demonstration:
Step 1: find the OAuth document corresponding to the platform, find the interface for obtaining user information, return JSON, and convert it to C# entity class. As follows:
Expand user attributes according to their own needs and interface standards
public class GiteeUserModel : IUserInfoModel
{
    [JsonPropertyName("name")]
    public string Name { get; set; }

    [JsonPropertyName("avatar_url")]
    public string Avatar { get; set; }

    [JsonPropertyName("message")]
    public string ErrorMessage { get; set; }

    [JsonPropertyName("email")]
    public string Email { get; set; }

    [JsonPropertyName("blog")]
    public string Blog { get; set; }
    //... Other properties are similar as above
}
It's used here netcore's built-in Json serialization library is said to have improved its performance a lot!
Step 2: write the authorization interface of the corresponding platform
/// <summary>
/// https://gitee.com/api/v5/oauth_doc#/
/// </summary>
public class GiteeOAuth : OAuthLoginBase<GiteeUserModel>
{
    public GiteeOAuth(OAuthConfig oauthConfig) : base(oauthConfig) { }
    protected override string AuthorizeUrl => "https://gitee.com/oauth/authorize";
    protected override string AccessTokenUrl => "https://gitee.com/oauth/token";
    protected override string UserInfoUrl => "https://gitee.com/api/v5/user";
}
Add notes, a total of ten lines, as you can see, very convenient. If the platform protocol is developed in accordance with the OAuth2 standard, just a few lines.
Of course, if you do not follow the rules to customize the field platform, you can also extend it, such as wechat public platform.
WechatAccessTokenModel.cs AccessToken class extension
namespace MrHuo.OAuth.Wechat
{
    public class WechatAccessTokenModel : DefaultAccessTokenModel
    {
        [JsonPropertyName("openid")]
        public string OpenId { get; set; }
    }
}
It inherits from DefaultAccessTokenModel and adds a new field OpenId. Because OpenId is required to obtain user information, it is required here.
WechatUserInfoModel.cs user information class
using System.Collections.Generic;
using System.Text.Json.Serialization;
namespace MrHuo.OAuth.Wechat
{
    public class WechatUserInfoModel : IUserInfoModel
    {
        [JsonPropertyName("nickname")]
        public string Name { get; set; }

        [JsonPropertyName("headimgurl")]
        public string Avatar { get; set; }

        [JsonPropertyName("language")]
        public string Language { get; set; }

        [JsonPropertyName("openid")]
        public string Openid { get; set; }

        [JsonPropertyName("sex")]
        public int Sex { get; set; }

        [JsonPropertyName("province")]
        public string Province { get; set; }

        [JsonPropertyName("city")]
        public string City { get; set; }

        [JsonPropertyName("country")]
        public string Country { get; set; }

        /// <summary>
        ///User privilege information, json array, such as wechat Woka user (chinaunicom)
        /// </summary>
        [JsonPropertyName("privilege")]
        public List<string> Privilege { get; set; }

        [JsonPropertyName("unionid")]
        public string UnionId { get; set; }

        [JsonPropertyName("errmsg")]
        public string ErrorMessage { get; set; }
    }
}
Here, the [JsonPropertyName("xxxx")] on the user information field is completely written according to the fields in the document, otherwise the correct value cannot be obtained. If you don't need too many fields, delete them yourself.
WechatOAuth.cs core class
using System.Collections.Generic;
namespace MrHuo.OAuth.Wechat
{
    /// <summary>
    ///Wechat OAuth related documents reference:
    /// <para>https://developers.weixin.qq.com/doc/offiaccount/OA_Web_Apps/Wechat_webpage_authorization.html</para>
    /// </summary>
    public class WechatOAuth : OAuthLoginBase<WechatAccessTokenModel, WechatUserInfoModel>
    {
        public WechatOAuth(OAuthConfig oauthConfig) : base(oauthConfig) { }
        protected override string AuthorizeUrl => "https://open.weixin.qq.com/connect/oauth2/authorize";
        protected override string AccessTokenUrl => "https://api.weixin.qq.com/sns/oauth2/access_token";
        protected override string UserInfoUrl => "https://api.weixin.qq.com/sns/userinfo";
        protected override Dictionary<string, string> BuildAuthorizeParams(string state)
        {
            return new Dictionary<string, string>()
            {
                ["response_type"] = "code",
                ["appid"] = oauthConfig.AppId,
                ["redirect_uri"] = System.Web.HttpUtility.UrlEncode(oauthConfig.RedirectUri),
                ["scope"] = oauthConfig.Scope,
                ["state"] = state
            };
        }
        public override string GetAuthorizeUrl(string state = "")
        {
            return $"{base.GetAuthorizeUrl(state)}#wechat_redirect";
        }
        protected override Dictionary<string, string> BuildGetAccessTokenParams(Dictionary<string, string> authorizeCallbackParams)
        {
            return new Dictionary<string, string>()
            {
                ["grant_type"] = "authorization_code",
                ["appid"] = $"{oauthConfig.AppId}",
                ["secret"] = $"{oauthConfig.AppKey}",
                ["code"] = $"{authorizeCallbackParams["code"]}"
            };
        }
        protected override Dictionary<string, string> BuildGetUserInfoParams(WechatAccessTokenModel accessTokenModel)
        {
            return new Dictionary<string, string>()
            {
                ["access_token"] = accessTokenModel.AccessToken,
                ["openid"] = accessTokenModel.OpenId,
                ["lang"] = "zh_CN",
            };
        }
    }
}
At first glance, a lot of content, confused? Don't be confused, let me say one by one:
protected override Dictionary<string, string> BuildAuthorizeParams(string state)
{
    return new Dictionary<string, string>()
    {
        ["response_type"] = "code",
        ["appid"] = oauthConfig.AppId,
        ["redirect_uri"] = System.Web.HttpUtility.UrlEncode(oauthConfig.RedirectUri),
        ["scope"] = oauthConfig.Scope,
        ["state"] = state
    };
}
Careful readers found that this paragraph is to construct a list of parameters at the back of Authorize Url, and return a Dictionary, which is to think of client_ for WeChat official account. The ID field is changed to appid, so it needs to be handled here.
public override string GetAuthorizeUrl(string state = "")
{
    return $"{base.GetAuthorizeUrl(state)}#wechat_redirect";
}
This paragraph is prefixed with a #wechat after the Authorize Url_ Redirect, although I don't know what wechat has done on this parameter (PS: friends who know, tell them ~ ~), I'll write it in his document.
protected override Dictionary<string, string> BuildGetAccessTokenParams(Dictionary<string, string> authorizeCallbackParams)
{
    return new Dictionary<string, string>()
    {
        ["grant_type"] = "authorization_code",
        ["appid"] = $"{oauthConfig.AppId}",
        ["secret"] = $"{oauthConfig.AppKey}",
        ["code"] = $"{authorizeCallbackParams["code"]}"
    };
}
Similarly, this paragraph is to construct GetAccessToken interface parameters.
protected override Dictionary<string, string> BuildGetUserInfoParams(WechatAccessTokenModel accessTokenModel)
{
    return new Dictionary<string, string>()
    {
        ["access_token"] = accessTokenModel.AccessToken,
        ["openid"] = accessTokenModel.OpenId,
        ["lang"] = "zh_CN",
    };
}
Similarly, this paragraph is used to construct GetUserInfo interface parameters.
As you can see, this framework is based on the principle of freedom and openness. You can customize it wherever you can. Also, my original starting point is not only for OAuth login. I want to access all the API s provided in his platform, because it is too easy to expand, but time and energy are limited. In addition, people are old and don't have much intelligence after 30, so the opportunity is left to young people.