brief introduction
NetCat, known as "Swiss Army Knife" in network tools, is short and practical (1.84 version is no more than 25k, old version or reduced version or even smaller), and is designed as a simple and reliable network tool, which can transmit read and write data through TCP or UDP protocol. At the same time, it is also a network application Debug analyzer, because it can create various types of network connections as required.
Official website: http://netcat.sourceforge.net/
use
install
Take centos7 for example:
[root@localhost ~]# yum install nmap-ncat.x86_64
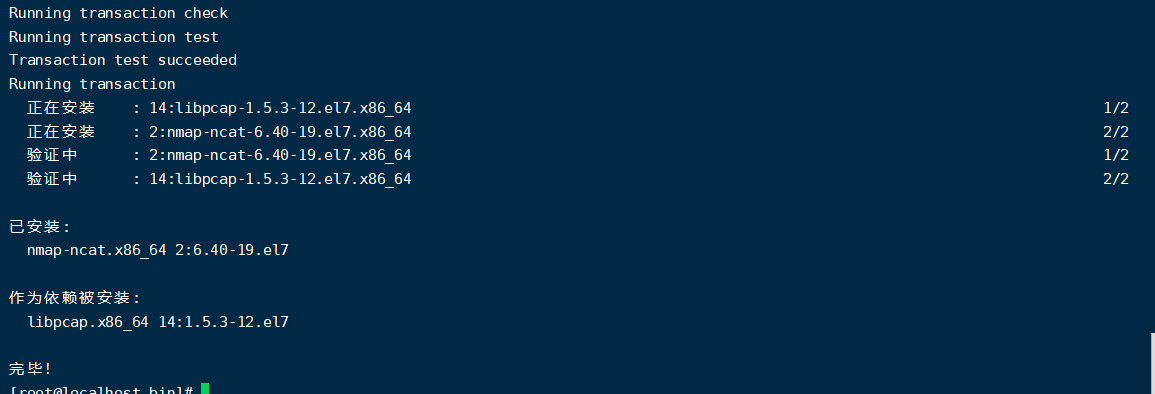
To verify success, use the nc -help command:
[root@localhost bin]# nc -help
Ncat 7.50 ( https://nmap.org/ncat )
Usage: ncat [options] [hostname] [port]

Options taking a time assume seconds. Append 'ms' for milliseconds,
's' for seconds, 'm' for minutes, or 'h' for hours (e.g. 500ms).
  -4                         Use IPv4 only
  -6                         Use IPv6 only
  -U, --unixsock             Use Unix domain sockets only
  -C, --crlf                 Use CRLF for EOL sequence
  -c, --sh-exec <command>    Executes the given command via /bin/sh
  -e, --exec <command>       Executes the given command
      --lua-exec <filename>  Executes the given Lua script
  -g hop1[,hop2,...]         Loose source routing hop points (8 max)
  -G <n>                     Loose source routing hop pointer (4, 8, 12, ...)
  -m, --max-conns <n>        Maximum <n> simultaneous connections
  -h, --help                 Display this help screen
  -d, --delay <time>         Wait between read/writes
  -o, --output <filename>    Dump session data to a file
  -x, --hex-dump <filename>  Dump session data as hex to a file
  -i, --idle-timeout <time>  Idle read/write timeout
  -p, --source-port port     Specify source port to use
  -s, --source addr          Specify source address to use (doesn't affect -l)
  -l, --listen               Bind and listen for incoming connections
  -k, --keep-open            Accept multiple connections in listen mode
  -n, --nodns                Do not resolve hostnames via DNS
  -t, --telnet               Answer Telnet negotiations
  -u, --udp                  Use UDP instead of default TCP
      --sctp                 Use SCTP instead of default TCP
  -v, --verbose              Set verbosity level (can be used several times)
  -w, --wait <time>          Connect timeout
  -z                         Zero-I/O mode, report connection status only
      --append-output        Append rather than clobber specified output files
      --send-only            Only send data, ignoring received; quit on EOF
      --recv-only            Only receive data, never send anything
      --allow                Allow only given hosts to connect to Ncat
      --allowfile            A file of hosts allowed to connect to Ncat
      --deny                 Deny given hosts from connecting to Ncat
      --denyfile             A file of hosts denied from connecting to Ncat
      --broker               Enable Ncat's connection brokering mode
      --chat                 Start a simple Ncat chat server
      --proxy <addr[:port]>  Specify address of host to proxy through
      --proxy-type <type>    Specify proxy type ("http" or "socks4" or "socks5")
      --proxy-auth <auth>    Authenticate with HTTP or SOCKS proxy server
      --ssl                  Connect or listen with SSL
      --ssl-cert             Specify SSL certificate file (PEM) for listening
      --ssl-key              Specify SSL private key (PEM) for listening
      --ssl-verify           Verify trust and domain name of certificates
      --ssl-trustfile        PEM file containing trusted SSL certificates
      --ssl-ciphers          Cipherlist containing SSL ciphers to use
      --version              Display Ncat's version information and exit

See the ncat(1) manpage for full options, descriptions and usage examples
Syntax:
NC [- hlnruz] [- G < gateway >][- G < number of directors >] [- I < delay seconds >] [- O < output file >] [- P < communication port >] [- s < source address >] [- V ][- W < timeout seconds >] [host name] [communication port ]
Parameter Description:
-G < gateway > set router hop communication gateway, the most lost is 8.
-G < number of directors > sets the source routing director, which is a multiple of 4.
-h online help.
-I < delay seconds > set the time interval to transmit information and scan the communication port.
-l use monitoring mode to control the incoming data.
-n use IP address directly instead of domain name server.
-O < output file > specify the file name, dump the data transferred in and out into the file with hexadecimal character code for saving.
-P < communication port > set the communication port used by the local host.
-r random number specifies the communication port between the local and remote hosts.
-S < source address > set the IP address of the packet sent by the local host.
-u use UDP transport protocol.
-v shows the instruction execution process.
-W< timeout seconds > sets the time to wait for a connection.
-z uses 0 I / O mode, which is only used when scanning communication ports.
Common operations
1. TCP port scan
# nc -v -z -w2 127.0.0.1 1-100
Connection to 127.0.0.1 22 port [tcp/ssh] succeeded!
Connection to 127.0.0.1 53 port [tcp/domain] succeeded!
Connection to 127.0.0.1 80 port [tcp/http] succeeded!
...
nc: connect to 127.0.0.1 port 100 (tcp) failed: Connection refused
It can run in TCP or udp mode. The default is TCP, and the - u parameter is adjusted to udp
The z parameter tells netcat to use 0 IO. When the connection is successful, the connection will be closed immediately without data exchange
The v parameter refers to using the redundancy option
n parameter tells netcat not to use DNS to reverse query the domain name of IP address
2. File transfer
Suppose you want to transfer a file file.txt From a to B. A or B can be used as a server or a client. Below, let a be used as a server and B as a client.
Server(192.168.1.100)
$nc -l 1567 < file.txt
Client(192.168.1.101)
$nc -n 192.168.1.100 1567 > file.txt
Here we create A server on A and redirect the input of netcat to A file file.txt When any successful connection is made to the port, netcat will send the file contents of the file.
On the client side, we redirect the output to file.txt When B is connected to A, A sends the file content, and B saves the file content to file.txt .
There is no need to create a file source as a Server, we can also use the opposite method. Like the following we send files from B to a, but the Server is created on A. this time we only need to redirect the output of netcat and the input file of B.
B as Server
Server
$nc -l 1567 > file.txt
Client
nc 192.168.1.101 1567 < file.txt
3. Directory transfer
Sending a file is very simple, but if we want to send multiple files, or the entire directory, it is also very simple. We only need to use the compression tool tar to send compressed packets after compression.
If you want to transfer A directory from A to B over the network.
Server(192.168.1.100)
$tar -cvf – dir_name | nc -l 1567
Client(192.168.1.101)
$nc -n 192.168.1.100 1567 | tar -xvf -
Here on the A server, we create A tar archive and redirect it through - on the console, then use the pipeline to redirect it to netcat, which can send it over the network.
On the client side, we download the compressed package through the netcat pipeline and open the file.
If we want to save bandwidth to transmit compressed packets, we can use bzip2 or other tools to compress them.
Server
$tar -cvf – dir_name| bzip2 -z | nc -l 1567
Compress with bzip2
Client
$nc -n 192.168.1.100 1567 | bzip2 -d |tar -xvf -
Decompress with bzip2
There are also clone a device, open a shell and other functions, not 11 listed
The above contents are all learned from the network
Learning reference: https://www.cnblogs.com/machangwei-8/p/10355248.html