The previous article talked about how to use jquery ajax to submit data to the background, which receives and returns it to ajax. https://www.cnblogs.com/tiezhuxiong/p/11943328.html
Today, we will send the data to the database for query. Don't talk much. Take a tutorial.
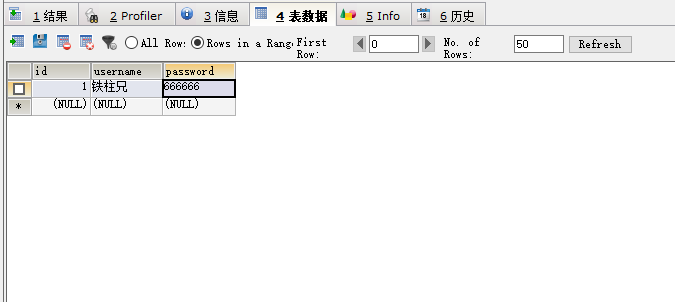
First, we need to establish a database:
CREATE TABLE `user` (
   `id` int(11) NOT NULL AUTO_INCREMENT,
   `username` varchar(255) DEFAULT NULL,
   `password` varchar(255) DEFAULT NULL,
   PRIMARY KEY (`id`)
 )
INSERT INTO `user`.`user`(`id`,`username`,`password`) VALUES ( NULL,'Iron pillar elder brother','666666');
Database is finished. Next, go to eclipse to edit java code. Students, keep up with it.
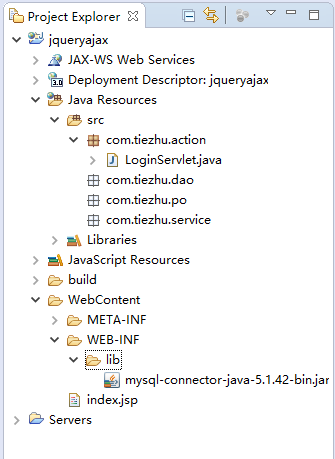
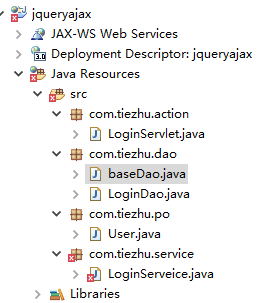
Today, based on the previous foundation, we created three new packages and imported an ancestral mysql jar package:
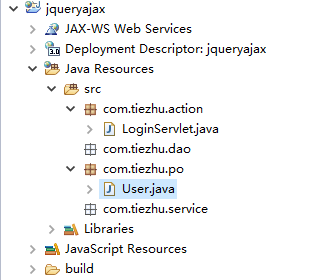
Let's first create a java class named User in the po package (the class name can be determined by yourself, as long as you can understand it), and set three fields in the class to create get and set methods for these three fields:
package com.tiezhu.po;

public class User {
 private int id;//Unique identification of the user
 private String userName;//User login account (user name)
 private String Password;//Password
public int getId() {
	return id;
}
public void setId(int id) {
	this.id = id;
}
public String getUserName() {
	return userName;
}
public void setUserName(String userName) {
	this.userName = userName;
}
public String getPassword() {
	return Password;
}
public void setPassword(String password) {
	Password = password;
}

}
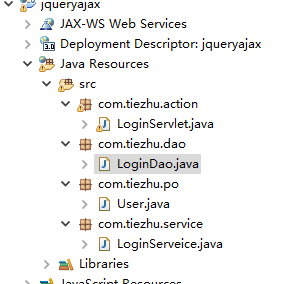
After finishing the User class, we go to the service package to create the loginservice class, and then go to the dao package to create the LoginDao class:
Go back to the LoginServlet class we created last time:
package com.tiezhu.action;
import java.io.IOException;
import javax.servlet.ServletException;
import javax.servlet.annotation.WebServlet;
import javax.servlet.http.HttpServlet;
import javax.servlet.http.HttpServletRequest;
import javax.servlet.http.HttpServletResponse;import com.tiezhu.po.User;
import com.tiezhu.service.LoginServeice;@WebServlet(name="LoginServlet",urlPatterns="/login")
public class LoginServlet extends HttpServlet{/**
*
*/
private static final long serialVersionUID = 1L;@Override
protected void doGet(HttpServletRequest req, HttpServletResponse resp) throws ServletException, IOException {
// TODO Auto-generated method stub
super.doGet(req, resp);
}@Override
protected void doPost(HttpServletRequest req, HttpServletResponse resp) throws ServletException, IOException {
//Processing encoding formats
req.setCharacterEncoding("UTF-8");
resp.setContentType("html/text;charset=UTF-8");
//Accept data from the front end
String userName=req.getParameter("userName");
String password=req.getParameter("password");
System.out.println("Data received from the front end: userName="+userName+"password="+password);
//new out of user object
User user=new User();
//new out loginservice object
LoginServeice loginservice=new LoginServeice();
//Create login method in loginservice, and insert user,userName and password into login method
user=loginservice.login(userName,password);
//Judge whether there is value for user
if(user!=null){
resp.getWriter().print("query was successful");System.out.println("1");
}else{
System.out.println("0");
resp.getWriter().print("user does not exist");
}
}}
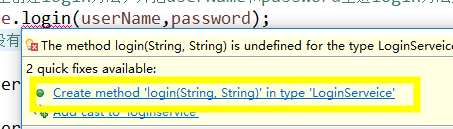
At this time, the login in user=loginservice.login(userName,password); line 40 will report an error, because this method does not exist in loginservice.
Put the mouse over login, and the first prompt tool will automatically create this method for us.
Now we enter the LoginServeic class and continue our code:
package com.tiezhu.service;

import org.apache.tomcat.jni.User;

import com.tiezhu.dao.LoginDao;

public class LoginServeice {

	public User login(String userName, String password) {
          User user=null;
		//new out dao object
		LoginDao dao=new LoginDao();
		//Create login method in dao and insert userName and password into login method
		user=dao.login(userName,password);//At this time, the code will go into the dao layer, wait until the login method in the dao layer is finished, and then return
		return user;
	}

}
At this time, the login in user=dao.login(user,userName,password); will report an error, or use the same method, put the mouse on it, click the first prompt according to the prompt, and the tool will automatically create the login method for us in Dao.
Don't rush to write the LoginDao class now. Let's first create a java class of BaseDao in the dao package.
package com.tiezhu.dao;

import java.sql.Connection;
import java.sql.DriverManager;
import java.sql.PreparedStatement;
import java.sql.ResultSet;
import java.sql.SQLException;

public class baseDao {
	//mysql driver package
	private static String driver="com.mysql.jdbc.Driver";
	//Database address, 3306 is the port number, and user is the database name
	private static String url="jdbc:mysql://localhost:3306/user";
	//Database account
	private static String user="root";
	//Database password
	private static String password="root";
	//sql connection
	Connection conn = null;

	/**
	 * Establish connection
	 */
	public Connection getConnection(){
		//If conn is empty, establish a connection
		if(conn==null){
			try {
				//1. Loading drive
				Class.forName(driver);System.out.println("Loading driver succeeded");
				//2. Establish connection
				conn=DriverManager.getConnection(url, user, password);System.out.println("Connecting...");
			} catch (Exception e) {
				e.printStackTrace();
			}

		}
		System.out.println("Successfully connected to database");
		return conn;

	}
	/**
	 * Close connection
	 */
	public void closeAll(Connection conn,PreparedStatement pstm,ResultSet rs){
		if(rs!=null){
			try {
				rs.close();
			} catch (SQLException e) {
				// TODO Auto-generated catch block
				e.printStackTrace();
			}
		}
		if(pstm!=null){
			try {
				pstm.close();System.out.println("Close pstm Success");
			} catch (SQLException e) {
				// TODO Auto-generated catch block
				e.printStackTrace();
			}
		}
		if(conn!=null){
			try {
				conn.close();System.out.println("Close conn Success");
			} catch (SQLException e) {
				// TODO Auto-generated catch block
				e.printStackTrace();
			}
		}
	}
}
Friendly tip: all packages of baseDao must be sql. Do not type other packages, or you will report an error.
Now let's go to LoginDao:
package com.tiezhu.dao;
import java.sql.Connection;
import java.sql.PreparedStatement;
import java.sql.ResultSet;
import java.sql.SQLException;import com.tiezhu.po.User;
public class LoginDao extends baseDao{
public User login( String userName, String password) {
//user is defined here for later use
User user=null;
//1 define Connection
Connection conn = null;
//2. Define PreparedStatement
PreparedStatement pstm = null;
//3. To query, you need to define a ResultSet
ResultSet rs = null;
try {
conn=this.getConnection();
String sql="select * from user where username='"+userName+"' and password='"+password+"'";
pstm = conn.prepareStatement(sql);
System.out.println(sql);
rs=pstm.executeQuery();
while (rs.next()) {
//In this case, the user is listed in new, and the following values to be queried from the data are listed in user
user=new User();
//set into user class queried from database
user.setId(rs.getInt("id"));
user.setUserName(rs.getString("username"));
user.setPassword(rs.getString("password"));
System.out.println(user.getUserName());
}
System.out.println("dao Go to the end of the floor user Send back service layer");
} catch (SQLException e) {
// TODO Auto-generated catch block
e.printStackTrace();
}finally {
this.closeAll(rs,conn, pstm);//Release data connection
}
//Return the user to the service layer.
return user;
}}
JAVA class done! Let's go back to the jsp interface, and I'd like to apologize to you here, because the last time I wrote it too fast, I didn't notice that the jsp was wrong. Now I'll correct it here:
In the last error point, I quoted the uploaded userName, resulting in the final data obtained in the background is userName, rather than the value entered by the user. At the same time, I remind you to be more careful when you write the code in the future (now it has been changed back):
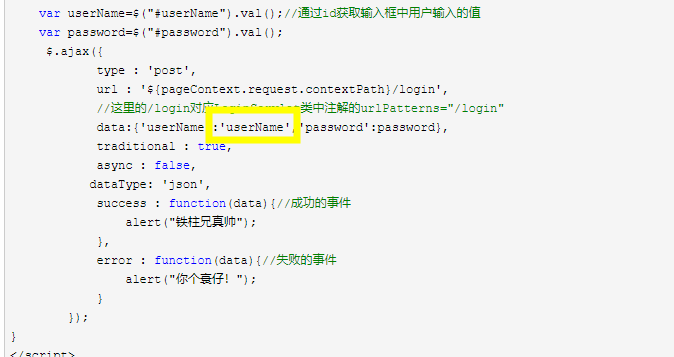
This time, there are some changes in ajax in our jsp. The code is posted:
<%@ page language="java" contentType="text/html; charset=UTF-8"
    pageEncoding="UTF-8"%>
<!DOCTYPE html PUBLIC "-//W3C//DTD HTML 4.01 Transitional//EN" "http://www.w3.org/TR/html4/loose.dtd">
<html>
<head>
<meta http-equiv="Content-Type" content="text/html; charset=UTF-8">
<script src="https://cdn.staticfile.org/jquery/2.1.1/jquery.min.js"></script>
<title>Insert title here</title>
</head>
<body>
<input type="text" id="userName"/>
<input type="text" id="password"/>
<a onclick="btnConfirm()">Point I submit</a>
<script type="text/javascript">

function btnConfirm(){//Click event in a tag
	var userName=$("#userName").val(); / / get the value entered by the user in the input box through id
	var password=$("#password").val();
	 $.ajax({
	        type : 'post',
	        url : '${pageContext.request.contextPath}/login',
	        //The / login here corresponds to the urlpatterns of the annotation in the LoginServlet class = "/ login"
	        data:{'userName':userName,'password':password},
	        traditional : true,
	        async : false,
	       dataType: 'text',
	        success : function(data){//Successful events
	        	alert(data);
	        },
	        error : function(data){//Failed events
	        	alert(data);
	        }
	    });
}
</script>
</body>
</html>
All done! Run the code and try it.
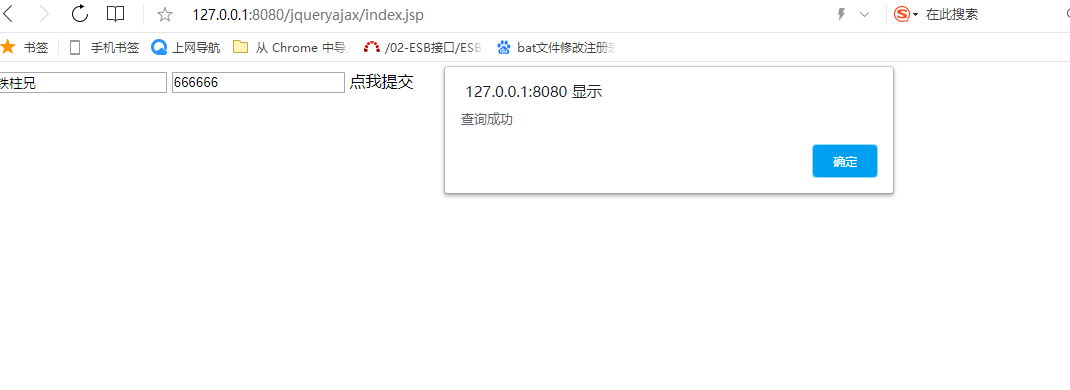

Thank you for watching this tutorial. If you have any questions, please leave a message in the comment area~