Author: Jingteng source: Hang Seng LIGHT cloud community
Introduction to Nginx
Nginx is a high-performance http server / reverse proxy server and e-mail (IMAP/POP3) proxy server developed by Igor Sysoev, a Russian programmer. Its main functions include:
- Reverse proxy
- load balancing
- HTTP server
At present, most of the running Nginx servers are using its load balancing function as the system architecture of service cluster.
Function description
The three main functions of Nginx are introduced above. Let's talk about the function of each function.
1, Reverse Proxy
Before introducing reverse proxy, let's first understand the concept of forward proxy.
For example, you are going to see Jay Chou's tour, but you find that the tickets from the official channels have been sold out, so you have to ask your powerful friend A to buy tickets internally, and you get this ticket as you wish. In this process, friend A acts as A forward agent, that is, it acts as an agent for the client (you) to send A request to the server (ticket seller), but the server (ticket seller) does not know who initiated the request from the source, but only knows that it was requested by the agent service (friend A) to itself.
From this example, let's understand the reverse proxy. For example, we often receive 10086 or 10000 calls, but the people who call are different every time. This is because 10086 is the switchboard number of China Mobile. When the extension calls the user, it is the number displayed through the switchboard agent. At this time, the client (you) cannot know who initiated the request, I only know that the agent service (switchboard) requested it from me.
The official explanation is that the reverse proxy method refers to using a proxy server to accept the connection request on the Internet, then forwarding the request to the server on the internal network, and returning the results obtained from the server to the client requesting the connection on the Internet. This era server is externally represented as a reverse proxy server.
The following is a section of Nginx configuration code for simple implementation of reverse proxy:
server {
    listen       80;
    server_name  localhost;
    client_max_body_size 1024M;

    location / {
        proxy_pass http://localhost:8080;
        proxy_set_header Host $host:$server_port;
    }
}
Among them http://localhost:8080 It is the target server of anti proxy. 80 is the port that Nginx exposes to the client.
2, Load Balance * *)**
Load balancing, as the name suggests, is to distribute the service load to multiple server units for execution, so as to improve the performance and reliability of websites, applications and other services. Let's compare the two system topologies. The first is the topology without load balancing:

The following is the topology designed for load balancing:
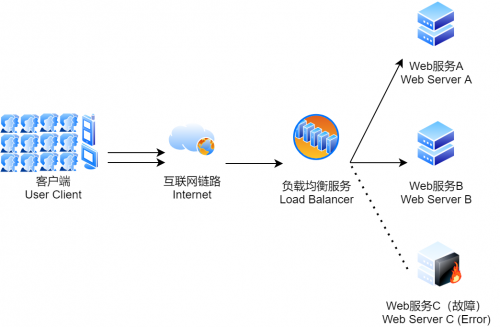
As can be seen from Figure 2, the user accesses the load balancer, and then the load balancer forwards the request to the back-end server. In this case, after the failure of Service C, the user access load will be distributed to service A and service B, avoiding the system crash. If this failure occurs in Figure 1, the system will crash directly.
Load balancing algorithm
The load balancing algorithm determines which healthy servers on the back end will be selected. Several common algorithms:
- Round Robin: select the first server in the list for the first request, then move the list down in order until the end, and then cycle.
- Least Connections: select the server with the least number of connections first. It is recommended when the session is generally long.
- Source: select the server to forward according to the hash of the IP of the request source. This method can ensure that specific users can connect to the same server to a certain extent.
If your application needs to process state and requires users to connect to the same server as before. You can create an association based on the IP information of the client through the Source algorithm, or use sticky sessions.
At the same time, load balancing needs to cooperate with the reverse agent function to play its role.
3, HTTP server
In addition to the above two functions, Nginx can also be used as a static resource server. For example, if you do not use the pure front-end resources of SSR (Server Side Render), you can rely on Nginx to realize resource hosting. Let's take a look at the configuration of the static resource server:
server {
    listen       80;
    server_name  localhost;
    client_max_body_size 1024M;

    location / {
        root   e:\wwwroot;
        index  index.html;
    }
}
The root configuration is the root directory where specific resources are stored, and the index configuration is the default file when accessing the root directory.
Dynamic and static separation
Dynamic and static separation is also an important concept used by Nginx as an Http server. To understand dynamic and static separation, we must first understand what dynamic resources and static resources are:
- Dynamic resources: the resource content that needs to be obtained in real time from the server, such as JSP, SSR rendering page, etc. the resource content will change when accessed at different times.
- Static resources: such as JS, CSS, Img, etc. the content of resources will not change when accessed at different times.
Because Nginx can be used as a static resource server, but it cannot carry dynamic resources, we need to split the access policies of static and dynamic resources when there is a scenario that requires dynamic and static separation:
upstream test{
    server localhost:8080;
    server localhost:8081;
}

server {
    listen       80;
    server_name  localhost;

    location / {
        root   e:\wwwroot;
        index  index.html;
    }

    # All static requests are processed by nginx, and the storage directory is html
    location ~ \.(gif|jpg|jpeg|png|bmp|swf|css|js)$ {
        root    e:\wwwroot;
    }

    # All dynamic requests are forwarded to tomcat for processing
    location ~ \.(jsp|do)$ {
        proxy_pass  http://test;
    }

    error_page   500 502 503 504  /50x.html;
    location = /50x.html {
        root   e:\wwwroot;
    }
}
It can be roughly understood from this configuration that when the client accesses different types of resources, Nginx will automatically allocate to its own static resource service or remote dynamic resource service according to the type, so as to meet the functions of a complete resource server.
Configuration introduction
1, Basic introduction
After finishing the functions of Nginx, let's briefly introduce the configuration file of Nginx. Most of the work related to the hot restart of NX can be done by the front-end personnel.
Here we look at the next default configuration of Nginx, that is, after installing Nginx, the default Nginx Contents of conf file:
#user  nobody;
worker_processes  1;

#error_log  logs/error.log;
#error_log  logs/error.log  notice;
#error_log  logs/error.log  info;

#pid        logs/nginx.pid;


events {
    worker_connections  1024;
}


http {
    include       mime.types;
    default_type  application/octet-stream;

    #log_format  main  '$remote_addr - $remote_user [$time_local] "$request" '
    #                  '$status $body_bytes_sent "$http_referer" '
    #                  '"$http_user_agent" "$http_x_forwarded_for"';

    #access_log  logs/access.log  main;

    sendfile        on;
    #tcp_nopush     on;

    #keepalive_timeout  0;
    keepalive_timeout  65;

    #gzip  on;

    server {
        listen       80;
        server_name  localhost;

        #charset koi8-r;

        #access_log  logs/host.access.log  main;

        location / {
            root   html;
            index  index.html index.htm;
        }

        #error_page  404              /404.html;

        # redirect server error pages to the static page /50x.html
        #
        error_page   500 502 503 504  /50x.html;
        location = /50x.html {
            root   html;
        }

        # proxy the PHP scripts to Apache listening on 127.0.0.1:80
        #
        #location ~ \.php$ {
        #    proxy_pass   http://127.0.0.1;
        #}

        # pass the PHP scripts to FastCGI server listening on 127.0.0.1:9000
        #
        #location ~ \.php$ {
        #    root           html;
        #    fastcgi_pass   127.0.0.1:9000;
        #    fastcgi_index  index.php;
        #    fastcgi_param  SCRIPT_FILENAME  /scripts$fastcgi_script_name;
        #    include        fastcgi_params;
        #}

        # deny access to .htaccess files, if Apache's document root
        # concurs with nginx's one
        #
        #location ~ /\.ht {
        #    deny  all;
        #}
    }


    # another virtual host using mix of IP-, name-, and port-based configuration
    #
    #server {
    #    listen       8000;
    #    listen       somename:8080;
    #    server_name  somename  alias  another.alias;

    #    location / {
    #        root   html;
    #        index  index.html index.htm;
    #    }
    #}


    # HTTPS server
    #
    #server {
    #    listen       443 ssl;
    #    server_name  localhost;

    #    ssl_certificate      cert.pem;
    #    ssl_certificate_key  cert.key;

    #    ssl_session_cache    shared:SSL:1m;
    #    ssl_session_timeout  5m;

    #    ssl_ciphers  HIGH:!aNULL:!MD5;
    #    ssl_prefer_server_ciphers  on;

    #    location / {
    #        root   html;
    #        index  index.html index.htm;
    #    }
    #}

}
The corresponding structure is roughly:
...              #Global block

events {         #events block
    ...
}

http      #http block
{
    ...   #http global block
        server        #server block
        {
        ...       #server global block
            location [PATTERN]   #location block
            {
            ...
        }
        location [PATTERN]
            {
            ...
        }
    }
    server
        {
        ...
    }
    ...     #http global block
}
The corresponding functions of the above code blocks are:
- Global block: configure instructions that affect Nginx global. Generally, there are user groups running the Nginx server, the pid storage path of the Nginx process, the log storage path, the introduction of configuration files, the number of worker process es allowed to be generated, etc.
- events block: the configuration affects the Nginx server or the network connection with the user. There is the maximum number of connections per process, which event driven model is selected to process connection requests, whether it is allowed to accept multiple network connections at the same time, and start the serialization of multiple network connections.
- http block: it can nest multiple server s, configure most functions such as proxy, cache, log definition and the configuration of third-party modules. Such as file import, MIME type definition, log customization, whether to use sendfile to transfer files, connection timeout, number of single connection requests, etc.
- server block: configure the relevant parameters of the virtual host. There can be multiple servers in one http.
- location block: configure the routing of requests and the processing of various pages.
The detailed configuration method of each code block can be referred to Nginx document
2, Nginx solves cross domain problems
The following shows a section of location code block commonly used to deal with front-end cross domain problems. In terms of understanding and using Nginx to solve cross domain problems.
location /cross-server/ {
    set $corsHost $http_origin;
    set $allowMethods "GET,POST,OPTIONS";
    set $allowHeaders "broker_key,X-Original-URI,X-Request-Method,Authorization,access_token,login_account,auth_password,user_type,tenant_id,auth_code,Origin, No-Cache, X-Requested-With, If-Modified-Since, Pragma, Last-Modified, Cache-Control, Expires, Content-Type, X-E4M-With, usertoken";

    if ($request_method = 'OPTIONS'){
        add_header 'Access-Control-Allow-Origin' $corsHost always;
        add_header 'Access-Control-Allow-Credentials' true always;
        add_header 'Access-Control-Allow-Methods' $allowMethods always;
        add_header 'Access-Control-Allow-Headers' $allowHeaders;
        add_header 'Access-Control-Max-Age' 90000000;
        return 200;
    }

    proxy_hide_header Access-Control-Allow-Headers;
    proxy_hide_header Access-Control-Allow-Origin;
    proxy_hide_header Access-Control-Allow-Credentials;
    add_header Access-Control-Allow-Origin $corsHost always;
    add_header Access-Control-Allow-Methods $allowMethods always;
    add_header Access-Control-Allow-Headers $allowHeaders;
    add_header Access-Control-Allow-Credentials true always;
    add_header Access-Control-Expose-Headers *;
    add_header Access-Control-Max-Age 90000000;

    proxy_pass http://10.117.20.54:8000/;
    proxy_set_header        Host   $host:443;
    proxy_set_header        X-Forwarded-For         $remote_addr;
    proxy_redirect http:// $scheme://;

}
It can be seen that in the previous paragraph, set is used to set local variables in location, and then these variables are used in the following instruction configurations. The following are the functions of each instruction:
- add_header: used to add a return header field to the request. It is valid if and only if the status codes are those listed below: 200, 201 (1.3.10), 204, 206, 301, 302, 303, 304, 307 (1.1.16, 1.0.13), or 308 (1.13.0)
- **proxy_ hide_ Header: * * you can hide the information in the response header.
- **proxy_redirect: * * specifies to modify the values of the location header field and the refresh header field in the response header returned by the proxy server.
- **proxy_set_header: * * redefine the request header sent to the back-end server.
- **proxy_pass: * * the forwarding service path of the proxy.
The above configuration can be directly copied to Nginx Conf, and then modify / cross server / (the path that Nginx exposes to client access) and http://10.117.20.54:8000/ (the forwarded service path) can effectively avoid the cross domain problem of services.
Cross domain skill supplement
In the development environment, if you don't want to use Nginx to deal with cross domain debugging, you can also modify the Chrome configuration to realize cross domain debugging. In essence, cross domain is a browser security policy, so it's more convenient to solve this problem from the browser.
Windows system:
1. Copy the chrome browser shortcut, right-click the shortcut icon to open the "properties" as shown in the figure:
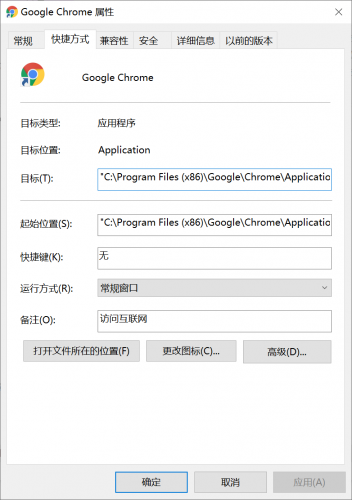
2. Add -- Disable web security -- user data dir after "target". For example, after modification in the figure, it is: "C: \ program files (x86) \ Google \ chrome \ application \ chrome. Exe" -- Disable web security -- user data dir ".
3. Click OK to reopen the browser, and the following appears:
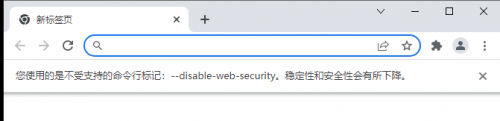
At this time, after the modification of shielding cross domain settings is completed, the page accessed by clicking this shortcut will ignore the cross domain rules, avoiding the trouble of configuring cross domains on the server in the development environment.
Mac system:
The following is reproduced from: Solve the cross domain problem of Chrome browser on Mac
First, create a folder. This folder is used to save the user information after closing the security policy. The name can be taken at will and the location can be put at will.
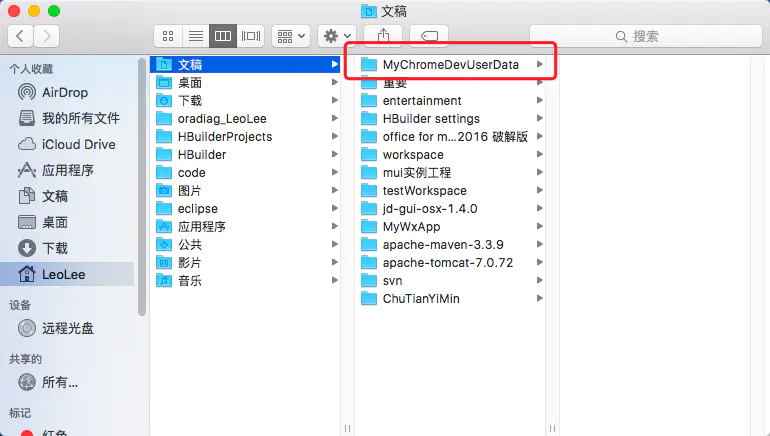
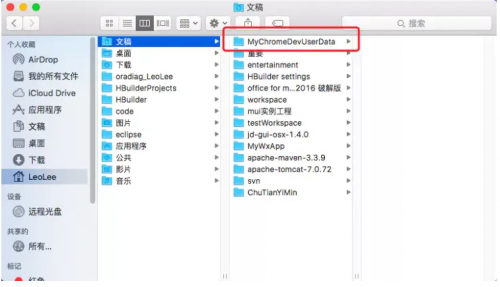
Create a folder
Then open the console and enter the following code open - N / applications / Google \ chrome app/ --args --disable-web-security --user-data-dir=/Users/LeoLee/Documents/MyChromeDevUserData

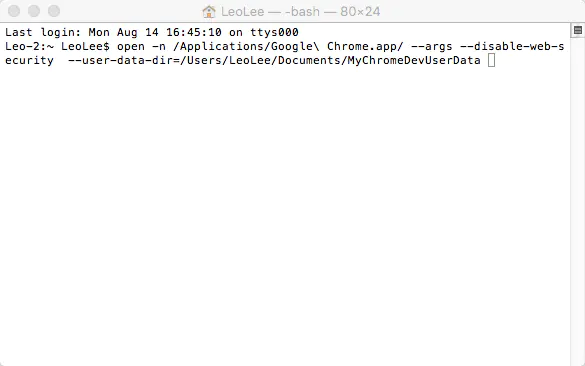
Turn off security policy code
You need to change the above code according to the address where you store the folder you just created, that is, the red box area in the figure below. It is the lack of this code in most online tutorials that causes many users to fail to close the security policy
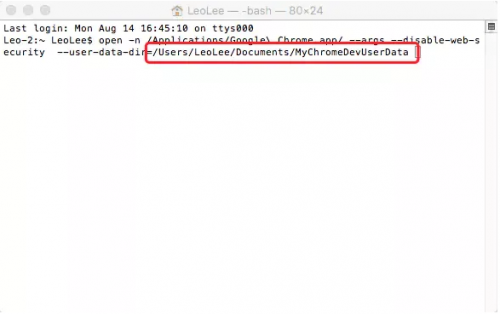
Users need to modify the code according to their folder address
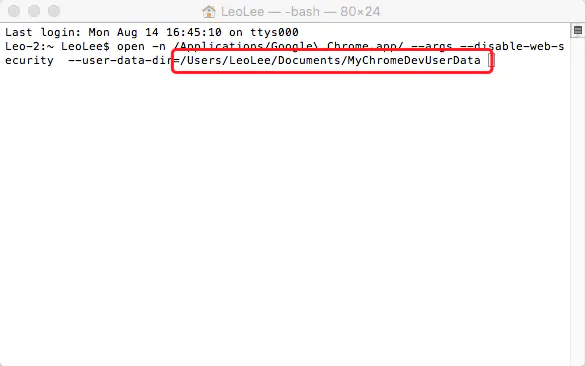
Enter the code and press enter. Then Chrome should pop up a window
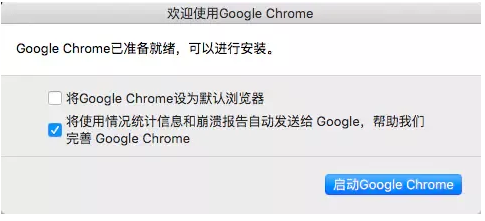
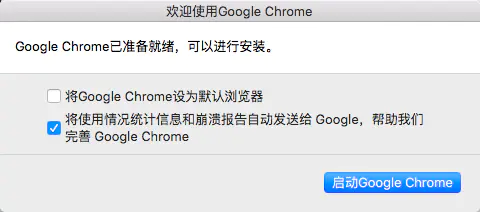
Chrome pop-up
Click to start Google Chrome, and you will find that compared with the previous chrome, there is more chrome at this time. A prompt at the top tells you that the current mode is not safe
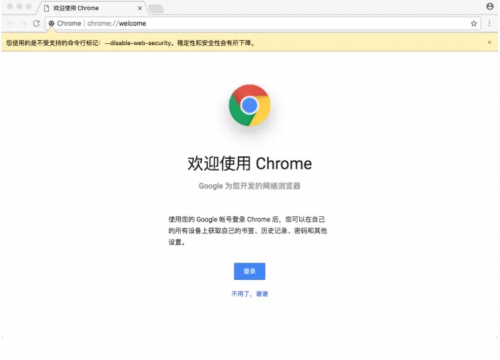
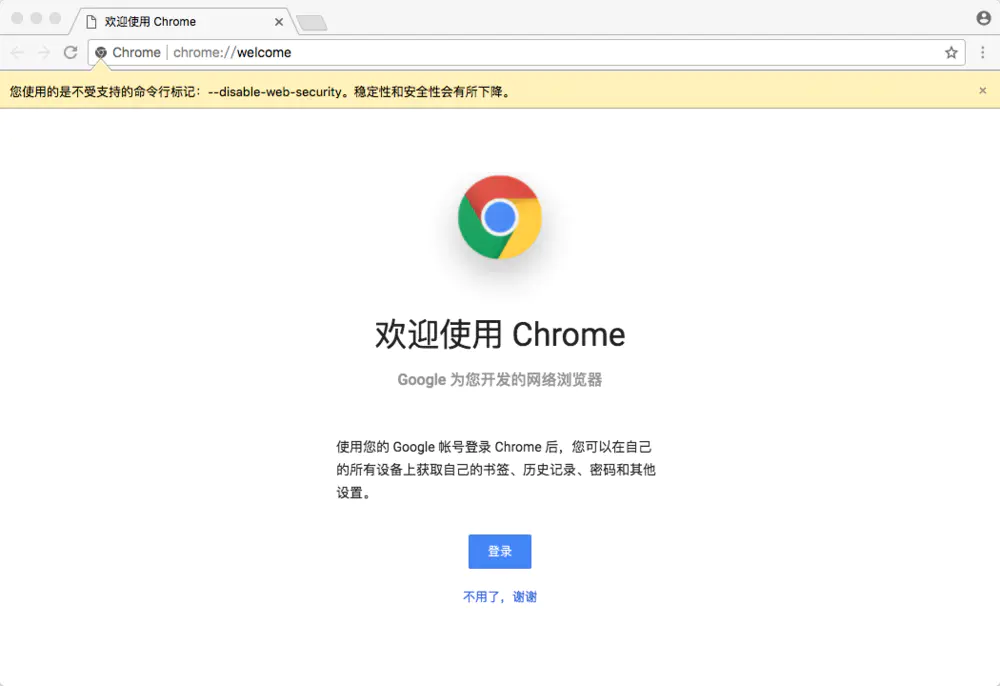
One more line of prompt will appear above the browser
Its principle is similar to that of Windows version. It bypasses the security policy by modifying the configuration.