catalogue
1, Compiling and installing Nginx services
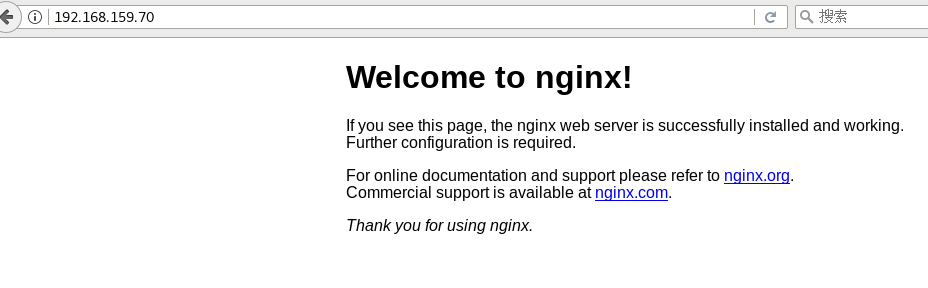
4. Check, start, restart and stop nginx service
1. Check to see if HTTP is included_ STUB_ Status module
2. Modify the configuration file and add a stub_status configuration
1. Authorization based access control
2. Client based access control
5, Application of virtual host
1. Domain name based Nginx virtual host
3. Based on different IP access
preface
Nginx is a lightweight Web server / reverse proxy server and e-mail (IMAP/POP3) proxy server, which is distributed under a BSD like protocol. It is characterized by less memory and strong concurrency. In fact, nginx does perform well in the same type of Web server.
1, Compiling and installing Nginx services
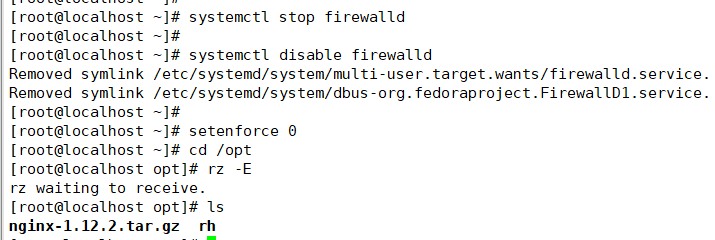
1. Close the firewall and upload the software package required to install ngnix to the / opt directory
systemctl stop firewalld
systemctl disable firewalld
  Removed symlink /etc/systemd/system/multi-user.target.wants/firewalld.service.
  Removed symlink /etc/systemd/system/dbus-org.fedoraproject.FirewallD1.service.
setenforce 0
2. Install dependent packages
yum -y install pcre-devel zlib-devel gcc gcc-c++ make

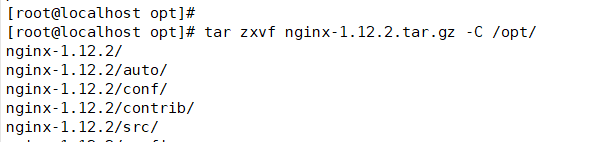
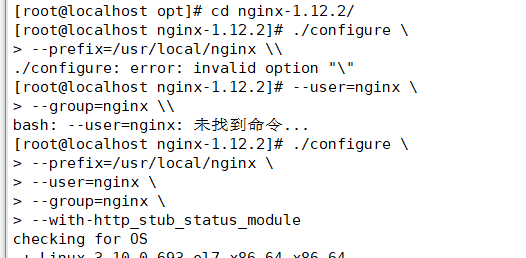
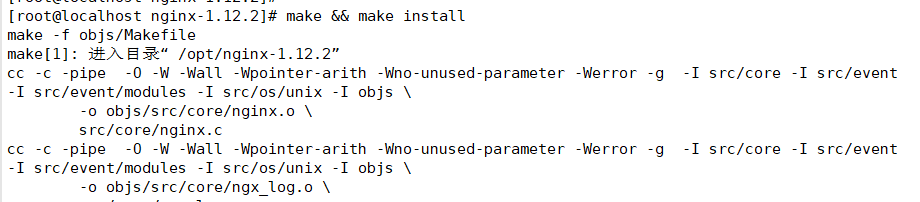
3. Compile and install Nginx
tar zxvf nginx-1.12.2.tar.gz -C /opt/

cd nginx-1.12.2/
./configure \
--prefix=/usr/local/nginx \
--user=nginx \
--group=nginx \
--with-http_stub_status_module

make && make install

ln -s /usr/local/nginx/sbin/nginx /usr/local/sbin/

cd /opt
useradd -M -s /sbin/nologin nginx

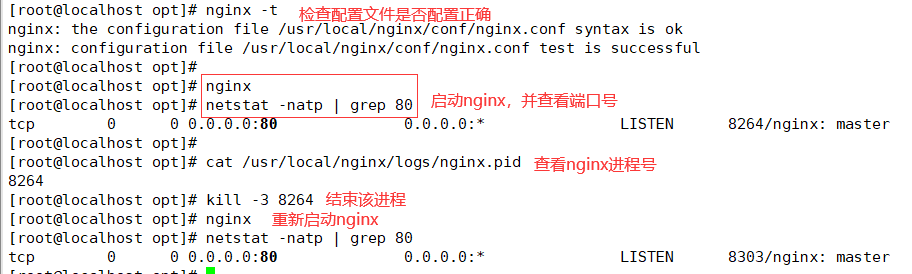
4. Check, start, restart and stop nginx service
nginx -t								#Check whether the configuration file is configured correctly
nginx									#start-up
cat /usr/local/nginx/logs/nginx.pid		#First check the PID number of nginx
kill -3 <PID number>
kill -s QUIT <PID number>				    #stop it
killall -3 nginx
killall -s QUIT nginx

kill -1 <PID number>						    #heavy load
kill -s HUP <PID number>
killall -1 nginx
killall -s HUP nginx					#Log separator, reopen log file
kill -USR1 <PID number>						#Smooth upgrade
kill -USR2 <PID number>
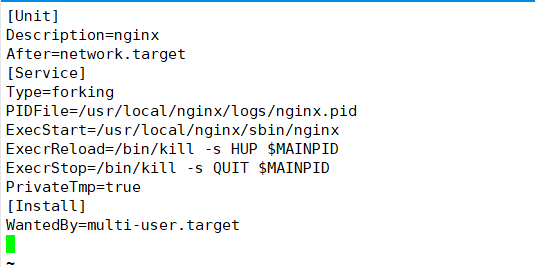
5. Add Nginx system service
vim /lib/systemd/system/nginx.service

[Unit]
Description=nginx
After=network.target
[Service]
Type=forking
PIDFile=/usr/local/nginx/logs/nginx.pid
ExecStart=/usr/local/nginx/sbin/nginx
ExecrReload=/bin/kill -s HUP $MAINPID
ExecrStop=/bin/kill -s QUIT $MAINPID
PrivateTmp=true
[Install]
WantedBy=multi-user.target


chmod 754 /lib/systemd/system/nginx.service
systemctl start nginx.service
systemctl enable nginx.service


Note: you may not start normally here. You have installed apache before, which is in conflict. You have to stop the nginx process and restart it
killall -3 nginx
nginx
2, Nginx profile
vim /usr/local/nginx/conf/nginx.conf
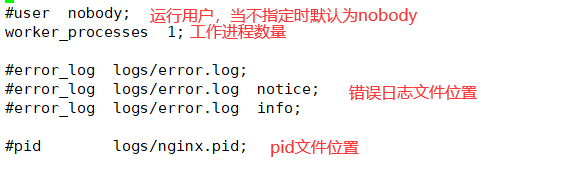
1. Global configuration
#user  nobody;
worker_processes  1;

#error_log  logs/error.log;
#error_log  logs/error.log  notice;
#error_log  logs/error.log  info;

#pid        logs/nginx.pid;
2. I/O event configuration
events {
    use epoll;    #epoll model, multiplexing mechanism and process coordination + callback realize high concurrency to improve performance
    worker_connections  1024;  #Each process handles 4096 connections, which is limited by the maximum number of file openings and cpu


#To increase the number of connections per process, you also need to execute the command "ulimit -n 65535" to temporarily modify the maximum number of files that can be opened simultaneously by each local process.
#On the Linux platform, when processing highly concurrent TCP connections, the maximum number of concurrent connections is limited by the system to the number of files that can be opened by a single user process at the same time (this is because the system creates a socket handle for each TCP connection, and each socket handle is also a file handle).
#You can use the ulimit -a command to view the limit on the number of files that the system allows the current user process to open.
3. HTTP configuration
http {
	##File extension and file type mapping table
    include       mime.types;

	##Default file type
    default_type  application/octet-stream;

	##Log format setting
    #log_format  main  '$remote_addr - $remote_user [$time_local] "$request" '
    #                  '$status $body_bytes_sent "$http_referer" '
    #                  '"$http_user_agent" "$http_x_forwarded_for"';

	##Access log location
    #access_log  logs/access.log  main;

	##Support file sending (downloading)
    sendfile        on;
 	##This option allows or disables TCP using socke_ The option of cork (cache data before sending packets), which is only used when sendfile is used
    #tcp_nopush     on;

	##Connection hold timeout, in seconds
    #keepalive_timeout  0;
    keepalive_timeout  65;

	##Gzip module settings, setting whether to enable gzip compressed output
    #gzip  on;

##Listening configuration for Web Services
server {
	##Listening address and port
	listen 80;
	##The site domain name can have multiple, separated by spaces
	server_name www.lic.com;

	##Default character set for web pages
	charset utf-8;

	##Root configuration
	location / {

		##Location of the site root directory / usr/local/nginx/html
		root html;

		##Default home page file name
		index index.html index.htm;
	}

	##Feedback page for internal errors
	error_page 500 502 503 504 /50x.html;
	##Error page configuration
	location = /50x.html {
		root html;
	}
}
}
3, Status access statistics
1. Check to see if HTTP is included_ STUB_ Status module

cd /usr/local/nginx/conf/
nginx -V
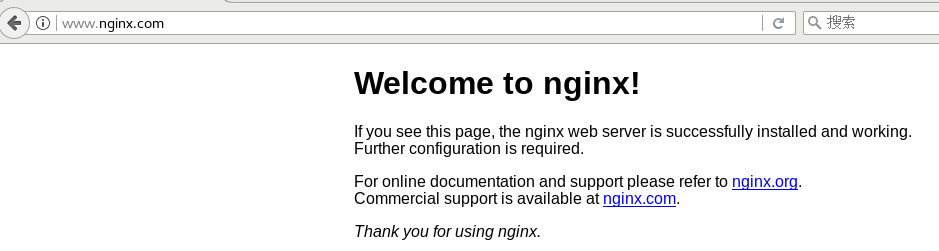
2. Modify the configuration file and add a stub_status configuration

cp nginx.conf nginx.conf.bak
vim /usr/local/nginx/conf/nginx.conf
http {
......
server {
listen 80;
server_name www.nginx.com;
#charset koi8-r;
#access_log logs/host.access.log main;
location / {
root html;
index index.html index.htm;
}
##Add stub_status configuration
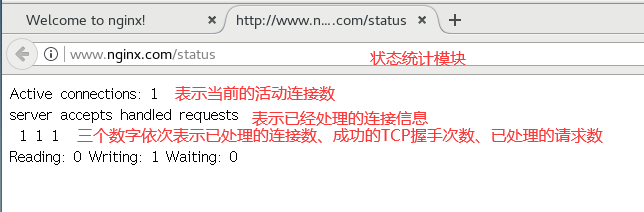
location /status { #Visit www.nginx.com/status
stub_status on; #Turn on the status statistics function
access_log off; #Turn off logging at this location
}

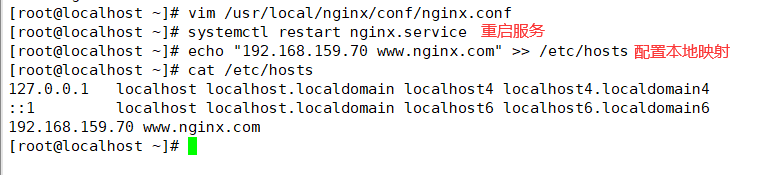
3. Restart service

vim /etc/hosts
nginx -t
systemctl restart nginx.service

4, Access control
1. Authorization based access control
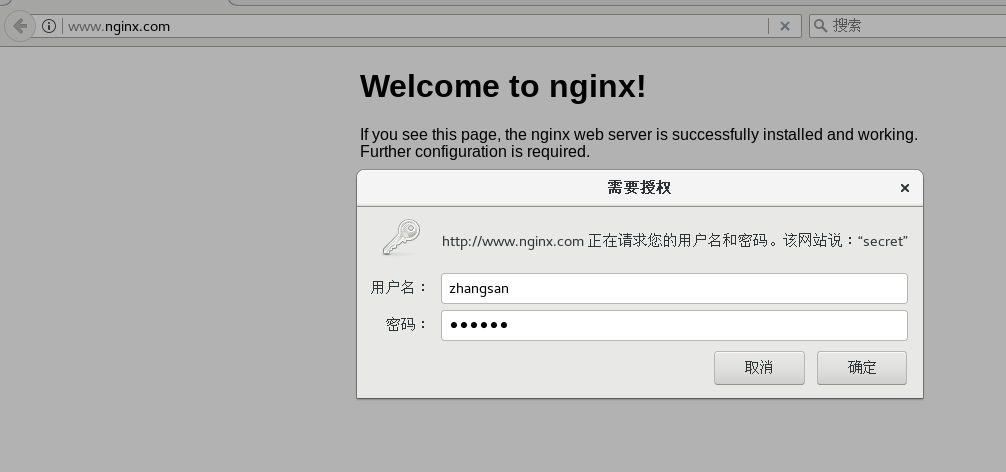
1-1. Generate user password authentication file
yum install -y httpd-tools
htpasswd -c /usr/local/nginx/passwd.db zhangsan
chown nginx /usr/local/nginx/passwd.db
chmod 400 /usr/local/nginx/passwd.db
ls -l /usr/local/nginx/passwd.db


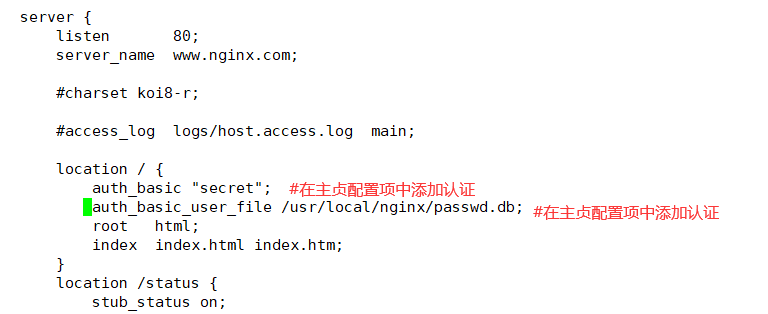
1-2. Modify the directory corresponding to the main configuration file and add authentication configuration items
vim /usr/local/nginx/conf/nginx.conf
......
	server {
		location / {
			......
			##Add authentication configuration##
			auth_basic "secret";
			auth_basic_user_file /usr/local/nginx/passwd.db;
		}
	}
1-3. Restart the service and access the test
nginx -t
systemctl restart nginx

2. Client based access control
2-1. Access control rules are as follows:
deny IP/IP segment: deny client access to an IP or IP segment
allow IP/IP segment: allow clients of an IP or IP segment to execute access rules from top to bottom. If they match, they will stop and no longer match from bottom to top
vim /usr/local/nginx/conf/nginx.conf
......
	server {
		location / {
			......
			##Add control rule##
			deny 192.168.226.160; 					#Access denied client IP
			allow all;								#Allow other IP clients to access
		}
	}

systemctl restart nginx
5, Application of virtual host
1. Domain name based Nginx virtual host
1-1. Add domain name resolution


1-2. Prepare the web page document of the virtual site
mkdir -p /var/www/html/accp
mkdir -p /var/www/html/benet
echo "<h1>www.accp.com</h1>" > /var/www/html/accp/index.html
echo "<h1>www.benet.com</h1>" > /var/www/html/benet/index.html

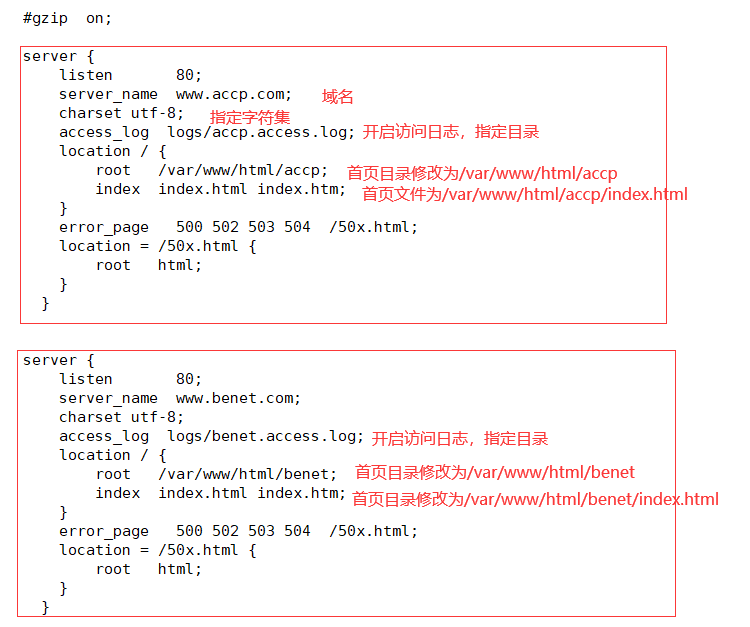
1-3. Modify the configuration file
vim /usr/local/nginx/conf/nginx.conf
http {

  ......

    #gzip  on;

    server {
        listen       80;
        server_name  www.accp.com;      ##Set the domain name www.accp.com
        charset utf-8;
        access_log  logs/accp.access.log;
        location / {
            root   /var/www/html/accp;    ##Set the working directory of www.accp.com
            index  index.html index.htm;
        }
        error_page   500 502 503 504  /50x.html;
        location = /50x.html {
            root   html;
        }
      }


    server {
        listen       80;
        server_name  www.benet.com;   ##Set the domain name www.benet.com
        charset utf-8;
        access_log  logs/benet.access.log;
        location / {
            root   /var/www/html/benet;
            index  index.html index.htm;
        }
        error_page   500 502 503 504  /50x.html;
        location = /50x.html {
            root   html;
        }
      }

    # another virtual host using mix of IP-, name-, and port-based configuration
    #
    #server {
    #    listen       8000;


2. Port based virtual host
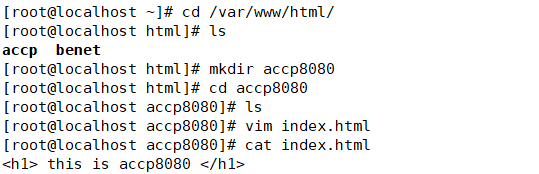
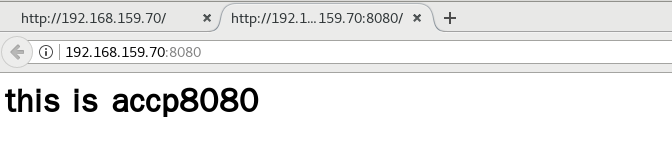
2-1. Create a web page file on port 8080
cd /var/www/html/
ls
mkdir accp8080
cd accp8080
vim index.html
   <h1> this is accp8080 </h1>
 cat index.html

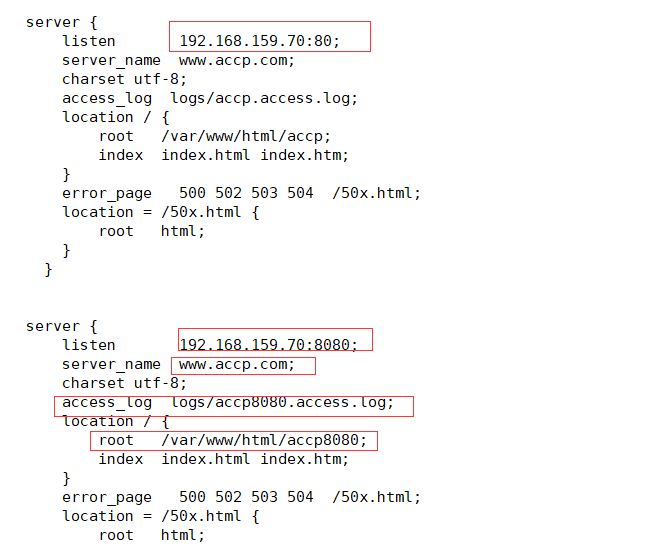
2-2. Modify the configuration file

vim /usr/local/nginx/conf/nginx.conf
http {
......
#gzip on;
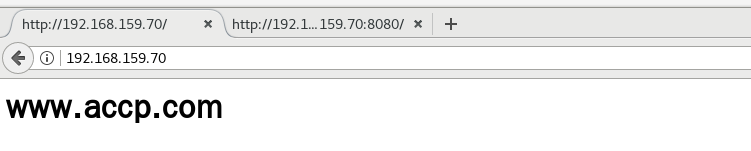
server {
listen 192.168.159.70:80;
server_name www.accp.com;
charset utf-8;
access_log logs/accp.access.log;
location / {
root /var/www/html/accp;
index index.html index.htm;
}
error_page 500 502 503 504 /50x.html;
location = /50x.html {
root html;
}
}
server {
listen 192.168.159.70:8080;
server_name www.accp.com;
charset utf-8;
access_log logs/accp8080.access.log;
location / {
root /var/www/html/accp8080;
index index.html index.htm;
}
error_page 500 502 503 504 /50x.html;
location = /50x.html {
root html;
}
}
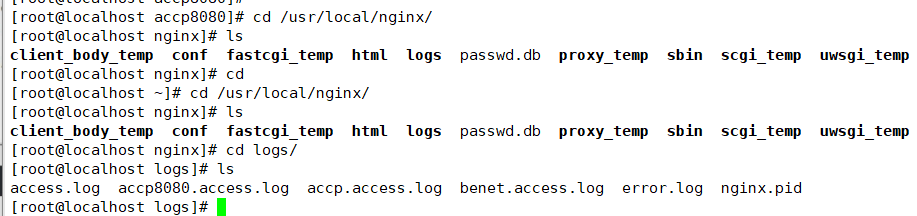
2-3. Restart, verify and view logs
 nginx -t
systemctl restart nginx

View log:
3. Based on different IP access
3-1. Add the mapping of 192.168.159.100
vim /etc/hosts

   127.0.0.1   localhost localhost.localdomain localhost4 localhost4.localdomain4
   ::1         localhost localhost.localdomain localhost6 localhost6.localdomain6
   192.168.159.70 www.accp.com
   192.168.159.100 www.benet.com

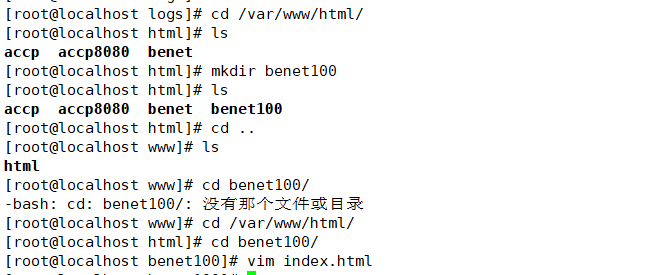
3-2. Create a website root directory and a website home page of 192.168.159.100
cd /var/www/html/
ls
mkdir benet100
ls
cd benet100/
vim index.html
   <h1> this is benet100 web </h1>

3-3. Modify the configuration file,
cd /usr/local/nginx/conf/
vim nginx.conf

http {

......

    server {
        listen       192.168.159.70:80;
        server_name  www.accp.com;
        charset utf-8;
        access_log  logs/accp.access.log;
        location / {
            root   /var/www/html/accp;
            index  index.html index.htm;
        }
        error_page   500 502 503 504  /50x.html;
        location = /50x.html {
            root   html;
        }
      }


    server {
        listen       192.168.159.100:80;
        server_name  www.benet.com;
        charset utf-8;
        access_log  logs/benet100.access.log;
        location / {
            root   /var/www/html/benet100;
            index  index.html index.htm;
        }
        error_page   500 502 503 504  /50x.html;
        location = /50x.html {
            root   html;
        }
      }


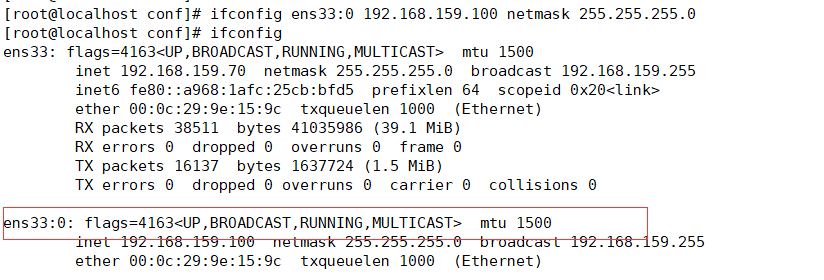
3-4. Create a virtual network card temporarily
ifconfig ens33:0 192.168.159.100 netmask 255.255.255.0
ifconfig
3-5. Restart and verification
nginx -t
systemctl restart nginx


summary
The advantage of nginx is to process static requests, use fewer resources, support more concurrent connections, reflect higher efficiency, and the cpu memory utilization is low. apache is suitable for processing dynamic requests, so now the front end generally uses nginx as the reverse agent to resist the pressure, and apache as the back end to process dynamic requests.