In the previous section, we introduced reverse proxy, and we know that Reverse Proxy means that a proxy server accepts a connection request on the internet, forwards the request to the server on the internal network, and returns the result from the server to the client requesting a connection on the internet. The proxy server is now externally represented as a reverse proxy server. Here are a few cases.
Case 1: Using nginx reverse proxy www.mytomcat.com jumps directly to 127.0.0.1:8080.
(1) Environmental preparation
a. Install tomcat
Unzip tomcat: tar-zxvf apache-tomcat-9.0.26. Tar. Gz
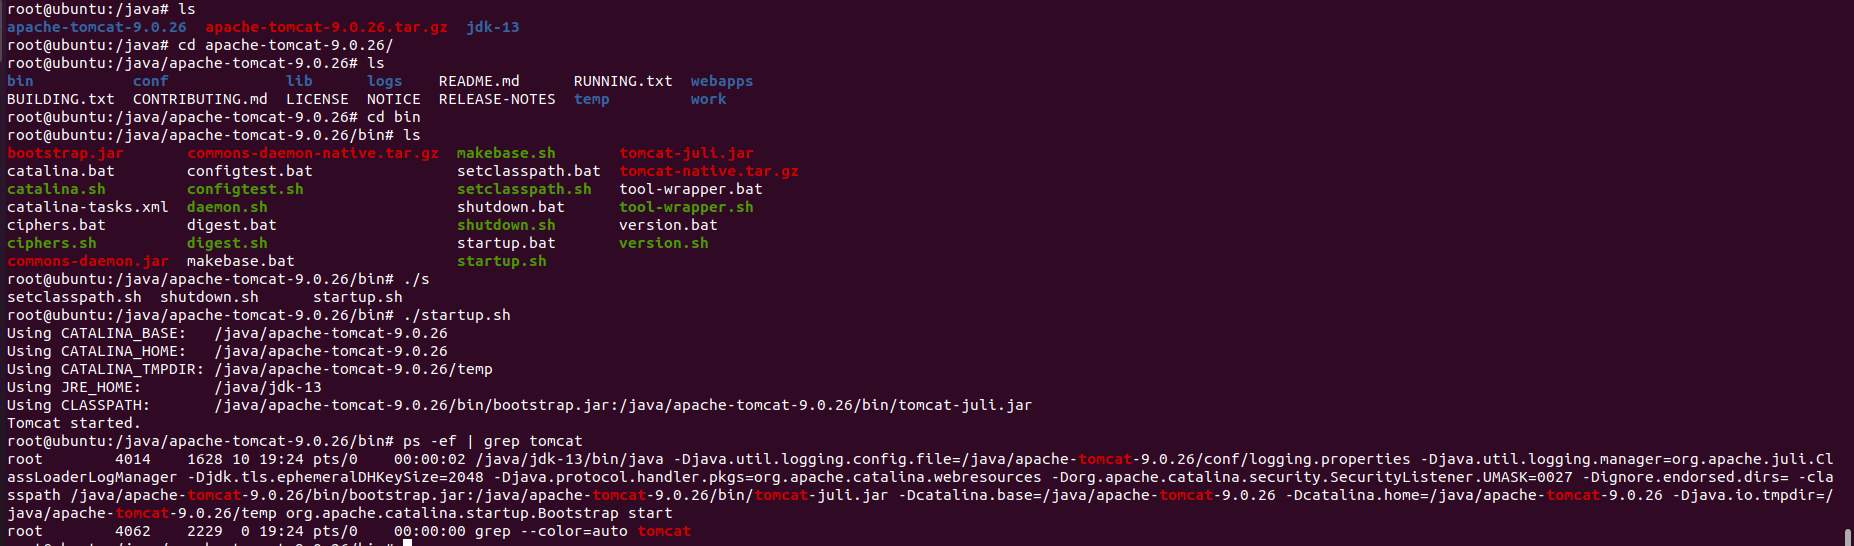
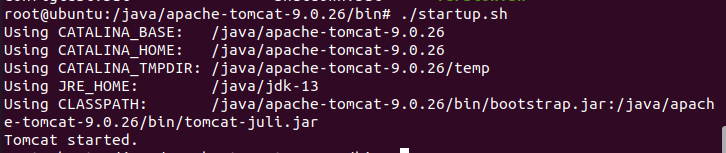
Go to the bin directory under tomcat, heart. / startup.sh.
View the tomcat process: ps-ef | grep tomcat
b. Install jdk
Unzip openjdk:tar-zxvf openjdk-13_ Linux-x64_ Bin. Tar. Gz
View the path: pwd
Configuration environment variables: gedit/etc/profile
JAVA_HOME=/java/jdk-13
export JAVA_HOME

PATH=$JAVA_HOME/bin:$PATH
export PATH
Make configuration effective: source/etc/profile
Check to see if the installation was successful: Enter java, javac, java-version in turn.
(2) Perform reverse proxy
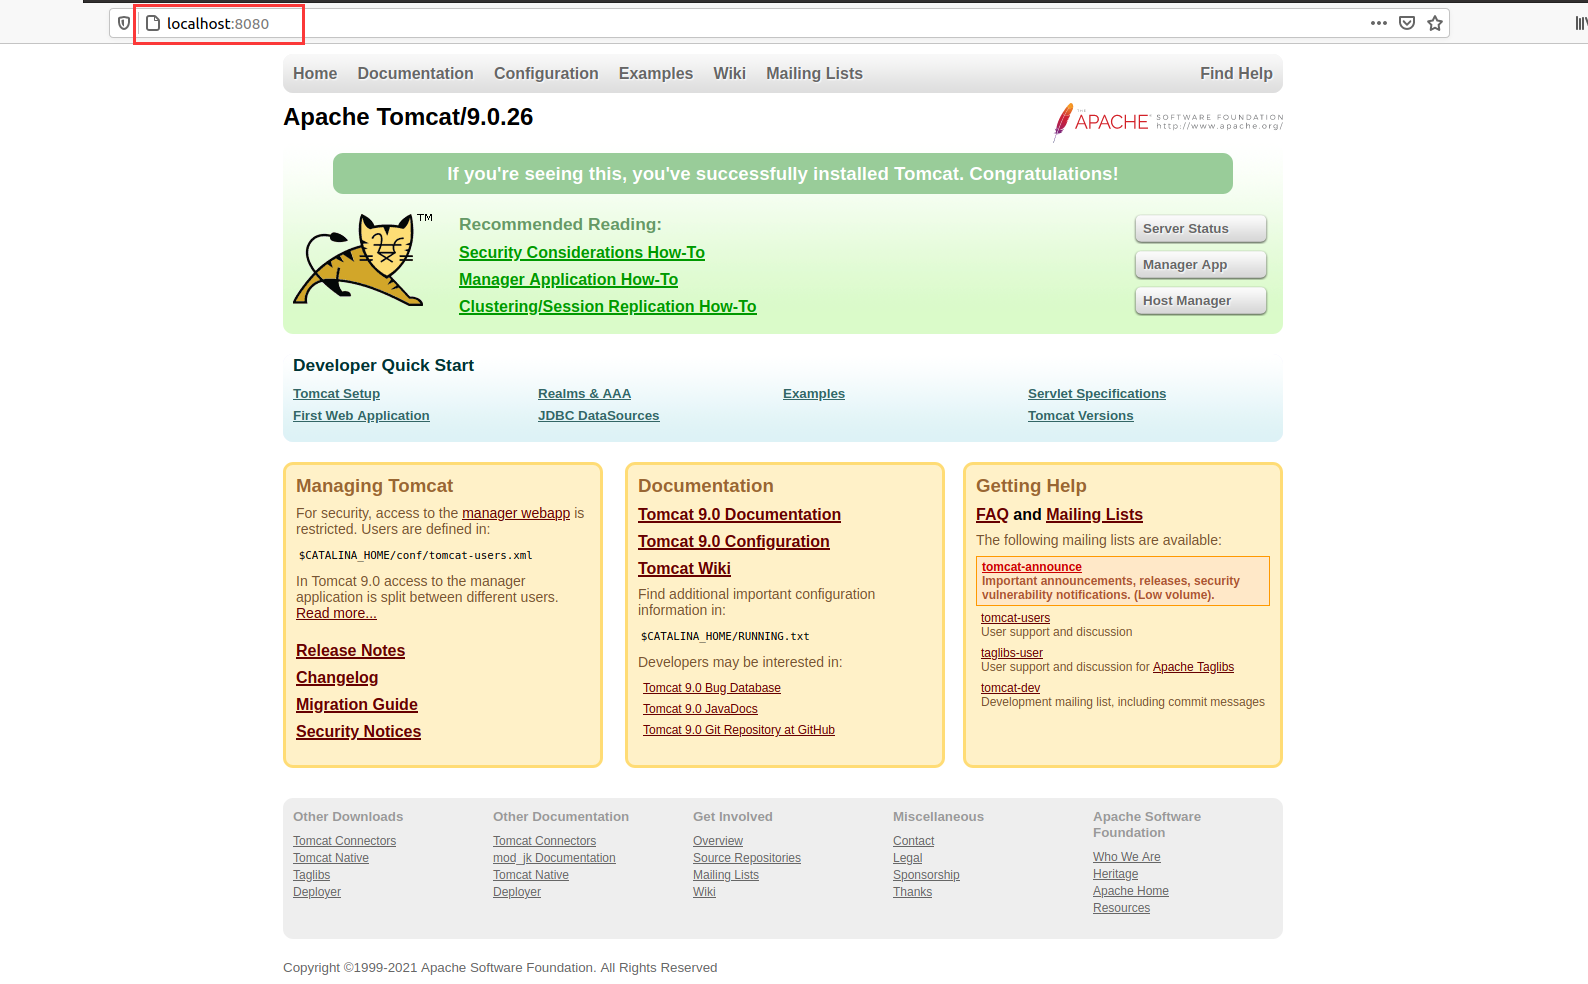
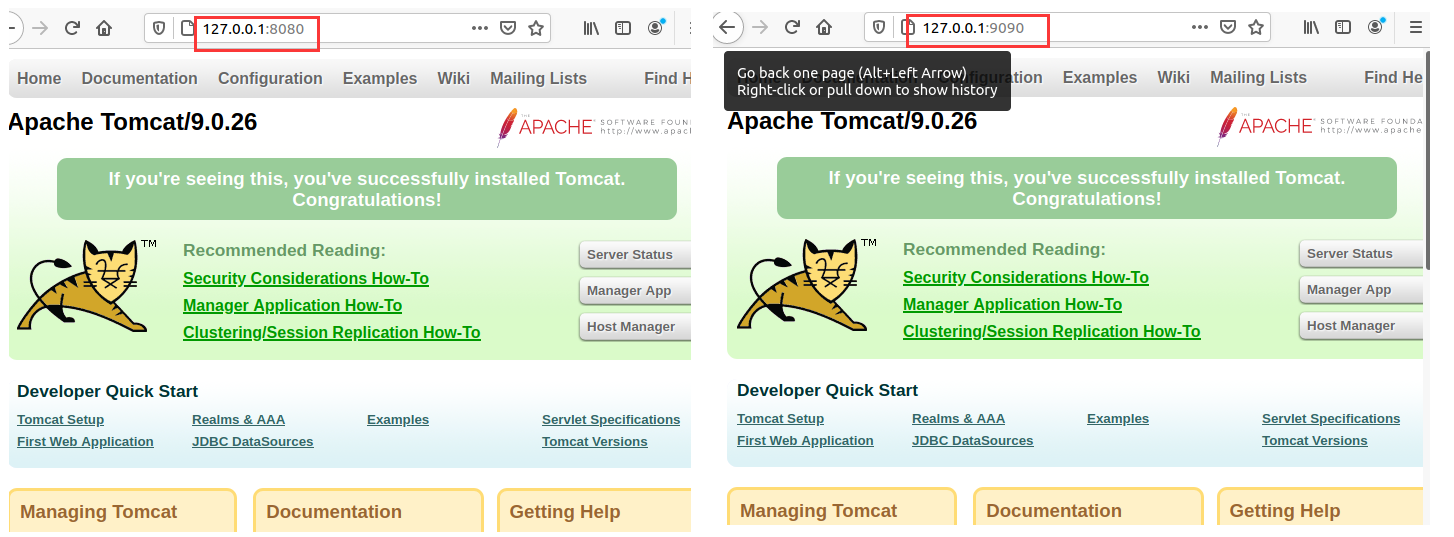
a. Start tomcat and browser address bar access in ubuntu as follows:
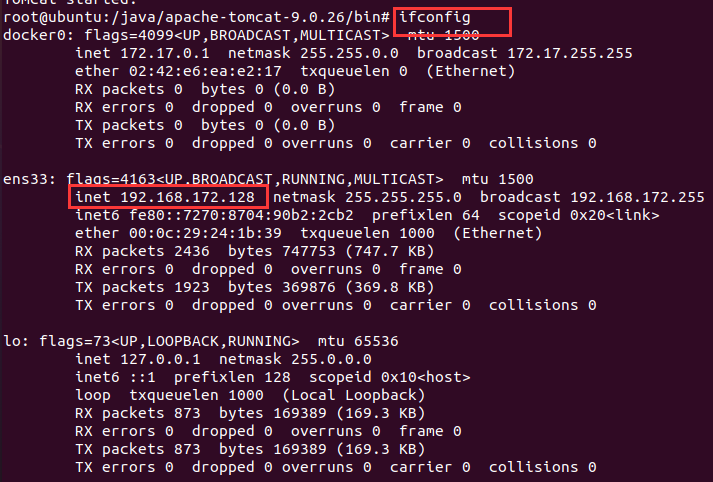
b. View the IP address of Ubuntu in the virtual machine.
c. Modify the host file of the host to www.mytomcat.com maps to 192.168.172.128.
Path: C:\Windows\System32\driversetchosts
Add information: 192.168.172.128 www.mytomcat.com
d. Modify nginx in the virtual machine. Conf file information.
#user  nobody;
worker_processes  1;

#error_log  logs/error.log;
#error_log  logs/error.log  notice;
#error_log  logs/error.log  info;

#pid        logs/nginx.pid;


events {
    worker_connections  1024;
}


http {
    include       mime.types;
    default_type  application/octet-stream;

    #log_format  main  '$remote_addr - $remote_user [$time_local] "$request" '
    #                  '$status $body_bytes_sent "$http_referer" '
    #                  '"$http_user_agent" "$http_x_forwarded_for"';

    #access_log  logs/access.log  main;

    sendfile        on;
    #tcp_nopush     on;

    #keepalive_timeout  0;
    keepalive_timeout  65;

    #gzip  on;

    # another virtual host using mix of IP-, name-, and port-based configuration
    #
    server {
        listen       80;
        server_name  www.mytomcat.com;

        location / {
            proxy_pass http://127.0.0.1:8080;
            index  index.html index.htm;
        }
    }


    # HTTPS server
    #
    #server {
    #    listen       443 ssl;
    #    server_name  localhost;

    #    ssl_certificate      cert.pem;
    #    ssl_certificate_key  cert.key;

    #    ssl_session_cache    shared:SSL:1m;
    #    ssl_session_timeout  5m;

    #    ssl_ciphers  HIGH:!aNULL:!MD5;
    #    ssl_prefer_server_ciphers  on;

    #    location / {
    #        root   html;
    #        index  index.html index.htm;
    #    }
    #}

}
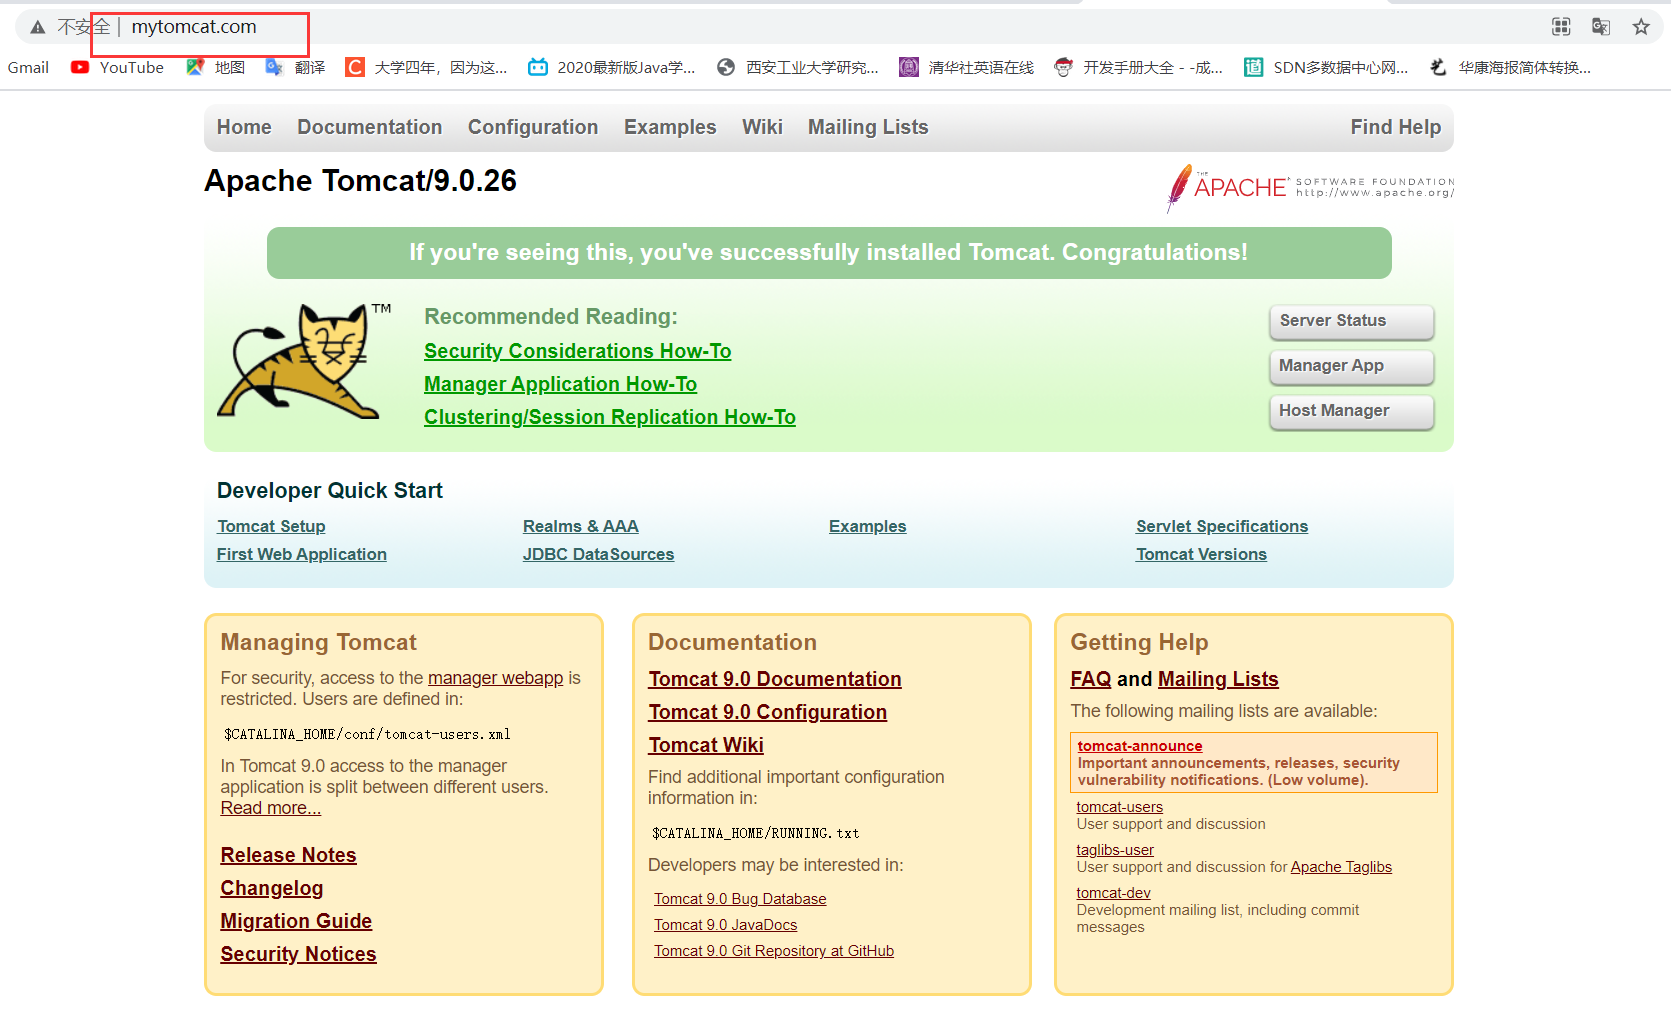
e. Access in the real browser address bar: http://www.mytomcat.com/ As follows:
Case 2: Using the Nginx reverse proxy, jump to services on different ports according to different paths of access.
(1) Achieving the Goals:
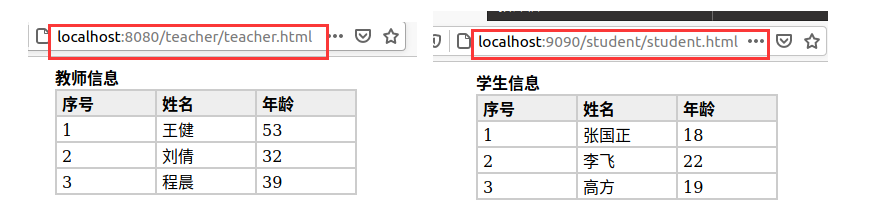
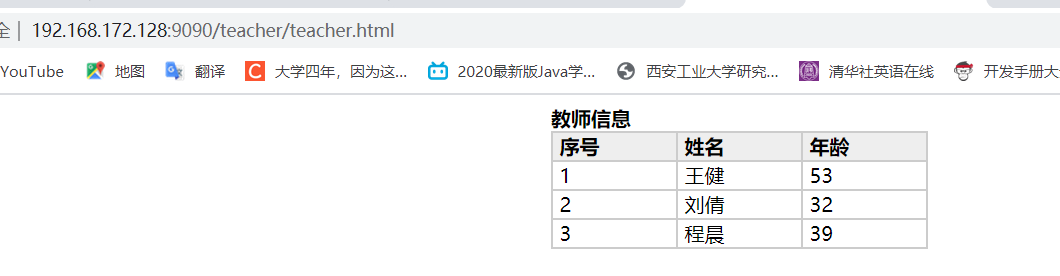
Access in the Real Machine Address Bar http://192.168.172.128:9090/teacher/teacher.html And get information about teachers.
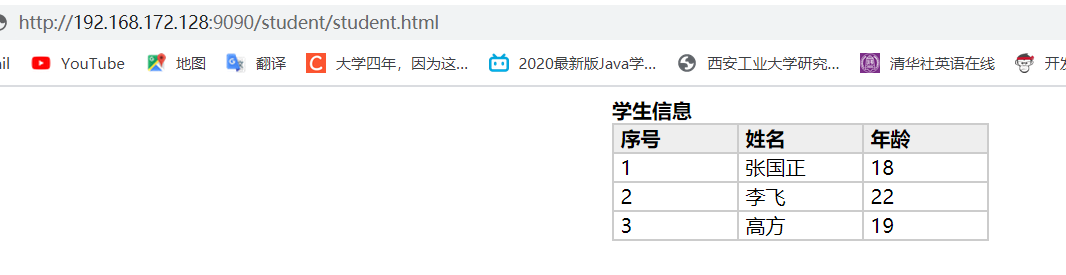
Access in the Real Machine Address Bar http://192.168.172.128:9090/student/student.html To get information about the students.
(2) Implementation process
a. Configure two Tomcats with ports 8080 and 9090, respectively.
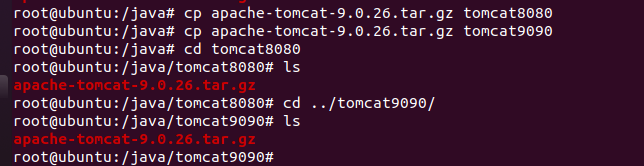
Create two directories, tomcat8080 and tomcat9090, to store two different tomcats.

Copy the compressed package of tomcat into the two directories you created and unzip them separately.
Go to the directory of tomcat9090 and modify the server under conf. XML file, change tomcat's configuration port to 9090. The configuration file information is as follows:
<?xml version="1.0" encoding="UTF-8"?>
<!--
Licensed to the Apache Software Foundation (ASF) under one or more
contributor license agreements. See the NOTICE file distributed with
this work for additional information regarding copyright ownership.
The ASF licenses this file to You under the Apache License, Version 2.0
(the "License"); you may not use this file except in compliance with
the License. You may obtain a copy of the License at
http://www.apache.org/licenses/LICENSE-2.0
Unless required by applicable law or agreed to in writing, software
distributed under the License is distributed on an "AS IS" BASIS,
WITHOUT WARRANTIES OR CONDITIONS OF ANY KIND, either express or implied.
See the License for the specific language governing permissions and
limitations under the License.
-->
<!-- Note: A "Server" is not itself a "Container", so you may not
define subcomponents such as "Valves" at this level.
Documentation at /docs/config/server.html
-->
<Server port="9015" shutdown="SHUTDOWN">
<Listener className="org.apache.catalina.startup.VersionLoggerListener" />
<!-- Security listener. Documentation at /docs/config/listeners.html
<Listener className="org.apache.catalina.security.SecurityListener" />
-->
<!--APR library loader. Documentation at /docs/apr.html -->
<Listener className="org.apache.catalina.core.AprLifecycleListener" SSLEngine="on" />
<!-- Prevent memory leaks due to use of particular java/javax APIs-->
<Listener className="org.apache.catalina.core.JreMemoryLeakPreventionListener" />
<Listener className="org.apache.catalina.mbeans.GlobalResourcesLifecycleListener" />
<Listener className="org.apache.catalina.core.ThreadLocalLeakPreventionListener" />
<!-- Global JNDI resources
Documentation at /docs/jndi-resources-howto.html
-->
<GlobalNamingResources>
<!-- Editable user database that can also be used by
UserDatabaseRealm to authenticate users
-->
<Resource name="UserDatabase" auth="Container"
type="org.apache.catalina.UserDatabase"
description="User database that can be updated and saved"
factory="org.apache.catalina.users.MemoryUserDatabaseFactory"
pathname="conf/tomcat-users.xml" />
</GlobalNamingResources>
<!-- A "Service" is a collection of one or more "Connectors" that share
a single "Container" Note: A "Service" is not itself a "Container",
so you may not define subcomponents such as "Valves" at this level.
Documentation at /docs/config/service.html
-->
<Service name="Catalina">
<!--The connectors can use a shared executor, you can define one or more named thread pools-->
<!--
<Executor name="tomcatThreadPool" namePrefix="catalina-exec-"
maxThreads="150" minSpareThreads="4"/>
-->
<!-- A "Connector" represents an endpoint by which requests are received
and responses are returned. Documentation at :
Java HTTP Connector: /docs/config/http.html
Java AJP Connector: /docs/config/ajp.html
APR (HTTP/AJP) Connector: /docs/apr.html
Define a non-SSL/TLS HTTP/1.1 Connector on port 8080
-->
<Connector port="9090" protocol="HTTP/1.1"
connectionTimeout="20000"
redirectPort="8443" />
<!-- A "Connector" using the shared thread pool-->
<!--
<Connector executor="tomcatThreadPool"
port="8080" protocol="HTTP/1.1"
connectionTimeout="20000"
redirectPort="8443" />
-->
<!-- Define an SSL/TLS HTTP/1.1 Connector on port 8443
This connector uses the NIO implementation. The default
SSLImplementation will depend on the presence of the APR/native
library and the useOpenSSL attribute of the
AprLifecycleListener.
Either JSSE or OpenSSL style configuration may be used regardless of
the SSLImplementation selected. JSSE style configuration is used below.
-->
<!--
<Connector port="8443" protocol="org.apache.coyote.http11.Http11NioProtocol"
maxThreads="150" SSLEnabled="true">
<SSLHostConfig>
<Certificate certificateKeystoreFile="conf/localhost-rsa.jks"
type="RSA" />
</SSLHostConfig>
</Connector>
-->
<!-- Define an SSL/TLS HTTP/1.1 Connector on port 8443 with HTTP/2
This connector uses the APR/native implementation which always uses
OpenSSL for TLS.
Either JSSE or OpenSSL style configuration may be used. OpenSSL style
configuration is used below.
-->
<!--
<Connector port="8443" protocol="org.apache.coyote.http11.Http11AprProtocol"
maxThreads="150" SSLEnabled="true" >
<UpgradeProtocol className="org.apache.coyote.http2.Http2Protocol" />
<SSLHostConfig>
<Certificate certificateKeyFile="conf/localhost-rsa-key.pem"
certificateFile="conf/localhost-rsa-cert.pem"
certificateChainFile="conf/localhost-rsa-chain.pem"
type="RSA" />
</SSLHostConfig>
</Connector>
-->
<!-- Define an AJP 1.3 Connector on port 8009 -->
<Connector port="9019" protocol="AJP/1.3" redirectPort="8443" />
<!-- An Engine represents the entry point (within Catalina) that processes
every request. The Engine implementation for Tomcat stand alone
analyzes the HTTP headers included with the request, and passes them
on to the appropriate Host (virtual host).
Documentation at /docs/config/engine.html -->
<!-- You should set jvmRoute to support load-balancing via AJP ie :
<Engine name="Catalina" defaultHost="localhost" jvmRoute="jvm1">
-->
<Engine name="Catalina" defaultHost="localhost">
<!--For clustering, please take a look at documentation at:
/docs/cluster-howto.html (simple how to)
/docs/config/cluster.html (reference documentation) -->
<!--
<Cluster className="org.apache.catalina.ha.tcp.SimpleTcpCluster"/>
-->
<!-- Use the LockOutRealm to prevent attempts to guess user passwords
via a brute-force attack -->
<Realm className="org.apache.catalina.realm.LockOutRealm">
<!-- This Realm uses the UserDatabase configured in the global JNDI
resources under the key "UserDatabase". Any edits
that are performed against this UserDatabase are immediately
available for use by the Realm. -->
<Realm className="org.apache.catalina.realm.UserDatabaseRealm"
resourceName="UserDatabase"/>
</Realm>
<Host name="localhost" appBase="webapps"
unpackWARs="true" autoDeploy="true">
<!-- SingleSignOn valve, share authentication between web applications
Documentation at: /docs/config/valve.html -->
<!--
<Valve className="org.apache.catalina.authenticator.SingleSignOn" />
-->
<!-- Access log processes all example.
Documentation at: /docs/config/valve.html
Note: The pattern used is equivalent to using pattern="common" -->
<Valve className="org.apache.catalina.valves.AccessLogValve" directory="logs"
prefix="localhost_access_log" suffix=".txt"
pattern="%h %l %u %t "%r" %s %b" />
</Host>
</Engine>
</Service>
</Server>b. Start two Tomcats separately for testing to ensure the modifications are successful.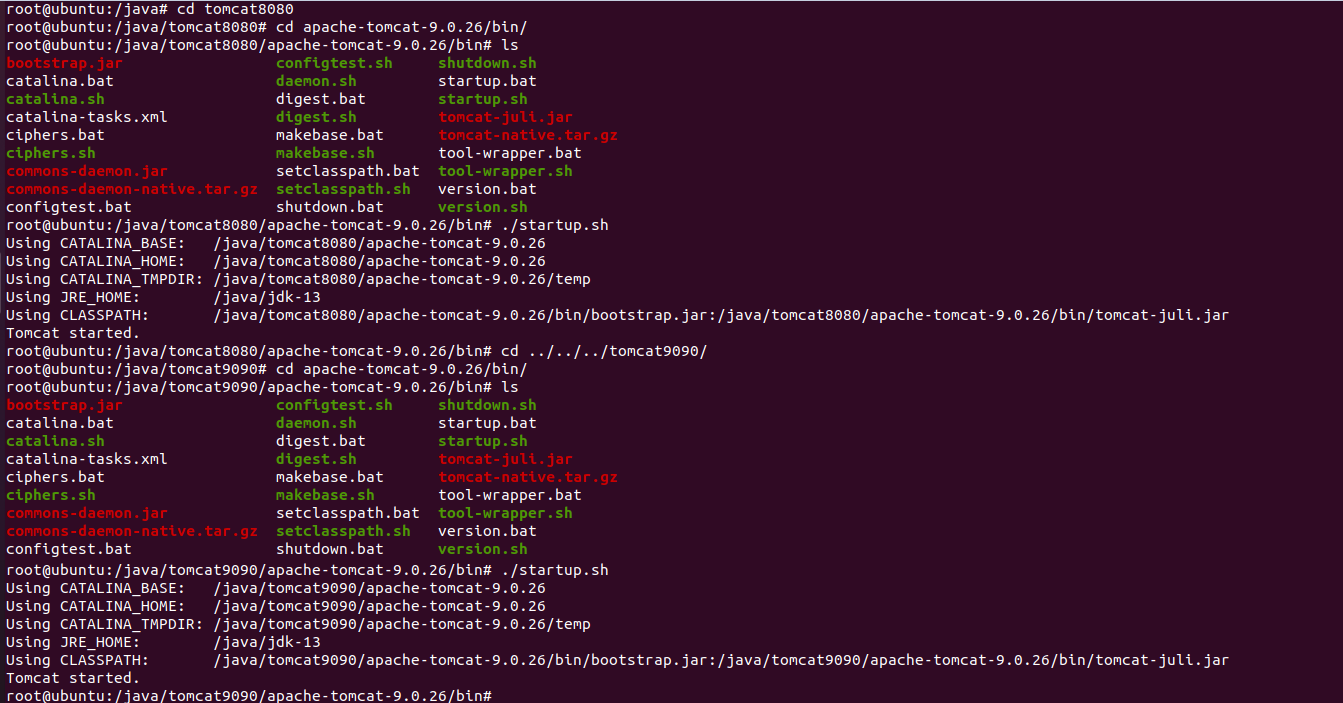
c. Enter the tomcat8080 folder, create a teacher under webapps, and create a teacher under teacher.html.


teacher.html is as follows:
<html>
<head>
    <title>Teacher Information</title>
    <meta http-equiv="Content-Type" content="text/html; charset=utf-8" />
    <style>
        .table{
            display:table;
            border-collapse:separate;
            border:1px solid #ccc;
			margin: 0 auto;
        }
        .table-caption{
            display:table-caption;
            margin:0;
            font-size:16px;
        }
        .table-header-group{
            display:table-header-group;
            background:#eee;
            font-weight:bold;
        }
        .table-row-group{
            display:table-row-group;
        }
        .table-footer-group{
            display:table-footer-group;
        }
        ul{
            list-style:none;
        }
        .table-row{
            display:table-row;
        }
        .table-cell{
            display:table-cell;
            padding:0 5px;
            border:1px solid #ccc;
        }
        .table-row-group .table-row:hover,
        .table-footer-group .table-row:hover{
            background:#f6f6f6;
            color:green;
            font-weight: bold;
        }

        .table-column-group{
            display:table-column-group;
        }
        .table-column{
            display:table-column;
            width:100px;
        }
    </style>
</head>
<body>
    <div class="table">
        <h2 class="table-caption">Teacher Information</h2>
        <!--This line of code controls the style of the column.-->
        <div class="table-column-group">
            <div class="table-column"></div>
            <div class="table-column"></div>
            <div class="table-column"></div>
        </div>
        <div class="table-header-group">
            <ul class="table-row">
                <li class="table-cell">Sequence Number</li>
                <li class="table-cell">Full name</li>
                <li class="table-cell">Age</li>
            </ul>
        </div>
        <div class="table-row-group">
            <ul class="table-row">
                <li class="table-cell">1</li>
                <li class="table-cell">Wang Jian</li>
                <li class="table-cell">53</li>
            </ul>
            <ul class="table-row">
                <li class="table-cell">2</li>
                <li class="table-cell">Liu Qian</li>
                <li class="table-cell">32</li>
            </ul>
            <ul class="table-row">
                <li class="table-cell">3</li>
                <li class="table-cell">Cheng Morning</li>
                <li class="table-cell">39</li>
            </ul>
        </div>

    </div>
</body>
d. Go to the Tomcat 9090 folder, create a student under webapps, and create a student under student.html.


student.html is as follows:
<html>
<head>
    <title>Student Information</title>
    <meta http-equiv="Content-Type" content="text/html; charset=utf-8" />
    <style>
        .table{
            display:table;
            border-collapse:separate;
            border:1px solid #ccc;
			margin: 0 auto;
        }
        .table-caption{
            display:table-caption;
            margin:0;
            font-size:16px;
        }
        .table-header-group{
            display:table-header-group;
            background:#eee;
            font-weight:bold;
        }
        .table-row-group{
            display:table-row-group;
        }
        .table-footer-group{
            display:table-footer-group;
        }
        ul{
            list-style:none;
        }
        .table-row{
            display:table-row;
        }
        .table-cell{
            display:table-cell;
            padding:0 5px;
            border:1px solid #ccc;
        }
        .table-row-group .table-row:hover,
        .table-footer-group .table-row:hover{
            background:#f6f6f6;
            color:green;
            font-weight: bold;
        }

        .table-column-group{
            display:table-column-group;
        }
        .table-column{
            display:table-column;
            width:100px;
        }
    </style>
</head>
<body>
    <div class="table">
        <h2 class="table-caption">Student Information</h2>
        <!--This line of code controls the style of the column.-->
        <div class="table-column-group">
            <div class="table-column"></div>
            <div class="table-column"></div>
            <div class="table-column"></div>
        </div>
        <div class="table-header-group">
            <ul class="table-row">
                <li class="table-cell">Sequence Number</li>
                <li class="table-cell">Full name</li>
                <li class="table-cell">Age</li>
            </ul>
        </div>
        <div class="table-row-group">
            <ul class="table-row">
                <li class="table-cell">1</li>
                <li class="table-cell">Zhang Guozheng</li>
                <li class="table-cell">18</li>
            </ul>
            <ul class="table-row">
                <li class="table-cell">2</li>
                <li class="table-cell">Li Fei</li>
                <li class="table-cell">22</li>
            </ul>
            <ul class="table-row">
                <li class="table-cell">3</li>
                <li class="table-cell">Elevation</li>
                <li class="table-cell">19</li>
            </ul>
        </div>

    </div>
</body>
e. Start two tomcat servers in the virtual machine for testing.
f. Add a reverse proxy to the nginx configuration file.
server {
        listen       9090;
        server_name  192.168.172.128;

        location ~ /teacher/ {
            proxy_pass http://127.0.0.1:8080;
        }

        location ~ /student/ {
            proxy_pass http://127.0.0.1:9090;
        }
    }
g. Testing.
Enter in the real machine address bar: http://192.168.172.128:9090/teacher/teacher.html
Enter in the real machine address bar: http://192.168.172.128:9090/student/student.html