Wang Hailong, technical manager of Rancher China community, is responsible for the maintenance and operation of Rancher China technology community. He has 6 years of experience in the field of cloud computing and experienced the technological transformation from OpenStack to Kubernetes. He has rich operation and maintenance and practical experience in the underlying operating system Linux, virtualization KVM or Docker container technology.
preface
The certificate problem of Rancher Server has always been frequently mentioned in the Rancher technology community. If the user does not consider fully when setting up the Rancher environment for the first time and needs to replace the certificate later, the general operation is to rebuild the cluster.
This article will introduce how to replace the Rancher Certificate in the original cluster, so as to avoid the operation of rebuilding the cluster.
The Rancher version used at the time of writing this article is v2 5. X, the operation of other versions may be slightly different.
The following describes how to replace certificates with single node and highly available Rancher Server respectively.
Replace single node Rancher Server certificate
This section will demonstrate how to replace the default certificate of a single node Rancher with a self signed certificate.
preparation in advance
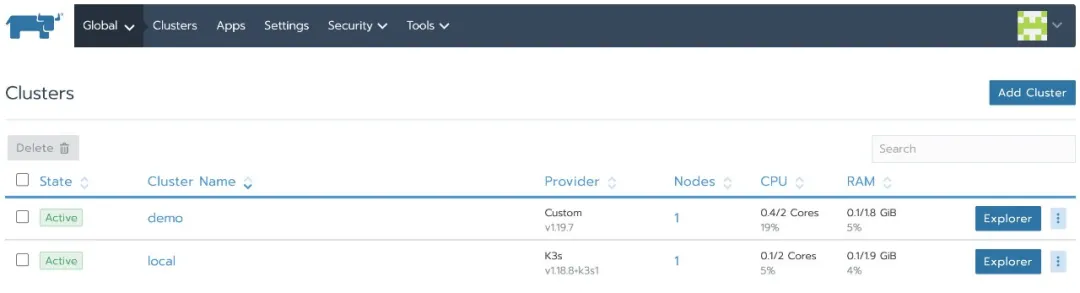
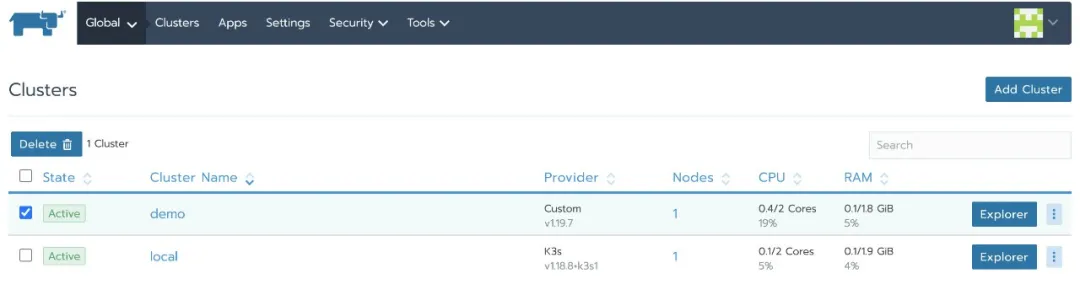
Suppose you have built a single node Rancher and created a downstream business cluster:
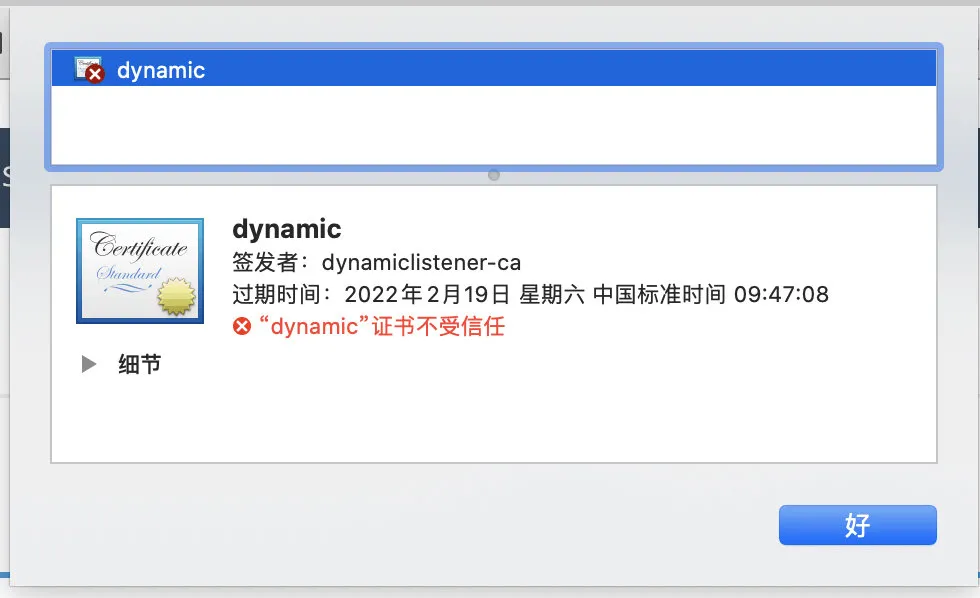
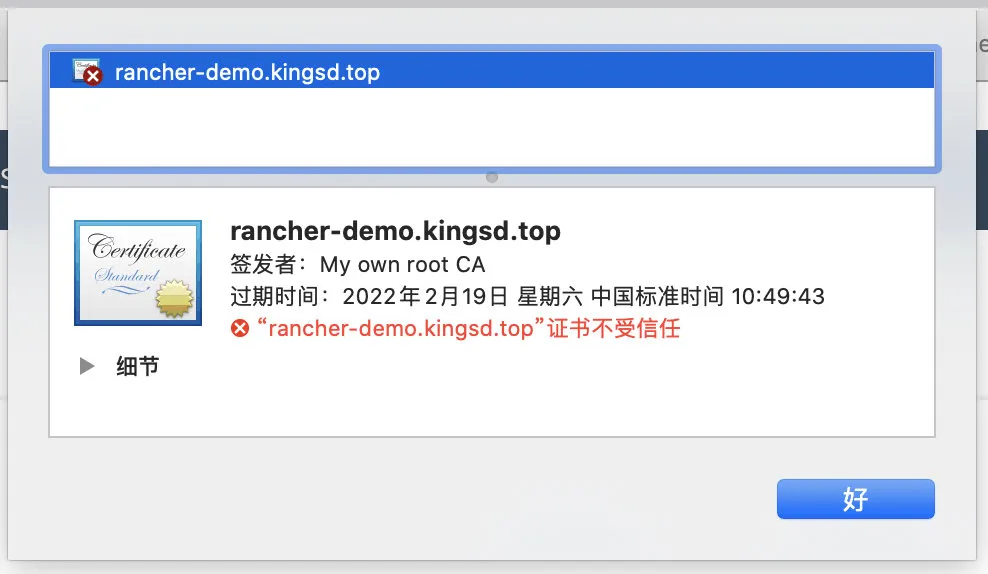
Next, from the browser, check that the Rancher certificate is dynamic and the issuer is dynamic client ca. this is the default certificate generated by Rancher:
After replacing the certificate, the Rancher Agent needs to use the domain name to connect to the Rancher Server, and the business cluster will be unable to connect. Therefore, it is necessary to download the kubeconfig of the business cluster from the Rancher UI in advance and switch the context to demo-rancher-demo2. After switching, you can directly access k8s API server without using the Rancher api.
 1. # kubectl config get-contexts
 2. CURRENT   NAME                 CLUSTER              AUTHINFO

 3. NAMESPACE
 4.         demo                 demo                 demo
          demo-rancher-demo2   demo-rancher-demo2   demo
 5. List item
 6. # kubectl config use-context demo-rancher-demo2
 7. Switched to context "demo-rancher-demo2".
 8. List item
 9. # kubectl config current-context
 10. demo-rancher-demo2
 11. List item
 12. # kubectl get nodes
 13. NAME            STATUS   ROLES                      AGE
 14. VERSION
 15. rancher-demo2   Ready    controlplane,etcd,worker   58m   v1.19.6
Replace the Rancher Server with a self signed certificate
1. Backup Rancher Server
Refer to the official document [upgrade single node Rancher]:
 1. # docker ps
 2. CONTAINER ID        IMAGE               COMMAND             CREATED
    STATUS              PORTS                                      NAMES
 3. b0e3062667a2        rancher/rancher     "entrypoint.sh"     2 hours
    ago         Up 2 hours          0.0.0.0:80->80/tcp,
    0.0.0.0:443->443/tcp   silly_swanson
 4. List item
 5. # docker stop silly_swanson
 6. silly_swanson
 7. List item
 8. # docker create --volumes-from silly_swanson --name rancher-data rancher/rancher
 9. aca6f6c791f7caa870e96e1c9f6370a6f015af62c65d73f1f6f80c56587a7542
2. Start the Rancher Server with a custom certificate based on the backup
docker run -d --privileged --volumes-from rancher-data \
           --restart=unless-stopped \
           -p 80:80 -p 443:443 \
           -v $PWD/certs/cert.pem:/etc/rancher/ssl/cert.pem \
           -v $PWD/certs/key.pem:/etc/rancher/ssl/key.pem \
           -v $PWD/certs/ca.pem:/etc/rancher/ssl/cacerts.pem \
           --privileged \
           rancher/rancher:v2.5.5
be careful:
- If your requirement is only to replace the certificate, please do not modify the version number of the Rancher Server image and keep it consistent with the previous version. This example is: rancher / rancher: v2 5.5, otherwise the upgrade operation will be executed.
- This example is to replace the certificate with a self signed certificate. If you want to replace it with other types of certificates, please refer to the parameters of other options in the upgrade single node Rancher.
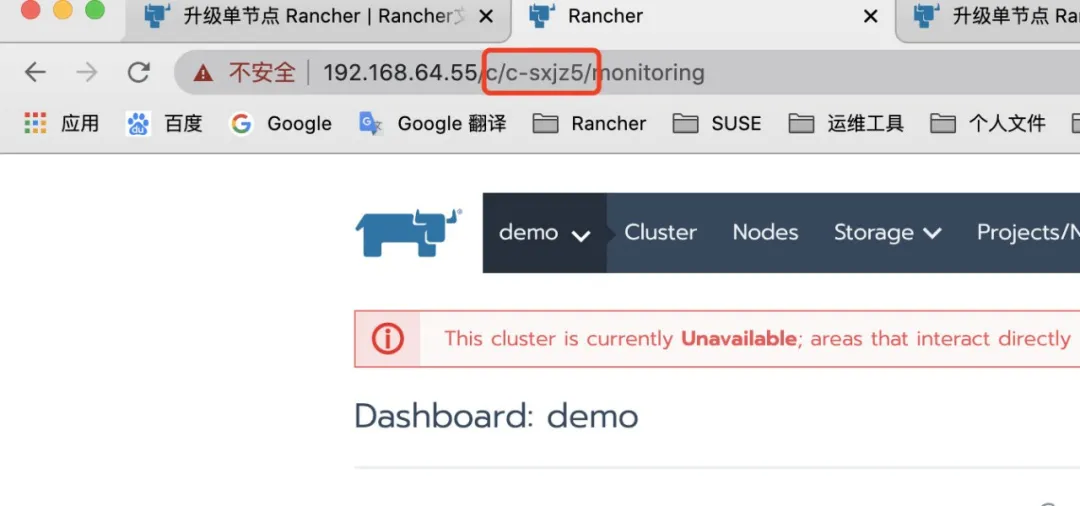
Log in to the Rancher UI again, and the status of the downstream cluster is Unavailable:

In addition, the cluster agent container reports an error:
kubectl logs -f cattle-cluster-agent-77cfbbff8b-ldt9n -n cattle-system

time="2021-02-09T09:32:08Z" level=error msg="Remotedialer proxy error" error="x509: cannot validate certificate for 192.168.64.55 because it doesn't contain any IP SANs"
W0209 09:32:15.106448       1 warnings.go:77] apiextensions.k8s.io/v1beta1 CustomResourceDefinition is deprecated in v1.16+, unavailable in v1.22+; use apiextensions.k8s.io/v1 CustomResourceDefinition
time="2021-02-09T09:32:18Z" level=info msg="Connecting to wss://192.168.64.55/v3/connect with token j6t7l2wkvz9k9xbdfnlf6kgxngfl89htl2svnmb4qgkrv7wl9ccp5m"
time="2021-02-09T09:32:18Z" level=info msg="Connecting to proxy" url="wss://192.168.64.55/v3/connect"
time="2021-02-09T09:32:18Z" level=error msg="Failed to connect to proxy. Empty dialer response" error="x509: cannot validate certificate for 192.168.64.55 because it doesn't contain any IP SANs"
3. Delete daemonset. Via kubectl Apps / cat node agent and deployment apps/cattle-cluster-agent
 1. kubectl -n cattle-system delete daemonset.apps/cattle-node-agent
    deployment.apps/cattle-cluster-agent
 2. daemonset.apps "cattle-node-agent" deleted
 3. deployment.apps "cattle-cluster-agent" deleted
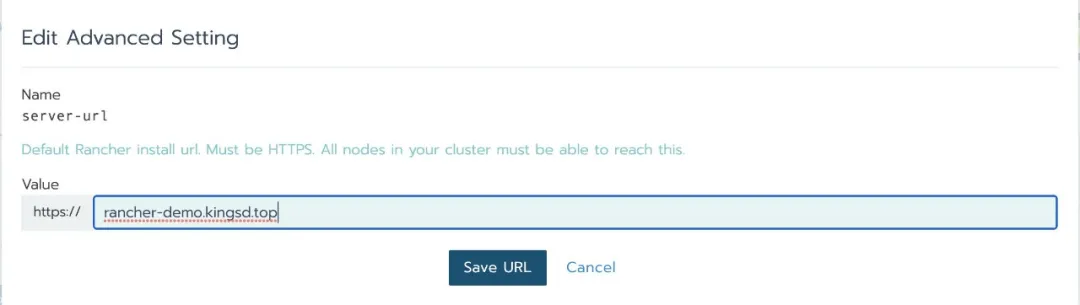
4. Go to the setting - > Advanced Settings page and modify the server URL address to the domain name you defined. This example is: Ranger demo kingsd. top
5. Export cluster YAML
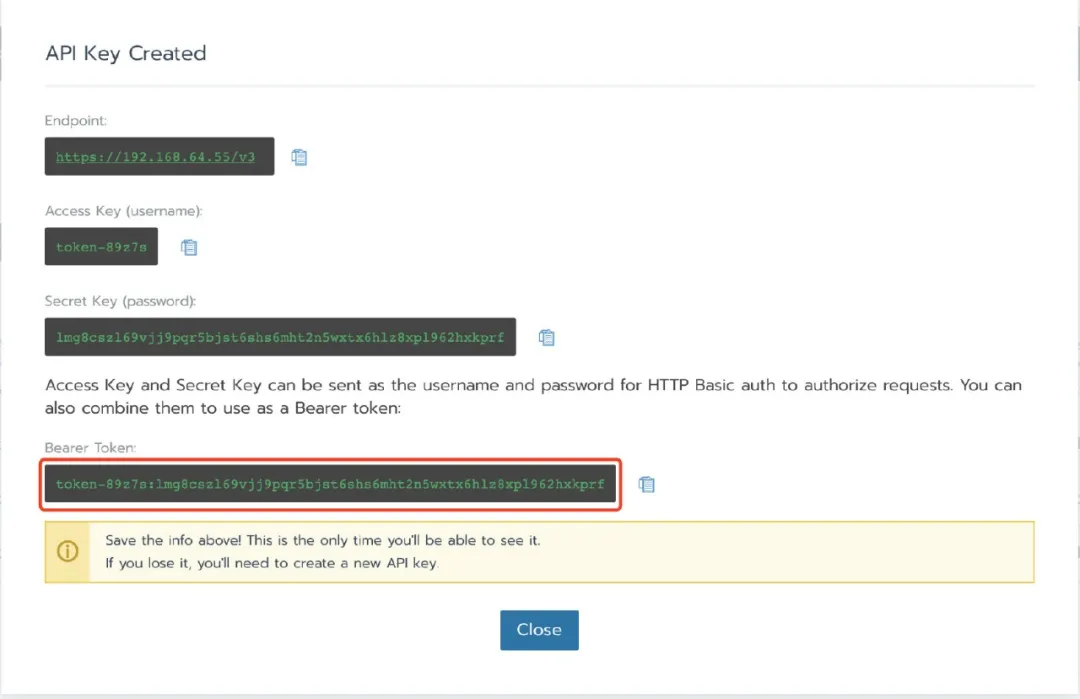
Create an API token (user - > API & keys) on the Rancher UI and save the bear token
After selecting a cluster, find its clusterid in the Rancher UI (Format: c-xxxxx) and find it in the address bar.
Replace according to the variables obtained above: RANCHERURL, CLUSTERID, TOKEN (curl and jq need to be installed on the host)
 1. # Rancher URL
 2. RANCHERURL="https://192.168.64.55"
 3. # Cluster ID
 4. CLUSTERID="c-sxjz5"
 5. # Token
 6. TOKEN="token-89z7s:lmg8cszl69vjj9pqr5bjst6shs6mht2n5wxtx6hlz8xpl962hxkprf"
 7. # Valid certificates
 8. curl -s -H "Authorization: Bearer ${TOKEN}"
 "${RANCHERURL}/v3/clusterregistrationtokens?clusterId=${CLUSTERID}"
    | jq -r '.data[] | select(.name != "system") | .command'
 9. # Self signed certificates  curl -s -k -H "Authorization: Bearer ${TOKEN}"

 10. "${RANCHERURL}/v3/clusterregistrationtokens?
         clusterId=${CLUSTERID}" | jq -r '.data[] | select(.name !=
              "system") | .insecureCommand'
After the above command is executed successfully, the command to import the cluster will be returned:
curl --insecure -sfL https://rancher-demo.kingsd.top/v3/import/rc2gb9qgl4wxm7tjwr5d6krqb9c8d8pkm8bt9fmtj8hrhx62fvqkgk.yaml | kubectl apply -f -
Then, it can be executed on the host with kubeconfig, and the command will regenerate the cat cluster agent:
 1. curl --insecure -sfL https://rancherdemo.kingsd.top/v3/import/rc2gb9qgl4wxm7tjwr5d6krqb9c8d8pkm8bt9fmtj8hrhx62fvqkgk.yaml
    | kubectl apply -f -
 2. clusterrole.rbac.authorization.k8s.io/proxy-clusterrole-kubeapiserver
    unchanged
 3. clusterrolebinding.rbac.authorization.k8s.io/proxy-role-binding-kubernetes-master
    unchanged
 4. namespace/cattle-system unchanged
 5. serviceaccount/cattle unchanged
 6. clusterrolebinding.rbac.authorization.k8s.io/cattle-admin-binding
    unchanged
 7. secret/cattle-credentials-cfff3df unchanged
 8. clusterrole.rbac.authorization.k8s.io/cattle-admin unchanged
    deployment.apps/cattle-cluster-agent created
verification
After a while, the cat cluster agent and cat node agent will run again:
kubectl -n cattle-system get pods
NAME                                   READY   STATUS    RESTARTS   AGE
cattle-cluster-agent-c9774fcdd-rwdk5   1/1     Running   2          2m14s
cattle-node-agent-r58w4                1/1     Running   0          2m13s
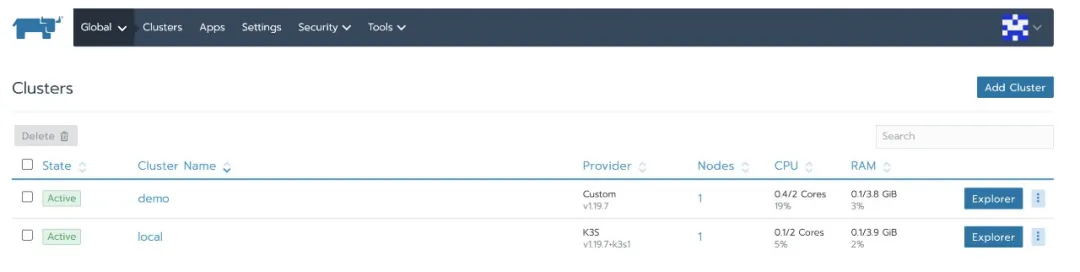
The business cluster status changes to Active again:
At this point, check the certificate of the Rancher Server again and replace it with a self signed certificate:
Replace Rancher HA certificate
This section demonstrates how to replace the Rancher HA with a trusted certificate from a self signed certificate
In this example, the Rancher HA is built in L4 mode. If the Rancher HA is built in L7 mode, replace the certificate from LB.
preparation in advance
Suppose you have built a highly available self signed Rancher cluster and created a downstream business cluster:
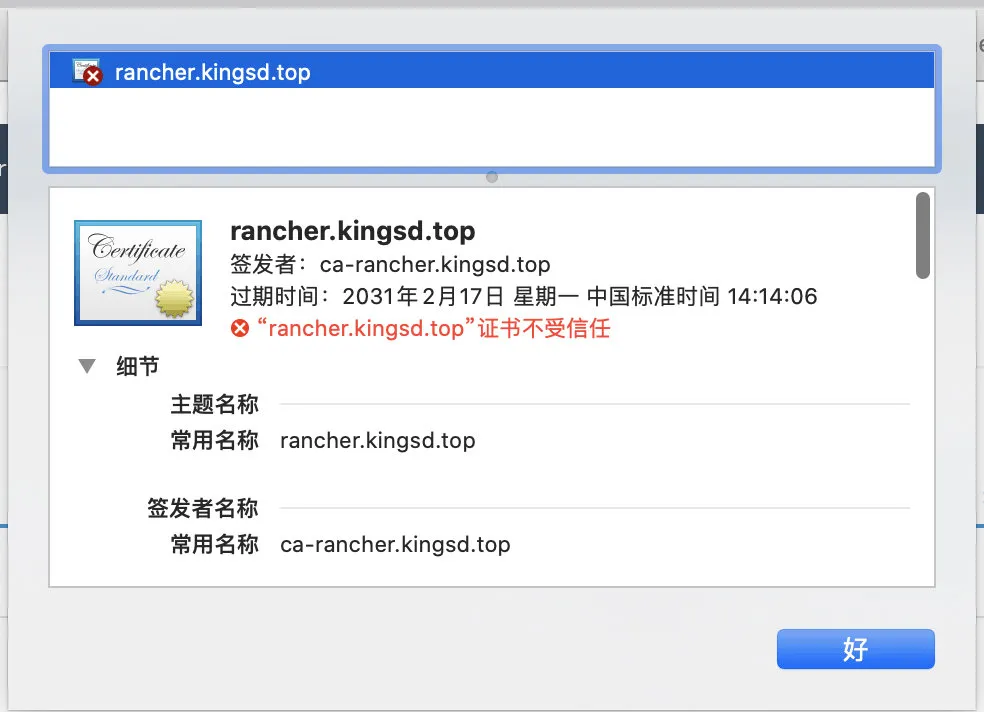
Next, view from the browser that the Rancher certificate is a self signed Rancher kingsd. Top, issued by Ca Rancher kingsd. top:
Replace self signed certificate with trusted certificate
1. Remove self signed certificate from secret
 1. kubectl -n cattle-system delete secret tls-rancher-ingress
 2. kubectl -n cattle-system delete secret tls-ca
2. Recreate TLS rancher ingress with a trusted certificate
 1. kubectl -n cattle-system create secret tls tls-rancher-ingress \
 2. --cert=rancher.kingsd.top.pem \
 3. --key=rancher.kingsd.top.key
3. Get the value passed with -- set from the currently installed Rancher Helm chart.
 1. # helm get values rancher -n cattle-system
 2. USER-SUPPLIED VALUES:
 3. hostname: rancher.kingsd.top
 4. ingress:
 5. tls:

 6. source: secret
 7. privateCA: true
4. Append all the values in the previous step to the command with -- set key=value.
 1. # helm upgrade rancher rancher-latest/rancher \
 2. --namespace cattle-system \

 3. --set hostname=rancher.kingsd.top \
 4. --set ingress.tls.source=secret
Because only self signed certificates need to use the parameter: privateCA: true, you need to delete the parameter when updating the cluster to a trusted certificate
The above is an example. There may be more values in the previous step that need to be added. In addition, you can export the current value to a file and reference the file when upgrading.
Refer to the [high availability upgrade guide] in the Chinese document:
https://docs.rancher.cn/docs/rancher2/installation_new/install-rancher-on-k8s/upgrades/_index/
This example is to replace the certificate with a trusted certificate. If you want to replace it with other types of certificates, please refer to the parameters of other options in the high availability upgrade guide.
verification
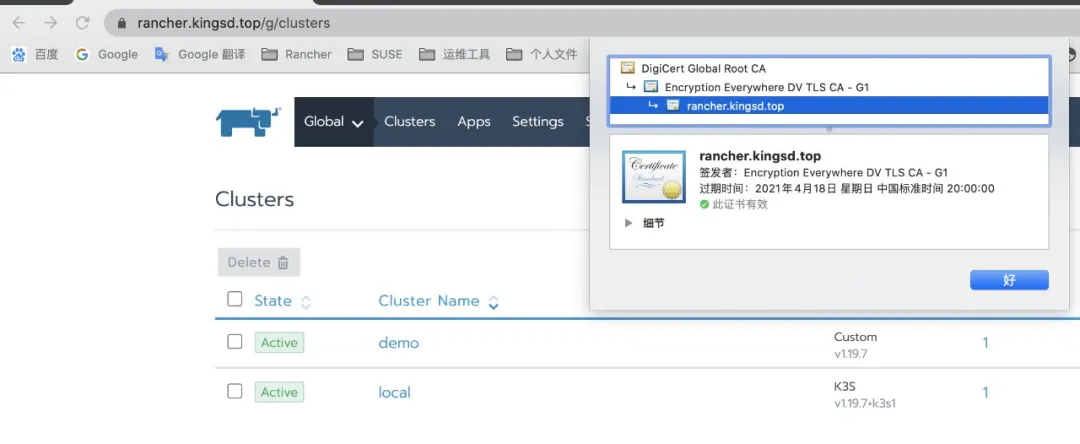
Wait a moment. After the Rancher pod is updated successfully, you can access the Rancher Server through the browser.
At this point, check the certificate of the Rancher Server again and replace it with a trusted certificate:
Postscript
Whether it is a single node or highly available Rancher Server replacement certificate, the idea is basically the same. It is to use the new certificate to update the original cluster. If the domain name changes or the business cluster agent cannot connect to the Rancher Server in the process of replacing the certificate, you can refer to the steps of replacing the single node Rancher Server certificate in this article to modify the server URL, Then recreate the cat cluster agent.