1, Node JS server development
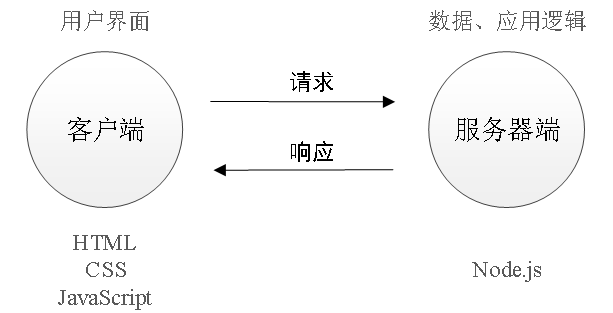
A complete website application is mainly composed of client and server. We can understand the server as a computer, which is mainly responsible for storing data and processing application logic.
Use node JS to replace the traditional server-side language (such as Java, PHP language, etc.) to develop the server-side website application. Client and server-side website development process:
1. Client and server
Client: in the network node, the computer responsible for consuming resources.
Server side: the computer responsible for providing network resources.
2,Node.js web server
Node.js website server meets the following conditions:
① The website server must be a computer;
② Node. Is required to be installed on the computer JS operating environment;
③ Use node JS creates an object that can receive requests and respond to requests.
3. http protocol
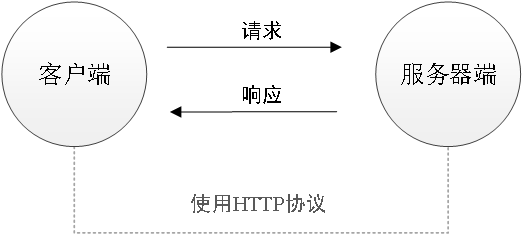
The full name of HTTP (Hyper Text Transfer Protocol) is hypertext transfer protocol.
① HTTP protocol specifies how to transmit hypertext from website server to local browser;
② HTTP protocol works based on client server architecture. It is the standard for client (user) and server (website) requests and responses.
③ HTTP protocol can make the browser more efficient and reduce network transmission.
④ HTTP protocol not only ensures that the computer transmits hypertext documents correctly and quickly, but also determines which part of the transmitted document and which part of the content is displayed first (for example, text precedes graphics).
Note: the data block transmitted in the process of HTTP request and response is called HTTP message, including the data to be transmitted and some additional information, and shall comply with the specified format.
Request message: refers to the data block carried by the client when sending a request to the server.
Response message: refers to the data block carried by the server when responding to the client request.
If we open this website http://nodejs.cn/api/http.html Then, open the web in the developer tool of the browser, and you can see the following information, which is the content of the http protocol followed.
(1) General message header
The following figure: it generally includes the following information
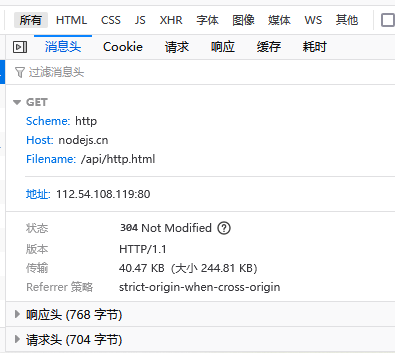
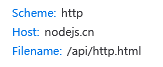
①Request Method
The method of the request specifies the type of contact between the client and the server. There are mainly GET and POST.
When the user directly enters a URL address in the browser address bar or clicks a hyperlink on the web page, the browser will send the request in GET mode by default.
If the method attribute of the tag on the web page is set to post, the request will be sent as post.

②Request URL
The requested URL corresponds to the browser address bar and what content to obtain from the server.
③Status Code
HTTP response code, also known as status code, indicates whether a specific HTTP request has been successfully completed. In the response message, the server should respond to each request of the client. When responding, we can tell the client whether the request is successful or failed through the status code.

The status code consists of 3 digits, indicating whether the request is understood or satisfied. The first digit of the HTTP response status code defines the response category. The last two digits have no specific classification. The first digit has five possible values.
1 * *: the request has been received and needs to be processed.
2 * *: the request has been successfully received, understood and accepted by the server.
3 * *: redirect the response and jump to another URL. In order to complete the request, the client needs to further refine the request.
4 * *: there is an error in the request of the client.
5 * *: server side error.
For example: 200 OK: the request is successful; 304 Not Modified: 304 is unchanged, indicating that the requested content does not need to be transmitted again, that is, the cached content can be used. If the client sends a conditional GET request and the request has been allowed, and the content of the document (since the last access or according to the conditions of the request) has not changed, the server should return this status code. 304 the response is forbidden to contain the message body, so it always ends with the first empty line after the message header.
Common status codes of HTTP protocol
| Status code | explain |
|---|---|
| 200 | Indicates that the server successfully processed the client's request |
| 302 | Indicates that the requested resource temporarily responds to the request from a different URI, but the requester should continue to use the original location for future requests |
| 404 | Indicates that the server cannot find the requested resource |
| 400 | Indicates that the client request has a syntax error |
| 500 | Indicates that the server has encountered an error and cannot process the client's request |
④Remote Address
IP address and port number of the requested server.

(2) Response header information
As shown in the figure below: it generally includes the following information
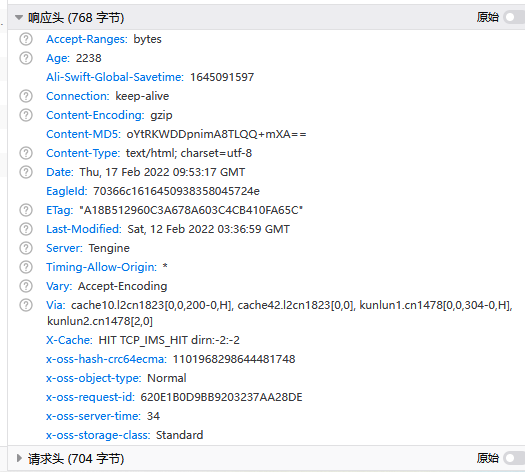
①Connection
Connection mode, keep alive (persistent connection).
②Content-Encoding
Content compression form.
③ Content type: file type of response, generally including:
text/plain: returns plain text format.
text/html: returns the HTML format.
text/css: returns CSS format.
application/javascript: returns the JavaScript format.
image/jpeg: returns the JPEG image format.
application/json: return JSON code format.
④Location
The jump URL is often used with the status code 3 * *.
(3) Request header information
The request header is a part of the request message. It is automatically sent to the server by the client browser. The server can obtain the relevant information of this request through the request header, such as browser type.
As shown in the figure below: it generally includes the following information:
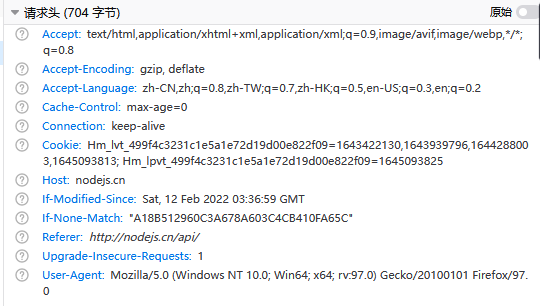
The format of the request header is key value pairs. The keys and values are separated by English colon ":". These key value pairs are also called attributes.
Typical request header attributes are as follows:
User agent: the type of browser that generated the request.
Accept: a list of response content types recognized by the client. The asterisk "*" is used to group types by range, with "/" indicating that all types can be received, and "type / *" indicating that all subtypes of type can be received.
Accept language: the natural language that the client can receive.
Accept encoding: the encoding compression format that the client can receive.
Accept charset: character set of the acceptable response.
Host: the requested host name, which allows multiple domain names to share one IP address, that is, the virtual host.
Connection: connection mode (close or keepalive).
Cookie: it is stored in the client extension field and sends a cookie belonging to the domain to the server of the same domain name.
(4) Request subject
Optional. It is used for the data that the browser sends a request to the server.
2, Server related concepts
1. IP address
(1) IP address features
IP address is the unique identification of devices in the Internet and represents the internet protocol address. Is a unified address format provided by IP protocol. In computer, the address is composed of a string of numbers.
It assigns a logical address to each network and host on the Internet to shield the difference of physical address. It is the unique address of each computer on the Internet. The primary IP address is unique. If a personal computer is compared to a telephone, the IP address is equivalent to the telephone number. As long as you know the other party's IP address, you can directly communicate with the corresponding computer.
(2) IP address development
The first IP address is IPv4. The existing Internet operates on the basis of IPv4 protocol. The IP address is in the format of 32-bit binary number, which is usually divided into four "8-bit binary numbers" (i.e. 4 bytes). It is usually expressed in the form of (a.b.c.d) by "dotted decimal", where a.b.c.d is a decimal integer between 0 and 255, for example, the IP address represented by dotted decimal (123.126.1.1).
Due to the vigorous development of the Internet, the demand for IP address is increasing. IPv6 protocol is proposed. It is the next version of internet protocol. It adopts 128 bit address length and can provide address almost unrestricted. In addition to larger addressing space, ipv6 also provides other technical advantages. In particular, it allows hierarchical address allocation methods to promote routing aggregation on the Internet, thereby limiting the expansion of routing tables. It expands and simplifies the use of multicast addressing and provides additional optimization for the provision of services. For more information about IPv6, you can open this website: https://baike.baidu.com/item/IPv6
be careful:
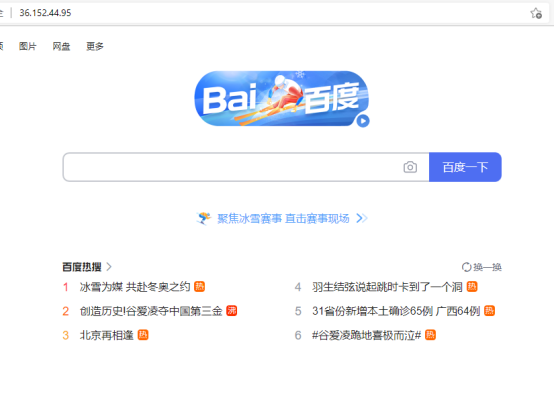
① each Web server in the Internet has its own IP address. For example, ping www.baidu.com can be run in Windows terminal Com command, you can view the IP address of Baidu server.

You can see that the IP address of Baidu server is 36.152.44.95. We can also search it directly in the browser, which can also directly open Baidu home page.
② during the development period, your computer is both a server and a client. In order to facilitate the test, you can enter the IP address 127.0.0.1 in your browser and access your computer as a server.
2. Domain name and domain name server
Although IP address can uniquely mark computers on the network, IP address is a long string of numbers, which is not intuitive and not easy to remember. Therefore, people have invented another set of character type address scheme, namely Domain Name address.
Domain name: the web address used to surf the Internet at ordinary times. The IP address corresponds to the domain name. Enter the domain name in the address bar of the browser, and a special server will resolve the domain name to the corresponding IP address, so as to find the corresponding server.
IP address and domain name are one-to-one correspondence. This correspondence is stored in a computer called Domain name server (DNS). Users only need to access the corresponding server through a friendly domain name, and the corresponding conversion is realized by the Domain name server. Therefore, Domain name server is a server that provides direct mutual conversion service between IP address and domain name.
be careful:
① computers in the Internet can work normally only by using IP addresses, but with the blessing of domain names, the world of the Internet can become more convenient.
② during the development and testing, the domain name corresponding to 127.0.0.1 is localhost. They all represent our own computer, and there is no difference in the use effect.
3. Port number
In a computer, hundreds of Web services can be run, and each web service corresponds to a unique port number. The network request sent by the client can be accurately handed over to the corresponding web service for processing through the port number.
Node.js developers are used to using 3000 as node Generally speaking, the port of JS server does not use the number between 0 and 1024, because this is the port occupied by operating system software and common software.
be careful:
① each port number cannot be occupied by multiple web services at the same time
② in practical application, port 80 in the URL can be omitted.
4,URL
URL is also called uniform resource locator. It is an addressing method specially designed to identify the location of resources on the Internet.
3, http module
The http module is node JS is an official module for creating a Web server, which is provided through the http module Createserver () method can easily turn an ordinary computer into a Web server, so as to provide external Web resource services.
1. Import http module
const http = require('http');
2. Role of http module
The difference between server and ordinary computer is that web server software is installed on the server, such as IIS, Apache, etc. By installing these server software, you can turn an ordinary computer into a web server.
On node JS, we don't need to use IIS, Apache and other third-party Web server software. We can be based on node The http module provided by JS writes a server software through code, so as to provide web services.
The main function of http module is to simulate the browser to send requests to the web server and create a web server.
4, http module application
1. Simulation browser
http. Application of get():
http.get(options[, callback])
http.get(url[, options][, callback])
URL < string > | < URL > requested URL;
Options < Object > accept and HTTP Request() has the same options, but the method is always set to GET. Properties inherited from the prototype will be ignored.
Callback < function > callback function to get the response from the server.
Return < http ClientRequest>
Send requests. Since most requests are GET requests without text, node JS provides this convenient method. This method is similar to http The only difference in request () is that it sets the method to GET and automatically calls req end().
Note: callback is called with a single parameter (an instance of http.IncomingMessage).
Examples are as follows:
//Introduce http module
const http = require('http');
//Send request to web server
//get(): parameter 1: URL of request, parameter 2: get response
http.get('http://www.tmooc.cn',(res)=>{
    //res: response object
    //statusCode is the status code of the response, which can judge the response. If it is 200, it means the response is successful
    console.log( res.statusCode );
    //Get the content of the response
    //Event: listen for data flow response
    res.on('data',(chunk)=>{
        console.log(chunk.toString())
    })
})

res response object;
res.statusCode get the status code of the response;
res.on(‘data’,function(chunk){ }); Event: monitor whether data is transmitted from the server
chunk is the transmitted data in the format of buffer, so when we want to see the string format, we need to use the toString() method.
2. Creating a web server example 1
(1)request.write()
request.write(chunk[, encoding][, callback]);
chunk < string > | < Buffer >
The encoding < string > parameter is optional. It is only applicable when chunk is a string. The default is' utf8 '.
The callback < function > parameter is optional and will be called when refreshing this data block, provided that the block is not empty.
Return: < Boolean >
The function of this method is to send a piece of text, which can be called multiple times, and request needs to be called End() to complete the send request.
(2)response.end()
response.end([data[, encoding]][, callback]);
data < string > | < Buffer >
encoding < string >
callback < Function >
Return: < this >
This method sends a signal to the server to indicate that all response headers and text have been sent; The server should consider this message complete. response. The end () method must be called on each response.
If data is specified, the effect is similar to calling response Write (data, encoding) followed by response end(callback).
If callback is specified, it is called when the response flow completes.
(3)response.writeHead()
response.writeHead(statusCode[, statusMessage][, headers]);
statusCode < number >
statusMessage < string >
headers < Object > | < Array >
Return: < http ServerResponse>
Send a response header to the request. The status code is a 3-bit HTTP status code, such as 404. The last parameter headers is the response header. Optionally, a human readable statusMessage is given as the second parameter.
This method can only be called once in a message and must be called before response End () before calling. If you call this, response. is called. Write() or response End(), the implicit / mutable header will be evaluated and this function will be called. When the header has used response When setheader() is set, they will be passed to response The header of writehead() is merged and passed to response The header of writehead() takes precedence.
If this method is called and response has not been called Setheader(), the provided header value will be directly written to the network channel without internal cache, and the response will be displayed on the header Getheader () does not produce the expected results. If you need to fill in the header step by step and make potential retrieval and modification in the future, use response instead setHeader().
(4)response.setHeader()
response.setHeader(name, value);
name < string >
value < any >
Return: < http ServerResponse>
Returns the response object. Sets a single header value for an implicit header. If the header already exists in the header to be sent, its value will be replaced.
Usage:
response.setHeader('Content-Type', 'text/html');
//perhaps
response.setHeader('Set-Cookie', ['type=ninja', 'language=javascript']);
Attempting to set a header field name or value that contains invalid characters will result in a TypeError being thrown.
When the header has used response When setheader() is set, they will be passed to response The header of writehead() is merged and passed to response The header of writehead() takes precedence.
(5) Examples
Examples are as follows:
//Introduce http module
const http = require('http');
//Create web server
var app = http.createServer();
//Receive the request and respond to it
//Event request: once there is a request, the event will be triggered automatically
//Callback function: the server responds
app.on('request',(req,res)=>{
    //req: the object of the request. Get all requests
    //The URL of the request and the method of the request. Note: the URL at this time refers to the part after the port number
    console.log(`Requested URL: ${req.url},Method of request: ${req.method}`);
    //res: the object of the response and makes a specific response
    //Use write to set the response content
    res.write('this is homepage')
    //End and send the response content to the browser
    res.end()
})
//Set the listening port (the port number can be configured by yourself)
app.listen(8080);
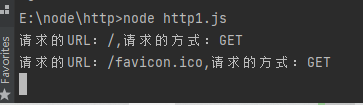
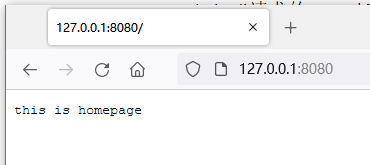
This is home page will be displayed on the browser, favicon ICO is the icon that comes with the website.
We can also use the writeHead() method to set the header information and status code of the response.
//Introduce http module
const http = require('http');
//Create web server
var app = http.createServer();
//Receive the request and respond to it
//Event request: once there is a request, the event will be triggered automatically
//Callback function: the server responds
app.on('request',(req,res)=>{
    //req: the object of the request. Get all requests
    //The URL of the request and the method of the request. Note: the URL at this time refers to the part after the port number
    console.log(`Requested URL: ${req.url},Method of request: ${req.method}`);
    //res: the object of the response and makes a specific response
    //Set the header information and status code of the response
    res.writeHead(302,{
        Location:'http://baidu.com'
    })
    //End and send the response content to the browser
    res.end()
})
//Set the listening port (the port number can be configured by yourself)
app.listen(8080);

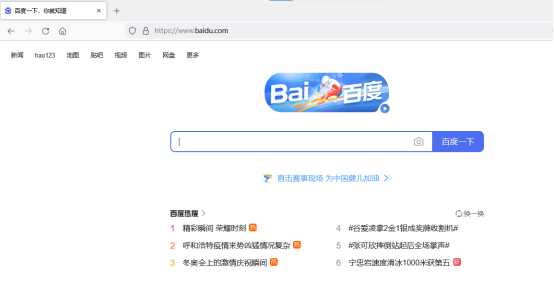
At this time, we start the server and open the browser. Due to the setting of header information and status code, the browser will automatically jump to Baidu page.
3. Example 2 of creating a web server
(1) Basic steps for creating a web server
① http import module.
② Create a web server instance.
③ Bind the request event for the server instance and listen for the network request sent by the client.
④ Start the server. Call the of the server instance listen() method to start the current web server instance.
(2) Code
//Import http module
const http = require('http');
//Create a web server instance
const server = http.createServer();
//Bind the request event for the server instance and listen for the client's request
server.on('request',function (req,res){
    console.log('Request service');
})
//Start server
server.listen(8989,function (){
    console.log('Server startup')
})
(3) req request object
As long as the server receives the request from the client, it will call through server On() is the request event handler bound to the server.
If you want to access data or attributes related to the client in the event handler function, you can use the following methods:
const http = require('http');
const server = http.createServer()
server.on('request',(req)=>{
    //req is a request object, which contains data and attributes related to the client, such as:
    //req.url is the URL address requested by the client
    //req.method is the method request type of the client
    const str = `Your request url is ${req.url},and request method is ${req.method}`
    console.log(str)
})
server.listen(80,()=>{
    console.log('Server running on http://127.0.0.1 ')
})
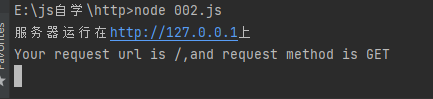
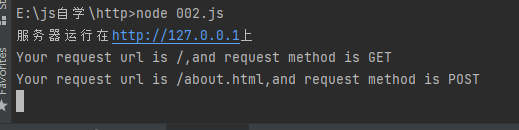
When we run the program and open the browser, we can see the display of the terminal as shown in the figure above. At this time, the request method is GET. If we want to change it to POST. You can open the postman software, set the POST website after creating a new window, and click send Ding.
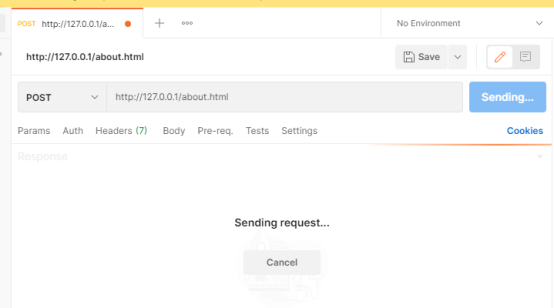
After setting, the terminal displays the result, and the request mode will change to POST.
(4) res response object
In the request event processing function of the server, if you want to access data or attributes related to the server, you can use the following methods:
const http = require('http');
const server = http.createServer()
server.on('request',(req,res)=>{
    //res is a response object, which contains data and attributes related to the server, such as:
    //The string to send to the client
    const str = `Your request url is ${req.url},and request method is ${req.method}`
    //res.end() method:
    //Send the specified content to the client and end the processing of this request
    res.end(str);
})
server.listen(80,()=>{
    console.log('Server running on http://127.0.0.1 ')
})
When we run the program, the terminal displays the following:
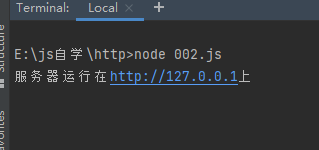
After the browser is opened, it will display as follows, and the content we set will be displayed on the client browser.

(5) Solve the problem of Chinese garbled code
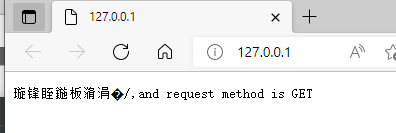
When the res.end() method is called to send Chinese content to the client, there will be garbled code. For example, we will change the str of the previous example to
const str = `The request address is ${req.url},and request method is ${req.method}`
Then run the code. The contents appearing on the browser are as follows:
Therefore, it is necessary to manually set the encoding format of the content. In order to prevent the Chinese display from being garbled, it is necessary to set the value of the response header content type to test/html;charset=utf-8, there are two methods, one of which is optional.
res.writeHead(200,{
'content-type':'text/html;charset=utf-8'
})
res.setHeader('Content-Type','text/html;charset=utf-8')
For example:
const http = require('http');
const server = http.createServer()
server.on('request',(req,res)=>{
    //The content sent contains Chinese
    const str = `The request address is ${req.url},and request method is ${req.method}`
    //In order to prevent garbled Chinese display, it is necessary to set the content type value of the response header to test/html;charset=utf-8
    res.setHeader('Content-Type','text/html;charset=utf-8')
    //Respond the content containing Chinese to the client
    res.end(str);
})
server.listen(80,()=>{
    console.log('Server running on http://127.0.0.1 ')
})
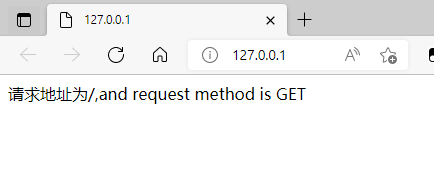
In this way, the problem is solved.
(6) Respond to different html content according to different URLs
Implementation steps:
① get the url address of the request
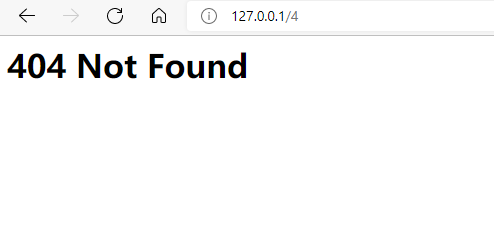
② set the default response content as 404 Not Found
③ judge whether the requested is / or / index HTML home page
④ judge whether the user's request is / about HTML home page
⑤ set the content type response header to prevent Chinese garbled code
⑥ use res.end() to send the response to the client
const http = require('http');
const server = http.createServer()
server.on('request',(req,res)=>{
//Get the url address of the response
const url = req.url;
//Set the default content to 404 Not Found
let content = '<h1>404 Not Found</h1>'
//Different situations of user requests
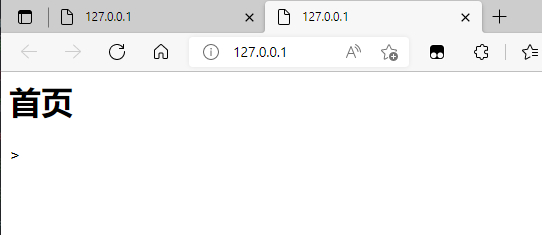
if(url === '/' || url === '/index.html'){
content = '<h1>home page</h1>>'
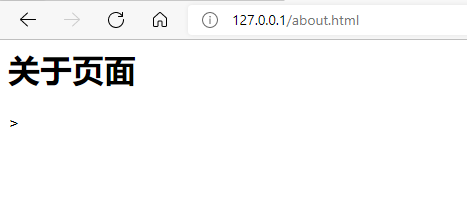
}else if(url === '/about.html'){
content = '<h1>About page</h1>>'
}
res.setHeader('Content-Type','text/html;charset=utf-8')
//Respond the content containing Chinese to the client
res.end(content);
})
server.listen(80,()=>{
console.log('Server running on http://127.0.0.1 ')
})
The different situations are as follows:
(7) Case: web server displaying page
Core idea:
Take the actual storage path of the file as the request url address of each resource.
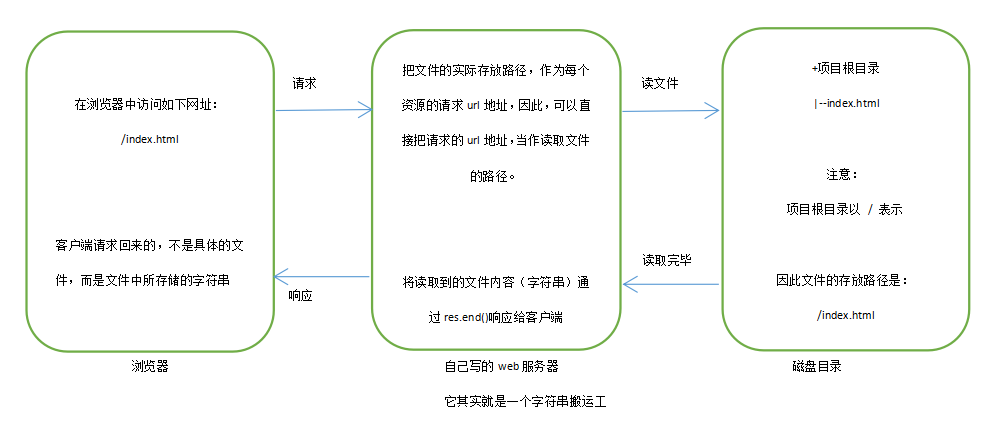
Implementation steps:
① import the required modules.
② create a basic web server.
③ map the request url address of the resource to the storage path of the file.
④ read the contents of the file and respond to the client
⑤ optimize the request path of resources
We write 004 in the current folder JS code, the code is as follows:
//1. Import module
//1.1 import http module
const http = require('http');
//1.2 import fs file system module
const fs = require('fs');
//1.3 import path processing module
const path = require('path');
//2. Create a basic web server
//2.1 creating a web server
const server = http.createServer();
//2.2 listening to the request event of the web server
server.on('request',function (req,res){
//3.1 get the url address requested by the client
// /http/index.html
const url = req.url;
//3.2 map the requested url address to the storage path of specific files
const fpath = path.join(__dirname,url);
//4.1 read the contents of the file according to the mapped file path
fs.readFile(fpath,'utf8',(err,datastr)=>{
//Failed to read and respond to the client with fixed error information
if(err) return res.end('404 not found');
res.end(datastr);
})
});
//2.3 start the web server
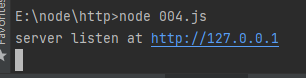
server.listen(80,function (){
console.log('server listen at http://127.0.0.1')
});
Index. In the current directory The HTML code is as follows:
<!DOCTYPE html>
<html lang="en">
<head>
    <meta charset="UTF-8">
    <meta http-equiv="X-UA-Compatible" content="IE=edge">
    <meta name="viewport" content="width=device-width, initial-scale=1.0">
    <title>Document</title>
</head>
<style>
    #haha{
        width: 400px;
        height: 400px;
        color: red;
        background-color: green;
        padding-left: 50px;
    }
</style>
<body>
    <div id="haha">
        study hard and make progress every day
    </div>
</body>
</html>
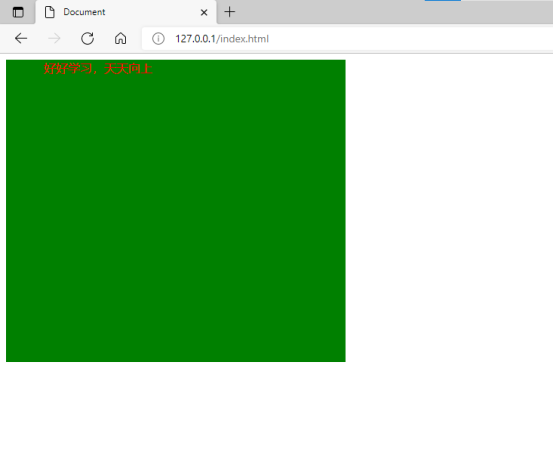
We execute node 004 in the terminal JS command
Then enter the browser and search 127.0.0.1/index HTML, you can display success.
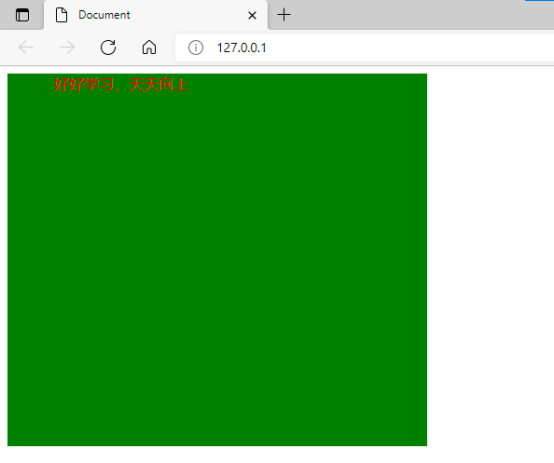
Request path for optimizing resources:
We store the original addressing path code
const fpath = path.join(__dirname,url);
Replace with the following:
//5.1 predefined blank file storage path
let fpath = '';
if(url === '/'){
    //5.2 if the requested path is /, manually specify the storage path of the file
    fpath = path.join(__dirname,'./index.html')
}
    //5.3 if the request path is not /, address the path directly
In this way, after opening the browser, you don't have to enter / index HTML, the page content will be displayed directly.
5, GET request parameters and POST request parameters
1. GET request parameters
The GET parameter is placed in the browser address bar for transmission. The example URL address is as follows.
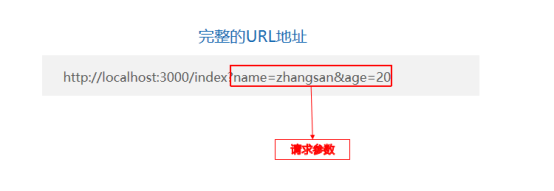
Use '?' between address and request parameters‘ separate;
Parameters and parameters are separated by '&'.
The method for the server to receive the parameters of the Get request: call URL Parse method for req URL to Get the request parameters from query.
2. POST request parameters
The POST request parameters are placed in the request body for transmission.
(1) Send POST request parameters from the client to the server
For example: first, let's write out a page, use the form form, and set the request method to POST:
<!DOCTYPE html>
<html lang="en">
<head>
    <meta charset="UTF-8">
    <meta http-equiv="X-UA-Compatible" content="IE=edge">
    <meta name="viewport" content="width=device-width, initial-scale=1.0">
    <title>post request</title>
</head>
<body>
    <form method="post" action="http://localhost:8080">
        <label>
            full name:
            <input type="text" name="username">
        </label>
        <br/><br/>
        <label>
            password:
            <input type="password" name="pwd">
        </label>
        <br/><br/>
        <button type="submit">register</button>
    </form>
</body>
</html>
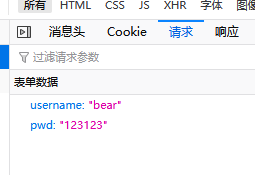
Run the server side, first open the page in the browser, then enter the data, click Register, and then open the network in the developer tool, and we can see the parameters we requested in the request body
(2) Receive these request parameters on the server side
Create a server:
const http = require('http');
//The import system module querystring is used to convert POST request parameters into object format
const querystring = require('querystring');
const app = http.createServer();
app.on('request',(req,res)=>{
    let postParams = '';
    //Listen for parameter transmission events
    req.on('data',(params)=>{
        postParams += params;
        //Event triggered after listening for parameter transmission
        req.on('end',()=>{
            let postStr = querystring.parse(postParams);
            console.log('post The request parameters are:',postStr)
        })
    })
    res.end('ok');
})
app.listen(8080);
console.log('The server has started, please visit http://localhost:8080')
When the server is started and the client sends in data, we can receive data:
