Personal blog is completed. Welcome to visit.
Rimmer lymoo's blog
http module in-depth
http protocol
http: Hypertext Transfer Protocol, through which all routes are transported and through which a pipeline between client and server can be constructed
http module: can build server environment (simulate client)
Create a server
Similar to those mentioned in the node.js Foundation (1)
var http = require("http");
var url = require("url");
var server = http.createServer(function (req, res) {
    console.log(req.url);    // Path of Print Request
    console.log(req.method); // Method of Printing Request
    res.end("Close this request");
});
server.listen(8080);
Example 1
Simple front-end and back-end interactions using from forms
First create three files, index.html and form.html, and http.js (name is optional, specifically to understand how to implement).
index.html file content
<!DOCTYPE html>
<html>
    <head>
        <meta charset="utf-8">
        <title>home page</title>
    </head>
    <body>
        <h1>home page</h1>
        <a href="form.html">Jump to the login registration page</a>
    </body>
</html>
form.html file content
<!DOCTYPE html>
<html>
<head>
<meta charset="utf-8">
<title>Title</title>
</head>
<body>
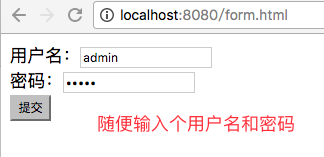
<form action="">
//User name:<input type="text" name="user"><br/>
//Password:<input type="password" name="pass"><br/>
<input type="submit" value="Submission" />
</form>
</body>
</html>http.js file content
var http = require("http");
var url = require("url");
var fs = require("fs");
var server = http.createServer(function (req, res) {
    var urlObj = url.parse(req.url, true);
    if (urlObj.pathname == "/" || urlObj.pathname == "/index.html") {
        // Read index.html from this project and write it into response res
        var rs = fs.createReadStream("index.html");
        rs.pipe(res);
    } else if (urlObj.pathname == "/form.html") {
        fs.createReadStream("form.html").pipe(res);
        console.log(urlObj.query); // Output username and password
    } else {
        // If the output is scrambled, students can add the following sentence
        res.writeHead(200, {"Content-Type": "text/html;charset=utf-8"});
        res.end("Close this request");
    }
});
server.listen(8080);
At this point, you can try to open the simulation server of http.js and enter it in the browser. http://localhost:8080 Do some related operations to see the effect. 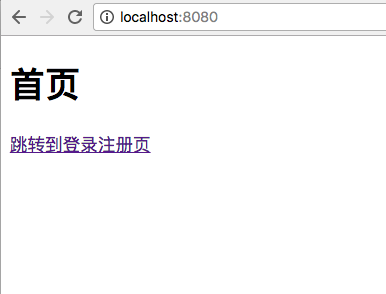

The final effect can be achieved in the terminal as shown in the figure, but there is only a simple interaction between two pages. If there are many pages, each page should go to else if to determine whether it is too troublesome. Here is a more convenient method. In the http.js file, change else if to the following:
else if (urlObj.pathname != "/favicon.ico") {
    fs.createReadStream("." + urlObj.pathname).pipe(res);
}
So you don't have to write a lot of pathname s to match one by one. Is it convenient?
The default mode of transmission here is through GET, so what if it is POST?
Example 2
Simple front-end and back-end interaction using POST transport from form
Or the three files in Example 1, changing the attributes in the form tag of the form.html file to
<form action="/post" method="post">Then change http.js to the following
var http = require("http");
var url = require("url");
var fs = require("fs");
var queryString = require("querystring");
var formidable = require("formidable");
var server = http.createServer(function (req, res) {
    var urlObj = url.parse(req.url, true);
    if (urlObj.pathname == "/" || urlObj.pathname == "/index.html") {
        var rs = fs.createReadStream("index.html");
        rs.pipe(res);
    } else if (urlObj.pathname == "/post") {
        res.writeHead(200, {"Content-Type": "text/html;charset=utf-8"});
        // Processing incoming data from post
        var str = "";
        req.on("data", function (chunk) {
        str += chunk;
    });
    req.on("end", function () {
        var query = queryString.parse(str);
        console.log(query);
    });
        res.end("The address you requested is" + urlObj.pathname);
    } else if (urlObj.pathname != "/favicon.ico") {
        fs.createReadStream("." + urlObj.pathname).pipe(res);
    }
});
server.listen(8080);
The final result is that the user name and password can be obtained as well as the GET method, and the final page returns the result of "the address you requested is / post".
Example 3
Simple image upload operation using POST transmission of from form
Here are also the three files mentioned above, labeling the uploaded files in the form.html file
<input type="file" name="fileup">In http.js, an operation for post transfer file is also added. The code is as follows:
else if (urlObj.pathname == "/post") {
    // Processing uploaded files
    var form = new formidable.IncomingForm();
    form.parse(req, function (err, fields, files) {
        // Fields: Are submitted fields
        // files: A submitted file object that is stored in a temporary path
        var rs = fs.createReadStream(files.fileup.path);
        // Store files from temporary paths to specified directories
        var ws = fs.createWriteStream("./upload/" + files.fileup.name);
        rs.pipe(ws);
    });
    res.writeHead(200, {"Content-Type": "text/html;charset = utf-8"});
    res.end("The address you requested is" + urlObj.pathname);
}
At this point, you can test uploading a picture to see if you can find the same picture in the upload directory.~
Example 4
Sending and receiving ajax requests
The form.html file is not needed here. The index.html is tagged with a script to send an ajax request. The code is as follows:
<script>
    window.onload = function () {
        var time = document.getElementById("time");
        var ajax = new XMLHttpRequest();
        ajax.open("GET", "/ajax?user=test&pass=123", true);
        ajax.send();
        ajax.onload = function () {
            time.innerHTML = ajax.responseText;
        }
    }
</script>
Add a code after else if in the http.js file
else if (urlObj.pathname == "/ajax") {
    // Received data transmitted by ajax
    console.log(urlObj.query);
}
Ultimately, enter the same in the browser http://localhost:8080 You can receive the user and pass fields sent by ajax at the terminal.~
Example 5
http simulation client
Here we create a new file called request.js. Here we provide get and post. The code is as follows:
var http = require("http");
get mode
var request = http.request({
    host: "localhost",
    port: "8080",
    path: "/request?user=test&pass=111",
    method: "get"
}, function (res) {
    // console.log(res.statusCode);
    res.on("data", function (chunk) {
        console.log(chunk.toString());
    });
});
request.end("End of request"); // Close this request

// post mode
var request = http.request({
    host: "localhost",
    port: "8080",
    path: "/request",
method: "post"
}, function (res) {
    // console.log(res.statusCode);
    res.on("data", function (chunk) {
        console.log(chunk.toString());
    });
});
request.write("user=test&pass=111");
request.end("End of request"); // Close this request
Then add another other if code to the http.js file
else if (urlObj.pathname == "/request") {
    // get mode
    console.log(urlObj.query);
    res.statusCode = 200;
    res.end('{"err": 0, "msg": "Content of the request"}');

    // post mode
    req.on("data", function (chunk) {
        console.log(chunk.toString());
    });
    res.end('{"err": 0, "msg": "Content of the request"}');
}
Then we start the simulation server http.js and run request.js to simulate the request. We will find that request.js will return {"err": 0, "msg": "content of the request"} and then the server will return user=xxx&pass=111 to complete the request. If such a result occurs, it means that the transmission is successful! ____________
Links to the original text