1, Express introduction
1. What is Express
Express is based on node JS platform, a fast, open and minimalist Web development framework.
The role of ExpressExpress and node JS is similar to the built-in http module, which can help developers quickly create a Web server.
ExpressExpress is a popular node based The Web application development framework of JS running environment is simple and flexible, and provides powerful functions for Web applications. Express provides a lightweight module, similar to jQuery (encapsulated tool library), which integrates node The functions of the HTTP module of JS are encapsulated in a simple and easy-to-use interface, which is used to expand the functions of the HTTP module and can easily handle the routing, response, Cookie and HTTP request status of the server.
Advantages:
(1) Concise route definition.
(2) Simplify the processing of HTTP request parameters.
(3) Provide middleware mechanism to control HTTP requests.
(4) Has a large number of third-party middleware.
(5) Support multiple template engines.
Essence: it is a third-party package on npm, which provides a convenient way to quickly create a Web server.
https://www.expressjs.com.cn/
This is the official website of express in Chinese. You can learn about express on it.
2. Why Express
When we want to create a server, because node The http built-in module provided by JS is very complex to use and has low development efficiency. Therefore, Express is encapsulated based on http module, which greatly improves the development efficiency.
3. The role of express
Using Express, you can easily and quickly create a Web site server or an API interface server.
Web site server: a server dedicated to providing web page resources.
API interface server: a server dedicated to providing API interfaces.
2, Basic use of Express
1. Installation
Create a directory and create a new directory under this directory, such as server as the root directory of the project.
Execute the following command under the server directory.
npm init(Project initialization, build package.json (file)
npm install express(install express)
After installation, open the command line tool in the current directory and execute the "npm list express" command to view the Express version.
2. Create a basic Web server
//1. Import express module
const express = require('express');
//2. Create web server
const app = express();
//3. Listen to port 80 and start the web server
app.listen(80,()=>{
    console.log('express server running at http://127.0.0.1');
});
3. Listen for GET requests
Via app The GET () method can listen to the GET request of the client. The specific syntax format is as follows:
//Listen for GET requests
//Parameter 1: URL address requested by the client
//Parameter 2: request corresponding processing function
//      req: request object (containing attributes and methods related to the request)
//      res: response object (containing properties and methods related to response)
app.get('request URL',function(req,res){
    //Processing function
})
4. Listen for POST requests
Via app The POST () method can listen to the POST request of the client. The specific syntax format is as follows:
//Parameter 1: URL address requested by the client
//Parameter 2: request corresponding processing function
//       req: request object (containing attributes and methods related to the request)
//       res: response object (containing properties and methods related to response)
app.post('request URL',function(req,res){
    //Processing function
})
5. Respond the content to the client
The methods on the response object (res) in the following table can send a response to the client and terminate the request response cycle. If these methods are not called from the routing handler, the client request will remain suspended.
| method | explain |
|---|---|
| res.download() | Prompt for files to download. |
| res.end() | End the response process. |
| res.json() | Send a JSON response. |
| res.jsonp() | Send JSON response and JSONP support. |
| res.redirect() | Redirect request. |
| res.render() | Render the view template. |
| res.send() | Send various types of responses. |
| res.sendFile() | Send the file as an octet stream. |
| res.sendStatus() | Set the response status code and send its string representation as the response body. |
For example, through res.send() method, the processed content can be sent to the client:
app.get('/user',(req,res)=>{
    //Send JSON objects to clients
    res.send({
        name:'haha',
        age:90,
        gender:'male'
    })
})
app.post('/user',(req,res)=>{
    //Send text content to clients
    res.send('Request succeeded')
})
6. Examples
//1. Import express
const express = require('express');
//2. Create web server
const app = express();
//3. Listen to GET and POST requests and respond to specific contents to the client
app.get('/user',(req,res)=>{
    //Send JSON objects to clients
    res.send({
        name:'haha',
        age:90,
        gender:'male'
    })
})
app.post('/user',(req,res)=>{
    //Send text content to clients
    res.send('Request succeeded')
})
//4. Start the web server
app.listen(80,()=>{
    console.log('express server running at http://127.0.0.1');
});
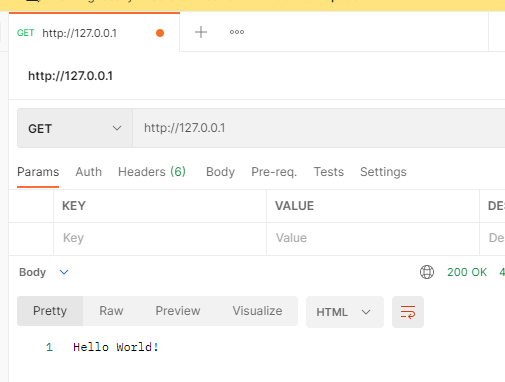
First, we start the server

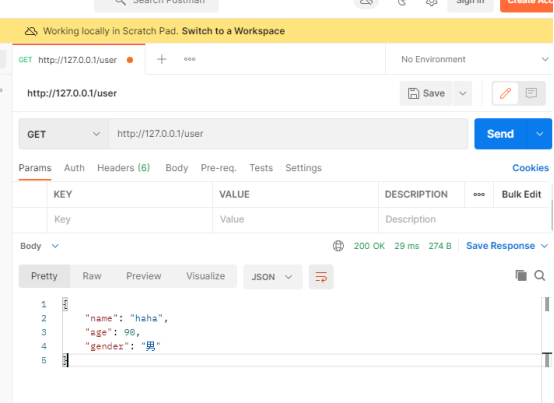
Then we can open postman to test whether our request is effective. First, test the GET request. After entering the website and clicking send, the following results will appear, and the response is successful.
Then test the POST request. Similarly, enter the website address, select POST, and then click send. The following results appear and the response is successful.

7. Get the query parameters carried in the URL
Through req The query object is used to obtain the GET request parameters, that is, the parameters that can be accessed by the client and sent to the server in the form of query string. The GET parameters will be converted into objects and returned.
app.get('/',(req,res)=>{
    //req.query is an empty object by default
    //Client use? Name = ahah & age = 20 is the parameter sent to the server in the form of query string,
    //You can use req The query object accesses, for example:
    //req.query.name   req.query.age
    console.log(req.query);
})
Examples are as follows:
//1. Import express
const express = require('express');
//2. Create web server
const app = express();
//3. Listen to GET and POST requests and respond to specific contents to the client
app.get('/user',(req,res)=>{
    //Send JSON objects to clients
    res.send({
        name:'haha',
        age:90,
        gender:'male'
    })
})
app.post('/user',(req,res)=>{
    //Send text content to clients
    res.send('Request succeeded')
})
app.get('/',(req,res)=>{
    //Through req Query can get the query parameters sent by the client
    //req.query is an empty object by default
    console.log(req.query);
    res.send(req.query);
})
//4. Start the web server
app.listen(80,()=>{
    console.log('express server running at http://127.0.0.1');
});
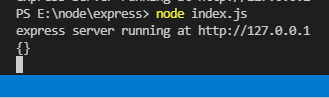
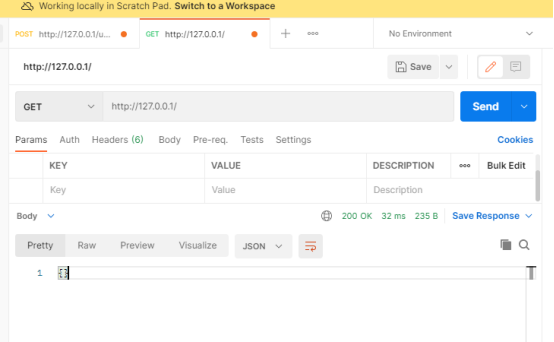
After starting the server, we can find that the printed object in the terminal is an empty object, and the response when testing with postman is also an empty object, because req Query is an empty object by default.
Next, let's retest and enter the query string in the URL entered by postman? Name = haha & age = 90, the result is as follows:
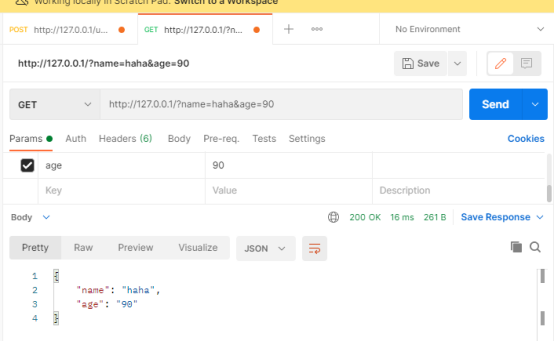
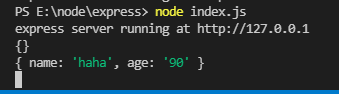
The query string is displayed successfully.
8. Get dynamic parameters in URL
Req Params object, which can access the URL and obtain the data transmitted by the route through the matching dynamic parameters:
In the URL address, you can match the dynamic parameter value in the form of parameter name. At this time, all kinds of data and id passed will be accepted.
app.get('/user/:id',(req,res)=>{
//req.params is an empty object by default
//The parameter values obtained by dynamic matching are stored in it
console.log(req.params)
})
Examples are as follows:
//1. Import express
const express = require('express');
//2. Create web server
const app = express();
//Note: id here is a dynamic parameter
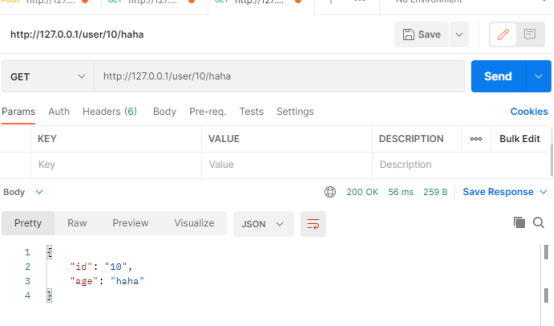
app.get('/user/:id/:age',(req,res)=>{
//req.params is an empty object by default
//It stores the URL parameter values obtained through dynamic matching
console.log(req.params)
res.send(req.params)
})
//3. Start the web server
app.listen(80,()=>{
console.log('express server running at http://127.0.0.1');
});
We can test it through postman:

9. Get post request data
(1) Get data through events
req.on('data',function(mydata){})
First, let's write a post HTML file, which uses form form, so that it can transfer data to the server.
Method: set the request method, such as post;
action: set the request url
name: used to receive the data entered in the form
<!DOCTYPE html>
<html lang="en">
<head>
    <meta charset="UTF-8">
    <meta http-equiv="X-UA-Compatible" content="IE=edge">
    <meta name="viewport" content="width=device-width, initial-scale=1.0">
    <title>post</title>
</head>
<body>
    <form action="/mylogin" method="post">
        <label>
            User:
            <input type="text" name="uname">
        </label>
        <br/>
        <label>
            password:
            <input type="password" name="upwd">
        </label>
        <br/>
        <input type="submit">
    </form>
</body>
</html>
Secondly, create a server and create the corresponding route according to the request of the submit button.
const express = require('express');
const querystring = require('querystring')
const app = express();
app.get('/login',(req,res)=>{
//Response file
res.sendFile(__dirname+'/post.html')
})
app.post('/mylogin',(req,res)=>{
//Get post request data
//event
req.on('data',(mydata)=>{
//mydata data is buffer data, so it needs to be converted into a string and then parsed into an object
var str = mydata.toString();
var obj = querystring.parse(str);
console.log(obj);
})
res.send('Login successful')
})
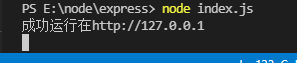
app.listen(80,()=>{
console.log('Successfully run in http://127.0.0.1');
})


(2) Body parser module
Req in Express Body is used to obtain POST request parameters, and the POST parameters need to be converted into object form with the help of a third-party body parser module. The example code of using req to obtain POST request parameters is as follows.
app.post('url address', (req, res) => {
  res.send(req.body);
});
Body parser is a module for parsing HTTP request body. This module can handle POST request parameters, which is very convenient to use. The example code of using the body parser module to process form data is as follows.
app.use(bodyParser.urlencoded({ extended: false }))
{ extended: false}Indicates the internal use of the method querystring System module to handle POST Request parameters;
{ extended: true}Indicates use qs Third party module for processing.
Generally, we choose false.
Before processing the POST request parameters, first complete the installation of the body parser module.
npm install body-parser
First, in index JS write the following code:
const express = require('express');
const bodyParser = require('body-parser');
const app = express();
app.use(bodyParser.urlencoded({ extended: false }));
app.post('/body', (req, res) => {
  res.send(req.body);
});
app.listen(3000);
console.log('The server started successfully');
Write another body html:
<!DOCTYPE html>
<html lang="en">
<head>
    <meta charset="UTF-8">
    <meta http-equiv="X-UA-Compatible" content="IE=edge">
    <meta name="viewport" content="width=device-width, initial-scale=1.0">
    <title>Document</title>
</head>
<body>
    <form action="http://localhost:3000/body" method="post">
        user name:
        <input type="text" name="username" />
        <br><br>
        password:
        <input type="password" name="password" />
        <br><br>
        <input type="submit" value="Submit">
    </form>
</body>
</html>
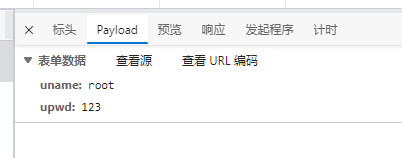
First start the server and open body in the browser HTML file, enter the user name and password, and click Submit. The result is shown in the figure.


3, Express routing
1. Concept of routing
(1) Routing in Express
In Express, routing refers to the mapping relationship between the client's request and the server's processing function, that is, receiving the request and responding, and a route can only process one request. Note: each route can have one or more processing functions, which will be executed when the routes match.
The route in Express consists of three parts: the type of request, the URL address of the request and the processing function. The format is as follows:
app.METHOD(PATH,HANDLER)
app: an instance of express.
METHOD: HTTP request METHOD, in lowercase, such as get and post.
PATH: is the request URL address, that is, the route PATH. It can be a string, string pattern or regular expression. A route will match any PATH immediately following its PATH, and then add a "/".
HANDLER: it is a function executed during route matching.
Note: enter the url directly in the browser address bar. The default is get request. The query string is used to transfer data. The browsing records may be cached by the browser.
The post request needs to be completed by form submission (at this stage) to obtain data usage events.
(2) Simple routing example
//Match the GET request, and the request URL is/
app.get('/',function(req,res){
    res.send('Hello World!')
})
//Match the POST request, and the request URL is/
app.post('/',function(req,res){
    res.send('Got a POST request')
})
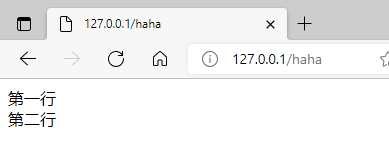
Exercise 1: create a route, request method: get, request url: / haha, respond to multiple lines of content.
Suppose we create a route like this:
const express = require('express');
const app = express();
app.get('/haha',(req,res)=>{
    res.send('first line')
    res.send('Second line')
})
app.listen(80,()=>{
    console.log('Successfully run in http://127.0.0.1');
})
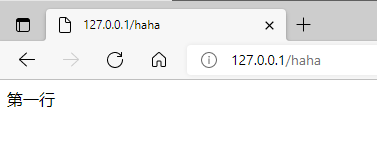
After starting the server and opening the browser, you can see that as long as the "first line" is displayed and the second line is not, the terminal also displays the following errors:

So note: send can only be used once, not multiple times. When we want to respond to multi line content, it can be written as follows:
const express = require('express');
const app = express();
app.get('/haha',(req,res)=>{
    res.send('first line<br/>Second line')
})
app.listen(80,()=>{
    console.log('Successfully run in http://127.0.0.1');
})
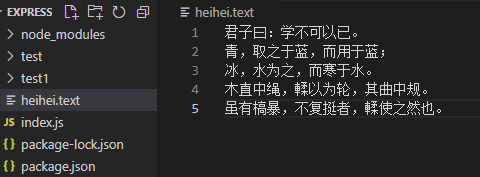
Exercise 2: create a route, use the get request method, request url: / heihei hei, respond and send a file.
Use the sendFile() method to respond to the file. The absolute path is required. You can use the__ dirname.
const express = require('express');
const app = express();
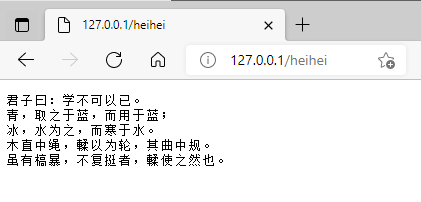
app.get('/heihei',(req,res)=>{
res.sendFile(__dirname+'/heihei.text')
})
app.listen(80,()=>{
console.log('Successfully run in http://127.0.0.1');
})
heihei.text file and index JS files are in the same directory, so__ Add '/ heihei. After dirname Text 'can:
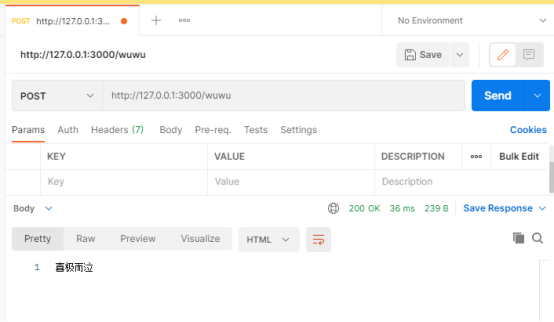
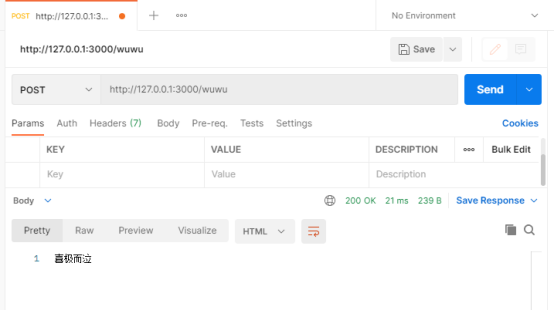
Exercise 3: get the request method, request url: / wuwu, and jump to the web page if you want to make a request https://www.baidu.com .
You can use the res.redirect() method, which is a redirect of the response and can jump to another url.
const express = require('express');
const app = express();
app.get('/wuwu',(req,res)=>{
    res.redirect('https://www.baidu.com')
})
app.listen(80,()=>{
    console.log('Successfully run in http://127.0.0.1');
})

(3) Route matching process
Every time a request arrives at the server, it needs to go through the routing matching first. Only after the matching is successful will the corresponding processing function be called.
When matching, it will be matched according to the routing order. If the request type and the requested URL are matched successfully at the same time, Express will transfer the request to the corresponding function function for processing.
be careful:
① Match in defined order
② If the request type and the requested URL match successfully at the same time, the corresponding processing function will be called.
2. Use of routing
(1) Simple usage
const express = require('express');
//Create a web server named app
const app = express();
//Mount routing
app.get('/',(req,res)=>{
    res.send('Hello World!');
})
app.post('/',(req,res)=>{
    res.send('Post Request');
})
//Start the web server
app.listen(80,()=>{
    console.log('server running at http://127.0.0.1');
})
After starting the server, you can open postman for testing. The results are as follows:

(2) Modular routing
In order to facilitate the modular management of routes, express does not recommend attaching routes directly to the Express instance, but recommends separating routes into separate modules, that is, through express Router () implements modular routing management. Also called router, it puts all routes into it.
The steps to separate the route into separate modules are as follows:
① Create the corresponding routing module js file to create a web server app
② Call express The router() function creates a routing object
③ Mount a specific route to the routing object
④ Use module Exports share routing objects outward
⑤ Use app The use() function registers the routing module
Note: app The use () function is used to register the global middleware. Mount the specified middleware function on the specified path: when the requested path base matches the path, the middleware function will be executed.
app.use([path,] callback [, callback...])
Path: the path where the middleware function is called, which can be:
A string representing a path;
A path mode;
Regular expression pattern matching path;
An array of any combination of the above.
Because the default path is "/", middleware without path will execute every request to the application.
Callback: callback function, which can be:
The function of a middleware;
A series of middleware functions (separated by commas);
Middleware function array;
The combination of the above points.
Multiple callback functions like middleware can be provided
(3) Create routing module
express. The route () method is used to create the route object route, and then use route Get() and route Post () to register the secondary route under the current module route object, which is a simple modular route.
Secondary routes can be defined under the route object. The example code is as follows:
route.get('Request path', 'Request processing function');   // Receive and process GET requests under route
route.post('Request path', 'Request processing function'); // Receive and process POST requests under route
Examples are as follows:
var express = require('express');//Import express
var router = express.Router();//Create routing object
router.get('/user/list',function(req,res){//Mount the route to get the user list
res.send('Get user list');
})
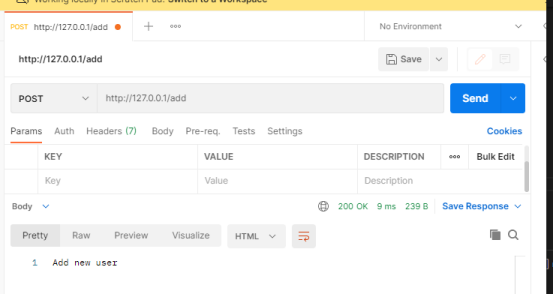
router.post('/user/add',function(req,res){//Mount routes for adding users
res.send('Add new user');
})
module.exports = router;//Export routing objects outward
(4) Register routing module
The format is as follows:
Let's first create a route JS as a routing module, which creates two secondary routes.
var express = require('express');//Import express
var router = express.Router();//Create routing object

router.get('/list',function(req,res){//Mount the route to get the user list
    res.send('Get user list');
})
router.post('/add',function(req,res){//Mount routes for adding users
    res.send('Add new user');
})
module.exports = router;//Export routing objects outward
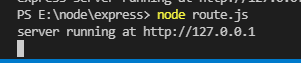
Then in index Create a server in JS and register the routing module,
Use app Use() registers the route modular route.
const express = require('express');
const app = express()
//Import routing module
const router = require('./route');
//Register routing module
app.use(router);

app.listen(80,()=>{
    console.log('express server running at http://127.0.0.1')
})
Start the server, and then verify whether it is successful in postman software:


(5) Prefix routing module
The format is as follows:
//Import routing module
const userRouter = require('./router');
//Use app Use() registers the routing module and adds a unified access prefix / api
app.use('/api',userRouter)
4, Managed static resources
1,express.static()
express.static(root, [options])
Specifies the root parameter of the static asset. This function determines the file to be served by combining req. The Url of the provided root directory. When the file is not found, instead of sending a 404 response, it calls next() to move to the next middleware, allowing stacking and fallback.
The properties of the option object can be viewed in the following website:
https://www.expressjs.com.cn/4x/api.html#express.static
Via express Static (), we can easily create a static resource server to host all static resources to a directory. If the browser requests static resources, it will automatically find them in the directory without creating a route. For example, pictures, CSS files and JavaScript files in the public directory can be opened to the public through the following code:
app.use(express.static('public'))
In this way, when the browser requests static resources, it will automatically find them in the public directory, and there is no need to create a separate route response file.
Note: Express finds files in the specified static directory and provides access paths to external resources. Therefore, the name of the directory where the static files are stored will not appear in the URL.
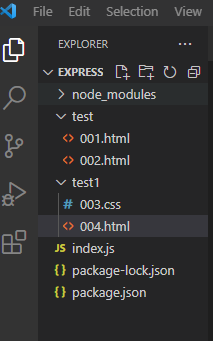
Examples are as follows:
const express = require('express');
const app = express()
//Call express The static () method can provide static resources quickly
app.use(express.static('test'))
app.listen(80,()=>{
    console.log('express server running at http://127.0.0.1')
})
Let's write two html files under the test folder:

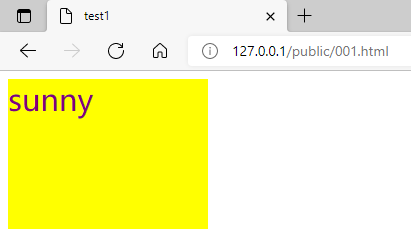
001. The HTML code is as follows:
<!DOCTYPE html>
<html lang="en">
<head>
    <meta charset="UTF-8">
    <meta http-equiv="X-UA-Compatible" content="IE=edge">
    <meta name="viewport" content="width=device-width, initial-scale=1.0">
    <title>test1</title>
</head>
<style>
    div{
        width: 200px;
        height: 150px;
        font-size: 30px;
        color: purple;
        background-color: yellow;
    }
</style>
<body>
    <div>sunny</div>
</body>
</html>
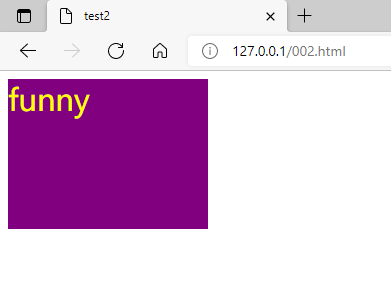
002. The HTML code is as follows:
<!DOCTYPE html>
<html lang="en">
<head>
    <meta charset="UTF-8">
    <meta http-equiv="X-UA-Compatible" content="IE=edge">
    <meta name="viewport" content="width=device-width, initial-scale=1.0">
    <title>test2</title>
</head>
<style>
    div{
        width: 200px;
        height: 150px;
        font-size: 30px;
        color: yellow;
        background-color: purple;
    }
</style>
<body>
    <div>funny</div>
</body>
</html>
After starting the server, enter the corresponding URL in the browser, and the results are as follows:

2. Hosting multiple static resource directories
To host multiple static resource directories, you need to call express multiple times Static() function:
app.use(express.static('test'))
app.use(express.static('test1'))
Note: when accessing static resource files, express The static () function will find the required files according to the order in which the directories are added, and will not look down again after finding them.
Examples are as follows:
const express = require('express');
const app = express()
//Call express The static () method can provide static resources quickly
app.use(express.static('test'))
app.use(express.static('test1'))

app.listen(80,()=>{
    console.log('express server running at http://127.0.0.1')
})
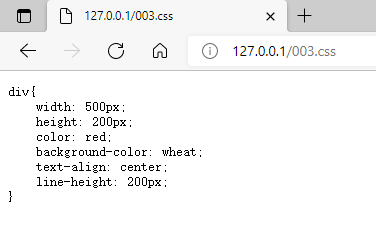
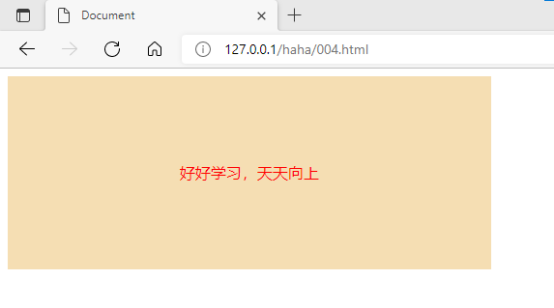
Let's create another test2 folder and write 003 CSS and 004 HTML two files.
003.css:
div{
    width: 500px;
    height: 200px;
    color: red;
    background-color: wheat;
    text-align: center;
    line-height: 200px;
}
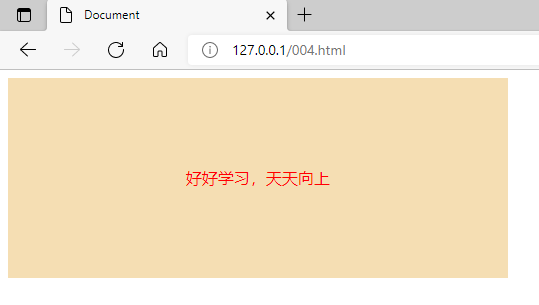
004.html:
<!DOCTYPE html>
<html lang="en">
<head>
    <meta charset="UTF-8">
    <meta http-equiv="X-UA-Compatible" content="IE=edge">
    <meta name="viewport" content="width=device-width, initial-scale=1.0">
    <title>Document</title>
    <link rel="stylesheet" href="./003.css">
</head>
<body>
    <div>
        study hard and make progress every day
    </div>
</body>
</html>
Now start the server and enter the corresponding URL in the browser. The results are as follows:

3. Mount path prefix
If you want to mount the path prefix before the managed static resource access path, you can use the following methods:
app.use('/public',express.static('test'))
In this way, you can access the files in the test directory through the address prefixed with / public:
http://localhost:80/public/001.html
http://localhost:80/public/002.html
Examples are as follows:
const express = require('express');
const app = express()
//Call express The static () method can provide static resources quickly
app.use('/public',express.static('test'))
app.use('/haha',express.static('test1'))

app.listen(80,()=>{
    console.log('express server running at http://127.0.0.1')
})
5, nodemon
1. Why use nodemon
Debugging node when writing JS project, if you modify the code of the project, you need to frequently manually shut down and then restart, which is very cumbersome. Now we can use nodemon( https://www.npmjs.com/package/nodemon )This tool can monitor the changes of project files. When the code is modified, nodemon will automatically help us restart the project, which is very convenient for development and debugging.
2. Install nodemon
Run the following command in the terminal to install nodemon as a globally available tool:
npm install -g nodemon

3. Using nodemon
When based on node When JS writes a website application, the traditional way is to run node app JS command to start the project. The disadvantage of this is that after the code is modified, you need to restart the project manually.
Use nodemon aoo JS to start the project has the advantage that after the code is modified, it will be monitored by nodemon, so as to realize the effect of automatically restarting the project.
Examples are as follows:
const express = require('express');
const app = express()
//Call express The static () method can provide static resources quickly
app.use(express.static('./test'))

app.listen(80,()=>{
    console.log('express server running at http://127.0.0.1')
})
We first use nodemon index JS start server:
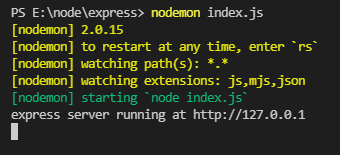
Now modify the code:
const express = require('express');
const app = express()
//Call express The static () method can provide static resources quickly
app.use('/public',express.static('./test'))
app.listen(80,()=>{
console.log('express server running at http://127.0.0.1')
})

You can see from the terminal that the project is restarted automatically.
6, Express Middleware
1. Concept of Middleware
(1) What is middleware
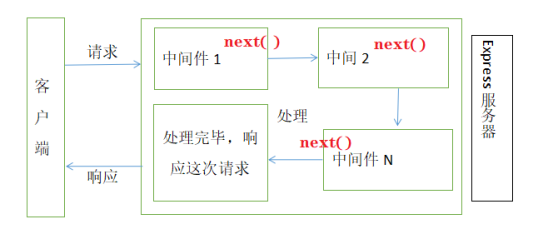
Middleware: the official interpretation is that the middleware function is a function that can access the request object (req), response object (res) and the next function in the request response cycle of the application. The next function is a function in the Express router. When it is called, it will execute the middleware that replaces the current middleware.
It refers specifically to the intermediate processing link of business process. Middleware can be understood as a series of methods to process client requests. If the request is compared to water flow, the middleware is the valve. The valve can control whether the water flow continues to flow downward, or conduct sewage treatment on the water flow at the current valve, and then continue to flow downward after the treatment is completed. The next middleware function is usually represented by a variable named next.
① Tasks that middleware functions can perform
Execute any code;
Change the request and response object;
End the request response cycle;
Call the next Middleware in the stack.
② Applications that can be realized by middleware mechanism
Route protection: when the client accesses the login page, it can first use the middleware to judge the login status of the user. If the user does not log in, it will intercept the request, directly respond to the prompt information, and prohibit the user from jumping to the login page.
Website maintenance announcement: define the middleware to receive all requests at the top of all routes, directly respond to the client, and prompt that the website is under maintenance.
Custom 404 page: define the middleware that receives all requests at the top of all routes, directly respond to the client, and prompt 404 page error information.
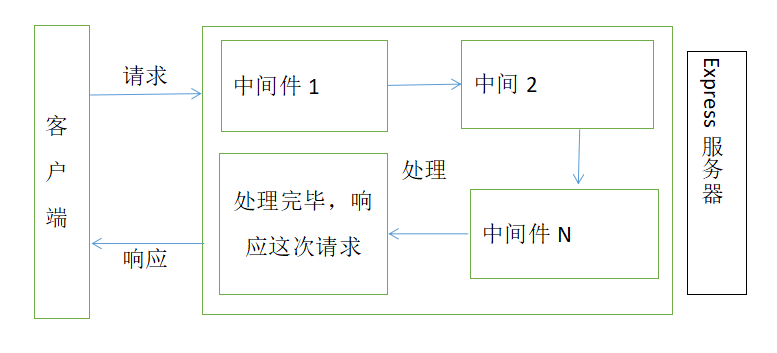
(2) Call process of Express Middleware
When a request arrives at the Express server, multiple middleware can be called continuously to preprocess the request.
If the current middleware function does not end the request response cycle, it must call next() to pass control to the next middleware function. Otherwise, the request will be shelved.
(3) Format of Express Middleware
Middleware is mainly composed of middleware methods and request processing functions.
Middleware method by Express Provide and be responsible for intercepting requests.
The request processing function is written by the developer and is responsible for processing the request.
Common middleware methods include app get(),
app.post(),app.use(),Its basic grammatical form is as follows.
app.get('Request path', 'Request processing function');  // Receive and process GET requests
app.post('Request path', 'Request processing function'); // Receive and process POST requests
app.use('Request path', 'Request processing function'); // Receive and process all requests and call other modules
For example, the middleware of Express is essentially a function processing function. The format is as follows:
const express = require('express');
const app = express();
app.get('/',function(req,res,next){
    next();
})
app.listen(3000);
Note: the formal parameter list of the middleware function must contain the next parameter, while the routing processing function only contains req and res.
(4) Function of next function
The next function is the key to realize the continuous call of multiple middleware. It means to transfer the flow relationship to the next middleware or route.
2. Simple usage of Express Middleware
(1) Define middleware functions
The simplest middleware function can be defined as follows:
//The constant bear points to a middleware function
const bear = function(req,res,next){
    console.log('Middleware function');
    //Note: after the business processing of the current middleware is completed, the next() function must be called
    //Indicates that the flow relationship is transferred to the next middleware or route
    next()
}
(2) Globally effective Middleware
app. The request path parameter of the use () method can be omitted. When omitted, it means that no path is specified, and all requests will be processed, that is, the middleware that takes effect globally.
Any request initiated by the client will trigger the middleware after it reaches the server, which is called the middleware with global effect.
By calling app Use (middleware function), you can define a globally effective middleware.
Now let's take an example. First, write an index JS file:
const express = require('express');
const app = express();
//The constant bear points to a middleware function
const bear = function(req,res,next){
    console.log('Middleware function');
    next()
}
//Globally effective Middleware
app.use(bear)
//Create route
app.get('/haha',(req,res)=>{
    res.send('be jubilant')
})
app.post('/wuwu',(req,res)=>{
    res.send('Cry with joy')
})
app.listen(3000,()=>{
    console.log('express server running at http://127.0.0.1')
});
After starting the server, we can see through the postman test that the middleware bear that takes effect globally will be triggered every time a request is made, print out the 'middleware function', and then transfer the flow relationship to the next route of the request through the next() function.
(3) Define a simplified form of global Middleware
The format is as follows:
app.use(function(req,res,next){
    console.log('Middleware function');
    next()
})
(4) Role of Middleware
Multiple middleware share the same req and res, so we can uniformly add custom attributes and methods for req or res objects in the upstream middleware for downstream middleware or routing.
Examples are as follows:
const express = require('express');
const app = express();
app.use(function(req,res,next){
    //Gets the time when the request arrived at the server
    const time = Date.now()
    //The user-defined req attribute is shared to all the subsequent routes
    req.gettime = time;
    next()
})

app.get('/haha',(req,res)=>{
    res.send('be jubilant'+req.gettime)
})

app.post('/wuwu',(req,res)=>{
    res.send('Cry with joy'+req.gettime)
})

app.listen(3000,()=>{
    console.log('express server running at http://127.0.0.1')
});
Start the server and test with postman:


It can be seen that since the middleware uses the next() function to pass the defined attribute gettime of req to the following route, req can be used when requesting Gettime property value.
(5) Define multiple global Middleware
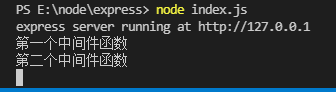
You can use app Use() continuously defines multiple global middleware, which means that requests from the same path are processed multiple times. After the client requests arrive at the server, Express will match the middleware from top to bottom by default. Examples are as follows:
const express = require('express');
const app = express();
app.use(function(req,res,next){
    console.log('First Middleware');
    next()
})
app.use(function(req,res,next){
    console.log('Second Middleware');
    next()
})
app.get('/haha',(req,res)=>{
    res.send('be jubilant')
})

app.post('/wuwu',(req,res)=>{
    res.send('Cry with joy')
})

app.listen(3000,()=>{
    console.log('express server running at http://127.0.0.1')
});

(6) Partially effective Middleware
Don't use app The middleware defined by use () is called locally effective middleware, for example:
const express = require('express');
const app = express();
//The constant bear points to a middleware function
const bear = function(req,res,next){
    console.log('Middleware function');
    next()
}
//The middleware bear is only effective in the current route. This usage belongs to the middleware with local effectiveness
app.get('/haha',bear,(req,res)=>{
    res.send('be jubilant')
})
//The middleware bear will not affect the following routes
app.post('/wuwu',(req,res)=>{
    res.send('Cry with joy')
})
app.listen(3000,()=>{
    console.log('express server running at http://127.0.0.1')
});
It can be seen from the results that the middleware value at this time affects the routes using it and will not affect all routes.
(7) Define multiple local Middleware
Multiple local middleware can be used in routing in the following two equivalent ways:
app.get('/',middle1,middle2,(req,res)=>{})
app.get('/',[middle1,middle2],(req,res)=>{})
Examples are as follows:
const express = require('express');
const app = express();

const bear = function(req,res,next){
    console.log('First middleware function');
    next()
}
const peach = function(req,res,next){
    console.log('The second middleware function');
    next()
}
app.get('/haha',(req,res)=>{
    res.send('be jubilant')
})

app.post('/wuwu',bear,peach,(req,res)=>{
    res.send('Cry with joy')
})
app.listen(3000,()=>{
    console.log('express server running at http://127.0.0.1')
});
(8) Precautions
① the middleware must be registered before routing, because after a request arrives at the server, it is matched from front to back in order. Once the route is matched successfully, it will respond directly. If the middleware is placed behind the route, it cannot be called;
② the request sent by the client can be processed by calling multiple middleware continuously;
③ after executing the business code of the middleware, don't forget to call the next() function;
④ in order to prevent code logic confusion, do not write additional code after calling the next() function;
⑤ when multiple middleware are called continuously, req and res objects are shared among multiple middleware.
3. Classification of Middleware
Express officially divides the common middleware usage into five categories:
Application level middleware, routing level middleware, error level middleware, Express built-in middleware and third-party middleware.
(1) Application level Middleware
Via app Use () or app Get () or app Post (), the middleware bound to the app instance, is called application level middleware, as shown in the following code:
//Application level middleware (Global Middleware)
app.use((req,res,next)=>{
    next()
})
//Application level middleware (local Middleware)
const middle = (req,res,next)=>{
    next()
}
app.get('/',middle,(req,res)=>{})
(2) Routing level Middleware
Bind to express The middleware on the router () instance is called the routing level middleware. Its usage is no different from that of application level middleware, except that application level middleware is bound to app instance and routing level middleware is bound to router instance. Examples are as follows:
var express = require('express');//Import express
var router = express.Router();//Create routing object
//Routing level Middleware
router.use(function(req,res,next){
    console.log('haha');
    next()
})
app.use('/',router);
(3) Error level Middleware
Function of error level middleware: it is specially used to capture abnormal errors in the whole project, so as to prevent the abnormal collapse of the project.
Error handling middleware always accepts four parameters. Four parameters must be provided to identify it as an error handling middleware function. Even if you do not need to use the next object, you must specify it to maintain the signature. Otherwise, the next object will be interpreted as regular middleware and will not be able to handle the error.
Format: in the function processing function of error level middleware, the four formal parameters are (err,req,res,next) from front to back.
Examples are as follows:
We throw an error artificially inside the route, so that the program will stop and res.send() cannot run. At this time, we define an error level middleware, which can capture the error, print the error information in the server and respond to the error information to the client, so as to prevent the program from crashing.
const express = require('express')
const app = express()
//Define route
app.get('/',(req,res)=>{
    //Throw a custom error
    throw new Error('This is a mistake')
    res.send('haha')
})
//Error level middleware captures the abnormal errors of the whole project, so as to prevent the collapse of the program
app.use((err,req,resnext)=>{
    //Print error messages in the server
    console.log('The error is:'+err.message);
    //Respond to the client about the error
    res.send('Error!'+err.message);
})
app.listen(80,()=>{
    console.log('express server running at http://127.0.0.1');
})
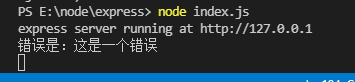

Note: the middleware of error parts must be registered after all routes, so that the error information can be captured.
(4) Express built-in Middleware
From express4 Since version 16.0, express has built three commonly used middleware, which greatly improves the development efficiency and experience of Express Project:
①express.static is a built-in middleware that quickly manages static resources, such as HTML files, pictures, CSS styles, etc. (no compatibility)
②express.json parsing request body data in JSON format (compatible, only available in version 4.16.0 +)
③express.urlencoded parses the request body data in URL encoded format (compatible, only available in version 4.16.0 +)
The format is as follows:
//Configure the built-in middleware for parsing application/json format data
app.use(express.json())
//Configure the built-in middleware for parsing application/x-www-form-urlencoded format data
app.use(express.urlencoded({
    extended:false
}))
express. Examples of JSON usage are as follows:
const express = require("express")
//Create a server instance of express
const app = express()
//Note: in addition to the error level middleware, other middleware must be configured before routing
//Configure the built-in middleware for parsing application/json format data
app.use(express.json())
app.post('/user',(req,res)=>{
    //On the server, you can use req The body attribute receives the request body data sent by the client
    //By default, if the middleware for parsing form data is not configured, req The default value of body is undefined
    console.log(req.body);
    res.send('ok')
})
app.listen(80,function(){
    console.log('express server running at http://127.0.0.1');
})
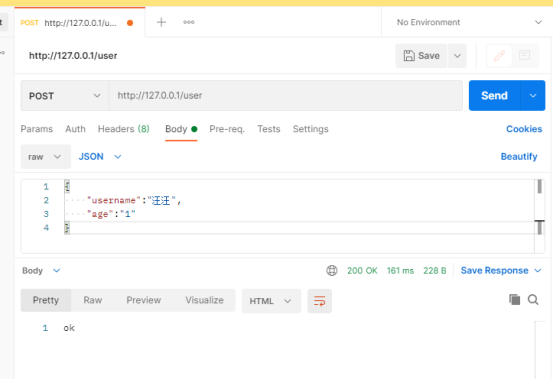
First, we create a server and define the post route. After starting the server, we can send a request Body data in JSON format to the server through postman. Note: the request Body data should be sent in the Body panel, so we switch the Params panel in postman to the Body panel, click raw, select JSON, and send the following data to the server:
{
    "username":"Woof",
    "age":"1"
}
Click send, the result is as follows, and the server successfully receives it.

express. Examples of the use of urlencoded are as follows:
const express = require("express")
//Create a server instance of express
const app = express()
//Note: except for the middleware with error level, other middleware must be configured before routing
//Configure the built-in middleware for parsing application/x-www-form-urlencoded format data
app.use(express.urlencoded({
    extended:false
}))
app.post('/user',(req,res)=>{
    //On the server side, you can use req Body to obtain form data in JSON format and data in URL encoded format
    console.log(req.body);
    res.send('ok')
})
app.listen(80,function(){
    console.log('express server running at http://127.0.0.1');
})
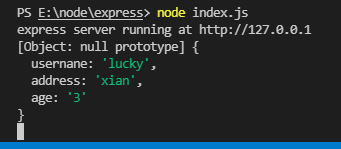
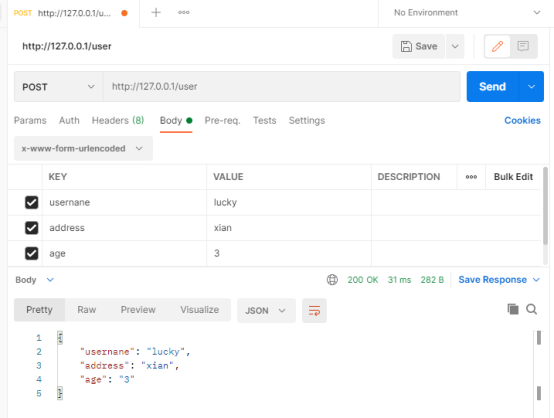
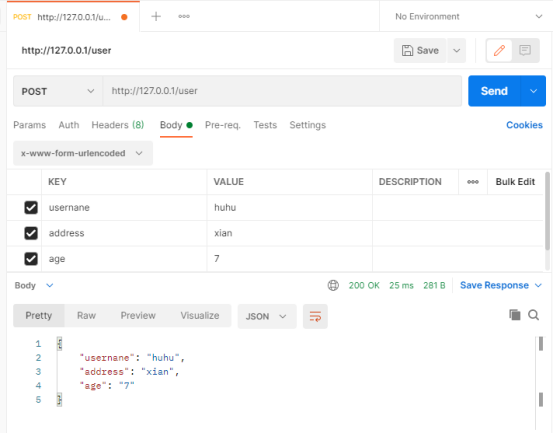
First, we create a server and define the post route. After starting the server, we can send a request Body data in x-www-form-urlencoded format to the server through postman, which is in key value pair format. We switch the Params panel in postman to the Body panel, and then click x-www-form-urlencoded to send the following data to the server. Click send, From the result, we can see that the server successfully received the request Body data.


(5) Third party Middleware
The middleware, which is not officially built in but developed by a third party, is called third-party middleware. In the project, the third-party middleware can be downloaded and configured on demand, so as to improve the development efficiency of the project.
For example: in express@4.16.0 In previous versions, body parser, a third-party middleware, was often used to parse the request body data. The steps are as follows:
① Run NPM install body parser to install middleware;
② Use require to import middleware;
③ Call app Use() register and use middleware;
app.use(bodyParser.urlencoded({ extended:false }))
④ Use req in the routing of post requests Body returns the object.
Examples are as follows:
const express = require("express")
//Create a server instance of express
const app = express()
//Middleware body parser for importing and parsing form data
const parser = require('body-parser')
//Use app Use () registers the body parser middleware and parses the data requested by post into objects.
app.use(parser.urlencoded({
//It means that instead of using the third-party qs module, the core module querystring is used to parse the query string as an object
extended:false
}))
app.post('/user',(req,res)=>{
    //If there is no middleware configured to parse form data, req Body is equal to undefined by default
    console.log(req.body);
    res.send('ok')
})

app.listen(80,function(){
    console.log('express server running at http://127.0.0.1');
})

Note: Express is built-in Urlencoded middleware is further encapsulated based on the third-party middleware body parser.
4. Custom Middleware
(1) Requirements description and implementation steps
Manually simulate a similar to express Middleware such as urlencoded is used to parse the form data submitted to the server by POST.
Implementation steps:
① Define Middleware
② Listen for data events of req
③ Listen for the end event of res
④ Use the querystring module to parse the request body data
⑤ Mount the parsed data object as req body
⑥ Encapsulate custom middleware into modules
(2) Define Middleware
Use app Use() to define the middleware with global effect. The code is as follows:
//Use app Use() registers middleware for parsing form data
app.use(function(req,res,next){
    //Define the specific business logic of Middleware
})
(3) Listen for data events of req
In the middleware, you need to listen to the data event of the req object to get the data sent by the client to the server.
If the amount of data is large and cannot be sent at one time, the client will cut the data and send it to the server in batches. Therefore, the data event may be triggered many times. Each time the data event is triggered, the obtained data is only a part of the complete data, and the received data needs to be spliced manually.
The code is as follows:
//Define variables to store the request body data sent by the client
let str = ''
//Listen for the data event of req object (new request body data sent by the client)
req.on('data',(chunk)=>{
    //Splice request body data, implicitly converted to string
    str += chunk
})
(4) Listen for the end event of req
When the request body data is received, the end event of req will be triggered automatically. Therefore, we can get and process the complete request body data in the end event of req. The code is as follows:
//Listen for the end event of req object (triggered automatically after the request body is sent)
req.on('end',()=>{
    //Print the complete request body data in str
    console.log(str);
})
(5) Use the querystring module to parse the request body data
Node.js has a built-in querystring module, which is specially used to process query strings. Through the parse() function provided by this module, you can easily parse the query string into the format of the object. The example code is as follows:
//Import the node that handles querystring JS built-in module
const qs = require('querystring')
...
        //Call QS Parse () method parses the request body data in string format into object format
        const body = qs.parse(str);
(6) Mount the parsed data object as req body
The same req and res are shared between upstream middleware and downstream middleware and routing. Therefore, we can mount the parsed data as a custom attribute of req and name it req Body, used downstream. The code is as follows:
    req.on('end',()=>{
        //Call QS Parse () method parses the request body data in string format into object format
        const body = qs.parse(str);
        //Mount the parsed request body object as req Body attribute
        req.body = body;
        next()
    })
(7) All codes
All codes are as follows:
const express = require("express")
//Create a server instance of express
const app = express()
//Import the node that handles querystring JS built-in module
const qs = require('querystring')

//Use app Use() registers middleware for parsing form data
app.use(function(req,res,next){
    //Define the specific business logic of Middleware
    //Define variables to store the request body data sent by the client
    let str = ''
    //Listen for the data event of req object (new request body data sent by the client)
    req.on('data',(chunk)=>{
        //Splice request body data, implicitly converted to string
        str += chunk
    })
    //Listen for the end event of req object (triggered automatically after the request body is sent)
    req.on('end',()=>{
        //Call QS Parse () method parses the request body data in string format into object format
        const body = qs.parse(str);
        //Mount the parsed request body object as req Body attribute
        req.body = body;
        next()
    })
})

app.post('/user',(req,res)=>{
    res.send(req.body)
})

app.listen(80,function(){
    console.log('express server running at http://127.0.0.1');
})
We can open postman to test:

(8) Encapsulate custom middleware into modules
In order to optimize the results of the code, we can encapsulate the customized middleware functions into independent modules. The example code is as follows:
First, we create a route JS file, which contains customized middleware functions, and then export it:
const qs = require('querystring')
function bodyParser(req,res,next){
        //Define the specific business logic of Middleware
    //Define variables to store the request body data sent by the client
    let str = ''
    //Listen for the data event of req object (new request body data sent by the client)
    req.on('data',(chunk)=>{
        //Splice request body data, implicitly converted to string
        str += chunk
    })
    //Listen for the end event of req object (triggered automatically after the request body is sent)
    req.on('end',()=>{
        //Call QS Parse () method parses the request body data in string format into object format
        const body = qs.parse(str);
        //Mount the parsed request body object as req Body attribute
        req.body = body;
        next()
    })
}
//Export the middleware function that parses the request body data
module.exports = bodyParser
Secondly, we create index JS file, which imports the customized middleware module and uses it to parse the request body data:
const express = require("express")
//Create a server instance of express
const app = express()
//Import self encapsulated custom modules
const customBodeParser = require('./route')
//Register the customized middleware functions as globally available middleware
app.use(customBodeParser)

app.post('/user',(req,res)=>{
    res.send(req.body)
})

app.listen(80,function(){
    console.log('express server running at http://127.0.0.1');
})
The test results using postman are as follows:

7, Create an Express project in Webstorm
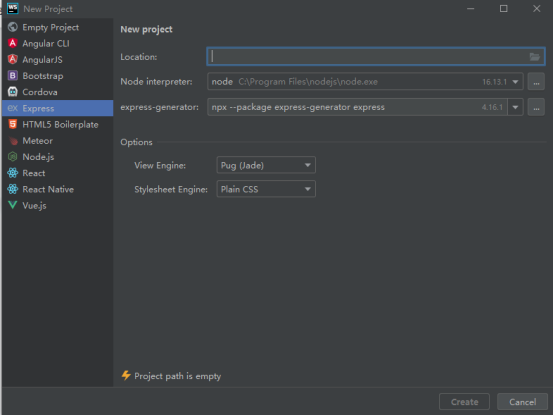
Select a new project and create an express project named Express demo. WebStorm will create it directly.
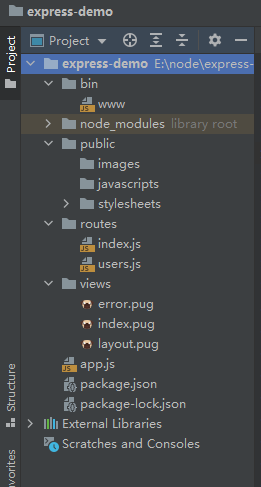
1. Modify the port number of the project: www - >
2. Static resource directory of the project: public
3. Routing folder: routes
4. View folder (page file): views
5. Project startup file (entry file): app js
Attachment:
(1) The moment module monitors the changes of the source code, and will automatically re run the program if the source code changes;
(2) The command to run the express project in cmd: npm start.