Reproduced in: http://c.biancheng.net/numpy/
NumPy is the abbreviation of Numerical Python. It is a library composed of multidimensional array objects (ndarray) and a collection of function s that process these arrays. Using NumPy library, you can perform mathematical operations and related logical operations on arrays. NumPy is not only an extension package for Python, but also a basic package for Python scientific computing.
This set of Python NumPy tutorials explains the basic knowledge of NumPy, such as the architecture of NumPy, the common functions of NumPy arrays, and the use of different index types. At the end of this tutorial, we explained the combination of NumPy and Matplotlib. In order to make it easier for everyone to learn better, the combination of knowledge points and examples is widely used in the tutorial.
readers
This tutorial is for beginners who want to learn the basic knowledge of NumPy. After completing this tutorial, your knowledge level will be improved to a certain extent. On this basis, you can further learn the software packages associated with NumPy, such as Pandas and Matplotlib.
Reading conditions
Before learning this set of tutorials, you should have a basic understanding of computer programming and master the basic knowledge of Python programming language, which will help you learn this set of tutorials.
What is NumPy
NumPy's full name is "Numeric Python". It is a third-party extension package of python, which is mainly used to calculate and process one-dimensional or multi-dimensional arrays.
In terms of array arithmetic calculation, NumPy provides a large number of mathematical functions. The bottom layer of NumPy is mainly written in C language, so it can perform numerical calculation at high speed. NumPy also provides a variety of data structures, which can be very suitable for the operation of arrays and matrices.

NumPy's predecessor was the Numeric package, which was developed by Jim Hugunin. After that, he also developed another similar package Numarray, which has more comprehensive functions than the former. In 2005, Travis Oliphant integrated NumPy by integrating the functions of Numarray and Numeric packages. The latest version of NumPy, 1.19.2, was released on September 10, 2020.
As an open source project, NumPy is jointly developed and maintained by many collaborators, which is also one of the advantages of NumPy.
NumPy usage requirements
With the vigorous development of Data Science (DS for short, including branches such as big data analysis and processing, big data storage and data capture), data analysis libraries such as NumPy, Science (Python Scientific Computing Library) and Pandas (NumPy based data processing library) have increased a lot, and they all have relatively simple syntax formats.
NumPy has very good performance in matrix multiplication and array shape processing. In addition, NumPy has fast calculation speed, which are important reasons why NumPy has become a data analysis tool.
Array shape can be understood as the dimension of array, such as one-dimensional array, two-dimensional array, three-dimensional array, etc; Taking a two-dimensional array as an example, changing the shape of the array is to exchange the rows and columns of the array, that is, rotate the array 90 degrees.
NumPy can process a large amount of data conveniently and efficiently. What are the advantages of using NumPy for data processing? The summary is as follows:
- NumPy is the basic library of Python scientific computing;
- NumPy can perform efficient mathematical operations on arrays;
- The ndarray object of NumPy can be used to build multidimensional arrays;
- NumPy can perform Fourier transform and reshape multi-dimensional array shape;
- NumPy provides linear algebra and built-in functions for random number generation.
NumPy application scenario
NumPy is usually used in combination with software packages such as SciPy (Python Scientific Computing Library) and Matplotlib (Python Drawing Library), which is widely used to replace the use of MatLab.
MatLab is a powerful mathematical calculation software, which is widely used in data analysis, electronic communication, deep learning, image processing, machine vision, quantitative finance and other fields. However, with the rapid development of Python language in recent years, Python is regarded as a more suitable programming language to replace MatLab. You can use Python toolkits such as NumPy, SciPy and Matplotlib to build a scientific computing environment. For example, Anaconda is an open source Python distribution, which contains more than 180 scientific packages such as Python and NumPy and their dependencies.
Because NumPy is an extension package of python, you should have some basic knowledge of Python before learning NumPy, which will be of great benefit to the study of this tutorial. If you want to know more about NumPy, you can visit NumPy's official website( https://numpy.org/ ).
NumPy download and installation
NumPy is a third-party extension package for Python, but it is not included in the python standard library, so you need to install it separately. This section describes how to install NumPy on different operating systems.
Windows system installation
There are two common ways to install NumPy under Windows system, which are introduced below.
Using Python package manager pip to install NumPy is the simplest and lightest method. Simply execute the following command:
pip install numpy
In actual projects, NumPy is usually used together with SciPy package. SciPy can be regarded as an extension of NumPy library, which adds many engineering calculation functions on the basis of NumPy. Therefore, it is a good choice to install them at the same time. However, if you only want to learn about NumPy, you can not consider this installation method.
Note: if you directly use pip to install SciPy under Windows, an error will be reported. We need to solve the dependency problem of SciPy, so it is not recommended to use pip to install SciPy package. The following describes how to install using the SciPy stack.
First, we need to know what is SciPy stack? In fact, it is an integrated platform for scientific computing software packages. This kind of platform includes commonly used numerical computing and machine learning libraries, such as NumPy, Matplotlib, science library, IPython, etc., and it can automatically solve the dependency between packages. All the above software packages can be installed by installing an integrated platform. Why not
The following describes several commonly used SciPy stacks, mainly including the following:
Anaconda (download from official website: https://www.anaconda.com/ )Is an open source Python distribution, which contains more than 180 science packages such as NumPy and SciPy and their dependencies. In addition to supporting Windows, it also supports Linux and Mac systems. Anaconda is widely used at present, so it is recommended to install it.
Anaconda's download file is about 500 MB. You can choose to install Miniconda. It is a lightweight version of anaconda, which only needs more than 40 megabytes.
Figure 1: Download diagram of Anaconda official website( Click to see the high-definition picture)
Python(x,y) (download address: https://python-xy.github.io/ )It is a software developed based on python, Qt (graphical user interface) and Spyder (interactive development environment). It is mainly used for engineering projects such as numerical calculation, data analysis and data visualization. At present, it only supports Python 2 version.
Pyzo (download address: https://pyzo.org/ )It is a cross platform Python IDE, written based on Python 3. It is very suitable for scientific computing. Its design purpose is to simplify and provide efficiency.
WinPython (download address: https://sourceforge.net/projects/winpython/files/ )The free Python distribution includes common scientific computing packages and Spyder IDE development environment, but only supports Windows systems.
MacOSX system installation
Although the Mac system comes with its own package manager Homebrew, it cannot download NumPy and other scientific computing packages, so it needs to be installed in the following ways:
$ pip3 install numpy scipy matplotlib -i https://pypi.tuna.tsinghua.edu.cn/simple
Note: after the - i parameter, it refers to the domestic download source to speed up the download speed.
Linux system installation
In Linux system, you can choose to install only one NumPy package separately, or install multiple packages at the same time. The following describes the specific installation commands for different Linux distributions, as follows:
1) Ubuntu/Debian
For Ubuntu/Debian system, you can execute the following commands on the terminal:
$ sudo apt-get install python-numpy python-scipy python-matplotlib ipython ipython-notebook python-pandas python-sympy python-nose
2) Redhat/CentOS
Execute the following commands on Redhat/CentOS system to install NumPy and other scientific computing packages:
$ sudo yum install numpy scipy python-matplotlib ipython python-pandas sympy python-nose
Note: different packages must be separated by "one space".
Finally, verify whether the installation is successful, as shown below:
Open the Python interactive interpreter and import the NumPy module, as shown in Figure 2 below. If there is no error prompt, it indicates that the installation has been successful.
Figure 2: Numpy installed successfully
Note: Windows system is taken as an example for verification, and the verification method of Linux is the same.
NumPy ndarray object
NumPy defines an n-dimensional array object, referred to as the ndarray object, which is an array collection composed of a series of elements of the same type. Each element in the array occupies a memory block of the same size. You can get each element in the array by index or slice.
The ndarray object has a dtype attribute, which is used to describe the data type of the element. The relevant knowledge will be described in< NumPy data type >This section gives a detailed introduction.
The ndarray object adopts the index mechanism of the array, maps each element in the array to the memory block, and arranges the memory block according to a certain layout. There are two common layout methods, namely, by row or by column.
Create an ndarray object
You can create an ndarray object through NumPy's built-in function array(), and its syntax format is as follows:
numpy.array(object, dtype = None, copy = True, order = None,ndmin = 0)
The following table describes its parameters:
| Serial number | parameter | Description |
|---|---|---|
| 1 | object | Represents an array sequence. |
| 2 | dtype | Optional parameter that allows you to change the data type of the array. |
| 3 | copy | Optional parameter, indicating whether the array can be copied. The default is True. |
| 4 | order | There are three optional values for which memory layout to create an array: C (row sequence) / F (column sequence) / a (default). |
| 5 | ndim | Specifies the dimension of the array. |
Create a one-dimensional array:
a=numpy.array([1,2,3])
Example code:
import numpy
a=numpy.array([1,2,3])#Building one-dimensional arrays using lists
print(a)
[1 2 3]
print(type(a))
#ndarray array type
<class 'numpy.ndarray'>
Create multidimensional array:
b=numpy.array([[1,2,3],[4,5,6]])
Example code:
b=numpy.array([[1,2,3],[4,5,6]])
print(b)
[[1 2 3]
[4 5 6]]
If you want to change the data type of array elements, you can set dtype by using, as shown below:
c=numpy.array([2,4,6,8],dtype = "data type name")
Now change the element type in the c array to the plural type:
c=numpy.array([2,4,6,8],dtype="complex")
print(c)
[2.+0.j 4.+0.j 6.+0.j 8.+0.j]
array() is the basic method to create an ndarray object, and other methods will be introduced in the following content.
ndim viewing array dimensions
Through ndim, you can view the dimensions of the array:
import numpy as np
arr = np.array([[1, 2, 3, 4], [4, 5, 6, 7], [9, 10, 11, 23]])
print(arr.ndim)
2
You can also use the ndim parameter to create arrays of different dimensions:
#Output a two-dimensional array
import numpy as np
a = np.array([1, 2, 3,4,5], ndim = 2)
print(a)
The output results are as follows:
[[1 2 3 4 5]]
reshape array variable dimension
The shape of an array refers to the number of rows and columns of a multidimensional array. Numpy module provides reshape() function, which can change the number of rows and columns of multidimensional array, so as to achieve the purpose of changing the dimension of array. Therefore, changing the dimension of the array means reshaping the shape of the array, as shown in Figure 1:

Figure 1: changing dimension of reshape function array
reshape() function can accept a tuple as a parameter to specify the number of rows and columns of the new array. An example is as follows:
import numpy as np
e = np.array([[1,2],[3,4],[5,6]])
print("Original array",e)
e=e.reshape(2,3)
print("New array",e)
The output is as follows:
Original array [[1 2]
[3 4]
[5 6]]
New array [[1 2 3]
[4 5 6]]
NumPy data type
As an extension package of Python, NumPy provides richer data types than Python, as shown in Table 1:
| Serial number | data type | Language description |
|---|---|---|
| 1 | bool_ | Boolean data type (True or False) |
| 2 | int_ | The default integer type is similar to long in C language, and the value is int32 or int64 |
| 3 | intc | Like the int type of C language, it is generally int32 or int 64 |
| 4 | intp | Integer type used for index (similar to C's ssize_t, usually int32 or int64) |
| 5 | int8 | Represents the same 8-bit integer as 1 byte. The range of values is - 128 to 127. |
| 6 | int16 | An integer representing 2 bytes (16 bits). The range is - 32768 to 32767. |
| 7 | int32 | Represents a 4-byte (32-bit) integer. The range is - 2147483648 to 2147483647. |
| 8 | int64 | Represents an 8-byte (64 bit) integer. The range is - 9223372036854775808 to 9223372036854775807. |
| 9 | uint8 | Represents a 1-byte (8-bit) unsigned integer. |
| 10 | uint16 | 2-byte (16 bit) unsigned integer. |
| 11 | uint32 | An unsigned integer of 4 bytes (32 bits). |
| 12 | uint64 | 8-byte (64 bit) unsigned integer. |
| 13 | float_ | Short for float64 type. |
| 14 | float16 | Semi precision floating-point number, including: 1 symbol bit, 5 finger digits and 10 trailing digits. |
| 15 | float32 | Single precision floating-point number, including 1 symbol bit, 8 finger digits and 23 trailing digits. |
| 16 | float64 | Double precision floating-point number, including 1 symbol bit, 11 finger digits and 52 trailing digits. |
| 17 | complex_ | Plural type, same as complex128 type. |
| 18 | complex64 | A complex number indicating that the real and imaginary parts share 32 bits. |
| 19 | complex128 | A complex number indicating that real and imaginary parts share 64 bits. |
| 20 | str_ | Represents the string type |
| 21 | string_ | Indicates the type of byte string |
Data type object
Data Type Object, also known as dtype object, is mainly used to describe the data type, size and byte order of array elements. At the same time, it can also be used to create structured data. For example, int64 and float32 are common instances of dtype objects. Their syntax format is as follows:
np.dtype(object)
To create a dtype object, you can use the following methods:
a= np.dtype(np.int64)
Example:
import numpy as np
a= np.dtype(np.int64)
print(a)
Output result:
int64
Data type identification code
Each data type in NumPy has a unique character code, as shown below:
| character | Corresponding type |
|---|---|
| b | Represents Boolean |
| i | Signed integer |
| u | unsigned int |
| f | float |
| c | Complex floating point |
| m | Time interval (timedelta) |
| M | datatime (date time) |
| O | Python object |
| S,a | Byte string (S) and string (a) |
| U | Unicode |
| V | Original data (void) |
The following uses the data type identification code to create a set of structured data:
#Create data type score
import numpy as np
dt = np.dtype([('score','i1')])
print(dt)
The output is as follows:
[('score', 'i1')]
Apply the above data type object dt to ndarray:
#Define the field name score and the array data type i1
dt = np.dtype([('score','i1')])
a = np.array([(55,),(75,),(85,)], dtype = dt)
print(a)
print(a.dtype)
print(a['score'])
Output result:
obtain a Array:
[(55,) (75,) (85,)]
Data type object dtype
dtype([('score', 'i1')])
obtain'score'Field score
[55 75 85]
Define structured data
Generally, structured data uses the form of fields to describe the characteristics of an object. The following example describes the characteristics of a teacher's name, age and salary. The structured data contains the following fields:
- str field: name
- int field: age
- float field: salary
The definition process is as follows:
import numpy as np
teacher = np.dtype([('name','S20'), ('age', 'i1'), ('salary', 'f4')])
#Output structured data
print(teacher)
#Apply it to the ndarray object
b = np.array([('ycs', 32, 6357.50),('jxe', 28, 6856.80)], dtype = teacher)
print(b)
Output result:
[('name', 'S20'), ('age', 'i1'), ('salary', '<f4')]
#The output name is the byte string type
[(b'ycs', 32, 6357.5) (b'jxe', 28, 6856.8)]
NumPy array property
This section describes the common properties of Numpy arrays.
ndarray.shape
The return value of the shape attribute is a tuple composed of array dimensions. For example, a two-dimensional array with 2 rows and 3 columns can be expressed as (2,3). This attribute can be used to adjust the size of array dimensions.
The example is as follows. The dimension of the array is output:
import numpy as np
a = np.array([[2,4,6],[3,5,7]])
print(a.shape)
Output result:
(2,3)
Modify the shape size of the array through the shape property:
import numpy as np
a = np.array([[1,2,3],[4,5,6]])
a.shape = (3,2)
print(a)
Output result:
[[1, 2]
[3, 4]
[5, 6]]
ndarray.reshape()
NumPy also provides a reshape() function to adjust the shape of the array.
import numpy as np
a = np.array([[1,2,3],[4,5,6]])
b = a.reshape(3,2)
print(b)
Output result:
[[1, 2]
[3, 4]
[5, 6]]
ndarray.ndim
This attribute returns the dimension of the array. An example is as follows:
import numpy as np
#Randomly generate a one-dimensional array
c = np.arange(24)
print(c)
print(c.ndim)
#Variable dimension operation on array
e = c.reshape(2,4,3)
print(e)
print(e.ndim)
The output results are as follows:
#Randomly generated c array
[ 0  1  2  3  4  5  6  7  8  9 10 11 12 13 14 15 16 17 18 19 20 21 22 23]
#Dimension of c array
1
#Variable dimension array e
[[[ 0  1  2]
  [ 3  4  5]
  [ 6  7  8]
  [ 9 10 11]]

[[12 13 14]
  [15 16 17]
  [18 19 20]
  [21 22 23]]]
#Array dimension of e
3
ndarray.itemsize
Returns the size (in bytes) of each element in the array. An example is as follows:
#The data type is int8, representing 1 byte
import numpy as np
x = np.array([1,2,3,4,5], dtype = np.int8)
print (x.itemsize)
The output result is:
1
#The data type is int64, representing 8 bytes
import numpy as np
x = np.array([1,2,3,4,5], dtype = np.int64)
print (x.itemsize)
Output result:
8
ndarray.flags
Returns the memory information of the ndarray array, such as the storage method of the ndarray array and whether it is a copy of other arrays.
Examples are as follows:
import numpy as np
x = np.array([1,2,3,4,5])
print (x.flags)
The output results are as follows:
C_CONTIGUOUS : True
F_CONTIGUOUS : True
OWNDATA : True
WRITEABLE : True
ALIGNED : True
WRITEBACKIFCOPY : False
UPDATEIFCOPY : False
Numpy create array
In< NumPy Ndarray object >This section introduces the basic methods of creating an array of ndarrays. In addition to using the array() method, NumPy also provides other methods of creating an array of ndarrays. This section briefly introduces these common methods.
numpy.empty()
numpy.empty() creates an uninitialized array. You can specify the shape and data type of the array. The syntax format is as follows:
numpy.empty(shape, dtype = float, order = 'C')
It accepts the following parameters:
- Shape: Specifies the shape of the array;
- dtype: the data type of the array element. The default value is float;
- Order: the storage order of index group elements in computer memory. The default order is "C" (row priority).
Examples of use are as follows:
import numpy as np
arr = np.empty((3,2), dtype = int)
print(arr)
Output result:
[[2003134838  175335712]
[ 538976288  538976288]
[1970562418 1684369010]]
As you can see, numpy Empty() returns an array with random values, but these values have no practical meaning. Remember that empty does not create an empty array.
numpy.zeros()
This function is used to create an array whose elements are all 0. At the same time, it can also specify the shape of the array. The syntax format is as follows:
numpy. zeros(shape,dtype=float,order="C")
| Parameter name | Description Description |
|---|---|
| shape | Specifies the shape size of the array. |
| dtype | Optional, the data type of the array |
| order | "C" means stored in row order, "F" means stored in column order |
Examples are as follows:
import numpy as np
#The default data type is floating point number
a=np.zeros(6)
print(a)
b=np.zeros(6,dtype="complex64" )
print(b)
Output result:
#a array
[0. 0. 0. 0. 0. 0.]
#b array
[0.+0.j 0.+0.j 0.+0.j 0.+0.j 0.+0.j 0.+0.j]
You can also create an array using a custom data type, as shown below:
c = np.zeros((3,3), dtype = [('x', 'i4'), ('y', 'i4')])
print(c)
#Output x,y, and specify the data type
[[(0, 0) (0, 0) (0, 0)]
[(0, 0) (0, 0) (0, 0)]
[(0, 0) (0, 0) (0, 0)]]
numpy.ones()
Returns a new array of the specified shape size and data type, and each element in the new array is filled with 1. The syntax format is as follows:
numpy.ones(shape, dtype = None, order = 'C')
Examples are as follows:
import numpy as np
arr1 = np.ones((3,2), dtype = int)
print(arr1)
The output results are as follows:
[[1 1] [1 1] [1 1]]
The following describes how to create a NumPy array using Python lists, stream objects, and iteratable objects.
numpy.asarray()
Asarray () is similar to array(), but it is simpler than array(). asarray() can convert a Python sequence into an ndarray object. The syntax format is as follows:
numpy.asarray(sequence,dtype = None ,order = None )
It accepts the following parameters:
- Sequence: accept a Python sequence, which can be a list or tuple;
- dtype: optional parameter, data type of array;
- order: array memory layout style, which can be set to C or F. the default is C.
Example 1: convert a list into a numpy array:
import numpy as np
l=[1,2,3,4,5,6,7]
a = np.asarray(l);
print(type(a))
print(a)
The output results are as follows:
#a array type
<class 'numpy.ndarray'>
#a array
[1 2 3 4 5 6 7]
Example 2: using tuples to create numpy arrays:
import numpy as np
l=(1,2,3,4,5,6,7)
a = np.asarray(l);
print(type(a))
print(a)
The output results are as follows:
<class 'numpy.ndarray'>
[1 2 3 4 5 6 7]
Example 3: create a multidimensional array using a nested list:
import numpy as np
l=[[1,2,3,4,5,6,7],[8,9]]
a = np.asarray(l);
print(type(a))
print(a)
Output result:
<class 'numpy.ndarray'>
[list([1, 2, 3, 4, 5, 6, 7]) list([8, 9])]
numpy.frombuffer()
Indicates that an array is created using the specified buffer. The syntax format of this function is given below:
numpy.frombuffer(buffer, dtype = float, count = -1, offset = 0)
Its parameters are described as follows:
- Buffer: convert any object into a stream and read it into the buffer;
- dtype: returns the data type of the array. The default is float32;
- count: the number of data to be read. The default value is - 1, which means to read all data;
- offset: the starting position of reading data. The default value is 0.
Example 4 is as follows:
import numpy as np
#Byte string type
l = b'hello world'
print(type(l))
a = np.frombuffer(l, dtype = "S1")
print(a)
print(type(a))
The output results are as follows:
<class 'bytes'>
[b'h' b'e' b'l' b'l' b'o' b' ' b'w' b'o' b'r' b'l' b'd']
<class 'numpy.ndarray'>
numpy.fromiter()
This method can convert the iterative object into an array of ndarray, and its return value is a one-dimensional array.
numpy.fromiter(iterable, dtype, count = -1)
The parameters are described as follows:
| Parameter name | Description |
|---|---|
| iterable | Iteratable object. |
| dtype | Returns the data type of the array. |
| count | The number of data read. The default is - 1. Read all data. |
Example 5: use the built-in range() function to create a list object, and then use the iterator to create an ndarray object. The code is as follows:
import numpy as np
# Use the range function to create a list object
list=range(6)
#Generate iteratable object i
i=iter(list)
#Using the i iterator, create the ndarray using the fromiter method
array=np.fromiter(i, dtype=float)
print(array)
Output result:
[0. 1. 2. 3. 4. 5.]
NumPy create interval array
The so-called interval array means that the values of array elements are within a certain range, and there may be some laws between array elements, such as proportional series, increasing, decreasing, etc.
In order to facilitate scientific calculation, Python NumPy supports the creation of interval arrays.
1. numpy.arange()
In NumPy, you can use range() to create an array with a given range of values. The syntax format is as follows:
numpy.arange(start, stop, step, dtype)
See the following table for Parameter Description:
| Parameter name | Parameter description |
|---|---|
| start | The starting value is 0 by default. |
| stop | Termination value. Note that the generated array element value does not contain the termination value. |
| step | Step size, the default is 1. |
| dtype | Optional parameter that specifies the data type of the ndarray array. |
According to the range specified by start and stop and the step value, an array of ndarray is generated. An example is as follows.
import numpy as np
x = np.arange(8)
print (x)
The output results are as follows:
[0 1 2 3 4 5 6 7]
Set the start, stop values and step size, and finally output the odd number in 0-10:
import numpy as np
x = np.arange(1,10,2)
print (x)
The output results are as follows:
[1 3 5 7 9]
2. numpy.linspace()
It means that within the specified numerical range, a one-dimensional equal difference array with uniform interval is returned. By default, 50 copies are equally divided. The syntax format is as follows:
np.linspace(start, stop, num=50, endpoint=True, retstep=False, dtype=None)
The parameters are described as follows:
- start: represents the starting value of the numerical range;
- stop: represents the end value of the numerical range;
- num: indicates how many uniform samples should be generated in the numerical range. The default value is 50;
- endpoint: the default value is True, which means that the sequence contains the stop termination value, otherwise it does not;
- retstep: the default value is True, which means that the tolerance item will be displayed in the generated array; otherwise, it will not be displayed;
- dtype: the data type representing the value of an array element.
Examples are as follows:
import numpy as np
#Generate 10 samples
a = np.linspace(1,10,10)
print(a)
Output result:
[ 1. 2. 3. 4. 5. 6. 7. 8. 9. 10.]
The following example shows that when the endpoint is Fasle, the termination value is not included at this time:
import numpy as np
arr = np.linspace(10, 20, 5, endpoint = False)
print("Array value range:",arr)
The output results are as follows:
Array value range: [10.12.14.16.18.]
Examples of retstep parameters are as follows:
import numpy as np
x = np.linspace(1,2,5, retstep = True)
print(x)
The output results are as follows, where 0.25 is the tolerance of the equal difference sequence:
(array([1. , 1.25, 1.5 , 1.75, 2. ]), 0.25)
3. numpy.logspace
This function also returns an array of ndarray, which is used to create an equal ratio array. The syntax format is as follows:
np.logspace(start, stop, num=50, endpoint=True, base=10.0, dtype=None)
Where base represents the base of the logarithmic function, which is 10 by default. See the following table for the detailed description of the parameters:
| Parameter name | Description Description |
|---|---|
| start | Starting value of sequence: base**start. |
| stop | End value of sequence: base**stop. |
| num | The number of samples in the value range is 50 by default. |
| endpoint | The default value is True, including the termination value; otherwise, it does not. |
| base | The log base of the logarithmic function. The default value is 10. |
| dtype | Optional parameter that specifies the data type of the ndarray array. |
Examples of use are as follows:
import numpy as np
a = np.logspace(1.0,2.0, num = 10)
print (a)
Output result:
[ 10.          12.91549665  16.68100537  21.5443469   27.82559402
  35.93813664  46.41588834  59.94842503  77.42636827 100.        ]
The following is the logarithm function of base = 2. An example is as follows:
import numpy as np
a = np.logspace(1,10,num = 10, base = 2)
print(a)
Output result:
[ 2. 4. 8. 16. 32. 64. 128. 256. 512. 1024.]
Numpy index and slice
In NumPy, if you want to access or modify the elements in the array, you can use the index or slice method, such as using the index starting from 0 to access the elements in the array in turn, which is the same as Python's list.
NumPy provides many types of indexing methods. There are two common methods: basic slicing and advanced indexing. This section focuses on basic slicing.
Basic slice
NumPy built-in function slice() can be used to construct slice objects. The function needs to pass three parameter values, namely start (start index), stop (stop index) and step (step). Through it, a new array can be cut from the original array.
Examples are as follows:
import numpy as np
a = np.arange(10)
#Generate slice object
s = slice(2,9,3)#The interval from index 2 to index 9 is 2
print(a[s])
Output result:
[2 5 8]
You can also divide the slice parameters by colon, and finally you can get the same result. An example is as follows:
import numpy as np
a = np.arange(10)
b = a[2:9:2]
print(b)
Output result:
[2 5 8]
The colon slice is briefly described below:
- If you enter only one parameter, the element corresponding to the index is returned. For the above example, [3] will return 3.
- If you insert ":" before it, such as [: 9], all numbers from 0 to 8 (excluding 9) will be returned.
- If it is [2:], a number between 2 and 9 will be returned.
- If between two parameters, such as [2:9], slice all elements between two index values (excluding stop index).
The following is a simple example of colon type slicing:
Example 1:
a = np.arange(10)
b = a[3]
print (b)
Output result:
3
Example 2:
import numpy as np
a = np.arange(10)
print (a[2:])
Output result:
[2 3 4 5 6 7 8 9]
Example 3:
import numpy as np
a = np.arange(10)
print a[2:5]
The output results are as follows:
[2 3 4]
Multidimensional array slice
Multidimensional array slicing operation, examples are as follows:
import numpy as np
a = np.array([[1,2,3],[3,4,5],[4,5,6]])
print(a)
# Cut from [1:] index
print(a[1:])
Output result:
[[1 2 3]
 [3 4 5]
 [4 5 6]]
#New array after cutting
[[3 4 5]
 [4 5 6]]
Note: the slice can also use the ellipsis "...". If the ellipsis is used at the row position, the return value will contain all row elements, otherwise, it will contain all column elements.
Examples are as follows:
import numpy as np
#Create a array
a = np.array([[1,2,3],[3,4,5],[4,5,6]])
#Returns the second column of the array
print (a[...,1])
#Returns the second row of the array
print (a[1,...])
#Returns all items after the second column
print (a[...,1:])
Output result:
#Second column array
[2 4 5]
#Second row array
[3 4 5]
#Returns all elements in the second column and beyond
[[2 3]
[4 5]
[5 6]]
NumPy advanced index
NumPy provides more indexing than Python's built-in sequences. Except in< Numpy slice and index >In addition to the index methods used in the first section, advanced index methods can also be used in NumPy, such as integer array index, Boolean index and fancy index. This section mainly introduces the above three index methods in detail.
The advanced index returns a copy of the array (deep copy), while the slicing operation returns an array view (shallow copy). If you are unfamiliar with the concepts of copy and view, you can jump directly to learn< NumPy copies and views >A section.
1. Integer array index
Integer array index, which can select any element in the array. For example, select an element in the row and column. The example is as follows:
import numpy as np
#Create a 2D array
x = np.array([[1,  2],  [3,  4],  [5,  6]])
#[0,1,2] represents the row index; [0,1,0] represents the column index
y = x[[0,1,2],[0,1,0]]
print (y)
The output is:
[1 4 5]
Make a simple analysis of the above example: combining row and column indexes will get (0,0), (1,1) and (2,0), which respectively correspond to the index position of the output result in the original array.
Let's take another look at a set of examples: the four corner elements in the 4 * 3 array are obtained. Their corresponding row indexes are [0,0] and [3,3], and column indexes are [0,2] and [0,2].
import numpy as np
b = np.array([[ 0, 1, 2],
              [ 3, 4, 5],
              [ 6, 7, 8],
              [ 9,10,11]])
r = np.array([[0,0],[3,3]])
c = np.array([[0,2],[0,2]])
#Get four corner elements
c = b[r,c]
print(c)
Output result:
[[ 0 2]
[ 9 11]]
You can also use the slice: or ellipsis Combined with integer array index, the example is as follows:
import numpy as np
d = np.array([[ 0,  1,  2],
              [ 3,  4,  5],
              [ 6,  7,  8],
              [ 9, 10, 11]])
#Slice the rows and columns separately
e = d[1:4,1:3]
print(e)
#Basic indexes are used for rows and advanced indexes are used for columns
f = d[1:4,[1,2]]
#Show sliced results
print (f)
#Use ellipsis for lines
h=d[...,1:]
print(h)
Output result:
#e array
[[ 4  5]
[ 7  8]
[10 11]]
#f array
[[ 4  5]
[ 7  8]
[10 11]]
#h array
[[ 1,  2],
 [ 4,  5],
 [ 7,  8],
 [10, 11]]
2. Boolean array index
When the output result needs Boolean operation (such as comparison operation), another advanced index method, Boolean array index, will be used. The following example returns all elements greater than 6 in the array:
#Returns an array of all numbers greater than 6
import numpy as np
x = np.array([[ 0,  1,  2],[ 3,  4,  5],[ 6,  7,  8],[ 9, 10, 11]])
print (x[x > 6])
Output result:
[ 7 8 9 10 11]
We can use the complement operator to remove NaN (i.e. non numeric elements), as follows:
import numpy as np
a = np.array([np.nan, 1,2,np.nan,3,4,5])
print(a[~np.isnan(a))
Output result:
[ 1. 2. 3. 4. 5.]
In the following example, delete the integer element in the array, as shown below:
import numpy as np
a = np.array([1, 2+6j, 5, 3.5+5j])
print( a[np.iscomplex(a)])
The output results are as follows:
[2.0+6.j 3.5+5.j]
3. Fancy index (expand knowledge)
Fancy indexes can also be understood as integer array indexes, but they are slightly different. The following is a brief explanation through an example. (this content can be used to expand knowledge understanding)
The fancy index also generates a new copy.
When the original array is a one-dimensional array and the one-dimensional integer array is used as the index, the index result is the element at the corresponding index position.
>>> import numpy as np
>>> x=np.array([1,2,3,4])
>>> print(x[0])
1
If the original array is a two-dimensional array, the index array also needs to be two-dimensional. The element value of the index array corresponds to each row of the indexed array. An example is as follows:
import numpy as np
x=np.arange(32).reshape((8,4))
#Corresponding to data items in line 4, line 2, line 1 and line 7 respectively
print (x[[4,2,1,7]])
Output result:
[[16 17 18 19]
[ 8  9 10 11]
[ 4  5  6  7]
[28 29 30 31]]
You can also use the inverted index array, for example:
import numpy as np
x=np.arange(32).reshape((8,4))
print (x[[-4,-2,-1,-7]])
Output result:
[[16 17 18 19]
[24 25 26 27]
[28 29 30 31]
[ 4  5  6  7]]
You can also use multiple index arrays at the same time, but in this case, you need to add NP ix_.
import numpy as np
x=np.arange(32).reshape((8,4))
print (x[np.ix_([1,5,7,2],[0,3,1,2])])
The output results are as follows:
[[ 4  7  5  6]
[20 23 21 22]
[28 31 29 30]
[ 8 11  9 10]]
Where [1,5,7,2] represents the row index, and [0,3,1,2] represents the column index value corresponding to the row index, that is, the element values in the row will be sorted according to the column index value. For example, the order of the first row of elements before sorting is [4,5,6,7], which becomes [4,7,5,6] after sorting by column index.
NumPy broadcast mechanism
The Broadcast mechanism in NumPy aims to solve the problem of arithmetic operation between arrays of different shapes. We know that if the shapes of two arrays are exactly the same, they can directly do the corresponding operations. Examples are as follows:
import numpy as np
a = np.array([0.1,0.2,0.3,0.4])
b = np.array([10,20,30,40])
c = a * b
print(c)
The output results are as follows:
[ 1. 4. 9. 16.]
But what if two arrays with different shapes? Can't they do arithmetic between them? Of course not! In order to keep the array shape the same, NumPy designed a broadcast mechanism. The core of this mechanism is to repeat the array with smaller shape for a certain number of times horizontally or vertically, so that it has the same dimension as the array with larger shape.
When the shapes of the two arrays are different, Numpy will automatically trigger the broadcast mechanism. Examples are as follows:
import numpy as np
a = np.array([[ 0, 0, 0],
           [10,10,10],
           [20,20,20],
           [30,30,30]])
#The shape of b array is different from that of a array
b = np.array([1,2,3])
print(a + b)
The output result is:
[[ 1  2  3]
[11 12 13]
[21 22 23]
[31 32 33]]
Figure 1 shows the implementation process of broadcast mechanism through the operation of arrays a and b.
Figure 1: Numpy array broadcast mechanism
The addition of 4x3 two-dimensional a array and 1x3 one-dimensional b array can essentially be understood as the downward expansion of b array three times vertically (repeat the first line three times), so as to generate an array with the same shape as a array, and then operate with a array.
NumPy traversal array
NumPy provides a Diter iterator object, which can complete the traversal of array elements in conjunction with the for loop.
Let's take a look at a set of examples. Create a 3 * 4 array using the range () function and generate an iterator object using nditer.
Example 1:
import numpy as npa = np.arange(0,60,5)a = a.reshape(3,4)#Use the nditer iterator and use for to traverse for X in NP nditer(a): print(x)
Output result:
0 5 10 15 20 25 30 35 40 45 50 55
traversal order
In memory, Numpy array provides two ways to store data: C-order (row priority) and FORTRAN order (column priority). So how does the nditer iterator handle arrays with a specific storage order? In fact, it chooses an order consistent with the array memory layout. The reason for doing so is to improve the efficiency of data access.
By default, when we traverse the elements in the array, we do not need to consider the storage order of the array, which can be verified by traversing the transposed array of the above array.
Example 2:
import numpy as np
a = np.arange(0,60,5)
a = a.reshape(3,4)
#Transpose array of a
b = a.T
print (b)
for x in np.nditer(b):
   print(x,end=",")
Output result:
#Transpose array b
[[ 0 20 40]
[ 5 25 45]
[10 30 50]
[15 35 55]]

#a traversal output after transpose
0 5 10 15 20 25 30 35 40 45 50 55
From the output results of examples 1 and 2, we can see that the traversal order of a and a.T is the same, that is, their storage order in memory is the same.
Next, access a copy of the transposed array in C style. Example 3 is as follows:
import numpy as np
a = np.arange(0,60,5).reshape(3,4)
#The copy method generates a copy of the array
for x in np.nditer(a.T.copy(order='C')):
    print (x, end=", " )
Output result:
0, 20, 40, 5, 25, 45, 10, 30, 50, 15, 35, 55,
It can be seen from example 3 that the traversal results of a.T.copy(order = 'C') are different from those of examples 1 and 2. The reason is that they are stored in different ways in memory.
Specify traversal order
You can specify the traversal order of the array through the order parameter of the nditer object. Example 4 is as follows:
import numpy as np
a = np.arange(0,60,5)
a = a.reshape(3,4)
print(a)
for x in np.nditer(a, order = 'C'):
   print (x,end=",")
for x in np.nditer(a, order = 'F'):
   print (x,end=",")
The output results are as follows:
#c=order line order
0,5,10,15,20,25,30,35,40,45,50,55,
#F-order column order
0,20,40,5,25,45,10,30,50,15,35,55,
Modify array element values
The nditer object provides an optional parameter op_flags, which indicates whether the elements can be modified when traversing the array. It provides three modes, as follows:
1) read-only
Read only mode, in which the elements in the array cannot be modified during traversal.
2) read-write
In read-write mode, the element value can be modified during traversal.
3) write-only
Write only mode, and the element value can be modified during traversal.
Examples are as follows:
import numpy as np
a = np.arange(0,60,5)
a = a.reshape(3,4)
print ("The original array is:",a)
for x in np.nditer(a, op_flags=['readwrite']):
    x[...]=2*x
print ('The modified array is:',a)
The final output results are as follows:
The original array is:
[[ 0  5 10 15]
[20 25 30 35]
[40 45 50 55]]
The modified array is:
[[ 0  10  20  30]
[ 40  50  60  70]
[ 80  90 100 110]]
External recycling
The constructor of nditer object has a "flags" parameter, which can accept the following parameter values (just understand):
| Parameter value | Description |
|---|---|
| c_index | Can track the C-order index. |
| f_index | Indexes that track Fortran order. |
| multi_index | Each iteration tracks an index type. |
| external_loop | The traversal result returned is a one-dimensional array with multiple values. |
Example 6 is as follows:
import numpy as np
a = np.arange(0,60,5)
a = a.reshape(3,4)
print("Original array",a)
#Modified array
for x in np.nditer(a, flags = ['external_loop'], order = 'F'):
   print(x)
Result output:
Original array:
[[ 0  5 10 15]
[20 25 30 35]
[40 45 50 55]]
#Modified one-dimensional array
[ 0 20 40]
[ 5 25 45]
[10 30 50]
[15 35 55]
Iterate over multiple arrays
If both arrays can be broadcast, the nditer object can iterate over them at the same time.
Assuming that the dimension of array A is 34 and the dimension of another array b is 14 (that is, array b with smaller dimension can be broadcast to array a), an example is as follows:
import numpy as np
a = np.arange(0,60,5)
a = a.reshape(3,4)
print (a)
b = np.array([1, 2, 3, 4], dtype = int)
print (b)
#Broadcast iteration
for x,y in np.nditer([a,b]):
    print ("%d:%d" % (x,y),end=",")
The output is:
0:1,5:2,10:3,15:4,20:1,25:2,30:3,35:4,40:1,45:2,50:3,55:4,
NumPy related array operation
NumPy contains some common methods for processing arrays, which can be roughly divided into the following categories:
- Variable dimension operation of array
- Array transpose operation
- Modify array dimension operation
- Join and split array operations
They are introduced below.
Variable dimension operation of array
| Function name | Function introduction |
|---|---|
| reshape | Modify the shape of the array without changing the elements of the array. |
| flat | The return is an iterator that can iterate through each element with a for loop. |
| flatten | Returns a copy of the array in the form of a one-dimensional array. The operation on the copy will not affect the original array. |
| ravel | Returns a continuous flat array (that is, an expanded one-dimensional array). Unlike flat, it returns the array view (modifying the view will affect the original array). |
reshape in< NumPy ndarray object >This section has been explained and will not be introduced in this section.
1) numpy.ndarray.flat
numpy.ndarray.flat returns an array iterator. The example is as follows:
import numpy as np
a = np.arange(9).reshape(3,3)
for row in a:
    print (row)
#Use the flat attribute:
for ele in a.flat:
    print (ele,end=",")
The output results are as follows:
#Original array
[0 1 2]
[3 4 5]
[6 7 8]
#Output element
0,1,2,3,4,5,6,7,8,
2) numpy.ndarray.flatten()
numpy.ndarray.flatten returns a copy of the array. Modifying the copy will not affect the original array. Its syntax format is as follows:
ndarray.flatten(order='C')
Examples are as follows:
import numpy as np
a = np.arange(8).reshape(2,4)
print (a)
#Default array expanded in row C Style
print (a.flatten())
#Array expanded in F-style order
print (a.flatten(order = 'F'))
Output result:
#Array a
[[0 1 2 3]
[4 5 6 7]]
#The default c-order station looks at the array
[0 1 2 3 4 5 6 7]
# F-order station viewing array
[0 4 1 5 2 6 3 7]
3) numpy.ravel()
numpy. Travel() expands the elements in a multidimensional array in the form of a one-dimensional array. This method returns the view of the array. If it is modified, it will affect the original array.
numpy.ravel(a, order='C')
The example results are as follows:
import numpy as np
a = np.arange(8).reshape(2,4)
print ('Original array:')
print (a)
print ('call ravel After function:')
print (a.ravel())
print ('F Style sequential call ravel After function:')
print (a.ravel(order = 'F'))
The output results are as follows:
Original array:
[[0 1 2 3]
[4 5 6 7]]
call ravel After function:
[0 1 2 3 4 5 6 7]
F Style sequential call ravel After function:
[0 4 1 5 2 6 3 7]
Array transpose operation
| Function name | explain |
|---|---|
| transpose | Exchange the dimension values of the array. For example, the dimension of two-dimensional array (2,4) is (4,2) after using this method. |
| ndarray.T | Same as the transfer method. |
| rollaxis | Roll back along the specified axis to the specified position. |
| swapaxes | Swap the axes of the array. |
1) numpy.transpose()
numpy. Transfer() is used to exchange the dimensions of multi-dimensional arrays, such as two-dimensional arrays. This method can realize matrix transpose. The syntax format is as follows:
numpy.transpose(arr, axes)
The parameters are described as follows:
- arr: array to operate on
- axes: optional parameter, tuple or integer list, which will be transposed according to this parameter.
Examples are as follows:
import numpy as np
a = np.arange(12).reshape(3,4)
print (a)
print (np.transpose(a))
Output result:
Original array:
[[ 0  1  2  3]
[ 4  5  6  7]
[ 8  9 10 11]]

Swap array:
[[ 0  4  8]
[ 1  5  9]
[ 2  6 10]
[ 3  7 11]]
ndarray. The use of T is similar to it, which will be repeated here.
2) numpy.rollaxis()
This method means scrolling backward to a specific position along the specified axis. The format is as follows:
numpy.rollaxis(arr, axis, start)
Parameter Description:
- arr: array to be passed in;
- Axis: along which axis to scroll backward, the relative position of other axes will not change;
- start: it starts with axis 0 by default. Its value can be adjusted according to the array dimension.
3) numpy.swapaxes()
This method is used to exchange two axes of the array. Its syntax format is as follows:
numpy.swapaxes(arr, axis1, axis2)
For example:
import numpy as np
# Created 3D ndarray
a = np.arange(27).reshape(3,3,3)
print (a)
#Exchange axis 0 and axis 2
print(np.swapaxes(a,2,0))
Output result:
#Original a array
[[[ 0  1  2]
  [ 3  4  5]
  [ 6  7  8]]

[[ 9 10 11]
  [12 13 14]
  [15 16 17]]

[[18 19 20]
  [21 22 23]
  [24 25 26]]]
#Array after axis exchange
[[[ 0  9 18]
  [ 3 12 21]
  [ 6 15 24]]

[[ 1 10 19]
  [ 4 13 22]
  [ 7 16 25]]

[[ 2 11 20]
  [ 5 14 23]
  [ 8 17 26]]]
Modify array dimension operation
The following methods are used to modify the array dimension:
| Function name | Description |
|---|---|
| broadcast | Generate an analog broadcast object. |
| broadcast_to | Broadcast the array as a new shape. |
| expand_dims | Expand the shape of the array. |
| squeeze | Removes a one-dimensional item from the shape of the array. |
1) numpy.broadcast()
The return value is the object after the array is broadcast. The function takes two arrays as input parameters. Examples are as follows:
import numpy as np
a = np.array([[1], [2], [3]])
b = np.array([4, 5, 6])
# Broadcast to b a
d = np.broadcast(a,b)
#d it has the iterator attribute
r,c = d.iters
print (next(r), next(c))
print (next(r), next(c))
# Add a and b using broadcast
e = np.broadcast(a,b)
f=np.empty(e.shape)
f.flat=[x+y for (x,y) in e]
print(f)
print(a+b)
Output result:
#Broadcast to b a
1 6
2 4
#f array
[[5. 6. 7.]
[6. 7. 8.]
[7. 8. 9.]]
#a+b
[[5 6 7]
[6 7 8]
[7 8 9]]
2) numpy.broadcast_to()
This function broadcasts the array to the new shape and returns a read-only view based on the original array. If the new shape does not comply with NumPy's broadcast rules, a ValueError exception will be thrown. The syntax format of the function is as follows:
numpy.broadcast_to(array, shape, subok)
Examples are as follows:
import numpy as np
a = np.arange(4).reshape(1,4)
print("Original array",a)
print ('call broadcast_to After function:')
print (np.broadcast_to(a,(4,4)))
The final output results are as follows:
#Original array
[[0 1 2 3]]

#Call broadcast_ After the to function:
[[0 1 2 3]
[0 1 2 3]
[0 1 2 3]
[0 1 2 3]]
3) numpy.expand_dims()
Insert a new axis at the specified position to expand the dimension of the array. The syntax format is as follows:
numpy.expand_dims(arr, axis)
Parameter Description:
- arr: input array
- Axis: the position where the new axis is inserted
Examples are as follows:
import numpy as np
x = np.array(([1,2],[3,4]))
print ('array x: ')
print (x)
# Insert a new axis at the 0 axis
y = np.expand_dims(x, axis = 0)
print ('array y: ')
print (y)
print ('\n')
print ('array x and y Shape of:')
print (x.shape, y.shape)
The output result is:
array x:
[[1 2]
[3 4]]

array y:
[[[1 2]
  [3 4]]]

array x and y Shape of:
(2, 2) (1, 2, 2)
4) numpy.squeeze()
Delete the item with dimension 1 in the array. For example, the shape of an array is (5,1). After this function, the shape becomes (5,1). Its function syntax format is as follows:
numpy.squeeze(arr, axis)
Parameter Description:
- arr: group of input numbers;
- Axis: the value is an integer or an integer tuple. It is used to specify the axis of the dimension to be deleted. The specified dimension value must be 1, otherwise an error will be reported. If it is None, all items with 1 in the array dimension will be deleted.
The following is an example with the axis parameter:
>>> x = np.array([[[0], [1], [2]]])
>>> x.shape
(1, 3, 1)
>>> np.squeeze(x).shape
(3,)
>>> np.squeeze(x, axis=(2,)).shape
(1, 3)
Look at another set of examples, as follows:
import numpy as np
a = np.arange(9).reshape(1,3,3)
print (a)
b = np.squeeze(a)
print (b)
print ('array a and b Shape of:')
print (x.shape, y.shape)
The output result is:
array a:
[[[0 1 2]
  [3 4 5]
  [6 7 8]]]

array b:
[[0 1 2]
[3 4 5]
[6 7 8]]

array a and b Shape of:
(1, 3, 3) (3, 3)
Join and split array operations
Connecting and dividing arrays are two operation modes of arrays. In order to facilitate your memory, we now integrate their methods as follows:
| type | Function name | Description |
|---|---|---|
| Join array method | concatenate | Joins two or more arrays of the same shape along a specified axis |
| stack | Join a series of arrays along the new axis | |
| hstack | Stack arrays in the sequence in horizontal order (column direction) | |
| vstack | Stack arrays in the sequence vertically (row direction) | |
| Split array method | split | Split an array into multiple subarrays |
| hsplit | Divide an array horizontally into multiple sub arrays (by column) | |
| vsplit | Divide an array vertically into multiple sub arrays (by row) |
1) Join array operation
numpy.concatenate() connects two or more arrays of the same shape along the specified axis. The format is as follows:
numpy.concatenate((a1, a2, ...), axis)
Parameter Description:
- a1, a2,...: represents a series of arrays of the same type;
- Axis: connect the array along the axis specified by this parameter. The default value is 0.
Example description: create two a and b arrays and connect them along the specified axis. Note that the shape of the two arrays should be consistent.
import numpy as np
#Create array a
a = np.array([[10,20],[30,40]])
print (a)
#Create array b
b = np.array([[50,60],[70,80]])
print (b)
#Join two arrays along axis 0
print (np.concatenate((a,b)))
#Connect two arrays along axis 1
print (np.concatenate((a,b),axis = 1))
Output result:
#a
[[10 20]
[30 40]]
#b
[[50 60]
[70 80]]
#axis=0 along the vertical direction
[[10 20]
[30 40]
[50 60]
[70 80]]
#axis=1 along the horizontal direction
[[10 20 50 60]
[30 40 70 80]]
Array join operation requires at least two arrays with the same dimension before they can be operated vertically or horizontally.
Stack arrays vertically, for example:
import numpy as np
a = np.array([[1,2],[3,4]])
b = np.array([[5,6],[7,8]])
#vertical stack
c = np.vstack((a,b))
print (c)
The output results are as follows:
[[1 2]
[3 4]
[5 6]
[7 8]]
2) Split array operation
numpy.split() divides the array into multiple sub arrays along the specified axis. The syntax format is as follows:
numpy.split(ary, indices_or_sections, axis)
Parameter Description:
- ary: array to be split
- indices_or_sections: if it is an integer, it represents the average segmentation with this integer. If it is an array, it represents the position of segmentation along the axis (left open and right closed);
- axis: the default value is 0, indicating horizontal segmentation; A value of 1 indicates vertical segmentation.
Examples are as follows:
import numpy as np
a = np.arange(6)
#Original array
print (a)
#Divide the array into two sub arrays of equal shape and size
b = np.split(a,2)
print (b)
#Mark the position of the array in the one-dimensional array to be split
b = np.split(a,[3,4])
print (b)
The output results are as follows:
#a array
[0 1 2 3 4 5]
#Splits an array of the same shape and size
[array([0, 1, 2]), array([3, 4, 5])]
#Mark the position segmentation according to the array, and open left and close right during segmentation
[array([0, 1, 2]), array([3]), array([4, 5])]
Finally, let's take a look at the usage of hsplit(), for example:
import numpy as np
#arr1 array
arr1 = np.floor(10 * np.random.random((2, 6)))
print(arr1)
#Split array
print(np.hsplit(arr1, 3))
Output result:
#Original arr1 array
[[2. 1. 5. 3. 1. 7.]
 [1. 2. 9. 0. 9. 9.]]
#The array obtained after horizontal segmentation
[array([[2., 1.],
       [1., 2.]]), array([[5., 3.],
       [9., 0.]]), array([[1., 7.],
       [9., 9.]])]]
Addition, deletion, modification and query of NumPy array elements
This section focuses on the addition, deletion, modification and query of NumPy array elements, mainly including the following methods:
| Function name | Description |
|---|---|
| resize | Returns a new array of specified shapes. |
| append | Adds the element value to the end of the array. |
| insert | Inserts the element value in front of the specified element along the specified axis. |
| delete | Delete the subarray on an axis and return the deleted new array. |
| argwhere | Returns the index value of the eligible elements in the array. |
| unique | Used to delete duplicate elements in the array and return a new array according to the element value from large to small. |
1. numpy.resize()
numpy.resize() returns a new array of specified shapes.
numpy.resize(arr, shape)
Use example:
import numpy as np
a = np.array([[1,2,3],[4,5,6]])
print(a)
#a is the shape of the array
print(a.shape)
b = np.resize(a,(3,2))
#b array
print (b)
#b shape of array
print(b.shape)
#Modify the b array so that its shape is larger than the original array
b = np.resize(a,(3,3))
print(b)
The output result is:
a Array:
[[1 2 3]
[4 5 6]]

a Shape:
(2, 3)

b Array:
[[1 2]
[3 4]
[5 6]]

b Shape of array:
(3, 2)

After modification b Array:
[[1 2 3]
[4 5 6]
[1 2 3]]
Here, we need to distinguish the use methods of resize() and reshape(). They look similar, but they are actually different. Resize only modifies the original array without returning a value, while reshape not only modifies the original array, but also returns the modified result.
Look at a set of examples, as follows:
In [1]: import numpy as np
In [2]: x=np.arange(12)
#Call the resize method
In [3]: x_resize=x.resize(2,3,2)
In [4]: x
Out[4]:
array([[[ 0,  1],
        [ 2,  3],
        [ 4,  5]],
       [[ 6,  7],
        [ 8,  9],
        [10, 11]]])
In [5]: x_resize
#Return to None and print with print
In [6]: print(x_resize)
None
#Call the reshape method
In [7]: x_shape=x.reshape(2,3,2)
#Returns the modified array
In [8]: x_shape
Out[8]:
array([[[ 0,  1],
        [ 2,  3],
        [ 4,  5]],
       [[ 6,  7],
        [ 8,  9],
        [10, 11]]])
In [9]: x
Out[9]:
array([[[ 0,  1],
        [ 2,  3],
        [ 4,  5]],
       [[ 6,  7],
        [ 8,  9],
        [10, 11]]])
2. numpy.append()
Add a value at the end of the array, which returns a one-dimensional array.
numpy.append(arr, values, axis=None)
Parameter Description:
- arr: input array;
- values: the value added to the arr array must be consistent with the shape of the arr array;
- Axis: the default value is None, which returns a one-dimensional array; When axis =0, the appended value will be added to the row, while the number of columns remains unchanged. If axis=1, it is just the opposite.
Use example:
import numpy as np
a = np.array([[1,2,3],[4,5,6]])
#Add elements to array a
print (np.append(a, [7,8,9]))
#Add element along axis 0
print (np.append(a, [[7,8,9]],axis = 0))
#Add element along axis 1
print (np.append(a, [[5,5,5],[7,8,9]],axis = 1))
The output result is:
Directional array a Add element:
[1 2 3 4 5 6 7 8 9]

Add element along axis 0:
[[1 2 3]
[4 5 6]
[7 8 9]]

Add elements along axis 1:
[[1 2 3 5 5 5]
[4 5 6 7 8 9]]
3. numpy.insert()
Indicates that the corresponding value is inserted at the previous position of the given index value along the specified axis. If no axis is provided, the input array is expanded into a one-dimensional array.
numpy.insert(arr, obj, values, axis)
Parameter Description:
- arr: array to enter
- obj: indicates the index value, and the values value is inserted before the index value;
- values: the value to insert;
- Axis: the specified axis. If it is not provided, the input array will be expanded into a one-dimensional array.
Examples are as follows:
import numpy as np
a = np.array([[1,2],[3,4],[5,6]])
#If axis is not provided, the array will be expanded
print (np.insert(a,3,[11,12]))
#Vertical direction along axis 0
print (np.insert(a,1,[11],axis = 0))
#Horizontal direction along axis 1
print (np.insert(a,1,11,axis = 1))
The output results are as follows:
provide axis Parameters:
[ 1  2  3 11 12  4  5  6]

Along axis 0:
[[ 1  2]
[11 11]
[ 3  4]
[ 5  6]]

Along axis 1:
[[ 1 11  2]
[ 3 11  4]
[ 5 11  6]]
4. numpy.delete()
This method deletes the specified subarray from the input array and returns a new array. It is similar to the insert() function. If the axis parameter is not provided, the input array is expanded into a one-dimensional array.
numpy.delete(arr, obj, axis)
Parameter Description:
- arr: array to input;
- obj: integer or integer array, indicating the array element or subarray to be deleted;
- Axis: along which axis to delete the subarray.
Use example:
import numpy as np
a = np.arange(12).reshape(3,4)
#a array
print(a)
#The axis parameter is not provided
print(np.delete(a,5))
#Delete the second column
print(np.delete(a,1,axis = 1))
#Delete sliced array
a = np.array([1,2,3,4,5,6,7,8,9,10])
print (np.delete(a, np.s_[::2]))
The output result is:
a Array:
[[ 0  1  2  3]
[ 4  5  6  7]
[ 8  9 10 11]]

nothing axis Parameters:
[ 0  1  2  3  4  6  7  8  9 10 11]

Delete the second column:
[[ 0  2  3]
[ 4  6  7]
[ 8 10 11]]

Delete sliced array:
[ 2  4  6  8 10]
5. numpy.argwhere()
This function returns the index of non-0 elements in the array. If it is a multidimensional array, it returns the index coordinates composed of row and column indexes.
Examples are as follows:
import numpy as np
x = np.arange(6).reshape(2,3)
print(x)
#Returns all element indexes greater than 1
y=np.argwhere(x>1)
print(y)
Output result:
#x array
[[0 1 2]
[3 4 5]]
#Return row and column index coordinates
[[0 2]
[1 0]
[1 1]
[1 2]]
6. numpy.unique()
It is used to delete duplicate elements in the array. Its syntax format is as follows:
numpy.unique(arr, return_index, return_inverse, return_counts)
Parameter Description:
- arr: input array. If it is a multi-dimensional array, it will be expanded in the form of one-dimensional array;
- return_index: if True, returns the position (index) of the new array element in the original array;
- return_inverse: if True, returns the position (index) of the original array element in the new array;
- return_counts: if True, returns the number of times the array element after de duplication appears in the original array.
Examples are as follows:
import numpy as np
a = np.array([5,2,6,2,7,5,6,8,2,9])
print (a)
#De duplication of array a
uq = np.unique(a)
print (uq)
#Index array after array de duplication
u,indices = np.unique(a, return_index = True)
#Print the index of the array after de duplication
print(indices)
#Index of de duplication array:
ui,indices = np.unique(a,return_inverse = True)
print (ui)
#Print subscript
print (indices)
#Returns the number of duplicates of the de duplicated element
uc,indices = np.unique(a,return_counts = True)
print (uc)
Element Occurrences:
print (indices)
The output result is:
a Array:
[5 2 6 2 7 5 6 8 2 9]

After weight removal a array
[2 5 6 7 8 9]

Index array of de duplication array:
[1 0 2 4 7 9]

Index of de duplication array:
[2 5 6 7 8 9]

Subscript of the original array in the new array:
[1 0 2 0 3 1 2 4 0 5]

Returns the number of repetitions of de duplicated elements:
[2 5 6 7 8 9]

Count the occurrence times of repeated elements:
[3 2 2 1 1 1]
NumPy mathematical function
NumPy contains a large number of mathematical functions, which are used to perform various mathematical operations, including trigonometric functions, rounding functions and so on. They are explained in detail below.
trigonometric function
The sin() (sine), cos() (cosine) and tan() (tangent) trigonometric functions for radian calculation are provided in NumPy.
Examples are as follows:
import numpy as np
arr = np.array([0, 30, 60, 90, 120, 150, 180])
#Calculates the trigonometric function value of the given angle in the arr array
#By multiplying by NP Pi / 180 converts it to radians
print(np.sin(arr * np.pi/180))
print(np.cos(arr * np.pi/180))
print(np.tan(arr * np.pi/180))
The output results are as follows:
sin()sine :
[0.00000000e+00 5.00000000e-01 8.66025404e-01 1.00000000e+00
8.66025404e-01 5.00000000e-01 1.22464680e-16]
cos()Cosine value:
[ 1.00000000e+00  8.66025404e-01  5.00000000e-01  6.12323400e-17
-5.00000000e-01 -8.66025404e-01 -1.00000000e+00]
tan()Tangent value:
[ 0.00000000e+00  5.77350269e-01  1.73205081e+00  1.63312394e+16
-1.73205081e+00 -5.77350269e-01 -1.22464680e-16]
In addition to the above trigonometric functions, NumPy also provides arcsin, arcos and arctan inverse trigonometric functions.
To verify the result of the inverse trigonometric function, you can use numpy Degrees() converts radians into angles. Examples are as follows:
import numpy as np
arr = np.array([0, 30, 60, 90])
#Sine array
sinval = np.sin(arr*np.pi/180)
print(sinval)
#Calculate the inverse sine of the angle, and the return value is in radians
cosec = np.arcsin(sinval)
print(cosec)
#It is verified by converting the degrees function into an angle
print(np.degrees(cosec))
#Cosine array
cosval = np.cos(arr*np.pi/180)
print(cosval)
#Calculates the arccosine value in radians
sec = np.arccos(cosval)
print(sec)
#It is verified by converting the degrees function into an angle
print(np.degrees(sec))
#Here is the tan() tangent function
tanval = np.tan(arr*np.pi/180)
print(tanval)
cot = np.arctan(tanval)
print(cot)
print(np.degrees(cot))
Output result:
Positive value array:
[0.        0.5       0.8660254 1.       ]
#Calculate the inverse sine value of the angle, in radians
[0.         0.52359878 1.04719755 1.57079633]
adopt degrees verification
[ 0. 30. 60. 90.]
Cosine array:
[1.00000000e+00 8.66025404e-01 5.00000000e-01 6.12323400e-17]
adopt degrees verification
[0.         0.52359878 1.04719755 1.57079633]
Inverse cosine value:
[ 0. 30. 60. 90.]

Tangent array:
[0.00000000e+00 5.77350269e-01 1.73205081e+00 1.63312394e+16]
Arctangent value:
[0.         0.52359878 1.04719755 1.57079633]
adopt degrees verification
[ 0. 30. 60. 90.]
Rounding function
NumPy provides three rounding functions, which are described as follows:
1) numpy.around()
This function returns a decimal value and rounds the value to the specified decimal place. The syntax of this function is as follows:
numpy.around(a,decimals)
Parameter Description:
- a: Represents the array to be input;
- decimals: the number of decimal places to round to. Its default value is 0. If it is negative, the decimal point will be moved to the left of the integer.
Examples are as follows:
import numpy as np
arr = np.array([12.202, 90.23120, 123.020, 23.202])
print(arr)
print("The array value is rounded to two decimal places",np.around(arr, 2))
print("The array value is rounded to the decimal point-1 position",np.around(arr, -1))
Output result:
Original array arr: [12.202 90.2312 123.02 23.202]
The array value is rounded to two decimal places[12.2 90.23 123.02 23.2]
The array value is rounded to the decimal point-1 position[10. 90. 120. 20.]
2) numpy.floor()
This function means to take down an integer for each element in the array, that is, to return the maximum integer not greater than the value of each element in the array. Examples are as follows:
import numpy as np
a = np.array([-1.8,  1.1,  -0.4,  0.9,  18])
#Round down array a
print (np.floor(a))
Output result:
[-2. 1. -1. 0. 18.]
3) numpy.ceil()
This function is opposite to the floor function and indicates rounding up. Examples are as follows:
import numpy as np
a = np.array([-1.8,  1.1,  -0.4,  0.9,  18])
#Round up array a
print (np.ceil(a))
Output result:
[-1. 2. -0. 1. 18.]
NumPy arithmetic operation
The "addition, subtraction, multiplication and division" arithmetic operation of NumPy array corresponds to the add(), subtract(), multiple() and divide() functions respectively.
Note: when performing arithmetic operation, the input array must have the same shape or comply with the broadcast rules of the array before the operation can be performed.
Here is a set of examples:
import numpy as np
a = np.arange(9, dtype = np.float_).reshape(3,3)
#Array a
print(a)
#Array b
b = np.array([10,10,10])
print(b)
#Array addition
print(np.add(a,b))
#Array subtraction
print(np.subtract(a,b))
#Array multiplication
print(np.multiply(a,b))
#Array Division
print(np.divide(a,b))
Output result:
a array:
[[ 0. 1. 2.]
[ 3. 4. 5.]
[ 6. 7. 8.]]
b Array:
[10 10 10]
Add:
[[ 10. 11. 12.]
[ 13. 14. 15.]
[ 16. 17. 18.]]
Minus:
[[-10. -9. -8.]
[ -7. -6. -5.]
[ -4. -3. -2.]]

Multiply:
[[ 0. 10. 20.]
[ 30. 40. 50.]
[ 60. 70. 80.]]
Except:
[[ 0. 0.1 0.2]
[ 0.3 0.4 0.5]
[ 0.6 0.7 0.8]]
The following describes other important arithmetic operation functions in NumPy.
numpy.reciprocal()
This function takes the reciprocal of each element in the array and returns them as an array.
When the data type of the array element is integer (int), the return value is 0 for the element whose absolute value is less than 1. When the array contains 0 element, the return value will appear overflow (inf) overflow prompt. The example is as follows:
import numpy as np
#Note that there are 0 here
a = np.array([0.25, 1.33, 1, 0, 100])
#Array a defaults to floating point data
print(a)
#Use the reciprocal operation on array a
print (np.reciprocal(a))
#The data type of b array is integer int
b = np.array([100], dtype = int)
print(b)
#Use the reciprocal operation on array b
print( np.reciprocal(b) )
Output result:
a Array:
[   0.25    1.33    1.      0.    100.  ]

yes a The reciprocal of array has inf Tips:
__main__:1: RuntimeWarning: divide by zero encountered in reciprocal
[ 4.         0.7518797  1.               inf  0.01     ]

b Array:
[100]

yes b Reciprocal of array:
[0]
numpy.power()
This function takes the elements in the a array as the base, takes the elements corresponding to a in the b array as the power, and finally returns the calculation results of both in the form of array. Examples are as follows:
import numpy as np
a = np.array([10,100,1000])
#a array
print ('Our array is;')
#Call the power function
print (np.power(a,2))
b array
b = np.array([1,2,3])
print (b)
call power function
print (np.power(a,b))
Output result:
a Array is:
[  10  100 1000]

call power Function:
[    100   10000 1000000]

b Array:
[1 2 3]

call power Function:
[        10      10000 1000000000]
numpy.mod()
Returns the remainder after dividing the elements at the corresponding positions of two arrays, which is the same as numpy Remainder() has the same function.
import numpy as np
a = np.array([11,22,33])
b = np.array([3,5,7])
#Divide the elements at the corresponding positions of a and b
print( np.mod(a,b))
#The remainder method is the same
print(np.remainder(a,b))
Output result:
mod:
[1 0 2]
remainder:
[1 0 2]
Complex array processing function
NumPy provides many functions for processing complex type arrays, mainly including the following:
- numpy.real() returns the real part of a complex array;
- numpy.imag() returns the imaginary part of a complex array;
- numpy.conj() returns the conjugate complex number by changing the sign of the imaginary part;
- numpy.angle() returns the angle of the complex parameter. The of this function provides a deg parameter. If deg=True, the returned value will be expressed in angle system; otherwise, it will be expressed in radian system.
Examples are as follows:
import numpy as np
a = np.array([-5.6j, 0.2j, 11. , 1+1j])
print(a)
#real()
print np.real(a)
#imag()
print np.imag(a)
#conj()
print np.conj(a)
#angle()
print np.angle(a)
#angle() with parameter deg
print np.angle(a, deg = True)
Output result:
a Array:
[ 0.-5.6j 0.+0.2j 11.+0.j 1.+1.j ]

real():
[ 0. 0. 11. 1.]

imag():
[-5.6 0.2 0. 1. ]

conj():
[ 0.+5.6j 0.-0.2j 11.-0.j 1.-1.j ]

angle() :
[-1.57079633 1.57079633 0. 0.78539816]

angle(a,deg=True)
[-90. 90. 0. 45.]
NumPy statistical function
NumPy provides many statistical functions, such as finding the maximum value, percentile, variance and standard deviation of array elements.
numpy.amin() and numpy amax()
These two functions are used to calculate the minimum and maximum values of the array along the specified axis:
- amin() finds the minimum value of the element in the array along the specified axis and returns it as an array;
- amax() finds the maximum value of the element in the array along the specified axis and returns it as an array.
For two-dimensional arrays, axis=1 means along the horizontal direction and axis=0 means along the vertical direction.
Figure 1: Axis axis
Examples are as follows:
import numpy as np
a = np.array([[3,7,5],[8,4,3],[2,4,9]])
print ('array a Yes:')
print(a)
#amin() function
print (np.amin(a))
#Call amin() function, axis=1
print(np.amin(a,1))
#Call amax() function
print(np.amax(a))
#Call the amax() function again
print(np.amax(a,axis=0))
The output results are as follows:
Our array is:
[[3 7 5]
[8 4 3]
[2 4 9]]

call amin()Function:
2

call amin(axis=1) Function:
[3 3 2]

amax() Function:
9
amax(axis=0) Function:
[8 7 9]
numpy.ptp()
numpy.ptp() is used to calculate the difference between the maximum values in the array elements, that is (maximum minimum value).
import numpy as np
a = np.array([[2,10,20],[80,43,31],[22,43,10]])
print("Original array",a)
print("along axis 1:",np.ptp(a,1))
print("along axis 0:",np.ptp(a,0))
Output result:
Original array array:
[[ 2 10 20]
[80 43 31]
[22 43 10]]

along axis 1: [18 49 33]
along axis 0: [78 33 21]
numpy.percentile()
Percentile is a unit of measurement used in statistics. This function means to calculate any percentage quantile in the array along the specified axis. The syntax format is as follows:
numpy.percentile(a, q, axis)
Function numpy Parameter description of percentile():
- a: Input array;
- q: The percentile to be calculated is between 0 and 100;
- Axis: calculates the percentile along the specified axis.
Examples are as follows:
import numpy as np
a = np.array([[2,10,20],[80,43,31],[22,43,10]])
print("array a:",a)
print("along axis=0 Calculate percentile",np.percentile(a,10,0))
print("along axis=1 Calculate percentile",np.percentile(a,10,1))
Output result:
array a:
[[ 2 10 20]
[80 43 31]
[22 43 10]]

along axis=0 Calculate percentile: [ 6.  16.6 12. ]
along axis=1 Calculate percentile: [ 3.6 33.4 12.4]
numpy.median()
numpy.median() is used to calculate the median (median) of a array element:
import numpy as np
a = np.array([[30,65,70],[80,95,10],[50,90,60]])
#Array a:
print(a)
#median()
print np.median(a)
#axis 0
print np.median(a, axis = 0)
#axis 1:
print(np.median(a, axis = 1))
The output results are as follows:
array a:
[[30 65 70]
[80 95 10]
[50 90 60]]
call median()function:
65.0
median(axis=0):
[ 50. 90. 60.]
median(axis=1):
[ 65. 80. 60.]
numpy.mean()
This function calculates the arithmetic mean of the elements in the array along the specified axis (that is, the sum of the elements divided by the number of elements). Examples are as follows:
import numpy as np
a = np.array([[1,2,3],[3,4,5],[4,5,6]])
print ('Our array is:')
print (a)
print ('call mean() Function:')
print (np.mean(a))
print ('Call along axis 0 mean() Function:')
print (np.mean(a, axis =  0))
print ('Call along axis 1 mean() Function:')
print (np.mean(a, axis =  1))
Output result:
Our array is:
[[1 2 3]
[3 4 5]
[4 5 6]]

call mean() Function:
3.6666666666666665

Call along axis 0 mean() Function:
[2.66666667 3.66666667 4.66666667]

Call along axis 1 mean() Function:
[2. 4. 5.]
numpy.average()
The weighted average value is to multiply each value in the array by the corresponding weight, then sum the weight values, and finally divide the sum of the weights by the total number of units (i.e. the number of factors).
numpy.average() calculates the weighted average of the array elements based on the weight given in the array. This function can accept an axis parameter axis. If it is not specified, the array will be expanded into a one-dimensional array.
Here is a simple example: the existing array [1,2,3,4] and the corresponding weight array [4,3,2,1], and its weighted average value is calculated as follows:
Weighted average = (1 * 4 + 2 * 3 + 3 * 2 + 4 * 1) / (4 + 3 + 2 + 1)
Use average() to calculate the weighted average. The code is as follows:
import numpy as np
a = np.array([1,2,3,4])
print('a The array is:')
print(a)
#average() function:
print (np.average(a))
# If the weight is not specified, it is equivalent to the average of the array
we = np.array([4,3,2,1])
#Calling the average() function: ')
print(np.average(a,weights = we))
#If returned is true, the sum of the weights is returned
prin(np.average([1,2,3,4],weights =  [4,3,2,1], returned =  True))
Output result:
a The array is:
[1 2 3 4]

When there is no multiple value average()Function:
2.5

When there is a weight value average()Function:
2.0

tuple(weighted average,Sum of weights):
(2.0, 10.0)
In the multidimensional array, you can also specify the axis parameter. Examples are as follows:
import numpy as np
a = np.arange(6).reshape(3,2)
#Multidimensional array a
print (a)
#Modified array
wt = np.array([3,5])
print (np.average(a, axis = 1, weights = wt))
#Modified array
print (np.average(a, axis = 1, weights = wt, returned =  True))
The output result is:
Multidimensional array a:
[[0 1]
[2 3]
[4 5]]

axis=1 Calculated in horizontal direction:
[0.625 2.625 4.625]

Modified array:
(array([0.625, 2.625, 4.625]), array([8., 8., 8.]))
Variance NP var()
Variance, also known as sample variance in statistics, how to get the variance? First, we need to know the average value of all samples, then find the square sum of the difference between each sample value and the mean value, and finally find the mean value for the square sum of the difference. The formula is as follows (where n represents the number of elements):

Figure 1: variance formula
Examples are as follows:
import numpy as np
print (np.var([1,2,3,4]))
Output result:
1.25
Standard deviation NP std()
Standard deviation is the arithmetic square root of variance, which is used to describe the dispersion of the average value of a group of data. If the standard deviation of a group of data is large, it indicates that there is a large difference between most values and their average values; If the standard deviation is small, it means that this group of values is close to the average value. Its formula is as follows:
std = sqrt(mean((x - x.mean())**2
NP. Is used in NumPy Std() calculates the standard deviation. Examples are as follows:
import numpy as np
print (np.std([1,2,3,4]))
Output result:
1.1180339887498949
NumPy sorting and search function
NumPy provides a variety of sorting functions, which can implement different sorting algorithms.
The characteristics of sorting algorithm are mainly reflected in the following four aspects: execution speed, complexity in the worst case, required workspace and stability of the algorithm. The following table lists three sorting algorithms:
| type | speed | Worst case complexity | working space | stability |
|---|---|---|---|---|
| quicksort | 1 | O(n^2) | 0 | instable |
| Merge sort | 2 | O(n * log(n)) | ~n/2 | stable |
| heapsort (heap sort) | 3 | O(n * log(n)) | 0 | instable |
numpy.sort()
numpy.sort() sorts the input array and returns a copy of the array. It has the following parameters:
numpy.sort(a, axis, kind, order)
Parameter Description:
- a: Array to sort;
- Axis: sort along the specified axis. If axis is not specified, sort on the last axis by default. If axis=0, sort by column and axis=1, sort by row;
- kind: quicksort by default;
- Order: if the array has fields set, order indicates the fields to be sorted.
Here is a set of examples:
import numpy as np
a = np.array([[3,7],[9,1]])
print('a The array is:')
print(a)
#Call the sort() function
print(np.sort(a))
#Sort by column:
print(np.sort(a, axis = 0))
#Sets the sort field in the sort function
dt = np.dtype([('name',  'S10'),('age',  int)])
a = np.array([("raju",21),("anil",25),("ravi",  17),  ("amar",27)], dtype = dt)
#Print a array again
print(a)
#Sort by name field
print(np.sort(a, order = 'name'))
Output result:
Our array is:
[[3 7]
[9 1]]

call sort()Function:
[[3 7]
[1 9]]

Sort by column:
[[3 1]
[9 7]]

Print again a Array:
[(b'raju', 21) (b'anil', 25) (b'ravi', 17) (b'amar', 27)]
Press name Field sorting:
[(b'amar', 27) (b'anil', 25) (b'raju', 21) (b'ravi', 17)]
numpy.argsort()
argsort() sorts the element values of the input array along the specified axis and returns the sorted element index array. Examples are as follows:
import numpy as np
a = np.array([90, 29, 89, 12])
print("Original array",a)
sort_ind = np.argsort(a)
print("Print sort element index values",sort_ind)
#Sort the original array using an indexed array
sort_a = a[sort_ind]
print("Print sort array")
for i in sort_ind:
    print(a[i],end = " ")
Output result:
Original array:
[90 29 89 12]
Print index array of sorted elements:
[3 1 2 0]
Print sort array:
12 29 89 90
numpy.lexsort()
numpy. The lexport () key sequence sorts the array and returns a sorted index array, similar to numpy argsort().
Here is a set of examples:
import numpy as np
a = np.array(['a','b','c','d','e'])
b = np.array([12, 90, 380, 12, 211])
ind = np.lexsort((a,b))
#Print index array of sorted elements
print(ind)
#Sort arrays using indexed arrays
for i in ind:
    print(a[i],b[i])
Output result:
Print index array of sorted elements:
[0 3 1 4 2]
Sort the original array using the index array:
a 12
d 12
b 90
e 211
c 380
NumPy provides many functions that can perform search functions within an array. For example, find the element with the most value or meeting certain conditions.
numpy.nonzero()
This function finds the index position of non-zero elements from the array. Examples are as follows:
import numpy as np
b = np.array([12, 90, 380, 12, 211])
print("Original array b",b)
print("Print index position of non-0 elements")
print(b.nonzero())
Output result:
Original array b
 [ 12  90 380  12 211]
Print index position of non-0 elements
(array([0, 1, 2, 3, 4]),)
numpy.where()
numpy. The return value of where () is the element index value that meets the given conditions.
import numpy as np
b = np.array([12, 90, 380, 12, 211])
print(np.where(b>12))
c = np.array([[20, 24],[21, 23]])
print(np.where(c>20))
Output result:
Returns the index array that meets the criteria
(array([1, 2, 4]),)
(array([0, 1, 1]), array([1, 0, 1]))
numpy.extract()
The return value of this function is the element value that meets the given conditions. An example is as follows:
import numpy as np
x = np.arange(9.).reshape(3, 3)
Print array x:'
print(x)
#Set conditions to select even elements
condition = np.mod(x,2)== 0
#Output Boolean array
print(condition)
#Extract the element value satisfying the condition by condition
print np.extract(condition, x)
Output result:
a The array is:[[0. 1. 2.][3. 4. 5.][6. 7. 8.]]Output Boolean array:[[ True False True][False True False][ True False True]]Extract elements by criteria:[0. 2. 4. 6. 8.]
numpy.argmax()
This function returns the index of the maximum value. The opposite function is argmin() to find the index of the minimum value. An example is as follows:
import numpy as np
a = np.array([[30,40,70],[80,20,10],[50,90,60]])
#a array
print (a)
#argmax() function
print (np.argmax(a))
#Expand the array in one dimension
print (a.flatten())
#Maximum index along axis 0:
maxindex = np.argmax(a, axis =  0)
print (maxindex)
#Maximum index along axis 1
maxindex = np.argmax(a, axis =  1)
print (maxindex)
Output result:
array a:
[[30 40 70]
[80 20 10]
[50 90 60]]

call argmax() Function:
7

Expand array:
[30 40 70 80 20 10 50 90 60]

Maximum index along axis 0:
[1 2 0]

Maximum index along axis 1:
[2 0 1]
numpy.argmin()
argmin() finds the minimum index. Examples are as follows:
import numpy as np
b= np.array([[3,4,7],[8,2,1],[5,9,6]])
print  ('array b: ')
print (b)
#Call argmin() function
minindex = np.argmin(b)
print (minindex)
#Expand the minimum value in the array:
print (b.flatten()[minindex])
#Minimum index along axis 0:
minindex = np.argmin(b, axis =  0)
print (minindex)
#Minimum index along axis 1:
minindex = np.argmin(b, axis =  1)
print (minindex)
Output result:
array b:
[[3 4 7]
[8 2 1]
[5 9 6]]
Return minimum index value:
5
#Expand the minimum value in the array:
1
#Minimum index along axis 0:
[0 1 1]
#Minimum index along axis 1:
[0 2 0]
NumPy byte exchange
Data is stored in the computer memory in the form of bytes, and the storage rules can be divided into two categories: small end byte order and large end byte order.
Small endian means that the low-order bytes are arranged at the low address end of the memory and the high-order bytes are arranged at the high address segment. It is just opposite to the big endian.
For the binary number 0x12345678, it is assumed that it is stored from the address 0x4000. In the large end and small end modes, their byte order is as follows:
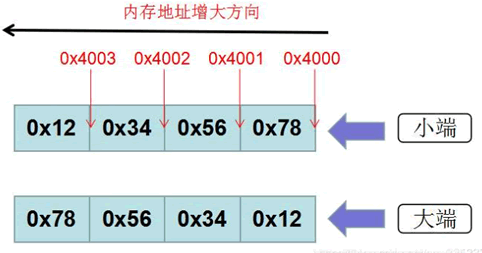
Figure 1: byte storage mode
After small end storage: 0x78563412 after large end storage: 0x12345678.
numpy.ndarray.byteswap()
This function exchanges the byte order of each element in the array. Examples are as follows:
import numpy as np
a = np.array([1, 256, 8755], dtype = np.int16)
#Array a
print(a)
#Represents data in memory in hexadecimal form
print(map(hex,a))
#The byteswap() function converts in place by passing the True parameter
#Call the byteswap() function
print(a.byteswap(True))
#Hexadecimal form
print(map(hex,a))
Output result:
array a
[ 1  256 8755]
Represents data in memory in hexadecimal form
<map object at 0x03445E10>
call byteswap()function
[ 256 1 13090]
Hexadecimal form
<map object at 0x03445FB0>
NumPy Matrix library
NumPy provides a matrix library module NumPy The function in this module returns a matrix object instead of an ndarray object. The matrix is composed of M rows and N columns (m*n). The elements in the matrix can be numbers, symbols or mathematical formulas.
matlib.empty()
matlib.empty() returns an empty matrix, so its creation is very fast.
numpy.matlib.empty(shape, dtype, order)
The parameters of this function are described as follows:
- Shape: Specifies the shape of the matrix as a tuple.
- dtype: represents the data type of the matrix.
- Order: there are two options, C (row order first) or F (column order first).
Examples are as follows:
import numpy.matlib
import numpy as np
#The matrix is filled with meaningless random values
print(np.matlib.empty((2,2)))
Output result:
[[1.81191899e+167 6.65173396e-114]
[9.71613265e-243 6.96320200e-077]]
numpy.matlib.zeros()
numpy.matlib.zeros() creates a matrix filled with 0. An example is as follows:
import numpy.matlib
import numpy as np
print(np.matlib.zeros((2,2)))
Output result:
[[ 0.  0.]
[ 0.  0.]]
numpy.matlib.ones()
numpy.matlib.ones() creates a matrix filled with 1.
import numpy.matlib
import numpy as np
print(np.matlib.ones((2,2)))
Output result:
[[ 1.  1.]
[ 1.  1.]]
numpy.matlib.eye()
numpy.matlib.eye() returns a matrix with diagonal elements of 1 and other elements of 0.
numpy.matlib.eye(n,M,k, dtype)
- n: Returns the number of rows of the matrix;
- M: Returns the number of columns of the matrix, which is n by default;
- k: Diagonal index;
- dtype: data type of elements in the matrix.
Examples are as follows:
import numpy.matlib
import numpy as np
print (np.matlib.eye(n =  3, M =  4, k =  0, dtype =  float))
Output result:
[[1. 0. 0. 0.]
[0. 1. 0. 0.]
[0. 0. 1. 0.]]
numpy.matlib.identity()
This function returns an identity matrix of a given size. The diagonal element of the matrix is 1 and the other elements are 0.
import numpy.matlib
import numpy as np
print np.matlib.identity(5, dtype = float)
Output result:
[[ 1.  0.  0.  0.  0.]
[ 0.  1.  0.  0.  0.]
[ 0.  0.  1.  0.  0.]
[ 0.  0.  0.  1.  0.]
[ 0.  0.  0.  0.  1.]]
numpy.matlib.rand()
numpy.matlib.rand() creates a matrix filled with random numbers and given dimensions. Examples are as follows:
import numpy.matlib
import numpy as np
print (np.matlib.rand(3,3))
Examples are as follows:
[[0.23966718 0.16147628 0.14162   ]
[0.28379085 0.59934741 0.62985825]
[0.99527238 0.11137883 0.41105367]]
It should be noted here that because matrix can only represent two-dimensional data, and ndarray can also be a two-dimensional array, the two can be converted to each other. Examples are as follows:
#Create Matrix i
import numpy.matlib
import numpy as np
i = np.matrix('1,2;3,4')
print (i)
Output result:
[[1  2]
[3  4]]
Realize the conversion between matrix and ndarray, as shown below:
import numpy.matlib
import numpy as np
j = np.asarray(i)
print (j)
k = np.asmatrix (j)
print (k)
Output result:
ndarray:
[[1  2]
[3  4]]
matrix:
[[1  2]
[3  4]]
NumPy linear algebra
NumPy provides NumPy Linalg module, which contains some common linear algebra calculation methods. The following is a brief introduction to the common functions:
| Function name | Description |
|---|---|
| dot | Dot product of two arrays. |
| vdot | Dot product of two vectors. |
| inner | Inner product of two arrays. |
| matmul | The matrix product of two arrays. |
| det | Calculate the determinant of the input matrix. |
| solve | Solve the linear matrix equation. |
| inv | Calculate the inverse matrix of the matrix. Multiply the inverse matrix with the original matrix to get the identity matrix. |
numpy.dot()
According to the multiplication rules of the matrix, the dot product operation results of the two matrices are calculated. When inputting a one-dimensional array, it returns a result value. If inputting a multi-dimensional array, it also returns a multi-dimensional array result.
Enter a one-dimensional array, for example:
import numpy as np
A=[1,2,3]
B=[4,5,6]
print(np.dot(A,B))
Output result:
32
When entering a two-dimensional array, an example is as follows:
import numpy as np
a = np.array([[100,200],
             [23,12]])
b = np.array([[10,20],
            [12,21]])
dot = np.dot(a,b)
print(dot)
Output result:
[[3400 6200]
[ 374  712]]
For the above output results, its calculation process is as follows:
[[10010+20012,10020+20021]
[2310+1212,2320+1221]]
Dot product operation is to multiply and add each row element of array a and each column element of array b.
numpy.vdot()
This function is used to calculate the dot product of two vectors, which is different from dot() function.
import numpy as np
a = np.array([[100,200],[23,12]])
b = np.array([[10,20],[12,21]])
vdot = np.vdot(a,b)
print(vdot)
Output result:
5528
numpy.inner()
The inner() method is used to calculate the inner product between arrays. When the calculated array is a one-dimensional array, it is the same as the dot() function. If the input is a multi-dimensional array, they are different. Let's take a look at the specific examples.
import numpy as np
A=[[1 ,10],
    [100,1000]]
B=[[1,2],
    [3,4]]
#inner function
print(np.inner(A,B))
#dot function
print(np.dot(A,B))
Output result:
[[ 21 43]
[2100 4300]]
[[ 31 42]
[3100 4200]]
The calculation process of inner() function is to multiply and add each row of array A and array B, as shown below:
[[1*1+2*10  1*3+10*4 ]
[100*1+1000*2  100*3+1000*4]]
dot() means that each row of array A is multiplied by each column of array B.
numpy.matmul()
This function returns the product of two matrices. If the dimensions of the two matrices are inconsistent, an error will occur.
import numpy as np
a = np.array([[1,2,3],[4,5,6],[7,8,9]])
b = np.array([[23,23,12],[2,1,2],[7,8,9]])
mul = np.matmul(a,b)
print(mul)
Output result:
[[ 48  49  43]
[144 145 112]
[240 241 181]]
numpy.linalg.det()
This function uses diagonal elements to calculate the determinant of the matrix, and calculates the determinant of 2 * 2 (two rows and two columns). Examples are as follows:
[[1,2],
 [3,4]]
Find the result of determinant through diagonal elements (formula: "one skim and one Na" calculation method):
14-23=-2
We can use numpy linalg. Det() function to complete the calculation. Examples are as follows:
import numpy as np
a = np.array([[1,2],[3,4]])
print(np.linalg.det(a))
Output result:
-2.0000000000000004
numpy.linalg.solve()
This function is used to solve the system of linear matrix equations and express the solution of the linear equation in the form of matrix, as follows:
3X + 2 Y + Z = 10 X + Y + Z = 6 X + 2Y - Z = 2
First, convert the above equation into the expression of matrix:
Equation coefficient matrix: 3 2 1 1 1 1 1 2 -1 Equation variable matrix: X Y Z Equation result matrix: 10 6 2
If m, x and n are used to represent the above three matrices respectively, the representation results are as follows:
m*x=n or x=n/m
Pass the coefficient matrix and result matrix to numpy Solve() function to find the solution of the thread equation, as shown below:
import numpy as np
m = np.array([[3,2,1],[1,1,1],[1,2,-1]])
print ('array m: ')
print (m)
print ('matrix n: ')
n = np.array([[10],[6],[2]])
print (n)
print ('calculation: m^(-1)n: ')
x = np.linalg.solve(m,n)
print (x)
Output result:
x Is the solution of the linear equation: [[1.] [2.] [3.]]
numpy.linalg.inv()
This function is used to calculate the inverse matrix of the matrix. The inverse matrix is multiplied by the original matrix to obtain the identity matrix. Examples are as follows:
import numpy as np
a = np.array([[1,2],[3,4]])
print("Original array:",a)
b = np.linalg.inv(a)
print("Inversion:",b)
Output result:
Original array: [[1 2] [3 4]] Inversion: [[-2. 1. ] [ 1.5 -0.5]]
NumPy matrix multiplication
Matrix multiplication takes two matrices as input values, multiplies and adds the row of matrix A and the column of matrix B, so as to generate a new matrix, as shown in the following figure:
Note: the number of rows in the first matrix must be equal to the number of columns in the second matrix, otherwise matrix multiplication cannot be performed.
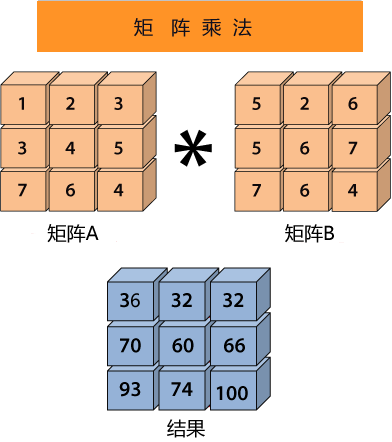
Figure 1: matrix multiplication
Matrix multiplication is called vectorization operation. The main purpose of vectorization is to reduce the number of for cycles used or not used at all. The purpose of this is to speed up the calculation of the program.
The following describes the three matrix multiplication provided by NumPy, so as to further deepen the understanding of matrix multiplication.
Element by element matrix multiplication
The multiple() function is used for element by element multiplication of two matrices. Examples are as follows:
import numpy as np array1=np.array([[1,2,3],[4,5,6],[7,8,9]],ndmin=3) array2=np.array([[9,8,7],[6,5,4],[3,2,1]],ndmin=3) result=np.multiply(array1,array2) result
Output result:
array([[[ 9, 16, 21],
[24, 25, 24],
[21, 16, 9]]])
Matrix product operation
matmul() is used to calculate the matrix product of two arrays. Examples are as follows:
import numpy as np array1=np.array([[1,2,3],[4,5,6],[7,8,9]],ndmin=3) array2=np.array([[9,8,7],[6,5,4],[3,2,1]],ndmin=3) result=np.matmul(array1,array2) print(result)
Output result:
Array([[[
[30,24,18],
[84,69,54 ],[138,114,90]]])
Matrix dot product
The dot() function is used to calculate the dot product of two matrices. As follows:
Examples are as follows:
import numpy as np array1=np.array([[1,2,3],[4,5,6],[7,8,9]],ndmin=3) array2=np.array([[9,8,7],[6,5,4],[3,2,1]],ndmin=3) result=np.dot(array1,array2) print(result)
Output result:
array([[[[ 30, 24, 18]],
[[ 84, 69, 54]],
[[138, 114, 90]]]])
NumPy and Matplotlib plot
Matplotlib is Python's drawing library, which is often used with NumPy to provide a solution that can replace Matlab. Not only that, Matplotlib can also be used with graphics toolkits such as PyQt and wxpthon.
Matplotlib was originally written by John D. Hunter. At present, its latest version is 3.3.1, and the last version supporting Python 2 is 2.2.5. You can install Matplotlib through Python package manager pip. The command is as follows:
pip3 install matplotlib
After successful installation, we can import it by using the following package introduction method:
from matplotlib import pyplot as plt
Draw linear function image
The sub module pyplot of Matplotlib is an important module for drawing 2D images. The following example draws an image of the function y = 2x + 5:
import numpy as np
from matplotlib import pyplot as plt
x = np.arange(1,11)
y = 2 * x + 5
#Draw coordinate title
plt.title("Matplotlib demo")
#Draw x and y axis notes
plt.xlabel("x axis")
plt.ylabel("y axis")
plt.plot(x,y)
plt.show()
The output results are as follows:
Figure 1: Matplotlib draws a linear graph
You can add formatting characters to the plot() function to achieve different styles of display or marking. The following table lists the commonly used formatting characters:
| character | describe |
|---|---|
| '-' | Solid line style |
| '–' | Dash style |
| '-.' | Dash dot style |
| ':' | Dashed line style |
| '.' | Point marker |
| ',' | Pixel marker |
| 'o' | Circle mark |
| 'v' | Inverted triangle mark |
| '^' | Positive triangle mark |
| '<' | Left triangle mark |
| '>' | Right triangle mark |
| '1' | Down arrow mark |
| '2' | Up arrow mark |
| '3' | Left arrow mark |
| '4' | Right arrow mark |
| 's' | Square mark |
| 'p' | Pentagonal mark |
| '*' | Star Mark |
| 'h' | Hexagon mark 1 |
| 'H' | Hexagon Mark 2 |
| '+' | Plus sign |
| 'x' | X mark |
| 'D' | Diamond mark |
| 'd' | Narrow diamond mark |
| '|' | Vertical line mark |
| '_' | Horizontal line mark |
At the same time, Matplotlib also defines some color characters, as shown below:
| character | colour |
|---|---|
| 'b' | blue |
| 'g' | green |
| 'r' | gules |
| 'c' | Cyan |
| 'm' | magenta |
| 'y' | yellow |
| 'k' | black |
| 'w' | white |
If you want to replace the line style in Figure 1 with a dot style, you can use "ob" as the formatting character of plot(). As follows:
import numpy as np
from matplotlib import pyplot as plt
x = np.arange(1,11)
y = 2 * x + 5
plt.title("Matplotlib demo1")
plt.xlabel("x axis")
plt.ylabel("y axis")
plt.plot(x,y,"ob")
plt.show()
The output results are as follows:
Figure 2: dot drawing by Matplotlib
Draw sine wave diagram
You can also use Matplotlib to generate sine wave diagrams. Examples are as follows:
import numpy as np
import matplotlib.pyplot as plt
# Calculate the x and y coordinates on the sine curve
x = np.arange(0, 3 * np.pi, 0.1)
y = np.sin(x)
plt.title("sine wave image")
# Mapping using matplotlib
plt.plot(x, y)
plt.show()
Output result:
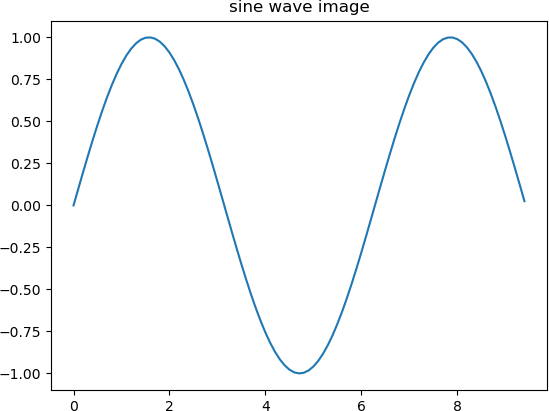
Figure 3: sine diagram of Matplotlib plot
subplot()
subplot() allows you to draw multiple images at different positions in the same canvas, which can be understood as dividing the canvas by rows and columns. The syntax format of the function is as follows:
plt.subplot(nrows, ncols, index, **kwargs)
Parameter Description: this function uses three integers to describe the position information of the subgraph. These three integers are the number of rows, columns and index value (here the index value starts from 1). The subgraph will be distributed at the set index position. Increase from the upper right corner to the lower right corner. For example, PLT Subplot (2, 3, 5) indicates that the subplot is located at the fifth position in two rows and three columns.

Figure 4: subplot canvas segmentation
The following example is to draw sine and cosine images in the same canvas. The code is as follows:
import numpy as np
import matplotlib.pyplot as plt
#Calculate the x and y coordinates of points on sine and cosine curves
x = np.arange(0, 3 * np.pi, 0.1)
y_sin = np.sin(x)
y_cos = np.cos(x)
#Draw the subplot grid into 2 rows and 1 column
#Activate the first subplot
plt.subplot(2, 1, 1)
#Draw the first image
plt.plot(x, y_sin)
plt.title('Sine')
#Activate the second subplot and draw the second image
plt.subplot(2, 1, 2)
plt.plot(x, y_cos)
plt.title('Cosine')
#Display image
plt.show()
The output results are as follows:
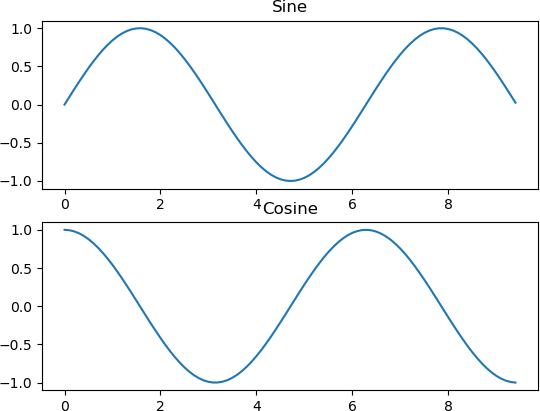
Figure 5: Matplotlib drawing waveform diagram
Bar bar chart
The bar() function is provided in the pyplot sub module to generate the histogram. The following example code generates a histogram of two groups of data:
from matplotlib import pyplot as plt
#First set of data
x1 = [5,8,10]
y1 = [12,16,6]
#Second set of data
x2 = [6,9,11]
y2 = [6,15,7]
plt.bar(x1, y1, align = 'center')
plt.bar(x2, y2, color = 'g', align = 'center')
plt.title('Bar graph')
#Set x-axis and y-axis scales
plt.ylabel('Y axis')
plt.xlabel('X axis')
plt.show()
Output result:
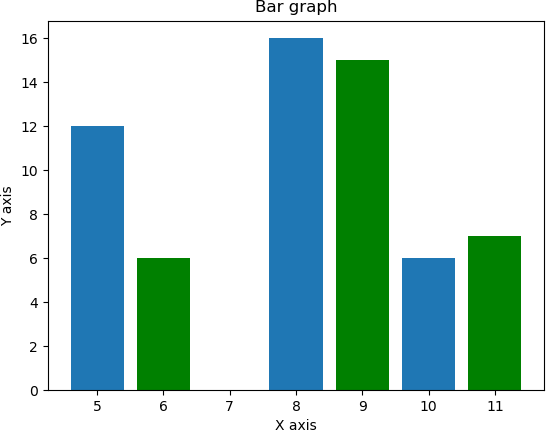
Figure 6: Matplotlib plotting histogram
numpy.histogram()
Histogram is a commonly used graph to represent the probability distribution of data. NumPy provides the histogram() function, which represents the probability distribution value of a set of data in the form of histogram.
The histogram() function has two return values, hist and bin_edges represents the range of histogram height value and bin value respectively. The syntax format of the function is as follows:
histogram(array,bins=10,range=None,weights=None,density=False)
Examples are as follows:
import numpy as np a = np.arange(8) hist, bin_edges = np.histogram(a, density=True)
The output results are as follows:
his: [0.17857143 0.17857143 0.17857143 0. 0.17857143 0.17857143 0. 0.17857143 0.17857143 0.17857143] bin_edges [0. 0.7 1.4 2.1 2.8 3.5 4.2 4.9 5.6 6.3 7. ]
numpy.histogram() takes the input array a and bins as two parameters, where the continuous elements of the bins array are the boundary values of the bin interval. Examples are as follows:
import numpy as np a = np.array([22,87,5,43,56,73,55,54,11,20,51,5,79,31,27]) np.histogram(a,bins = [0,20,40,60,80,100]) hist,bins = np.histogram(a,bins = [0,20,40,60,80,100]) print(hist) print(bins)
The output results are as follows:
return hist Histogram value: [3 4 5 2 1] return bin Interval edge value: [0 20 40 60 80 100]
plt()
The plot() function of pyplot sub module takes an input array and bins array as parameters and outputs them as histograms. Examples are as follows:
from matplotlib import pyplot as plt
import numpy as np
a = np.array([22,87,5,43,56,73,55,54,11,20,51,5,79,31,27])
plt.hist(a, bins = [0,20,40,60,80,100])
plt.title("histogram")
plt.show()
The output image is as follows:
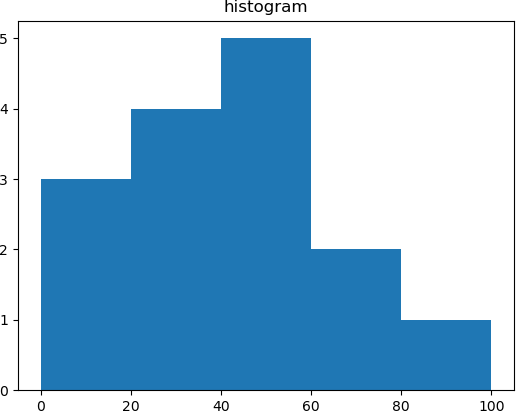
Figure 7: Matplotlib histogram
NumPy IO operation
NumPy IO operation is to load the ndarray object from the disk in the form of a file. In this process, NumPy can handle ndarray objects in two file types: binary files (ending with. npy) and ordinary text files.
The above two file formats correspond to different IO methods, as shown below:
| file type | processing method |
|---|---|
| Binary file | load() and save() |
| Plain text file | Loadtext() and savetxt() |
We know that files will be saved on different computers (such as Linux, Windows, Mac OS X, etc.). In order not to be affected by the computer architecture, the NumPy development team introduced a method to the ndarray object npy file format, through which to save the ndarray object.
numpy.save()
numpy. The save () method stores the input array in npy file.
numpy.save(file, arr, allow_pickle=True, fix_imports=True)
Parameter Description:
- File: the name of the saved file. Its file type is npy;
- arr: array to save
- allow_pickle: optional, Boolean parameter, allowing array objects to be saved using pickle serialization.
- fix_imports: optional, in order to facilitate reading the data saved by Python 3 in the Pyhton2 version.
Examples are as follows:
import numpy as np
a = np.array([1,2,3,4,5])
np.save('first',a)
Use load() to start from first Load data in NPY file as follows:
import numpy as np
b = np.load('outfile.npy')
print( b)
The output results are as follows:
[1, 2, 3, 4, 5]
savetxt()
Savetxt() and loadtext() respectively indicate that data is stored or loaded in text format. The syntax format of savetxt() is as follows:
np.savetxt('filename file path ', self.task, fmt="%d", delimiter = "")
Parameter Description:
- filename: indicates the path to save the file;
- self.task: the variable name of the array to be saved;
- fmt="%d": specify the format of saving the file. The default is decimal;
- delimiter = "" indicates a separator, which is separated by a space by default.
Examples are as follows:
import numpy as np
a = np.array([1,2,3,4,5])
np.savetxt('second.txt',a)
#Reload data using loadtext
b = np.loadtxt('second.txt')
print(b)
Output result:
[ 1. 2. 3. 4. 5.]