5. View
5.1 default template (understand)
-
To customize the default html template, you only need to create an app under the application root directory html file.
-
Default template:
<!DOCTYPE html> <html {{ HTML_ATTRS }}> <head {{ HEAD_ATTRS }}> {{ HEAD }} </head> <body {{ BODY_ATTRS }}> {{ APP }} </body> </html> -
Modify the template to support the lower version of IE browser (compatible with IE browser)
<!DOCTYPE html>
<!--[if IE 9]><html lang="en-US" class="lt-ie9 ie9" {{ HTML_ATTRS }}><![endif]-->
<!--[if (gt IE 9)|!(IE)]><!--><html {{ HTML_ATTRS }}><!--<![endif]-->
  <head {{ HEAD_ATTRS }}>
    {{ HEAD }}
  </head>
  <body {{ BODY_ATTRS }}>
    {{ APP }}
  </body>
</html>
5.2 default layout [Master]
5.2. 1 Layout overview
-
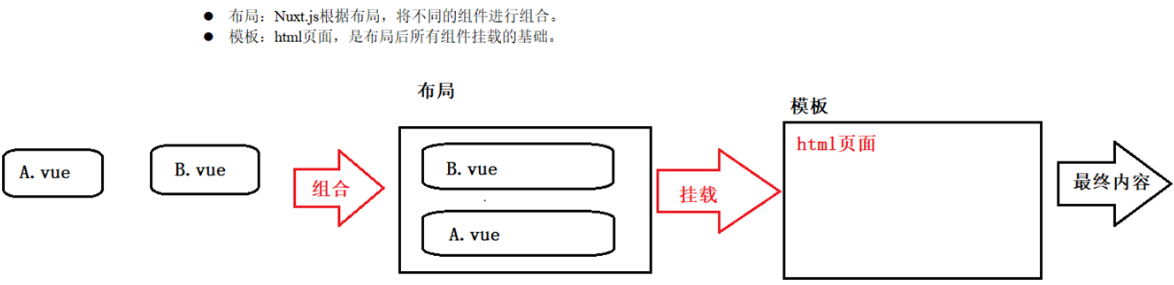
Layout: nuxt JS combines different components according to the layout.
-
Template: html page, which is the basis for mounting all components after layout.
5.2. 2 layout analysis
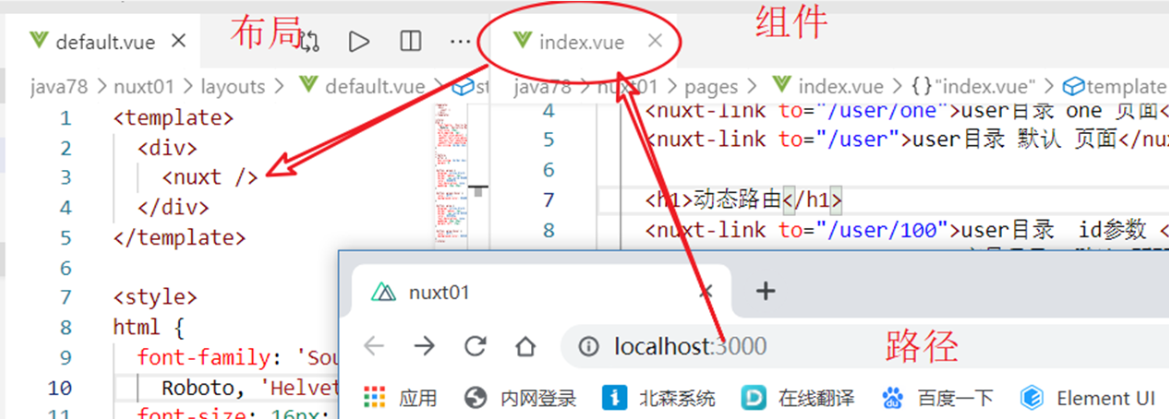
- layouts/default.vue default layout components
- The access path determines the execution component according to the route
- The specific display position of components is determined by layout
5.2. 3 public navigation
- Modify layouts / default vue
<template>
  <div>
    <nuxt-link to="/">home page</nuxt-link> |
    <nuxt-link to="/user/login">Sign in</nuxt-link> |
    <nuxt-link to="/user/123">details</nuxt-link> |
    <nuxt-link to="/about">Default page</nuxt-link> |
    <nuxt-link to="/nuxt/async">async</nuxt-link> |
    <hr/>
    <Nuxt />
  </div>
</template>
5.3 custom layout
-
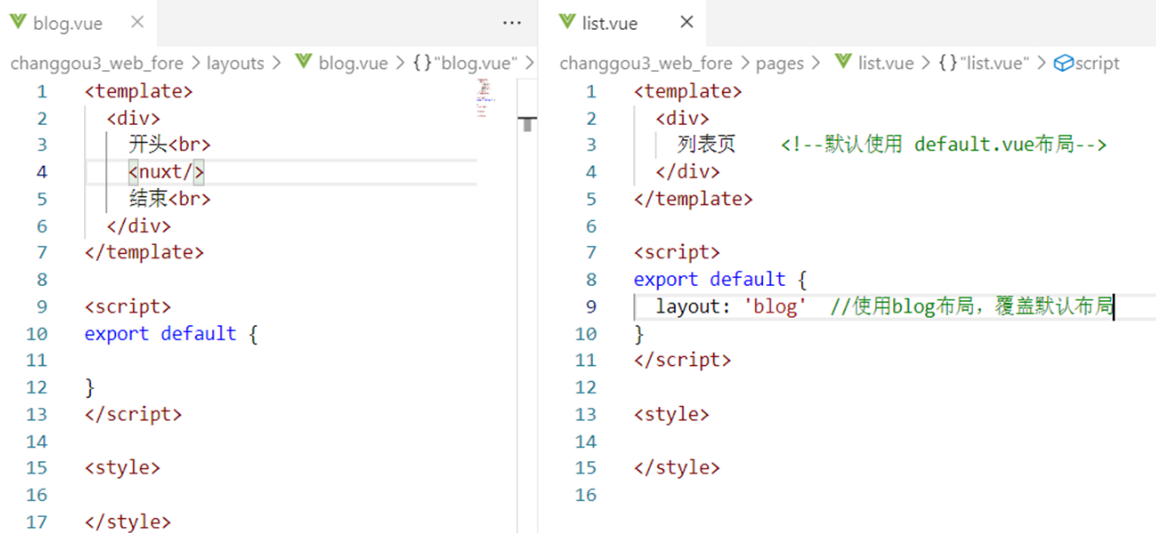
Create components in the layouts Directory: layouts / blog vue
<template> <div> start<br/> <nuxt/> end<br/> </div> </template> <script> export default { } </script> <style> </style> -
Use the blog layout in the desired view
<script>
export default {
  layout: 'blog'
  //...
}
</script>
5.4 error page
- Write layouts / error Vue page to realize personalized error page
<template>
  <div>
    <div v-if="error.statusCode == 404">
      404 Page does not exist {{error.message}}
    </div>
    <div v-else>
      application error
    </div>
    <nuxt-link to="/">home page</nuxt-link>
  </div>
</template>

<script>
export default {
  props: ['error']
}
</script>

<style>

</style>
- Problem solving: 404, 500, connection timeout (server shutdown)
- Summary: there are 2 ways to deal with error pages in the technology learned
- Method 1: default path vue (execute first)
- Method 2: error page, ~ / layouts / error vue
5.5 special configuration of nuxt components
- Page components are actually Vue components, just nuxt JS adds some special configuration items for these components
| Special configuration items | describe |
|---|---|
| asyncData | SSR performs asynchronous data processing, that is, the server-side ajax operation area. |
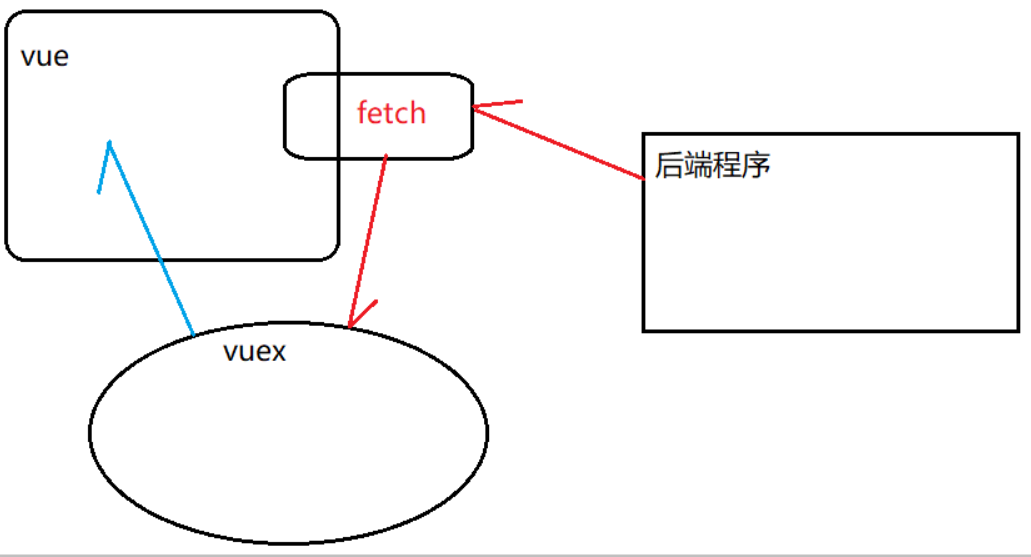
| fetch | Get the data before rendering the page and fill the application's state tree (store) |
| head | Configure the Meta tag of the current page |
| layout | Specifies the layout used by the current page |
| transition | Specifies the transition action of page switching |
| scrollToTop | Boolean value, default: false. Used to determine whether the current page needs to be scrolled to the top before rendering the page. |
5.5. 1 template code
<template>
  <h1 class="red">Hello {{ name }}!</h1>
</template>

<script>
export default {
	//It processes data asynchronously and is called before each load
  asyncData (context) {
    // called every time before loading the component
    return { name: 'World' }
  },
	//The state tree (store) used to get the data and fill the application before rendering the page
  fetch () {
    // The fetch method is used to fill the store before rendering the page
  },
	//Configure the Meta tag of the current page
  head: {
    // Set Meta Tags for this Page
  },
  // and more functionality to discover
  ...
}
</script>

<style>
.red {
  color: red;
}
</style>
5.5.2 head
-
html template code
<html>
<head>
	<meta charset="UTF-8" />
	<title>I'm the title</title>
	<link rel="stylesheet" type="text/css" href="css External files"/>
	<script src="js External files" type="text/javascript" charset="utf-8"></script>
</head>
<body>
</body>
</html>
-
By providing the head attribute with nuxt, you can also set the following contents for a single user: title, external css, external js, etc.
<template>
<div>
Detail page {{$route.params.id}} <br/>
<div class="bg2"></div>
<div class="bg3"></div>
</div>
</template>
<script>
export default {
head: {
title: 'Detail page',
link: [
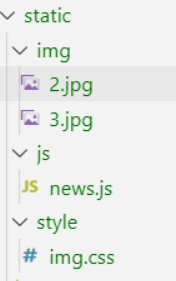
{rel:'stylesheet',href:'/style/img.css'},....
],
script: [
{ type: 'text/javascript', src: '/js/news.js' }
]
}
}
</script>
<style>
.bg2 {
background-image: url('~static/img/2.jpg');
width: 300px;
height: 300px;
background-size: 300px;
}
</style>
6.1. 2 manual integration (optional)
-
Step 1: package JSON has an axios version
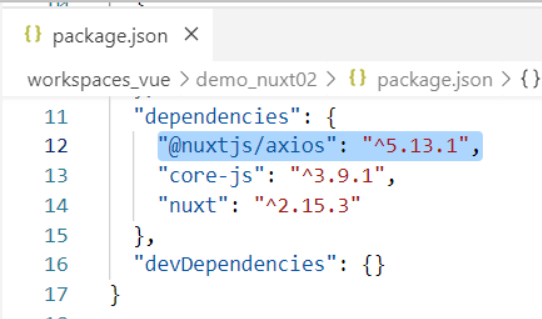
  "dependencies": {
    "@nuxtjs/axios": "^5.13.1",
  },
-
Step 2: install
npm install
-
Step 3: nuxt config. JS adds axios as a module
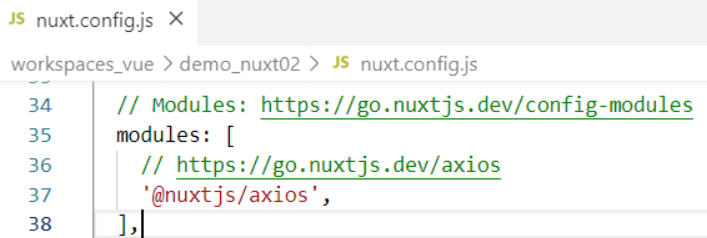
modules: [ // https://go.nuxtjs.dev/axios '@nuxtjs/axios', ],
6.1. 3 common configurations
-
Modify nuxt config. JS to configure baseURL
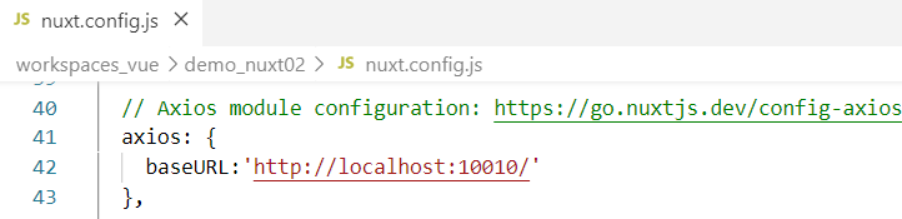
  // Axios module configuration: https://go.nuxtjs.dev/config-axios
  axios: {
    baseURL:'http://localhost:10010/'
  },
6.2 sending ajax using axios
-
On the vue page, through this a x i o s . x x x ( ) exercise do a j a x . t h i s . axios.xxx() operates ajax. this. axios.xxx() operates ajax. this.axios is equivalent to the previous Axios.
this.$axios.post("/search-service/search",this.searchMap).then( res => {
    //Get query results
    this.searchResult = res.data.data;
});
6.3 sending ajax using asyncData
- ajax in asyncData will be executed on the "front-end server", and the browser will see that it is data, not ajax program.
6.3. 1 send a request
- Syntax:
export default {
	async asyncData( context ) {  //context is equivalent to this in other places
        //Send ajax
        let { data } = await context.$axios.get('route','parameter')
        // Return results
        return {variable: Query results from data obtain }
	},
}
-
example
<template>
  <div>{{echo}}</div>
</template>

<script>
export default {
  async asyncData(context) {
    // Send ajax
    let {data} = await context.$axios.get('/service-consumer/feign/echo/abc')
    // Return data
    return {
      echo: data
    }
  },
}
</script>

<style>

</style>
6.3. 2 send multiple requests
-
Syntax 1:
export default { async asyncData( content ) { let [Result 1,Result 2] = await Promise.all([ ajax Request 1, ajax Request 2]) return { Variable 1: Result 1, Variable 2: Result 2 } }, } -
Syntax 2:
export default { async asyncData( content ) { let [{data:Alias 1},{data:Alias 2}] = await Promise.all([ ajax Request 1, ajax Request 2]) return { Variable 1: Alias 1, Variable 2: Alias 2 } }, } -
example
<template>
  <div>{{echo}} {{echo2}}</div>
</template>

<script>
export default {
  async asyncData(context) {
    // Send ajax
    let [{data:echo}, {data:echo2}] =
                await Promise.all([
                    context.$axios.get('/service-consumer/feign/echo/abc'),
                    context.$axios.get('/service-consumer/client/echo/abc')
                ])

    // Return data
    return {
      echo,
      echo2
    }
  },
}
</script>

<style>

</style>
6.4 sending ajax using fetch
-
The fetch method is used to fill in the application's state tree data before rendering the page. It is similar to the asyncData method, except that it does not set the component data.
-
Step 1: create store / index js
export const state = () => ({ str: 0 }) export const mutations = { setData (state, value) { state.str = value } } -
Step 2: test page
<template>
  <div>
    <!-- Display data -->
    {{$store.state.str}}
  </div>
</template>

<script>

export default {
  async fetch( {store, $axios} ) {
    // Send ajax
    let { data } = await $axios.get('/service-consumer/feign/echo/abc')
    // Set data
    store.commit('setData' , data )
  }
}
</script>

<style>

</style>
6.5 plug in: customize axios
6.5. 1 client
-
Step 1: in nuxt Configure the client plug-in in conf.js and set the mode to client
  plugins: [
    { src: '~plugins/api.js', mode: 'client' }
  ],

Step 2: write plugins / API JS enhances the built-in $axios
*
//Custom function
const request = {
  test : (params) => {
    return axios.get('/service-consumer/feign/echo/abc',{
      params
    })
  },
}

var axios = null
export default ({ $axios }, inject) => {

  //3) Save built-in axios
  axios = $axios

  //4) Give custom functions to nuxt
  // Usage 1: in vue, this$ request. xxx()
  // Usage 2: in asyncData of nuxt, content app.$ request. xxx()

  inject('request', request)
}
6.5. 2 server
-
Step 1: configure the server plug-in and set the mode to server
plugins: [ { src: '~plugins/api.js', mode: 'client' }, { src: '~plugins/api.server.js', mode: 'server' }, ], -
Step 2: write plugins / API server. JS enhances the built-in $axios
const request = {
  test : (params) => {
    return axios.get('/service-consumer/feign/echo/abc',{
      params
    })
  },

}

var axios = null
export default ({ $axios, redirect, process }, inject) => {

  //assignment
  axios = $axios

  //4) Give custom functions to nuxt
  // Usage 1: in vue, this$ request. xxx()
  // Usage 2: in asyncData of nuxt, content app.$ request. xxx()
  inject('request', request)
}
6.5. 3. Plug in configuration summary
//Method 1: set the file through src and set the mode through mode
plugins: [
	{ src: '~/plugins/apiclient.js', mode: 'client' },		//Front end client
	{ src: '~/plugins/apiserver.js', mode: 'server' },		//Front end server
    { src: '~/plugins/api.js' }								//Front end client + front end server
]

//Method 2: determine the mode by naming
plugins: [
    '~/plugins/api.client.js',				//Front end client
    '~/plugins/api.server.js',				//Front end server
    '~/plugins/api.js',						//Front end client + front end server
]
7. Vuex status tree
7.1 root module data operation
-
Step 1: create store / index JS adds a counter variable and can continue the accumulation operation
export const state = () => ({ counter: 0 }) export const mutations = { increment (state) { state.counter++ } } -
Step 2: in the page, use
<template>
  <div>
    home page {{counter}}
    <input type="button" value="+" @click="increment"/>
  </div>
</template>

<script>
import { mapState,mapMutations } from 'vuex'
export default {
  computed: {
    ...mapState(['counter'])
  },
  methods: {
    ...mapMutations(['increment'])
  },
}
</script>

<style>

</style>
7.2 data operation of other modules
-
Step 1: create other modules store / book js
export const state = () => ({ money: 0 }) export const mutations = { addmoney (state) { state.money += 5 } } -
Step 2: use the data in the specified module
<template>
  <div>
    home page {{money}}
    <input type="button" value="+" @click="addmoney" />
  </div>
</template>

<script>
import { mapState,mapMutations } from 'vuex'
export default {
  computed: {
    money () {
      return this.$store.state.book.money
    }
  },
  methods: {
    ...mapMutations({
      addmoney: 'book/addmoney'
    })
  },
}
</script>

<style>

</style>
7.3 complete vuex formwork
// state is a function. Pay attention to the writing of arrow function
const state = () => ({
  user: 'jack'
})

// mutations is an object
const mutations = {
  setUser(state, value) {
    state.counter = value
  }
}
// action execute mutation
const actions = {
  userAction (context,value){
    // You can send ajax
    context.commit('setUser',value)
  }

}

// get data
const getters = {
  getUser (state) {
    return state.user
  }
}
export default {
  namespace: true,	// Namespace
  state,
  mutations,
  actions,
  getters
}
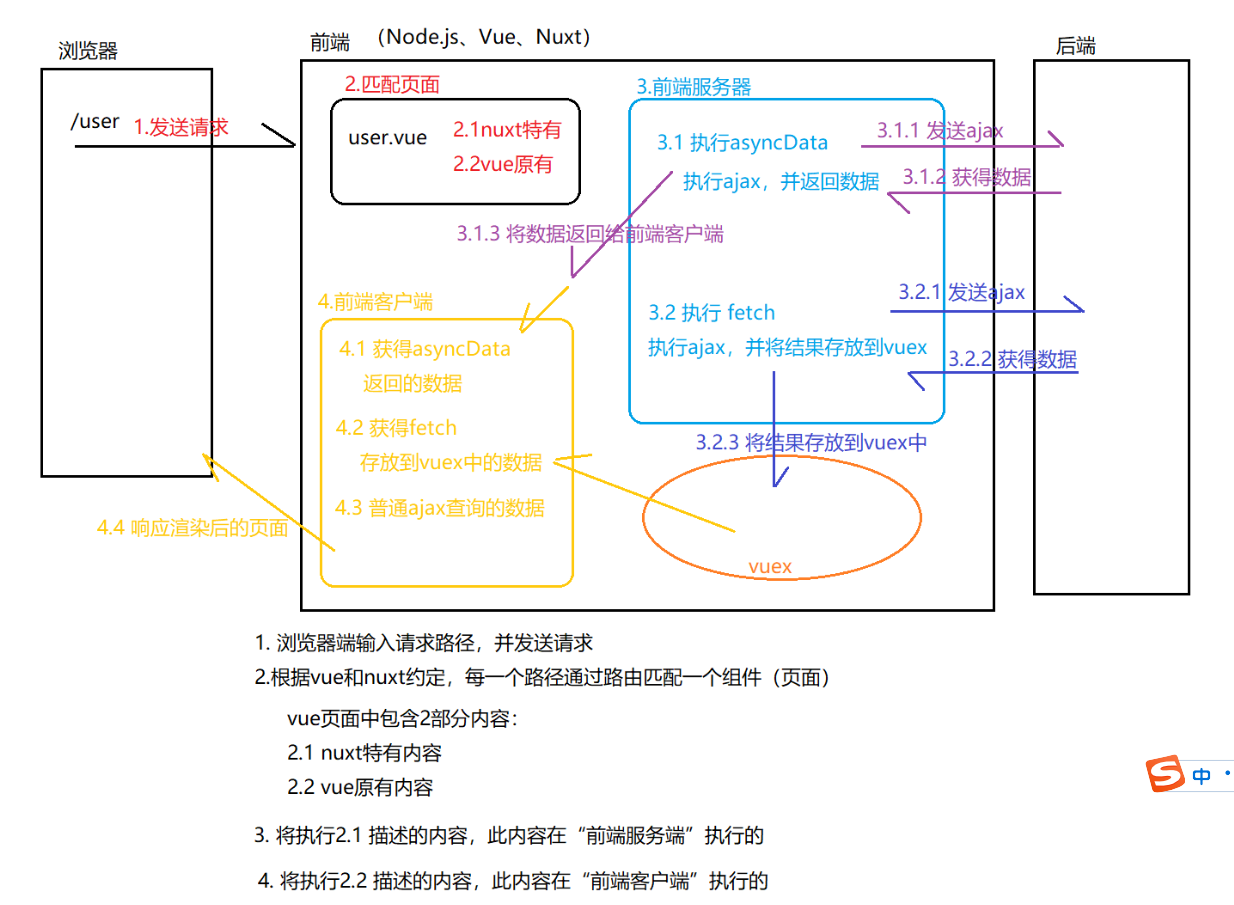
8. nuxt process summary