Although Android carries SQLite, its operation is troublesome, and if it is a large-scale project, it will become confusing and difficult to maintain, unless you design a very good architecture and package.
Of course, if it's easy to operate, Mr. Guo's Litepal is not bad. But today we learn the component of google in Jetpack - ROOM. Let's learn it together.
1, Basic use of ROOM
First, ROOM consists of three parts: Entity, Dao and Database
- Entity: used to define the entity classes that iFeng will give to the actual data. Each entity class will correspond to a table in the database, and the columns in the table are automatically generated according to the fields of the entity class.
- Dao: Dao is the meaning of data access object. It usually encapsulates various operations of database, such as adding, deleting, querying and modifying. In this way, when accessing data, you don't need to worry about the underlying database. You only need to deal with Dao
- Database: used to define the key information in the database, including version number, which entity classes are included and the access layer that provides Dao
If you need to use ROOM, you need to use the build.gradle Add plug-in
apply plugin: 'kotlin-kapt'
Association dependency:
//room
implementation 'androidx.room:room-runtime:2.1.0'
kapt 'androidx.room:room-compiler:2.1.0'
kpt means annotation, which is equivalent to annotation processor of java.
1.2 create entity class
Next, we create an entity class, User:
@Entity
data class UserData (
    @PrimaryKey val uid: Int,
    @ColumnInfo(name = "first_name") val firstName: String?,
    @ColumnInfo(name = "last_name") var lastName: String?
)
As you can see, we used @ Entity annotation to declare it as an Entity class, then added an id field, set it as the primary key using @ PrimaryKey annotation, and then used @ ColumnInfo annotation for parameters to represent the columns of the table.
1.3 setting up Dao
In the database, the most common thing is to add, delete, search and change, but the business is ever-changing, and what Dao has to do is to cover these businesses, so our logic only needs to deal with Dao, without paying attention to the underlying database.
Create a new UserDao, note that it must be an interface, and then write the following code:
@Dao
interface UserDao {

    @Query("SELECT * FROM userdata")
    fun getAll(): List<UserData>

    @Update
    fun updateUser(user: UserData)

    @Query("SELECT * FROM userdata WHERE first_name LIKE :first AND " +
            "last_name LIKE :last LIMIT 1")
    fun findByName(first: String, last: String): UserData

    @Insert
    fun insertAll(vararg users: UserData)

    @Delete
    fun delete(user: UserData)

    @Query("delete from UserData where last_name = :lastName")
    fun deleteByLastName(lastName:String) :Int
}
As you can see, when UserDao uses @ Dao annotation, ROOM will recognize Dao and provide @ Insert, @ Update, @ Delete, @ Query four corresponding annotations.
When @ Insert inserts the data, it will return the primary key id of the auto birth date. Pay special attention to the @ Query annotation. ROOM cannot know what data we want to Query, so we must write SQL statements.
If we don't use entity class parameters to add, delete or modify data, we need to write SQL statements. At this time, we can't use @ Inset @Delete @update annotation, but use @ Query annotation, such as the deleteByLastName method above.
Although it's not very friendly to write SQL statements, Room dynamically checks SQL statements at compile time. That is to say, if your SQL is not written correctly, an error will be reported at compile time.
1.3 write Database
Database needs to define version number, which entity classes are included, and provide access instance of Dao layer. Create a new one AppDatabase.kt , the code is as follows:
@Database(version = 1,entities = [UserData::class])
abstract class AppDataBase : RoomDatabase(){
    abstract fun userDao() : UserDao

    companion object{
        private var instance : AppDataBase ? = null;
        @Synchronized
        fun getDatabase(context:Context) : AppDataBase{
            instance?.let {
                return it
            }

            val db = Room.databaseBuilder(
                context.applicationContext,
                AppDataBase::class.java, "AppDataBase"
            ).build()
            return db.apply {
                instance = this;
            }
        }
    }
}
As you can see, the header of the AppDataBase class uses the @ Database annotation, and fills in the version number and entity class. If there are multiple entity classes, separate them with commas.
Note that AppDataBase needs to be declared as an abstract class and the abstract methods of Dao, such as userDao().
Then, because Dao should be a singleton mode in theory, it is decorated with company objeec. If it already exists in getDatabase, it will return directly. If it doesn't exist, it will pass Room.databaseBuilder To create a build, it takes three parameters:
- context: it is better to use applicationContext to prevent memory leakage
- Class type, passing appdatabase: class.java
- Database name
Then get the instance through apply and assign it to instance.
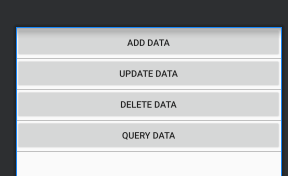
ok, the configuration of the Room is finished. Then, we add four buttons to the xml:
    <Button
        android:id="@+id/addDataBtn"
        android:layout_width="match_parent"
        android:layout_height="wrap_content"
        android:text="Add data"/>

    <Button
        android:id="@+id/updateBtn"
        android:layout_width="match_parent"
        android:layout_height="wrap_content"
        android:text="Update data"/>

    <Button
        android:id="@+id/deleteBtn"
        android:layout_width="match_parent"
        android:layout_height="wrap_content"
        android:text="delete data"/>

    <Button
        android:id="@+id/queryBtn"
        android:layout_width="match_parent"
        android:layout_height="wrap_content"
        android:text="query data"/>
Add code to activity:
        val userDao = AppDataBase.getDatabase(this).userDao();
        val user1 = UserData(1,"z","sr")
        val user2 = UserData(2,"w","y")

        //Add data
        addDataBtn.setOnClickListener{
            thread {
                userDao.insertAll(user1,user2)
            }
        }
        //Update data
        updateBtn.setOnClickListener{
            thread {
                 user2.lastName = "san"
                 userDao.updateUser(user2)
            }
        }

        //delete
        deleteBtn.setOnClickListener{
            thread {
               // userDao.delete(user1)
                userDao.deleteByLastName("sr")
            }
        }

        //query
        queryBtn.setOnClickListener{
            thread {
                for (user in userDao.getAll()){
                    Log.d(TAG, "zsr onCreate: "+user.toString())
                }
            }
        }
ROOM requires the query database to be in the thread, so thread {} is used here. If you think it needs to be updated in the main thread, you can set it in the configuration:
val db = Room.databaseBuilder(
            context.applicationContext,
            AppDataBase::class.java, "AppDataBase"
        ).allowMainThreadQueries().build()
Click add, and then press query:
Click Update, and then query:
Click delete, and then query:
2, Database upgrade
The database upgrade of ROOM is troublesome. If you are in the test phase, you can use fallbackToDestructiveMigration() to force the upgrade
val db = Room.databaseBuilder(
    context.applicationContext,
    AppDataBase::class.java, "AppDataBase"
).fallbackToDestructiveMigration().build()
2.1 add a new table
However, it's only for testing. What if I want to add a table? For example, add a Book:
@Entity
data class Book(var name:String,var pages:Int) {
    @PrimaryKey(autoGenerate = true)
    var id:Long = 0;
}
And add a BookDao interface:
@Dao
interface BookDao  {
    @Insert
    fun insertBook(book: Book)

    @Query("select * from Book")
    fun loadAllBooks() : List<Book>
}
Then modify AppDataBase:
@Database(version = 2, entities = [UserData::class, Book::class])
abstract class AppDataBase : RoomDatabase() {
    abstract fun userDao(): UserDao
    abstract fun bookDao(): BookDao
    companion object {

	val Migration1_2 = object : Migration(1, 2) {
                override fun migrate(database: SupportSQLiteDatabase) {
                    database.execSQL("create table Book (id integer primary key autoincrement not null," +
                            "name text not null ,pages integer not null)")
                }
            }

        private var instance: AppDataBase? = null;

        @Synchronized
        fun getDatabase(context: Context): AppDataBase {
            instance?.let {
                return it
            }

            val db = Room.databaseBuilder(
                context.applicationContext,
                AppDataBase::class.java, "AppDataBase"
            ).addMigrations(Migration1_2).build()
            return db.apply {
                instance = this;
            }
        }
    }
}
As you can see, in the @ Database annotation, we changed the version to 2 and added the BookDao class.
Next, implement a migration anonymous class, rewrite the migrate method, write SQL statements in it, and add a Book table; next, in the Room.databaseBuilder() there, through addMigrations(Migration1_2) Add in.
In this way, when the SQL version changes from 1 to 2, migration 1 will be executed_ 2. The method in it.
Next, call:
        val bookDao = AppDataBase.getDatabase(this).bookDao()

        //Add data
        addDataBtn.setOnClickListener{
            thread {
                 bookDao.insertBook(Book("android",100))
            }
        }


        //query
        queryBtn.setOnClickListener{
            thread {
                for (book in bookDao.loadAllBooks()){
                    Log.d(TAG, "zsr onCreate: "+book.toString())
                }
            }
        }
Click Insert and query:
2.2 new fields
But not every time you upgrade a table. What if you want to add a free field? For example, add the author name and author of the Book, and modify the Book class:
@Entity
data class Book(var name:String,var pages:Int,var author:String) {
    @PrimaryKey(autoGenerate = true)
    var id:Long = 0;
}
Because Book has changed, AppDatabase also needs to change:
@Database(version = 3, entities = [UserData::class, Book::class])
abstract class AppDataBase : RoomDatabase() {
    abstract fun userDao(): UserDao
    abstract fun bookDao(): BookDao

    companion object {
	...
    val Migration2_3 = object : Migration(2, 3) {
                override fun migrate(database: SupportSQLiteDatabase) {
                    database.execSQL("alter table Book add column author text not null default 'unknown'")
                }
            }
        private var instance: AppDataBase? = null;

        @Synchronized
        fun getDatabase(context: Context): AppDataBase {
            instance?.let {
                return it
            }


            val db = Room.databaseBuilder(
                context.applicationContext,
                AppDataBase::class.java, "AppDataBase"
            ).addMigrations(Migration1_2,Migration2_3).build()
            return db.apply {
                instance = this;
            }
        }
    }
}
As you can see, the version is renamed as 3, and a migration 2 is added_ 3. SQL statement uses alert to insert a column.
In this way, we have finished our study.
reference resources:
First line code, Third Edition
Official website ROOM