Welcome to my GitHub
Here we classify and summarize all the original works of Xinchen (including supporting source code): https://github.com/zq2599/blog_demos
About the Spring Cloud Gateway series
Spring Cloud Gateway practice is a series of original works by Xinchen in the field of Java. It aims to learn and master Spring Cloud Gateway with you through project practice and better serve the actual project
Overview of this article
As the beginning of Spring Cloud Gateway practice, the main contents of this article are as follows:
- Introduction to basic knowledge
- Confirm the version of tools and services involved in the environment
- Start nacos as the registration center and configuration center for subsequent actual combat
- Create maven parent project to manage the subsequent actual code and dependent library versions
- Create a sub project named common to store common constants and data structures
- Create a web application named provider hello for the destination of gateway routing
- Run a simple demo to complete the initial experience of spring cloud gateway
About Spring Cloud Gateway
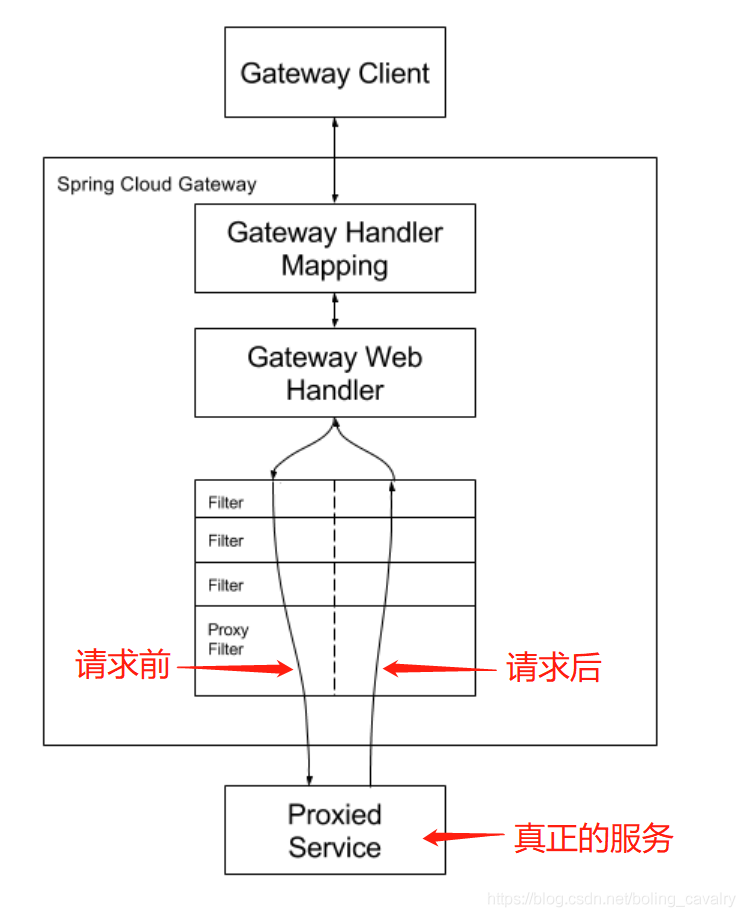
- This is an API gateway built based on Spring technology stack, involving Spring 5, Spring Boot 2, Reactor, etc. the goal is to provide simple and efficient API routing for the project, as well as powerful expansion capabilities: security, monitoring, elastic computing, etc
- The official architecture diagram is as follows. It can be seen that after the request arrives, the Handler Mapping determines the real target corresponding to the request, and then gives it to the Web Handler. A series of filters perform chain processing. It can be found from the red arrows and comments that there are filters running before and after the request:
Version information
- The software and library versions involved in the Spring Cloud Gateway series are as follows:
- The main versions involved in the actual combat are as follows:
- JDK: 1.8.0_291
- IDEA: 2021.1.3 (Ultimate Edition)
- maven: 3.8.1
- Operating system: win10 64 bit
- springboot: 2.4.2
- spring-cloud: 2020.0.1
- spring-cloud-alibaba: 2021.1
- For more detailed version matching relationship, please refer to: https://github.com/alibaba/spring-cloud-alibaba/wiki/ Version Description
Core concepts in classic configurations
- Let's first understand several core concepts through a typical simplified configuration. Suppose that the Spring Cloud Gateway application is running and listens to port 8080. Once a remote request comes to port 8080, the following configuration will take effect. Please refer to the Chinese Notes for the three core concepts and the functions of each configuration:
spring:
  cloud:
    gateway:
      # Core concept 1: routing. A route represents a processing logic,
      # The logic contains three elements: matching condition (whether this route should be processed), real processing address and filter
      routes:
        # id to ensure uniqueness
      - id: add_request_header_route
      	# The real processing address. Once the request is determined to be the current routing processing, it will be forwarded to this address
        uri: https://example.org
        # Core concept 2: predicate or assertion, which is used to judge whether the request is processed by the current route
        predicates:
          # This is an assertion that checks whether the value of mycookie in the requested Cookie is equal to mycookie value
        - Cookie=mycookie,mycookievalue
        # Core concept 3: filter. There can be filters before and after the request to process the request response data
        filters:
          # The function of this filter is to add a key value pair in the request header, and the value is equal to "aaabbbccc"
        - AddRequestHeader=X-Request-Red, aaabbbccc
- The predictions in the above configuration information is a simplified configuration. The comparison effect with the complete configuration is as follows. In short, a line is divided into three items: name, args.name and args.regexp
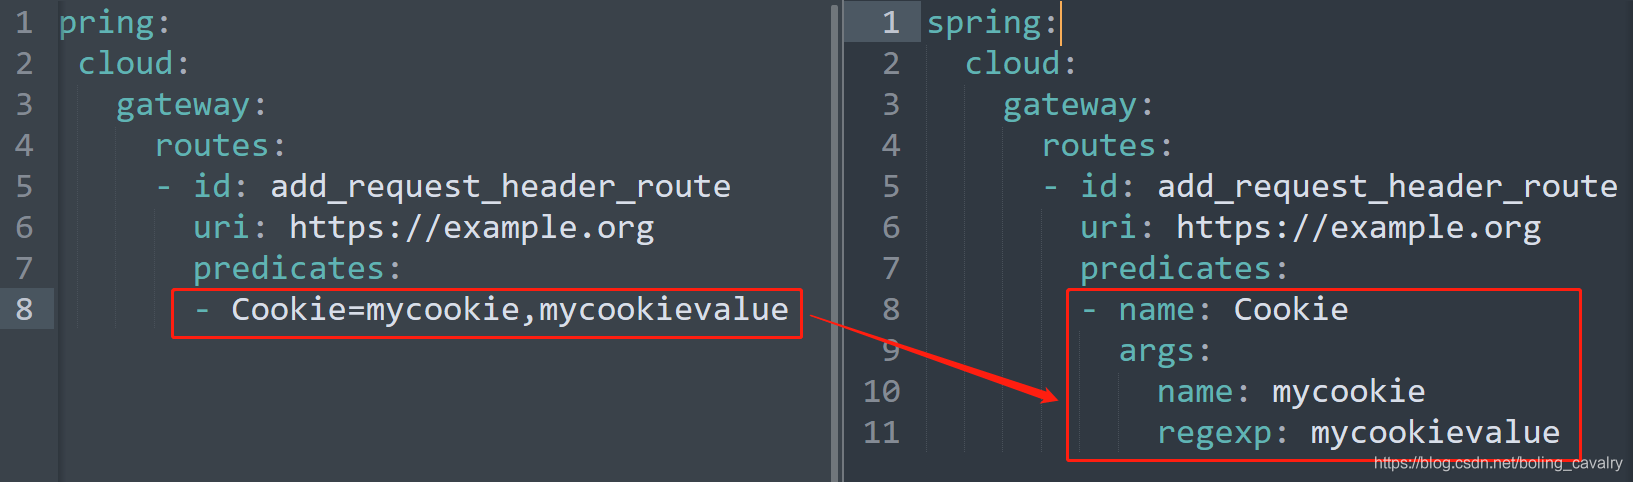
- So far as the theoretical knowledge is concerned, let's start as soon as possible
Start nacos-2.0.3
-
In the whole series of pring Cloud Gateway actual combat, we will involve multiple services, which will inevitably use the registration center and configuration center. Here I choose nacos, which can well assume the role of registration center and configuration center. Next, I will introduce how to deploy and start nacos
-
Download nacos at: https://github.com/alibaba/nacos/releases/download/2.0.3/nacos-server-2.0.3.zip
-
After decompression, enter the nacos\bin directory and execute the following command to start nacos:
startup.cmd -m standalone
- If your computer is mac or linux, execute the following command to start nacos:
sh startup.sh -m standalone
-
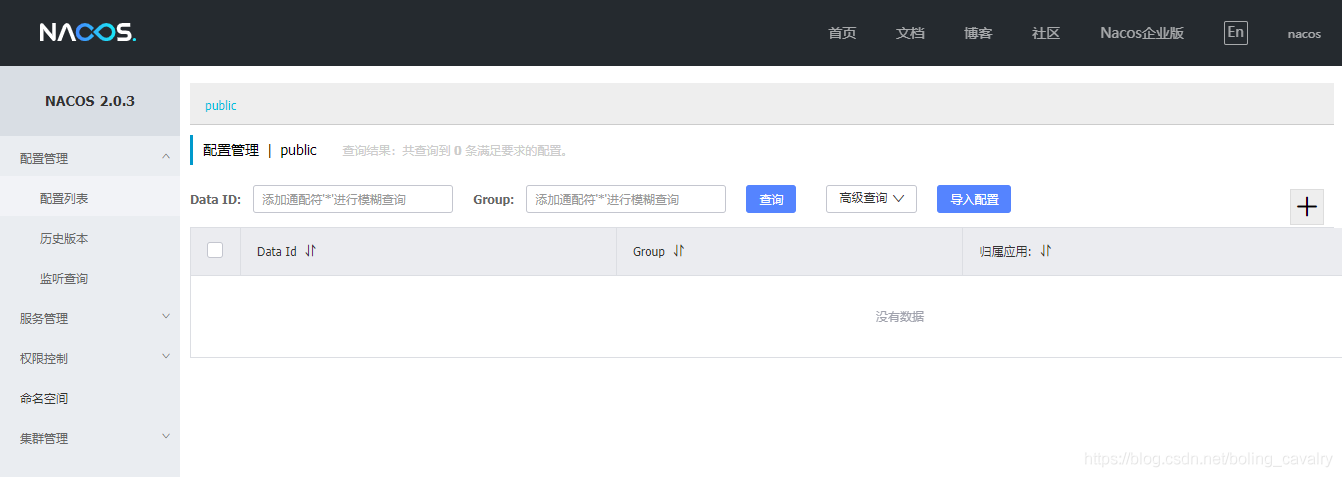
Log in to nacos with the browser at http://localhost:8848/nacos , account and password are both nacos
-
After successful login, the following is displayed:
Source download
- The complete source code in this actual combat can be downloaded from GitHub. The address and link information are shown in the table below( https://github.com/zq2599/blog_demos):
| name | link | remarks |
|---|---|---|
| Project Home | https://github.com/zq2599/blog_demos | The project is on the GitHub home page |
| git warehouse address (https) | https://github.com/zq2599/blog_demos.git | The warehouse address of the source code of the project, https protocol |
| git warehouse address (ssh) | git@github.com:zq2599/blog_demos.git | The project source code warehouse address, ssh protocol |
- There are multiple folders in this git project. The source code of this article is in the spring cloud tutorials folder, as shown in the red box below:

Parent project of Spring Cloud Gateway series
- Create a maven project named spring cloud tutorials, which is the parent project of all source codes of the Spring Cloud Gateway series. The pom.xml content is as follows. It can be seen that the version numbers of springboot, spring cloud and spring cloud Alibaba libraries have been determined here. In the future, sub projects need not pay attention to the version numbers of dependent libraries:
<?xml version="1.0" encoding="UTF-8"?>
<project xmlns="http://maven.apache.org/POM/4.0.0"
         xmlns:xsi="http://www.w3.org/2001/XMLSchema-instance"
         xsi:schemaLocation="http://maven.apache.org/POM/4.0.0 http://maven.apache.org/xsd/maven-4.0.0.xsd">
    <modelVersion>4.0.0</modelVersion>
    <modules>
        <module>hello-gateway</module>
        <module>provider-hello</module>
        <module>common</module>
    </modules>

    <parent>
        <groupId>org.springframework.boot</groupId>
        <artifactId>spring-boot-starter-parent</artifactId>
        <version>2.4.2</version>
        <relativePath/>
    </parent>

    <groupId>com.bolingcavalry</groupId>
    <artifactId>spring-cloud-tutorials</artifactId>
    <version>1.0-SNAPSHOT</version>

    <properties>
        <maven.compiler.source>8</maven.compiler.source>
        <maven.compiler.target>8</maven.compiler.target>
        <java.version>1.8</java.version>
        <spring-cloud.version>2020.0.1</spring-cloud.version>
        <spring-cloud-alibaba.version>2021.1</spring-cloud-alibaba.version>
    </properties>

    <packaging>pom</packaging>
    <description>Demo project for Spring Cloud </description>

    <dependencyManagement>
        <dependencies>
            <dependency>
                <groupId>org.springframework.cloud</groupId>
                <artifactId>spring-cloud-dependencies</artifactId>
                <version>${spring-cloud.version}</version>
                <type>pom</type>
                <scope>import</scope>
            </dependency>
            <dependency>
                <groupId>com.alibaba.cloud</groupId>
                <artifactId>spring-cloud-alibaba-dependencies</artifactId>
                <version>${spring-cloud-alibaba.version}</version>
                <type>pom</type>
                <scope>import</scope>
            </dependency>
            <dependency>
                <groupId>com.squareup.okhttp3</groupId>
                <artifactId>okhttp</artifactId>
                <version>3.14.9</version>
                <scope>compile</scope>
            </dependency>
            <dependency>
                <groupId>ch.qos.logback</groupId>
                <artifactId>logback-classic</artifactId>
                <version>1.1.7</version>
            </dependency>
            <dependency>
                <groupId>org.projectlombok</groupId>
                <artifactId>lombok</artifactId>
                <version>1.16.16</version>
            </dependency>
        </dependencies>
    </dependencyManagement>
</project>
Create a sub project named common to store common constants and data structures
-
Now create a sub project named common. The constants and data structures involved in the whole Spring Cloud Gateway practice series are placed in this sub project for the convenience of other projects
-
New constant Constants.java:
package com.bolingcavalry.common;

public interface Constants {
    String HELLO_PREFIX = "Hello World";
}
Create a web application as a service provider
-
Now create a web application called provider Hello, which is an extremely common web application and provides several http interface services. When we try the basic functions of Spring Cloud Gateway, we will route the request to provider hello
-
Provider Hello is a common springboot application, which will be registered in nacos. Its pom.xml content is as follows:
<?xml version="1.0" encoding="UTF-8"?>
<project xmlns="http://maven.apache.org/POM/4.0.0"
         xmlns:xsi="http://www.w3.org/2001/XMLSchema-instance"
         xsi:schemaLocation="http://maven.apache.org/POM/4.0.0 http://maven.apache.org/xsd/maven-4.0.0.xsd">
    <parent>
        <artifactId>spring-cloud-tutorials</artifactId>
        <groupId>com.bolingcavalry</groupId>
        <version>1.0-SNAPSHOT</version>
    </parent>
    <modelVersion>4.0.0</modelVersion>

    <artifactId>provider-hello</artifactId>
    <packaging>jar</packaging>

    <dependencies>

        <dependency>
            <groupId>com.bolingcavalry</groupId>
            <artifactId>common</artifactId>
            <version>${project.version}</version>
        </dependency>

        <dependency>
            <groupId>org.springframework.boot</groupId>
            <artifactId>spring-boot-starter-web</artifactId>
        </dependency>

        <!--nacos:For service registration and discovery-->
        <dependency>
            <groupId>com.alibaba.cloud</groupId>
            <artifactId>spring-cloud-starter-alibaba-nacos-config</artifactId>
        </dependency>

        <dependency>
            <groupId>com.alibaba.cloud</groupId>
            <artifactId>spring-cloud-starter-alibaba-nacos-discovery</artifactId>
        </dependency>

        <dependency>
            <groupId>org.springframework.boot</groupId>
            <artifactId>spring-boot-starter-test</artifactId>
            <scope>test</scope>
        </dependency>
    </dependencies>

    <build>
        <plugins>
            <!-- If the parent project is not springboot,You need to use the plug-in in the following ways to generate a normal plug-in jar -->
            <plugin>
                <groupId>org.springframework.boot</groupId>
                <artifactId>spring-boot-maven-plugin</artifactId>
                <configuration>
                    <mainClass>com.bolingcavalry.provider.ProviderApplication</mainClass>
                </configuration>
                <executions>
                    <execution>
                        <goals>
                            <goal>repackage</goal>
                        </goals>
                    </execution>
                </executions>
            </plugin>
        </plugins>
    </build>
</project>
- The project configuration file application.yml is as follows. The web port is 8082. Another thing to note is the nacos service address:
server:
  #Service port
  port: 8082

spring:
  application:
    name: provider-hello
  cloud:
    nacos:
      discovery:
        # nacos service address
        server-addr: 127.0.0.1:8848
- Start class ProviderApplication.java
package com.bolingcavalry.provider;

import org.springframework.boot.SpringApplication;
import org.springframework.boot.autoconfigure.SpringBootApplication;
import org.springframework.cloud.client.discovery.EnableDiscoveryClient;

@SpringBootApplication
public class ProviderApplication {
    public static void main(String[] args) {
        SpringApplication.run(ProviderApplication.class, args);
    }
}
- The common Controller class Hello.java provides an http service:
package com.bolingcavalry.provider.controller;

import com.bolingcavalry.common.Constants;
import org.springframework.web.bind.annotation.GetMapping;
import org.springframework.web.bind.annotation.RequestMapping;
import org.springframework.web.bind.annotation.RestController;
import java.text.SimpleDateFormat;
import java.util.Date;

@RestController
@RequestMapping("/hello")
public class Hello {

    private String dateStr(){
        return new SimpleDateFormat("yyyy-MM-dd hh:mm:ss").format(new Date());
    }

    /**
     * Return string type
     * @return
     */
    @GetMapping("/str")
    public String helloStr() {
        return Constants.HELLO_PREFIX + ", " + dateStr();
    }
}
- A new test class HelloTest.java is added to check whether the application service is normal:
package com.bolingcavalry.provider.controller;

import com.bolingcavalry.common.Constants;
import lombok.extern.slf4j.Slf4j;
import org.junit.jupiter.api.Test;
import org.springframework.beans.factory.annotation.Autowired;
import org.springframework.boot.test.autoconfigure.web.servlet.AutoConfigureMockMvc;
import org.springframework.boot.test.context.SpringBootTest;
import org.springframework.http.MediaType;
import org.springframework.test.web.servlet.MockMvc;
import org.springframework.test.web.servlet.request.MockMvcRequestBuilders;

import static org.hamcrest.Matchers.containsString;
import static org.springframework.test.web.servlet.result.MockMvcResultHandlers.print;
import static org.springframework.test.web.servlet.result.MockMvcResultMatchers.content;
import static org.springframework.test.web.servlet.result.MockMvcResultMatchers.status;

@SpringBootTest
@AutoConfigureMockMvc
@Slf4j
class HelloTest {

    @Autowired
    private MockMvc mvc;

    @Test
    void hello() throws Exception {
        String responseString = mvc.perform(MockMvcRequestBuilders.get("/hello/str").accept(MediaType.APPLICATION_JSON))
                .andExpect(status().isOk())
                .andExpect(content().string(containsString(Constants.HELLO_PREFIX)))
                .andDo(print())
                .andReturn()
                .getResponse()
                .getContentAsString();

        log.info("response in junit test :\n" + responseString);
    }
}
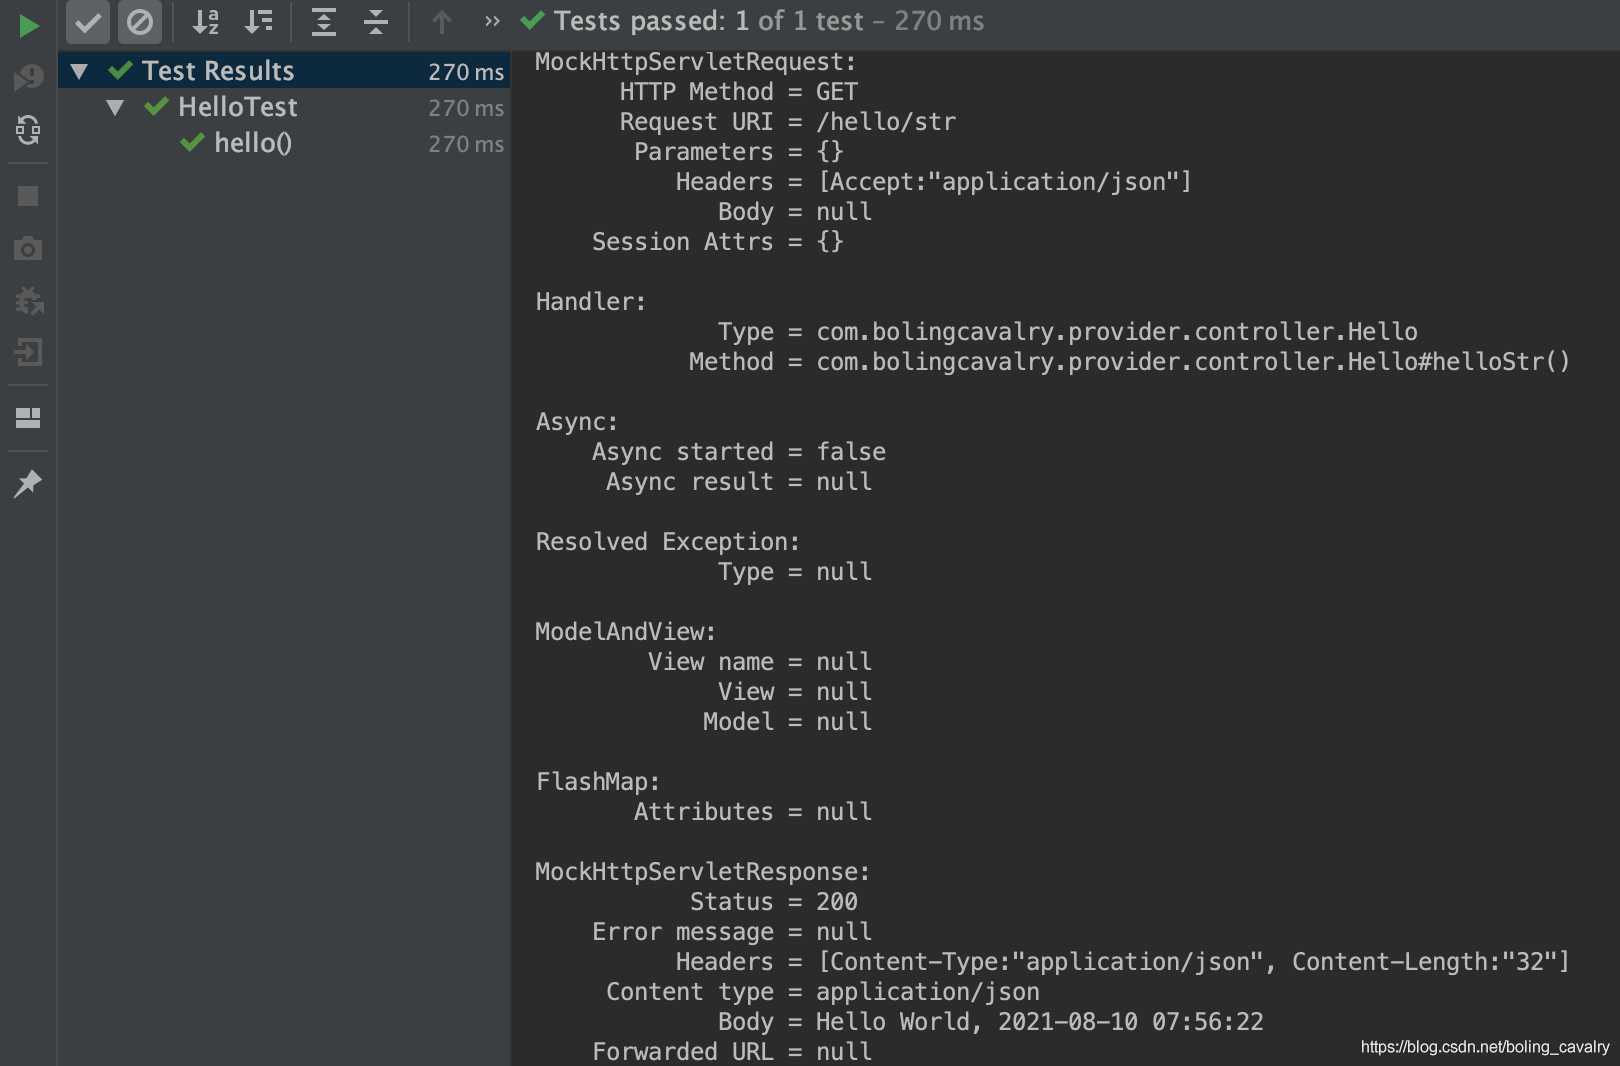
- Execute the unit test (it doesn't matter whether nacos is started at this time, but if it is not started, there will be some error messages on the console, but it has no impact). As follows, passing the test indicates that the service is normal:
Develop a simple demo to complete the initial experience of spring cloud gateway
-
After so much preparation, we will invest in the development of Spring Cloud Gateway. First, write a simple demo to quickly experience it
-
A new sub project named Hello gateway is added. pom.xml is as follows. The key point is to rely on the spring cloud starter gateway library. Another important thing to be careful about: the test library uses reactor test and spring boot starter test, which is very different from the previous unit test. It uses weblux:
<?xml version="1.0" encoding="UTF-8"?>
<project xmlns="http://maven.apache.org/POM/4.0.0"
         xmlns:xsi="http://www.w3.org/2001/XMLSchema-instance"
         xsi:schemaLocation="http://maven.apache.org/POM/4.0.0 http://maven.apache.org/xsd/maven-4.0.0.xsd">
    <parent>
        <artifactId>spring-cloud-tutorials</artifactId>
        <groupId>com.bolingcavalry</groupId>
        <version>1.0-SNAPSHOT</version>
    </parent>
    <modelVersion>4.0.0</modelVersion>

    <artifactId>hello-gateway</artifactId>

    <dependencies>
        <dependency>
            <groupId>com.bolingcavalry</groupId>
            <artifactId>common</artifactId>
            <version>${project.version}</version>
        </dependency>

        <dependency>
            <groupId>org.springframework.cloud</groupId>
            <artifactId>spring-cloud-starter-gateway</artifactId>
        </dependency>

        <dependency>
            <groupId>io.projectreactor</groupId>
            <artifactId>reactor-test</artifactId>
            <scope>test</scope>
        </dependency>

        <dependency>
            <groupId>org.springframework.boot</groupId>
            <artifactId>spring-boot-starter-test</artifactId>
            <scope>test</scope>
        </dependency>
    </dependencies>
</project>
- The following are the key points. The configuration file application.yml of Spring Cloud Gateway:
server:
  #Service port
  port: 8081
spring:
  application:
    name: hello-gateway
  cloud:
    gateway:
      routes:
        - id: path_route
          # After successful matching, it will be forwarded to port 8082. As for the path behind the port, it will directly use the path of the original request
          # for example http://127.0.0.1:8081/hello/str , will be forwarded to http://127.0.0.1:8082/hello/str
          uri: http://127.0.0.1:8082
          predicates:
            # According to the request path with "/ hello /", the matching is successful
          - Path=/hello/**
- If you want to forward to another domain name, you need to create a configuration class to solve the cross domain problem:
package com.bolingcavalry.hellogateway.config;

import org.springframework.context.annotation.Bean;
import org.springframework.context.annotation.Configuration;
import org.springframework.web.cors.CorsConfiguration;
import org.springframework.web.cors.reactive.CorsWebFilter;
import org.springframework.web.cors.reactive.UrlBasedCorsConfigurationSource;
import org.springframework.web.util.pattern.PathPatternParser;

@Configuration
public class CorsConfig {

    @Bean
    public CorsWebFilter corsFilter() {
        CorsConfiguration config = new CorsConfiguration();
        config.addAllowedMethod("*");
        config.addAllowedOrigin("*");
        config.addAllowedHeader("*");

        UrlBasedCorsConfigurationSource source = new UrlBasedCorsConfigurationSource(new PathPatternParser());
        source.registerCorsConfiguration("/**", config);

        return new CorsWebFilter(source);
    }
}
- Startup class:
package com.bolingcavalry.hellogateway;

import org.springframework.boot.SpringApplication;
import org.springframework.boot.autoconfigure.SpringBootApplication;

@SpringBootApplication
public class HelloGatewayApplication {
    public static void main(String[] args) {
        SpringApplication.run(HelloGatewayApplication.class,args);
    }
}
- The last is the unit test class. Please note that since the Spring Cloud Gateway uses the weblux technology stack, the common MockMvc cannot be used to simulate the request. Several comments are also worth noting. In addition, please note the usage of the expectStatus, expectBody and other API s of WebTestClient:
package com.bolingcavalry.hellogateway;

import com.bolingcavalry.common.Constants;
import org.junit.jupiter.api.Test;
import org.junit.jupiter.api.extension.ExtendWith;
import org.springframework.beans.factory.annotation.Autowired;
import org.springframework.boot.test.autoconfigure.web.reactive.AutoConfigureWebTestClient;
import org.springframework.boot.test.context.SpringBootTest;
import org.springframework.http.MediaType;
import org.springframework.test.context.junit.jupiter.SpringExtension;
import org.springframework.test.web.reactive.server.WebTestClient;
import static org.junit.jupiter.api.Assertions.assertTrue;

@SpringBootTest
@ExtendWith(SpringExtension.class)
@AutoConfigureWebTestClient
public class HelloTest {

    @Autowired
    private WebTestClient webClient;

    @Test
    void testHelloPredicates() {
        webClient.get()
                .uri("/hello/str")
                .accept(MediaType.APPLICATION_JSON)
                .exchange()
                // Verification status
                .expectStatus().isOk()
                // Verify the result. Note that the result is in string format
                .expectBody(String.class).consumeWith(result  -> assertTrue(result.getResponseBody().contains(Constants.HELLO_PREFIX)));
    }
}
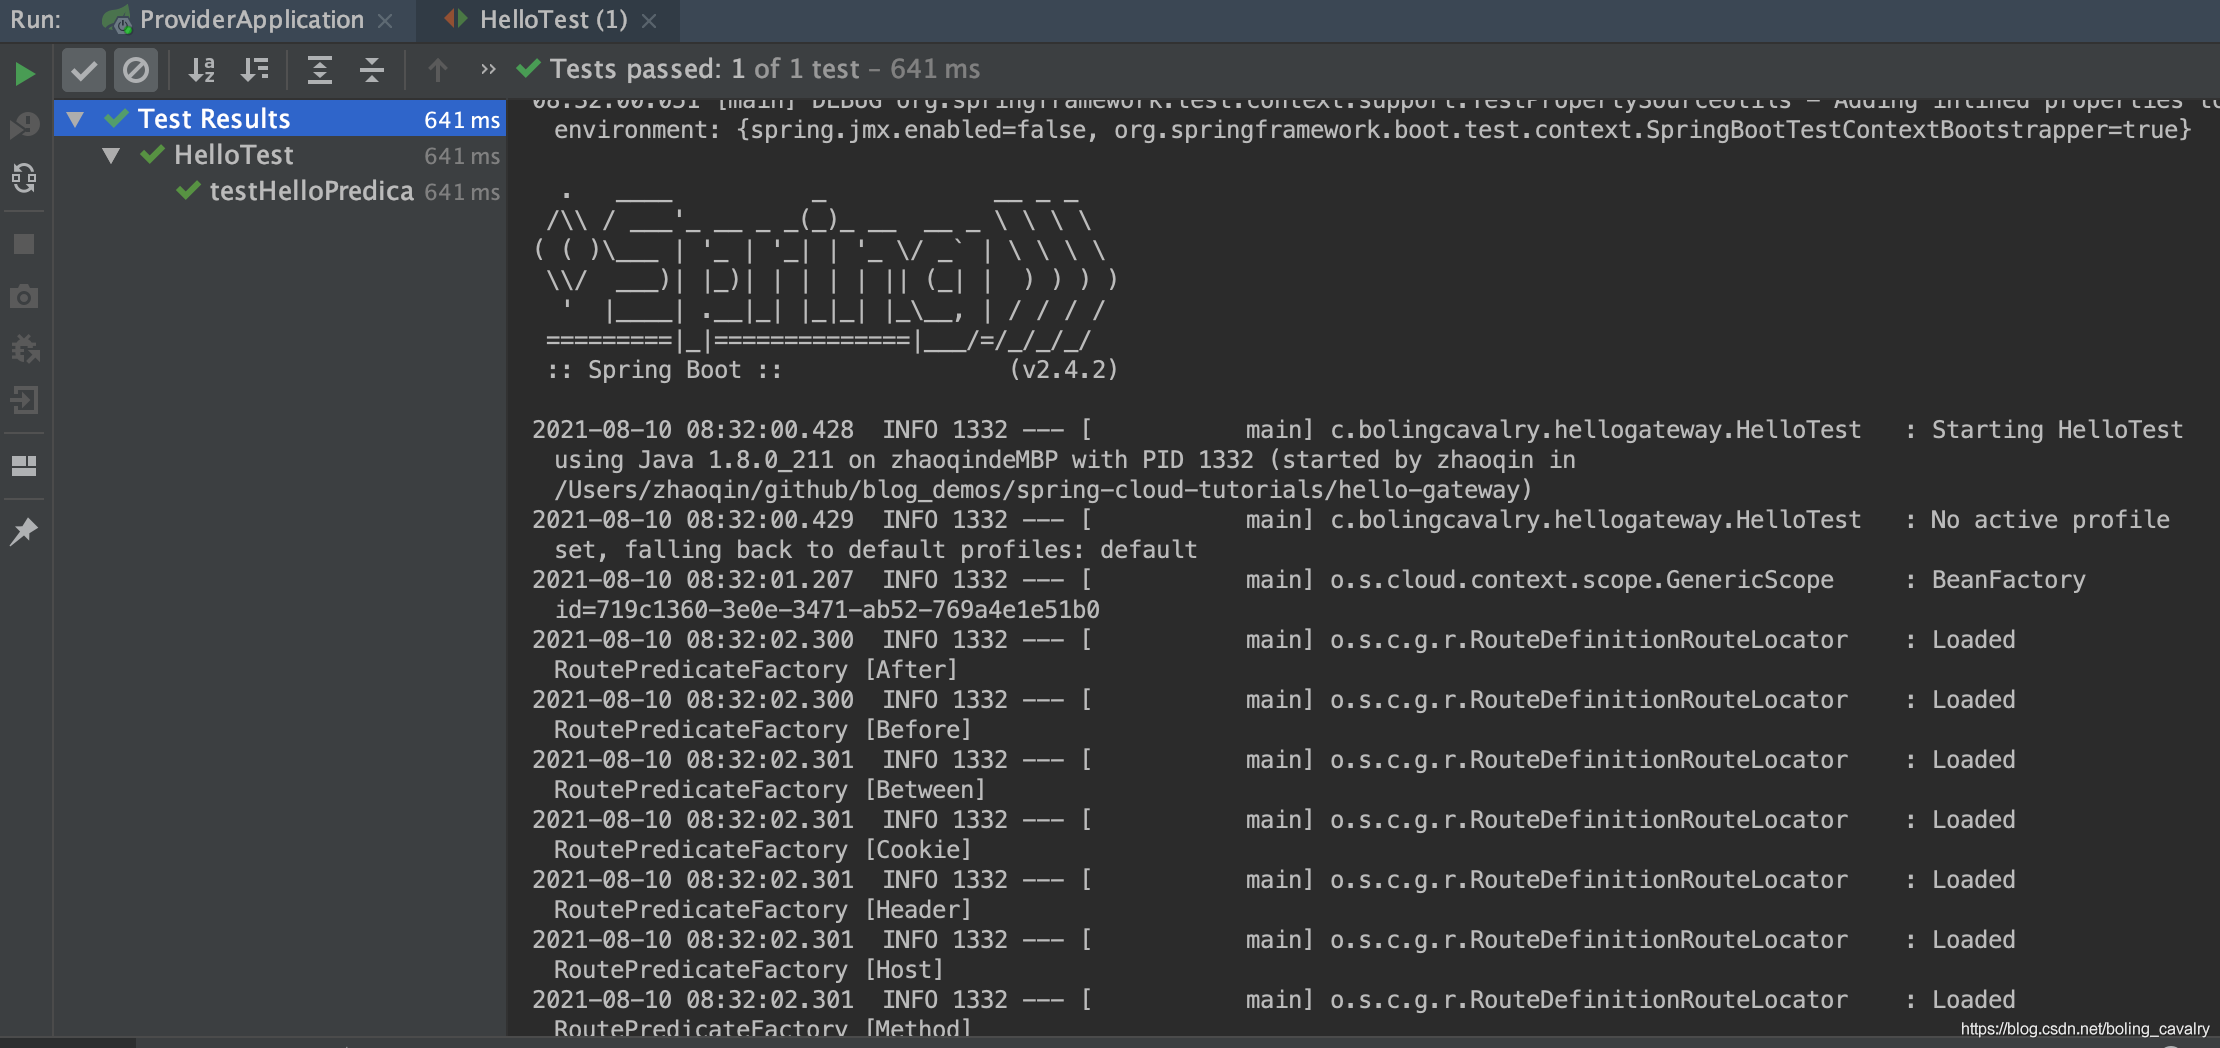
- Please ensure that the provider Hello application has been started, and then run HelloTest.java created above. The results are as follows. The test passes, which proves that the function of the Hello gateway meets the expectations, successfully forwards the request to the provider Hello application, and successfully receives the response:
- So far, the preparations for the Spring Cloud Gateway series have been completed, and a simple application has been developed to experience the most basic Spring Cloud Gateway functions. In the next article, let's practice more basic functions together.
You're not alone. Xinchen's original accompanies you all the way
- Java series
- Spring collection
- Docker series
- kubernetes series
- Database + middleware series
- DevOps series
Welcome to the official account: programmer Xin Chen
Wechat search "programmer Xinchen", I'm Xinchen, looking forward to traveling with you in the Java World
https://github.com/zq2599/blog_demos