Summary
Before I said the domestic conscience of kodexplorer, today I say another good domestic open source project jumpserver, in addition to the domestic open source project I think it is the pagoda panel.Don't talk too much about the tutorial. Although you can read the following tutorial without listening to my nonsense
http://docs.jumpserver.org/zh/docs/step_by_step.html
Although my tutorials are basically copied from this document, there are some differences
Pre-initialization
- First close selinux
vim /etc/selinux/config
SELINUX=enforcing
Change to
SELINUX=disabled
after
setenforce 0
- Close Firewall
systemctl stop firewalld
systemctl disable firewalld
- Modify Character Set
localedef -c -f UTF-8 -i zh_CN zh_CN.UTF-8
export LC_ALL=zh_CN.UTF-8
echo 'LANG="zh_CN.UTF-8"' > /etc/locale.conf
- Installing python3 and python compilation dependent environments
First install the dependency environment before mutant python3
yum -y install wget sqlite-devel xz gcc automake zlib-devel openssl-devel epel-release git
Then download the python3 compilation installation
wget https://www.python.org/ftp/python/3.6.1/Python-3.6.1.tar.xz
Unzip Compile Installation
tar xvf Python-3.6.1.tar.xz && cd Python-3.6.1 && ./configure && make && make install
- Setting up python's virtual environment
cd /opt && python3 -m venv py3 && source /opt/py3/bin/activate
- Autoload Python Virtual Environment Configuration
This is to allow you to automatically load environment variables when you enter the jumpserver folder
cd /opt && git clone git://github.com/kennethreitz/autoenv.git && echo 'source /opt/autoenv/activate.sh' >> ~/.bashrc && source ~/.bashrc
Install jumpserver
- clone Project
cd /opt/ && git clone https://github.com/jumpserver/jumpserver.git && cd jumpserver && git checkout master && echo "source /opt/py3/bin/activate" > /opt/jumpserver/.env
After entering the jumpserver folder, you will be prompted to enter y, so every time you enter the folder, you will automatically import py3 environment variables
- Dependency to install rpm packages
cd /opt/jumpserver/requirements && yum -y install $(cat rpm_requirements.txt)
- Install python dependencies
pip install -r requirements.txt -i https://pypi.douban.com/simple/
- Install Redis, Jumpserver uses Redis for cache and celery break
yum -y install redis && systemctl enable redis && systemctl start redis
- Install mariadb
yum -y install mariadb mariadb-devel mariadb-server && systemctl enable mariadb && systemctl start mariadb
- Set root password for mariadb
Just follow the process after executing mysql_secure_installation
[root@bboysoul-centos-vm ~]# mysql_secure_installation

NOTE: RUNNING ALL PARTS OF THIS SCRIPT IS RECOMMENDED FOR ALL MariaDB
      SERVERS IN PRODUCTION USE!  PLEASE READ EACH STEP CAREFULLY!

In order to log into MariaDB to secure it, we'll need the current
password for the root user.  If you've just installed MariaDB, and
you haven't set the root password yet, the password will be blank,
so you should just press enter here.

Enter current password for root (enter for none):
OK, successfully used password, moving on...

Setting the root password ensures that nobody can log into the MariaDB
root user without the proper authorisation.

Set root password? [Y/n] y
New password:
Re-enter new password:
Sorry, passwords do not match.

New password:
Re-enter new password:
Password updated successfully!
Reloading privilege tables..
 ... Success!


By default, a MariaDB installation has an anonymous user, allowing anyone
to log into MariaDB without having to have a user account created for
them.  This is intended only for testing, and to make the installation
go a bit smoother.  You should remove them before moving into a
production environment.

Remove anonymous users? [Y/n] y
 ... Success!

Normally, root should only be allowed to connect from 'localhost'.  This
ensures that someone cannot guess at the root password from the network.

Disallow root login remotely? [Y/n] n
 ... skipping.

By default, MariaDB comes with a database named 'test' that anyone can
access.  This is also intended only for testing, and should be removed
before moving into a production environment.

Remove test database and access to it? [Y/n] y
 - Dropping test database...
 ... Success!
 - Removing privileges on test database...
 ... Success!

Reloading the privilege tables will ensure that all changes made so far
will take effect immediately.

Reload privilege tables now? [Y/n] y
 ... Success!

Cleaning up...

All done!  If you've completed all of the above steps, your MariaDB
installation should now be secure.

Thanks for using MariaDB!
- Create database Jumpserver and authorize
[root@bboysoul-centos-vm ~]# mysql -u root -p
Enter password:
Welcome to the MariaDB monitor.  Commands end with ; or \g.
Your MariaDB connection id is 9
Server version: 5.5.60-MariaDB MariaDB Server

Copyright (c) 2000, 2018, Oracle, MariaDB Corporation Ab and others.

Type 'help;' or '\h' for help. Type '\c' to clear the current input statement.

MariaDB [(none)]> create database jumpserver default charset 'utf8';
Query OK, 1 row affected (0.00 sec)

MariaDB [(none)]> grant all on jumpserver.* to 'jumpserver'@'%' identified by 'Your password';
Query OK, 0 rows affected (0.01 sec)

MariaDB [(none)]> flush privileges;
Query OK, 0 rows affected (0.00 sec)

MariaDB [(none)]>
- Modify Jumpserver configuration file
cd /opt/jumpserver && cp config_example.py config.py && vi config.py
Here is my profile
"""
    jumpserver.config
    ~~~~~~~~~~~~~~~~~

    Jumpserver project setting file

    :copyright: (c) 2014-2017 by Jumpserver Team
    :license: GPL v2, see LICENSE for more details.
"""
import os

BASE_DIR = os.path.dirname(os.path.abspath(__file__))


class Config:
    # Use it to encrypt or decrypt data
    # SECURITY WARNING: keep the secret key used in production secret!
# Don't move this, just let him default
    SECRET_KEY = os.environ.get('SECRET_KEY') or '2vym+ky!997d5kkcc64mnz06y1mmui3lut#(^wd=%s_qj$1%x'

    # Django security setting, if your disable debug model, you should setting that
    ALLOWED_HOSTS = ['*']


# Turn off debug mode because we will install nginx as the proxy
    # Development env open this, when error occur display the full process track, Production disable it
    DEBUG = os.environ.get("DEBUG") or False

# Just turn the log level to a warning, or there will be too many logs
    # DEBUG, INFO, WARNING, ERROR, CRITICAL can set. See https://docs.djangoproject.com/en/1.10/topics/logging/
    LOG_LEVEL = os.environ.get("LOG_LEVEL") or 'WARNING'
    LOG_DIR = os.path.join(BASE_DIR, 'logs')

    # Database setting, Support sqlite3, mysql, postgres ....
    # See https://docs.djangoproject.com/en/1.10/ref/settings/#databases

    # SQLite setting:
    #DB_ENGINE = 'sqlite3'
    #DB_NAME = os.path.join(BASE_DIR, 'data', 'db.sqlite3')

    # MySQL or postgres setting like:
    # DB_ENGINE = os.environ.get("DB_ENGINE") or 'mysql'
    # DB_HOST = os.environ.get("DB_HOST") or '127.0.0.1'
    # DB_PORT = os.environ.get("DB_PORT") or 3306
    # DB_USER = os.environ.get("DB_USER") or 'jumpserver'
    # DB_PASSWORD = os.environ.get("DB_PASSWORD") or 'weakPassword'
    # DB_NAME = os.environ.get("DB_NAME") or 'jumpserver'

# Database settings because we are using mysql
    DB_ENGINE = os.environ.get("DB_ENGINE") or 'mysql'
    DB_HOST = os.environ.get("DB_HOST") or '127.0.0.1'
    DB_PORT = os.environ.get("DB_PORT") or 3306
    DB_USER = os.environ.get("DB_USER") or 'jumpserver'
    DB_PASSWORD = os.environ.get("DB_PASSWORD") or 'Your password'
    DB_NAME = os.environ.get("DB_NAME") or 'jumpserver'


    # When Django start it will bind this host and port
    # ./manage.py runserver 127.0.0.1:8080
    HTTP_BIND_HOST = '0.0.0.0'
    HTTP_LISTEN_PORT = 8080

    # Use Redis as broker for celery and web socket
    REDIS_HOST = os.environ.get("REDIS_HOST") or '127.0.0.1'
    REDIS_PORT = os.environ.get("REDIS_PORT") or 6379
    REDIS_PASSWORD = os.environ.get("REDIS_PASSWORD") or ''
    REDIS_DB_CELERY = os.environ.get('REDIS_DB') or 3
    REDIS_DB_CACHE = os.environ.get('REDIS_DB') or 4

    def __init__(self):
        pass

    def __getattr__(self, item):
        return None


class DevelopmentConfig(Config):
    pass


class TestConfig(Config):
    pass


class ProductionConfig(Config):
    pass


# Default using Config settings, you can write if/else for different env
config = DevelopmentConfig()
Here is the official configuration file for your reference
"""
    jumpserver.config
    ~~~~~~~~~~~~~~~~~

    Jumpserver project setting file

    :copyright: (c) 2014-2017 by Jumpserver Team
    :license: GPL v2, see LICENSE for more details.
"""
import os

BASE_DIR = os.path.dirname(os.path.abspath(__file__))


class Config:
    # Use it to encrypt or decrypt data

    # Jumpserver uses SECRET_KEY for encryption, be sure to modify the following settings
    # SECRET_KEY = os.environ.get('SECRET_KEY') or '2vym+ky!997d5kkcc64mnz06y1mmui3lut#(^wd=%s_qj$1%x'
    SECRET_KEY = 'Feel free to enter a random string (recommended characters greater than or equal to 50 bits)'

    # Django security setting, if your disable debug model, you should setting that
    ALLOWED_HOSTS = ['*']

    # DEBUG mode True is on False is off, on by default, off recommended by production environment
    # Note: If DEBUG = False is set, access to port 8080 page will show abnormal, nginx proxy needs to be set up for normal access
    DEBUG = os.environ.get("DEBUG") or True

    # Log level, default DEBUG, adjustable to INFO, WARNING, ERROR, CRITICAL, default INFO
    LOG_LEVEL = os.environ.get("LOG_LEVEL") or 'WARNING'
    LOG_DIR = os.path.join(BASE_DIR, 'logs')

    # The database configuration used, supports sqlite3, mysql, postgres, etc., uses SQLite3 by default
    # See https://docs.djangoproject.com/en/1.10/ref/settings/#databases

    # SQLite3 is used by default, if you use another database please comment on the following two lines
    # DB_ENGINE = 'sqlite3'
    # DB_NAME = os.path.join(BASE_DIR, 'data', 'db.sqlite3')

    # If you need to use MySQL or postgres, uncomment the following and enter the correct information. This example uses MySQL for demonstration (mariadb is also mysql)
    DB_ENGINE = os.environ.get("DB_ENGINE") or 'mysql'
    DB_HOST = os.environ.get("DB_HOST") or '127.0.0.1'
    DB_PORT = os.environ.get("DB_PORT") or 3306
    DB_USER = os.environ.get("DB_USER") or 'jumpserver'
    DB_PASSWORD = os.environ.get("DB_PASSWORD") or 'weakPassword'
    DB_NAME = os.environ.get("DB_NAME") or 'jumpserver'

    # Django listens on IPS and ports, production environments recommend changing 0.0.0.0 to 127.0.0.1, which means x.x.x access is allowed, 127.0.0.1 means only self access is allowed
    # ./manage.py runserver 127.0.0.1:8080
    HTTP_BIND_HOST = '0.0.0.0'
    HTTP_LISTEN_PORT = 8080

    # Redis related settings
    REDIS_HOST = os.environ.get("REDIS_HOST") or '127.0.0.1'
    REDIS_PORT = os.environ.get("REDIS_PORT") or 6379
    REDIS_PASSWORD = os.environ.get("REDIS_PASSWORD") or ''
    REDIS_DB_CELERY = os.environ.get('REDIS_DB') or 3
    REDIS_DB_CACHE = os.environ.get('REDIS_DB') or 4

    def __init__(self):
        pass

    def __getattr__(self, item):
        return None


class DevelopmentConfig(Config):
    pass


class TestConfig(Config):
    pass


class ProductionConfig(Config):
    pass


# Default using Config settings, you can write if/else for different env
config = DevelopmentConfig()
- Generate database table structure and initialize data
cd /opt/jumpserver/utils && bash make_migrations.sh
Run jumpserver
cd /opt/jumpserver && ./jms start all -d
The default background account is admin admin, but at this time I feel I don't want to visit it, and then I will visit it when nginx is finally installed
Install SSH Server and WebSocket Server: Coco
- Download or Clone Project
cd /opt && source /opt/py3/bin/activate && git clone https://github.com/jumpserver/coco.git && cd coco && git checkout master && echo "source /opt/py3/bin/activate" > /opt/coco/.env
Also the first time you enter this coco folder, you will be prompted to enter y.
- Installation Dependency
cd /opt/coco/requirements && yum -y install $(cat rpm_requirements.txt) && pip install -r requirements.txt -i https://pypi.douban.com/simple/
- Modify configuration file and run
cd /opt/coco && cp conf_example.py conf.py && vi conf.py
Actually, there is nothing to modify this profile above. If you want to modify it, you can modify the log level and the others will do it by themselves.
Run coco after
./cocod start -d
Official documents will allow you to enter the web interface at this time to accept any registration, regardless of it, and proceed directly to the next step
Install Web Terminal Front End: Luna
- Install Luna
cd /opt && wget https://github.com/jumpserver/luna/releases/download/1.4.1/luna.tar.gz && tar xvf luna.tar.gz && chown -R root:root luna
Install windows Support Build
Just because you can manage a windows server, docker is officially recommended, so use a docker image to install it
- Install docker
yum install -y yum-utils device-mapper-persistent-data lvm2 && yum-config-manager --add-repo http://mirrors.aliyun.com/docker-ce/linux/centos/docker-ce.repo && rpm --import http://mirrors.aliyun.com/docker-ce/linux/centos/gpg && yum makecache fast && yum -y install docker-ce && systemctl start docker && systemctl enable docker && systemctl status docker
- Start Guacamole
Note that the jumpserver address below cannot be written 127.0.0.1 because it is the container that runs so writing 127.0.0.1 is the container itself, just write the host ip or url
docker run --name jms_guacamole -d \
  -p 8081:8080 -v /opt/guacamole/key:/config/guacamole/key \
  -e JUMPSERVER_KEY_DIR=/config/guacamole/key \
  -e JUMPSERVER_SERVER=http://<Fill in the url address of jumpserver> \
  jumpserver/guacamole:latest
The official will then tell you to go to the web interface to receive any registration regardless of him and proceed to the next step
Configure Nginx to integrate components
- Install nginx
yum -y install nginx
- Configure nginx
First create the following file
vim /etc/nginx/conf.d/jumpserver.conf
input
server {
    listen 80;  # Proxy port, which will be accessed later, no longer through port 8080

    client_max_body_size 100m;  # Video Upload Size Limit

    location /luna/ {
        try_files $uri / /index.html;
        alias /opt/luna/;  # luna path, if you modify the installation directory, you need to modify it here
    }

    location /media/ {
        add_header Content-Encoding gzip;
        root /opt/jumpserver/data/;  # Recording location, if you change the installation directory, you need to change it here
    }

    location /static/ {
        root /opt/jumpserver/data/;  # Static resource, if you modify the installation directory, you need to modify it here
    }

    location /socket.io/ {
        proxy_pass       http://localhost:5000/socket.io/; #If coco is installed on another server, please fill in its ip
        proxy_buffering off;
        proxy_http_version 1.1;
        proxy_set_header Upgrade $http_upgrade;
        proxy_set_header Connection "upgrade";
        proxy_set_header X-Real-IP $remote_addr;
        proxy_set_header Host $host;
        proxy_set_header X-Forwarded-For $proxy_add_x_forwarded_for;
        access_log off;
    }

    location /guacamole/ {
        proxy_pass       http://localhost:8081/; #If guacamole is installed on another server, please fill in its ip
        proxy_buffering off;
        proxy_http_version 1.1;
        proxy_set_header Upgrade $http_upgrade;
        proxy_set_header Connection $http_connection;
        proxy_set_header X-Real-IP $remote_addr;
        proxy_set_header Host $host;
        proxy_set_header X-Forwarded-For $proxy_add_x_forwarded_for;
        access_log off;
    }

    location / {
        proxy_pass http://localhost:8080; #If jumpserver is installed on another server, please fill in its ip
        proxy_set_header X-Real-IP $remote_addr;
        proxy_set_header Host $host;
        proxy_set_header X-Forwarded-For $proxy_add_x_forwarded_for;
    }
}
Edit the following file after saving and exiting
vim /etc/nginx/nginx.conf
Delete the server field, which is
    server {
        listen       80 default_server;
        listen       [::]:80 default_server;
        server_name  _;
        root         /usr/share/nginx/html;

        # Load configuration files for the default server block.
        include /etc/nginx/default.d/*.conf;

        location / {
        }

        error_page 404 /404.html;
            location = /40x.html {
        }

        error_page 500 502 503 504 /50x.html;
            location = /50x.html {
        }
    }
Save Exit
- Run nginx
systemctl restart nginx && systemctl enable nginx
Start using jumpserver
First check that the components are working?
cd /opt/jumpserver && ./jms status
cd /opt/coco && ./cocod status
Is it normal to check Guacamole?
docker ps
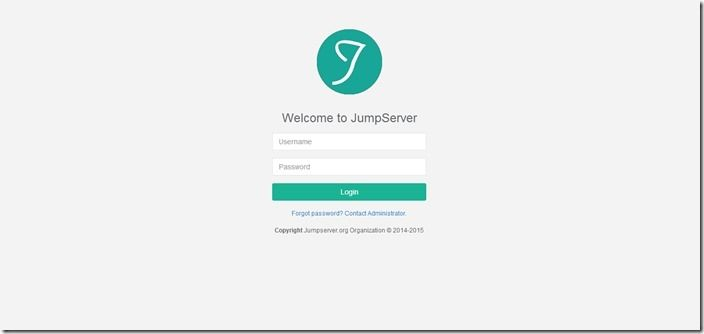
Next, our browser accesses the server's ip. The default account and password are admin
Once the login is complete, we can register our two components. Just click Session Management - > Terminal Management Terminal List with two lines and click Accept All
If not, restart the service in the following order
First shut down all services
cd /opt/jumpserver && ./jms stop all
cd /opt/coco && ./cocod stop
docker stop jms_guacamole
Then start the service in my order
cd /opt/jumpserver && ./jms start all -d
It is important to note that this step ensures successful startup, especially if the machine with a low configuration is likely to fail to start.
cd /opt/jumpserver && ./jms status
cd /opt/coco && ./cocod start -d
docker start jms_guacamole
Use
What I want to say about using is that there are two concepts: one is the management user in asset management, the other is the system user in asset management.
What is an administrative user? An administrative user is actually the root of a server that has the highest privileges to create system users on that server.
What is a system user? A system user is a user that you want to add to the server, or a user that already exists in the system. It can be root.If it is not created, jumpserver can use user push to create users to the server
With respect to asset authorization, when you create the completed asset, the asset, that is, the server, is not owned by any user. You must create an asset authorization, and authorize the asset to that user to access it.
With regard to MFA secondary authentication, in fact, when you log in, you have to download a Google Verifier to use the digital login inside, which is similar to previous game commands
Welcome to Bboysoul's blog www.bboysoul.com Have Fun