Opencv java to achieve simple special effects
Following the simple use of OpenCV Java last time, this time I share the implementation of some image processing effects.
In fact, there are many special effects tutorials imitating ps, but most of them are in opencv and python versions, and there are few materials to implement opencv in java version. Many of the following formulas can be found on the Internet, and many of them have been implemented in version c. here, a little translation has been made compared with version c, and some changes have been made.
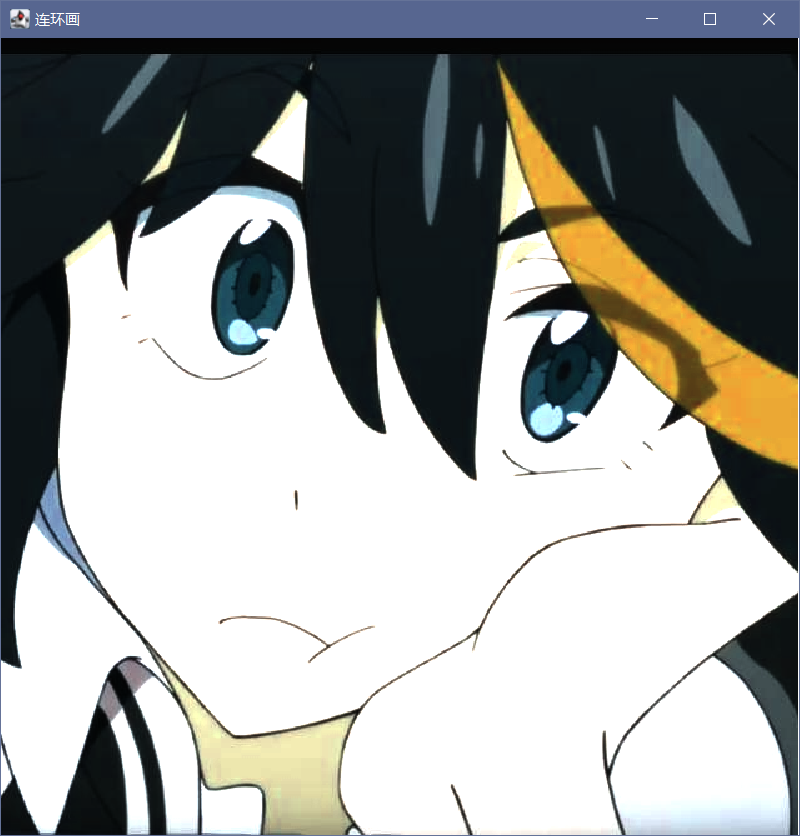
The pictures used for display are entangled. At present, it seems that the sketch effect is the best. After seeing the good pictures and directly processing them, you can hand in the sketch homework (laughter).
This paragraph can be ignored. The following algorithms are not implemented by myself, because the major operation form I choose is system construction, which is biased towards the system rather than the internal algorithm! I can't be expected to make any great achievements in three weeks (the demo of Czech brother Photopea has been written for three and a half years). I have the remaining 7 or 8 courses and have to open them when necessary. Many algorithms and implementations here have been verified and recognized on the network, but few people use opencv Java (at least I didn't find it when surfing), so I do more integration and translation.
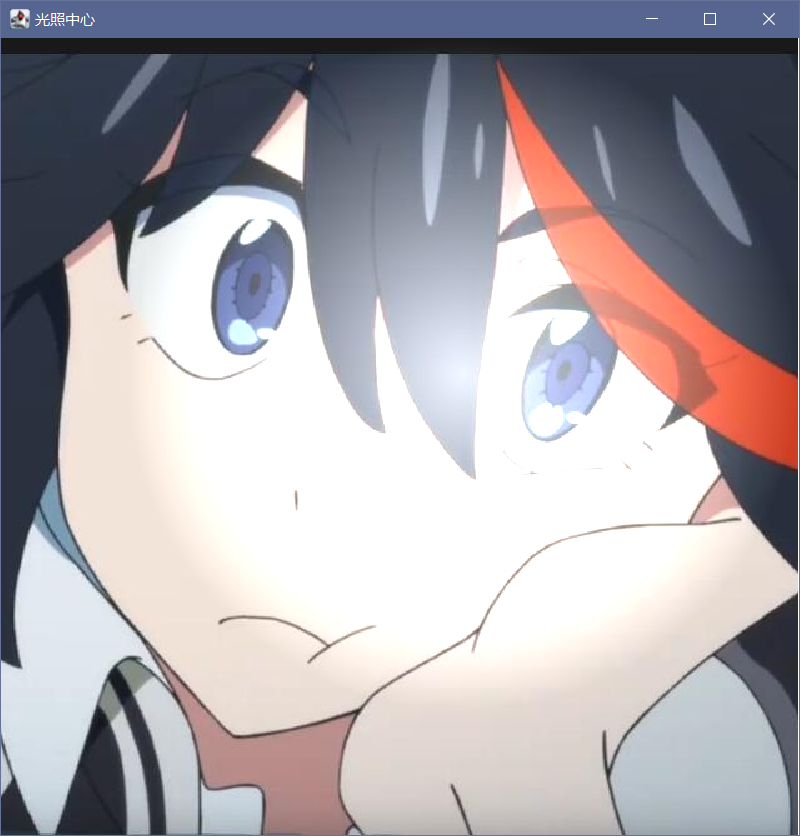
Midpoint polishing
/**
    * Central lighting
    * @param image
    * @param Strength
    * @param value
    */
public static void centerLight(Mat image, int Strength, int value){
    Mat dst = new Mat(image.size(),image.type());
    double[] pixelArr = new double[3];
    // Get row and column
    int rows = image.rows(), cols = image.cols();
    // Lighting Center
    int centerX = rows / 2 - value;
    int centerY = cols / 2 + value;
    int radius = Math.min(centerX,centerY);
    // Light intensity
    int strength = Strength;
    for (int i = 0;i<rows;i++){
        for (int j = 0;j<cols;j++){
            pixelArr = image.get(i,j).clone();
            // Calculates the distance from the current point to the middle point
            double distance = Math.pow((centerY-j), 2)+Math.pow((centerX-i),2);
            double r = pixelArr[2], g = pixelArr[1], b = pixelArr[0];

            if(distance<radius*radius){
                double result = (strength*(1.0-Math.sqrt(distance)/radius));
                r = pixelArr[2] +result;
                g = pixelArr[1] +result;
                b = pixelArr[0] +result;
                // Judge boundary
                pixelArr[2] = Math.min(255, Math.max(0,r));
                pixelArr[1] = Math.min(255, Math.max(0,g));
                pixelArr[0] = Math.min(255, Math.max(0,b));
                dst.put(i,j,pixelArr);
            }else{
                dst.put(i,j,pixelArr);
            }
        }
    }

    HighGui.imshow("Lighting Center",dst);
    waitKey();

}
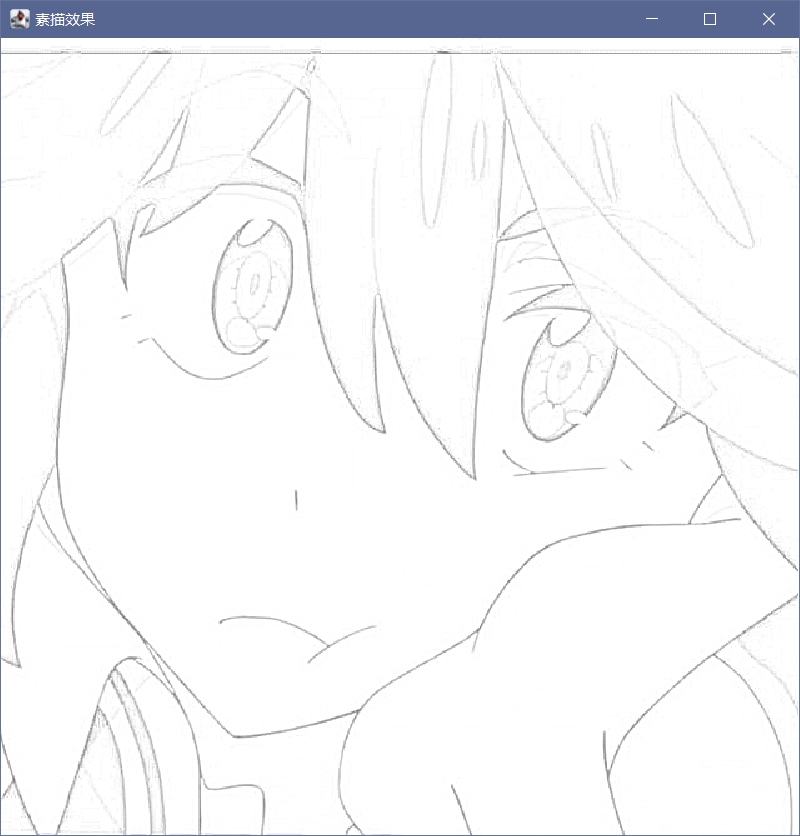
Sketch effect
Simulate the process of printing from ps color picture to sketch picture. The principle flow of the algorithm is as follows:
1. Decolorization;
2. Copy the decolor layer and reverse the color; On the reverse color can refer to another article opencv filter - reverse filter;
3. Gaussian blur of the inverse color image;
4. Select the color fading effect for the blurred image overlay mode.
Dilution formula: C =MINA + (A) × B) / (255 − b), 255, where C is the mixing result, A is the pixel after color removal, and B is the pixel after Gaussian blur.
/**
    * Sketch effects
    * @param image
    */
public static void fastDraw(Mat image){
    Mat dst = new Mat(image.size(),image.type());
    double[] pixelArr = new double[3];

    for (int i=0;i<image.rows();i++){
        for (int j=0;j<image.cols();j++) {
            pixelArr = image.get(i, j).clone();
            double max = Math.max(
                    Math.max(pixelArr[0], pixelArr[1]),
                    pixelArr[2]
            );

            double min = Math.min(
                    Math.min(pixelArr[0], pixelArr[1]),
                    pixelArr[2]
            );

            for (int k = 0; k < 3; k++)
                pixelArr[k] = (max + min) / 2;
            dst.put(i, j, pixelArr);
        }
    }

    //Reverse color
    Mat dsting = new Mat(image.size(), image.type());
    double[] pixelArr1 = new double[3];
    for (int i=0;i<dst.rows();i++){
        for (int j=0;j<dst.cols();j++){
            pixelArr = dst.get(i,j).clone();
            pixelArr1 = dsting.get(i,j).clone();
            for (int k=0;k<3;k++){
                pixelArr1[k] = 255 - pixelArr[k];
            }
            dsting.put(i,j,pixelArr1);
        }
    }

    //Gaussian blur
    Imgproc.GaussianBlur(dsting,dsting,new Size(7,7),0);

    //After blur, select the color fading effect for the image overlay mode
    // C = Min(A+(A*B)/(255-B),255)

    Mat result = new Mat(image.size(), image.type());
    double[] resultPixel = new double[3];
    for (int i=0;i<dst.rows();i++) {
        for (int j = 0; j < dst.cols(); j++) {
            pixelArr = dst.get(i,j).clone();
            pixelArr1 = dsting.get(i,j).clone();
            resultPixel = result.get(i,j).clone();
            for (int k=0;k<3;k++){
                double a = pixelArr[k], b=pixelArr1[k];
                double c = Math.min(
                        (a+(a*b)/(255-b)),
                        255
                );
                resultPixel[k] = c;

            }
            result.put(i,j,resultPixel);
        }
    }

    HighGui.imshow("Sketch effect",result);
    waitKey();
}
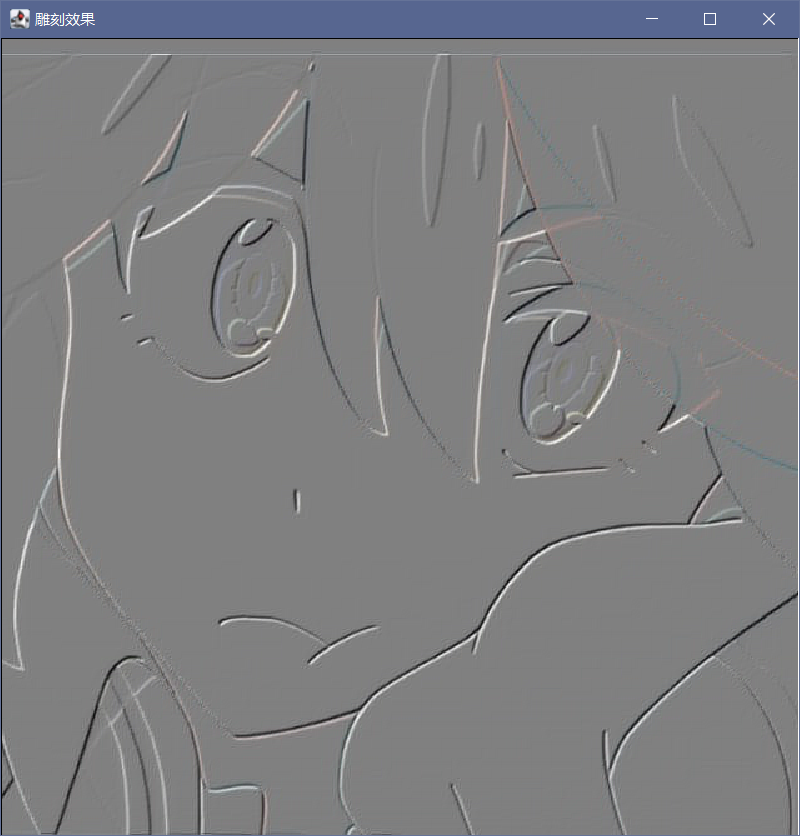
Carving effect
Subtract the gray value of the next pixel from the gray value of the previous pixel of the current pixel, and add 128 as the gray value of the current pixel.
The formula of the principle is: current(i, j) = current(j+1, j+1) - current(i-1, j-1)
The reason why the above operations can form engraving is that because the color values of adjacent points in the picture are relatively close, after such algorithm processing, only the edge area of color, that is, the part with large adjacent color difference, will have obvious results, while the values of other smooth areas are close to about 128, that is, gray, which has the engraving effect.
public static void stone(Mat image){

    Mat dst = new Mat(image.size(),image.type());
    double[] pixelArr = new double[3];
    for (int i = 1, rlen = image.rows(); i < rlen; i++) {
        for (int j = 1, clen = image.cols(); j < clen; j++) {
            pixelArr = image.get(i,j).clone();
            double[] pixelArrN = image.get(i-1,j-1).clone();
            for (int k = 0;k<3;k++){
                pixelArr[k] = pixelArr[k] - pixelArrN[k]+128;
            }
            dst.put(i,j,pixelArr);
        }
    }
    HighGui.imshow("Carving effect",dst);
    waitKey();

}
Comic strip effects

/**
    * Comic strip effects
    * @param image
    */
public static void draw(Mat image) {
    Mat dst = new Mat(image.size(), image.type());
    double[] pixelArr = new double[3];

    for (int i = 0, rlen = image.rows(); i < rlen; i++) {
        for (int j = 0, clen = image.cols(); j < clen; j++) {
            pixelArr = image.get(i, j).clone();
            double r = pixelArr[2],g=pixelArr[1],b=pixelArr[0];

            pixelArr[2] = Math.abs(g-b+g+r)*r/256;
            pixelArr[1] = Math.abs(b-g+b+r)*r/256;
            pixelArr[0] = Math.abs(b-g+b+r)*g/256;

            dst.put(i, j, pixelArr);
        }
    }
    HighGui.imshow("Comic strip",dst);
    waitKey();
}
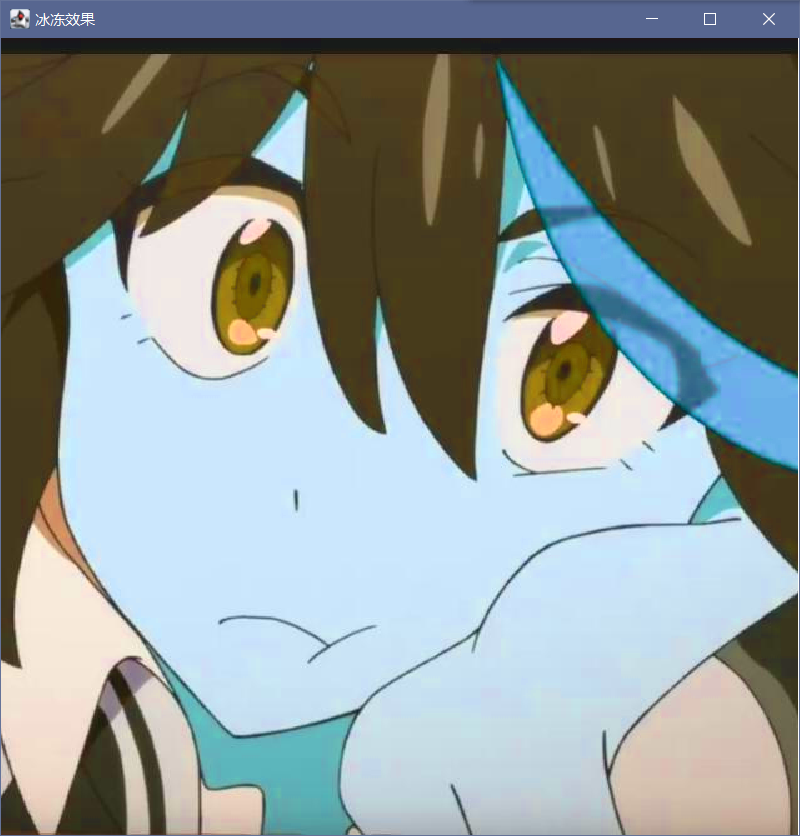
cold effect

/**
    * cold effect
    */
public static void forzee(Mat image){

    Mat dst = new Mat(image.size(),image.type());
    double[] pixelArr = new double[3];

    System.out.println("?");
    for (int i=0,rlen=image.rows();i<rlen;i++){
        for(int j=0,clen=image.cols();j<clen;j++){
            pixelArr = image.get(i, j).clone();
            double r = pixelArr[2],g=pixelArr[1],b=pixelArr[0];
            pixelArr[0] = Math.abs(b - g - r);
            pixelArr[1] = Math.abs(g - r - b);
            pixelArr[2] = Math.abs(r - b - g);

            dst.put(i,j,pixelArr);
        }
    }
    HighGui.imshow("cold effect " ,dst);
    waitKey();
}
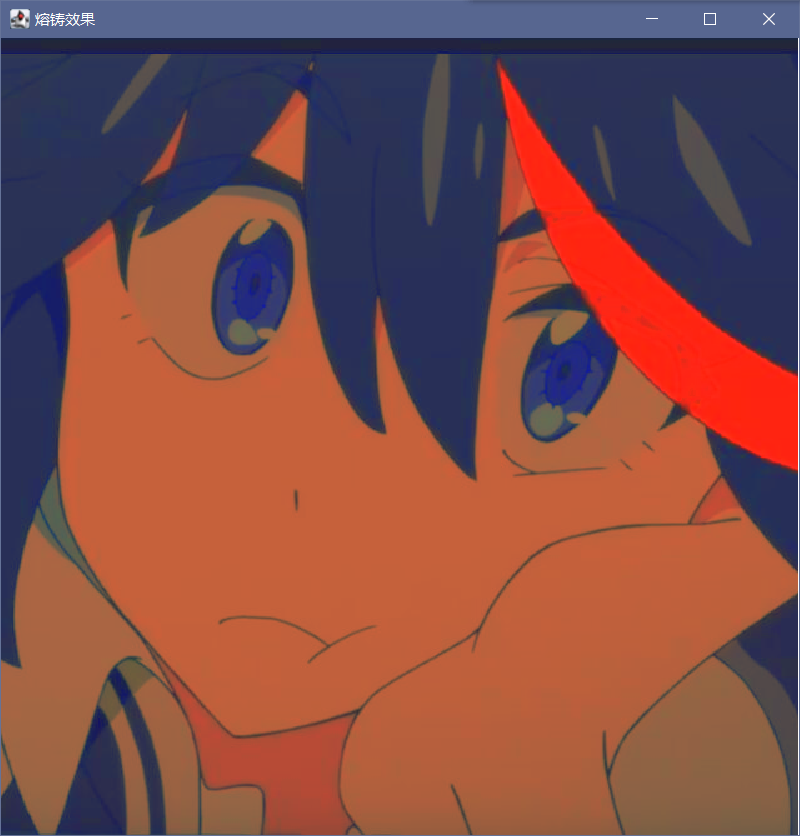
Casting effect

/**
    * Casting effect
    */
public static void fire(Mat image){
    Mat dst = new Mat(image.size(),image.type());

    double[] pixelArr = new double[3];
    for(int i = 0,rlen=image.rows();i<rlen;i++){
        for (int j=0,clen=image.cols();j<clen;j++){
            pixelArr = image.get(i, j).clone();

            pixelArr[0] = pixelArr[0]*128 / (pixelArr[1]+pixelArr[2]+1);
            pixelArr[1] = pixelArr[1]*128 / (pixelArr[0]+pixelArr[2]+1);
            pixelArr[2] = pixelArr[2]*128 / (pixelArr[0]+pixelArr[1]+1);

            dst.put(i, j, pixelArr);
        }
    }
    HighGui.imshow("Casting effect",dst);
    waitKey();
}