Data reading - pictures
read
The smallest component of each image is pixels. It is composed of many pixels. The range of each pixel is 0-255 (0 is black, the brightness is the darkest, 255 is white, and the brightness is the brightest)
RGB three color space. Generally, pictures are three channels. It can be regarded as represented by a three-layer matrix. The corresponding different pixels will have a corresponding value in the three color channels
import cv2 as cv #The format read by opencv is BGR
import numpy as np
import matplotlib.pyplot as plt
#You don't need to call show() to generate directly after the drawing is completed
%matplotlib inline
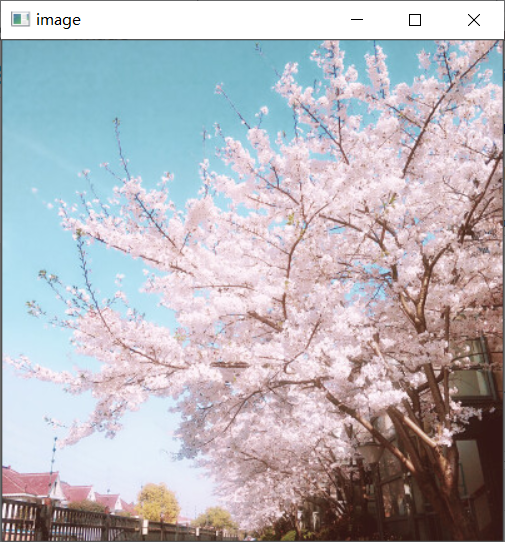
img = cv.imread('1.jpg')
The reading parameter is: picture name, which will be searched in the current directory
After reading, the result is: a three channel numpy array form
Look at the shape:
img.shape
This is the corresponding result:
(400, 400, 3)
be careful:
1. The form is the form of [h,w,c]
2. The reading order of OpenCV and PIL for three channels is different. The format read by opencv is BG, and RPIL(python image processing library) is opened using RGB
Exhibition
#Image display, you can also create multiple windows
cv.imshow('image',img)
#Waiting / disappearing time, in milliseconds, 0 indicates any key termination, not automatic termination
cv.waitKey(0)
cv.destroyAllWindows()
Here, there are two points to remember:
1.cv.waitKey(0)
Here is the display / disappearance time of the picture. If the parameter is 0, it means that you press any key to exit automatically. If it is not 0, the parameter is the time set by yourself, in milliseconds
2.cv.destroyAllWindows()
Official answer:
You can call destroyWindow() or destroyAllWindows() to close the window and deallocate any associated memory usage. For a simple program, you don't actually need to call these functions, because the operating system will automatically close all resources and windows of the application when you exit
Generally speaking, that is:
If there is no previous operation to free the memory, destroyallWIndows will free the memory occupied by that variable
We aggregate the contents of the whole picture into a function:
def cv_show(name,img):
    cv.imshow(name,img)
    cv.waitKey(0)
    cv.destroyAllWindows()
In this way, you can directly use this function when displaying later pictures
Grayscale
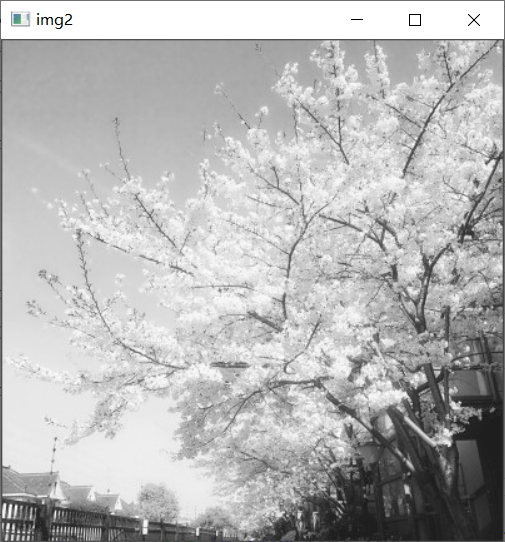
img2 = cv.imread('1.jpg',cv.IMREAD_GRAYSCALE)
cv2 IMREAD_COLOR color image
cv2 IMREAD_GRAYSCALE Gray image
We can show the pictures to observe the differences between the pictures:
IMG is the initial image. It is a three channel color image, while img2 is a grayscale image. It has only one channel and only needs brightness to express.
View img2's shape
img2.shape
Results obtained:
(400, 400)#Only [h,w], no c
preservation
cv.imwrite('1_gray.jpg',img2)
Look at the picture type
cv.imwrite('1_gray.jpg',img2)
This is the result:
numpy.ndarray
Look at the number of pixels in the picture
img.size
This is the result:
480000
Look at the range of each value of the matrix corresponding to the picture
img.dtype
This is the result:
dtype('uint8')
Data reading – video
vc = cv.VideoCapture('1.mp4')
#Check whether it is opened correctly
if vc.isOpened():
    open,frame = vc.read()
else:
    open = False
while open:
    #Parameters: ret: whether the current frame is read correctly, frame: the three channel matrix corresponding to each frame image
    ret,frame = vc.read()
    if frame is None:
        break
    if ret == True:
        gray = cv.cvtColor(frame,cv.COLOR_BGR2GRAY)
        cv.imshow('result',gray)
        #You can set how long you want him to wait or exit automatically. You can set the key to close. 27 corresponds to the exit key
        if cv.waitKey(10) % 0xFF == 27:
            break
vc.release()
cv.destroyAllWindows()
It is equivalent to reading video frame by frame, which is equivalent to processing pictures
ROI (area of interest)
Intercepting part of image data
img = cv.imread('1.jpg')
tree = img[0:200,0:200]
cv_show('tree',tree)
In this way, we get the height and width we want, and then intercept all three channels
Image color channel extraction
b,g,r = cv.split(img)
See what b is:
array([[190, 192, 194, ..., 175, 165, 159],
       [190, 191, 193, ..., 183, 158, 180],
       [192, 192, 193, ..., 172, 159, 194],
       ...,
       [ 87,  62, 146, ...,  20,  18,  20],
       [ 68,  50, 173, ...,  22,  20,  23],
       [ 72,  54, 179, ...,  21,  22,  25]], dtype=uint8)
The picture above is the representation of single matrix:
To process the channels separately and then combine them together:
img=cv.merge((b,g,r))
Keep only the writing of R
Because the reading method of opencv is the reading method of BGR, if you want to retain a certain layer of channels, just modify the last number of channels.
#Keep only R
cur_img = img.copy()
cur_img[:,:,0]=0
cur_img[:,:,1]=0
cv_show('R',cur_img)
#Keep only G
cur_img = img.copy()
cur_img[:,:,0]=0
cur_img[:,:,2]=0
cv_show('R',cur_img)
#Keep only B
cur_img = img.copy()
cur_img[:,:,1]=0
cur_img[:,:,2]=0
cv_show('R',cur_img)
Boundary fill
When reading data, we usually take the form of reading convolution kernel, that is, [3 * 3] or [5 * 5], that is, we will read the data around it as a reference. Therefore, when we read the edge data, we need to fill the boundary. Yes, we can read all valid information to prevent loss.
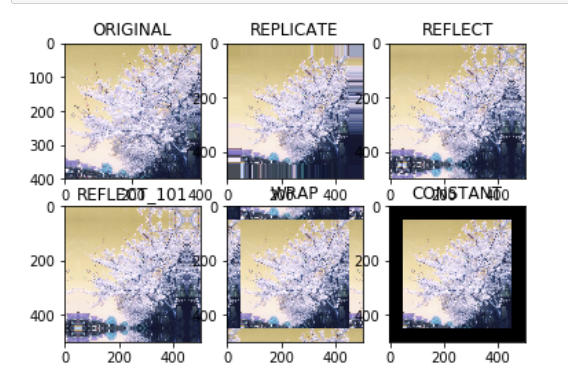
top_size,bottom_size,left_size,right_size = (50,50,50,50)
#The difference is, borderType: what is the filling method
replicateto = cv.copyMakeBorder(img,top_size,bottom_size,left_size,right_size,borderType=cv.BORDER_REPLICATE)
reflect = cv.copyMakeBorder(img,top_size,bottom_size,left_size,right_size,borderType=cv.BORDER_REFLECT)
reflect101 = cv.copyMakeBorder(img,top_size,bottom_size,left_size,right_size,borderType=cv.BORDER_REFLECT_101)
wrap = cv.copyMakeBorder(img,top_size,bottom_size,left_size,right_size,borderType=cv.BORDER_WRAP)
#value is the parameter. Here, set the parameter to 0, that is, black. You can also set other colors
constant = cv.copyMakeBorder(img,top_size,bottom_size,left_size,right_size,borderType=cv.BORDER_CONSTANT,value = 0)
1.top_size,bottom_size,left_size,right_size means filling the top, bottom, left and right of the picture respectively
2.borderType
BORDER_REPLICATE: Copy method, that is, copy the most edge pixels
BORDER_REFLECT: Reflection method: copy the pixels in the image of interest on both sides, for example: fedcba|abcdefgh|hgfedcb
BORDER_REFLECT_101: Reflection method: that is, it is symmetrical with the edge pixel as the axis, gfedcb|abcdefgh|gfedcba
BORDER_WRAP: Outer packaging method, cdefgh|abcdefgh|abcdefg
BORDER_CONSTANT: Constant value filling( value That's the parameter. Here, set the parameter to 0, that is, black, or other colors)
The following is the actual operation:
import matplotlib.pyplot as plt
plt.subplot(231),plt.imshow(img,'gray'),plt.title('ORIGINAL')
plt.subplot(232),plt.imshow(replicateto,'gray'),plt.title('REPLICATE')
plt.subplot(233),plt.imshow(reflect,'gray'),plt.title('REFLECT')
plt.subplot(234),plt.imshow(reflect101,'gray'),plt.title('REFLECT_101')
plt.subplot(235),plt.imshow(wrap,'gray'),plt.title('WRAP')
plt.subplot(236),plt.imshow(constant,'gray'),plt.title('CONSTANT')

plt.show()
This is the display result of the code:
numerical calculation
img_tree = cv.imread('1.jpg')
img_flo = cv.imread('2.jpg')
#Addition and subtraction will be performed on each pixel
img_tree2 = img_tree+10
img_tree[:5,:,0]
img_tree[:5,:,0]
Here, because a picture matrix is relatively large, the system can go to the first 5 lines and observe the differences
img_tree[:5,:,0]
array([[190, 192, 194, ..., 175, 165, 159],
       [190, 191, 193, ..., 183, 158, 180],
       [192, 192, 193, ..., 172, 159, 194],
       [194, 194, 193, ..., 168, 180, 176],
       [195, 194, 194, ..., 153, 165, 151]], dtype=uint8)
Add and subtract on each pixel of the original picture
img_tree[:5,:,0]
array([[200, 202, 204, ..., 185, 175, 169],
       [200, 201, 203, ..., 193, 168, 190],
       [202, 202, 203, ..., 182, 169, 204],
       [204, 204, 203, ..., 178, 190, 186],
       [205, 204, 204, ..., 163, 175, 161]], dtype=uint8)
When two pictures are added or subtracted directly:
Note: two pictures must have the same shape to add or subtract
(img_tree+img_tree2)[:5,:,0]
#Equivalent to the sum of their corresponding pixels and% 256
array([[134, 138, 142, ..., 104,  84,  72],
       [134, 136, 140, ..., 120,  70, 114],
       [138, 138, 140, ...,  98,  72, 142],
       [142, 142, 140, ...,  90, 114, 106],
       [144, 142, 142, ...,  60,  84,  56]], dtype=uint8)
When using the add function:
cv.add(img_tree,img_tree2)[:5,:,0]
#When the sum of the corresponding pixels is greater than 255, that is, it is out of bounds, it is 255
array([[255, 255, 255, ..., 255, 255, 255],
       [255, 255, 255, ..., 255, 255, 255],
       [255, 255, 255, ..., 255, 255, 255],
       [255, 255, 255, ..., 255, 255, 255],
       [255, 255, 255, ..., 255, 255, 255]], dtype=uint8)
Image fusion
img_tree.shape
(400, 400, 3)
img_flo.shape
(1080, 1920, 3)
It can be found that their shapes are different, so we need to make the resize method to make their shapes the same
#The addition and subtraction must be the same as the shape. The parameters of resize, w,h
img_flo=cv.resize(img_flo,(400,400))
img_flo.shape
Then they can be fused, and they conform to a formula
R = ax + by + b
X and Y here represent picture 1 and picture 2
a represents the weight of picture 1, and b represents the weight of picture 2
b represents the offset
res = cv.addWeighted(img_tree,0.4,img_flo,0.6,0)
Zoom transformation
#For scaling transformation, the previous value is formulated as (0,0). You can not say the specific value, but you can say the multiple relationship between length and width. The following meaning is, x*3,y*1, that is, the length becomes 3 times and the height remains unchanged
res = cv.resize(img,(0,0),fx = 3,fy = 1)
plt.imshow(res)
#The following meaning is: change the first point into (0,0), then the length remains unchanged and the height becomes three times the original
res = cv.resize(img,(0,0),fx = 1,fy = 3)
plt.imshow(res)
We can also choose equal scale magnification:
res = cv.resize(img,(0,0),fx = 3,fy = 3)
plt.imshow(res)