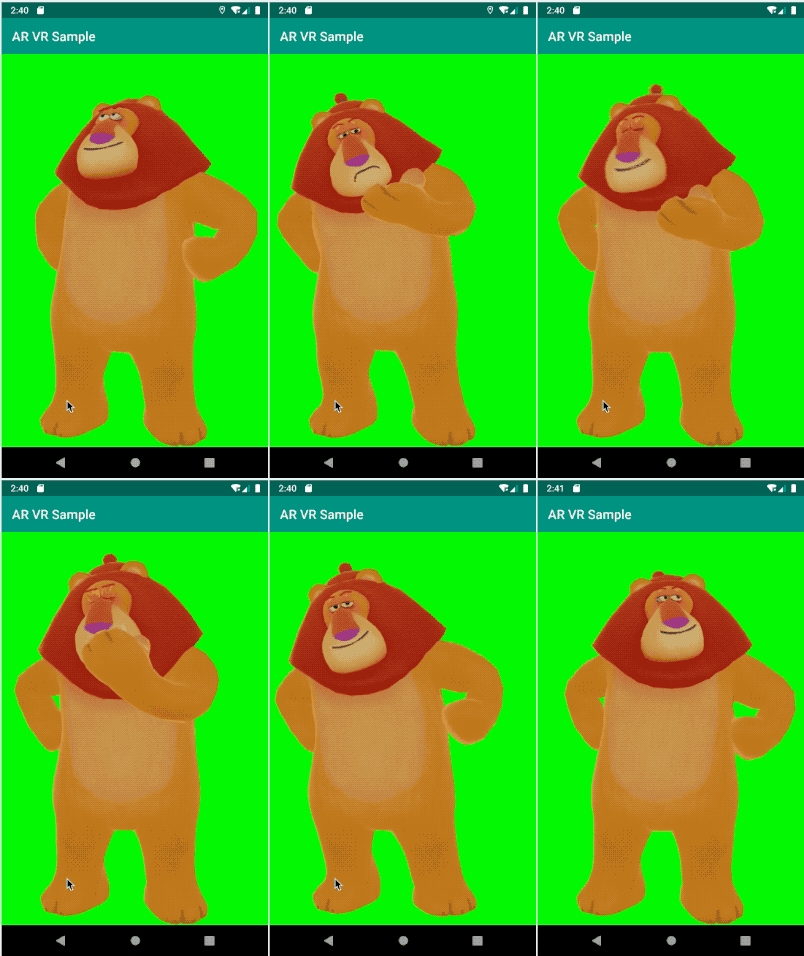
Why play video with OpenGL ES
We all know that there is a VideoView control in Android that can play video directly, which is both simple and practical. So why do we use OpenGL ES to play video? That's because OpenGL ES can do more cool dynamic effects, such as rotating video, double finger zooming video, video screenshots, video recording, live broadcast, face changing, and special effects like those in the "cute" App, which are impossible for VideoView to achieve, while OpenGL ES can achieve these cool effects, of course, this article will not introduce how to achieve these realities Now these effects, if you want to understand these effects, please pay attention to me, and the following articles will introduce one by one.
Let's start our performance, let's enjoy the following renderings:

shader
First, we create vertex and fragment shaders. The vertex shader code is as follows:
attribute vec4 a_Position;
attribute vec2 a_TexCoordinate;
varying vec2 v_TexCoord;

void main()
{
    v_TexCoord = a_TexCoordinate;
    gl_Position = a_Position;
}
The code of segment shader is as follows:
#extension GL_OES_EGL_image_external : require
precision mediump float;

uniform samplerExternalOES u_Texture;
varying vec2 v_TexCoord;

void main()
{
    gl_FragColor = texture2D(u_Texture, v_TexCoord);
}
U ﹣ texture is texture in fragment shader. Note that its type is samplerExternalOES, not sampler2D. sampler2D is 2D texture, which is used to display pictures. samplerExternalOES is a unique type of Android, which is used to draw videos and cameras.
program
After the shader is created, we compile the shader and link it to the program, and then get the handle of the parameters. The code is as follows:
override fun onSurfaceCreated(p0: GL10?, p1: EGLConfig?) {
            createProgram()
            //Get vPosition index
            vPositionLoc = GLES20.glGetAttribLocation(mProgramHandle, "a_Position")
            texCoordLoc = GLES20.glGetAttribLocation(mProgramHandle, "a_TexCoordinate")
            textureLoc = GLES20.glGetUniformLocation(mProgramHandle, "u_Texture")
			...
        }

        private fun createProgram() {
            var vertexCode =
                AssetsUtils.readAssetsTxt(
                    context = context,
                    filePath = "glsl/video_vs.glsl"
                )
            var fragmentCode =
                AssetsUtils.readAssetsTxt(
                    context = context,
                    filePath = "glsl/video_fs.glsl"
                )
            mProgramHandle = GLTools.createAndLinkProgram(vertexCode, fragmentCode)
        }
Create texture
Video texture creation is slightly different from 2D texture creation, and the code is as follows:
fun createOESTextureId(): Int {
        val textures = IntArray(1)
        GLES20.glGenTextures(1, textures, 0)
        glCheck("texture generate")
        GLES20.glBindTexture(GLES11Ext.GL_TEXTURE_EXTERNAL_OES, textures[0])
        glCheck("texture bind")

        GLES20.glTexParameterf(
            GLES11Ext.GL_TEXTURE_EXTERNAL_OES,
            GLES20.GL_TEXTURE_MIN_FILTER,
            GLES20.GL_LINEAR.toFloat()
        )
        GLES20.glTexParameterf(
            GLES11Ext.GL_TEXTURE_EXTERNAL_OES,
            GLES20.GL_TEXTURE_MAG_FILTER,
            GLES20.GL_LINEAR.toFloat()
        )
        GLES20.glTexParameteri(
            GLES11Ext.GL_TEXTURE_EXTERNAL_OES,
            GLES20.GL_TEXTURE_WRAP_S,
            GLES20.GL_CLAMP_TO_EDGE
        )
        GLES20.glTexParameteri(
            GLES11Ext.GL_TEXTURE_EXTERNAL_OES,
            GLES20.GL_TEXTURE_WRAP_T,
            GLES20.GL_CLAMP_TO_EDGE
        )

        return textures[0]
    }
The difference is that gles20.glbindtexture (gles11ext.gl ﹣ text ﹣ external ﹣ oes, textures [0]), and the related parameter descriptions of gles20.gltextparameterf function can be referred to OpenGL ES texture filtering mode - glTexParameteri.
After the texture is created successfully, return to the texture id, then create surfacetexture - > Surface, and set the Surface to MediaPlayer. The code is as follows:
override fun onSurfaceCreated(p0: GL10?, p1: EGLConfig?) {
			...

            textureId = GLTools.createOESTextureId()
            var surfaceTexture = SurfaceTexture(textureId)
            surfaceTexture.setOnFrameAvailableListener(frameAvailableListener)

			...
        }
Here we will talk about the frameAvailableListener. When there is a new frame of data in the surfaceTexture, the frameAvailableListener will be called back. At this time, we will update the data and draw. In the previous article, we introduced that in rendermode = glsurfaceview. Rendermode? When? Dirty mode, we need to call glSurfaceView.requestRender(), so we implemented the FRA in Activity Meavailablelistener, and pass this implementation to Renderer. The code is as follows:
class VideoActivity : AppCompatActivity(), SurfaceTexture.OnFrameAvailableListener {

    override fun onFrameAvailable(surfaceTexture: SurfaceTexture?) {
        glSurfaceView.queueEvent {
            surfaceTexture?.updateTexImage()
            glSurfaceView.requestRender()
        }
    }

    override fun onCreate(savedInstanceState: Bundle?) {
        super.onCreate(savedInstanceState)
        setContentView(R.layout.surface)
        glSurfaceView.setEGLContextClientVersion(2)
        glSurfaceView.setRenderer(MyRenderer(context = baseContext, frameAvailableListener = this))
        glSurfaceView.renderMode = GLSurfaceView.RENDERMODE_CONTINUOUSLY
    }

	...
}
Initialize MediaPlayer and play video
Here we use the MediaPlayer that comes with Android API. I personally suggest that if it's a business project, please use ijkplayer (github open source) Whether it's the MediaPlayer and ijkplay that complete the video encoding and decoding work, ijkplay's performance is more stable, and its playback format is more comprehensive.
MediaPlayer initialization and video playback code are as follows:
override fun onSurfaceCreated(p0: GL10?, p1: EGLConfig?) {
            ...

            textureId = GLTools.createOESTextureId()
            var surfaceTexture = SurfaceTexture(textureId)
            surfaceTexture.setOnFrameAvailableListener(frameAvailableListener)

            mediaPlayer = MediaPlayer()
            mediaPlayer.setAudioStreamType(AudioManager.STREAM_MUSIC)
            val surface = Surface(surfaceTexture)
            mediaPlayer.setSurface(surface)

            startVideo()
        }
fun startVideo() {
            try {
                mediaPlayer.reset()
                val fd = context.assets.openFd("video/lion_chroma.mp4")
                mediaPlayer.setDataSource(fd.fileDescriptor,fd.startOffset,fd.length)
                mediaPlayer.prepare()
                mediaPlayer.start()
            } catch (e: Exception) {
                Log.e("mqd","$e")
            }
        }
We store the video file in assets/video directory. Of course, you can play SD or online video.
Create vertex coordinates, texture coordinates, vertex index data
The vertex coordinates are initialized as follows:
        var vertexBuffer = GLTools.array2Buffer(
            floatArrayOf(
                -1.0f, 1.0f, 0.0f,  // top left
                -1.0f, -1.0f, 0.0f,  // bottom left
                1.0f, -1.0f, 0.0f,  // bottom right
                1.0f, 1.0f, 0.0f  // top right
            )
        )
Texture coordinates are initialized as follows:
var texBuffer = GLTools.array2Buffer(
            floatArrayOf(
                0.0f, 0.0f,
                0.0f, 1.0f,
                1.0f, 1.0f,
                1.0f, 0.0f
            )
        )
The vertex index is initialized as follows:
var index = shortArrayOf(3, 2, 0, 0, 1, 2)
val indexBuffer = GLTools.array2Buffer(index)
Draw
After all the preparatory work is completed, start to draw, and the code is as follows:
override fun onDrawFrame(p0: GL10?) {
            GLES20.glUseProgram(mProgramHandle)
            //Set vertex data
            vertexBuffer.position(0)
            GLES20.glEnableVertexAttribArray(vPositionLoc)
            GLES20.glVertexAttribPointer(vPositionLoc, 3, GLES20.GL_FLOAT, false, 0, vertexBuffer)
            //Set texture vertex data
            texBuffer.position(0)
            GLES20.glEnableVertexAttribArray(texCoordLoc)
            GLES20.glVertexAttribPointer(texCoordLoc, 2, GLES20.GL_FLOAT, false, 0, texBuffer)
            //Set texture
            GLES20.glActiveTexture(GLES20.GL_TEXTURE0)
            GLES20.glBindTexture(GLES20.GL_TEXTURE_2D, textureId)
            GLES20.glUniform1i(textureLoc, 0)

            GLES20.glDrawElements(
                GLES20.GL_TRIANGLES,
                index.size,
                GLES20.GL_UNSIGNED_SHORT,
                indexBuffer
            )
        }
This is the end of our performance. When we run, we can see the effect picture at the beginning. However, there is a small flaw here. If the scale of video is different from that of GLSurfaceView (drawing window), the phenomenon of video stretch will appear. In the following chapters, we will solve this problem. Please look forward to it.
Read more about:
If this article is helpful to you, I hope you will pay attention to my public number. Thank you.


