Preparing object storage
The MTC Replication Repository can use the following object stores:
- Multi-Cloud Object Gateway (MCG)
- Amazon Web Services (AWS) S3
- Google Cloud Provider (GCP)
- Microsoft Azure Generic
- S3 object storage, MinIO or Ceph
Please refer to the " OpenShift 4 - Deploy Run MinIO Object Store "Deploy the MinIO environment on OpenShift 4.
Configure environment for migration source OpenShift 3
Deploy Migration Operator
- Execute the command to create a Migration Operator from the two yaml files.
$ mkdir $HOME/mtc
$ sudo docker cp $(sudo docker create registry.redhat.io/rhmtc/openshift-migration-rhel7-operator:v1.3.1):/operator.yml $HOME/mtc
$ sudo docker cp $(sudo docker create registry.redhat.io/rhmtc/openshift-migration-rhel7-operator:v1.3.1):/controller-3.yml $HOME/mtc
$ oc create -f $HOME/mtc/operator.yml
$ oc create -f $HOME/mtc/controller-3.yml
- View deployed Operator resources
$ oc get pods -n openshift-migration
NAME                                  READY     STATUS    RESTARTS   AGE
migration-operator-77d77fff48-28t9c   1/1       Running   0          1m
restic-b2k9z                          1/1       Running   0          31s
restic-c8hwm                          1/1       Running   0          31s
restic-gpnjz                          1/1       Running   0          31s
restic-nfqwd                          1/1       Running   0          31s
velero-585b8ddc7d-ftprk               1/1       Running   0          31s
Deploy file-uploader test application
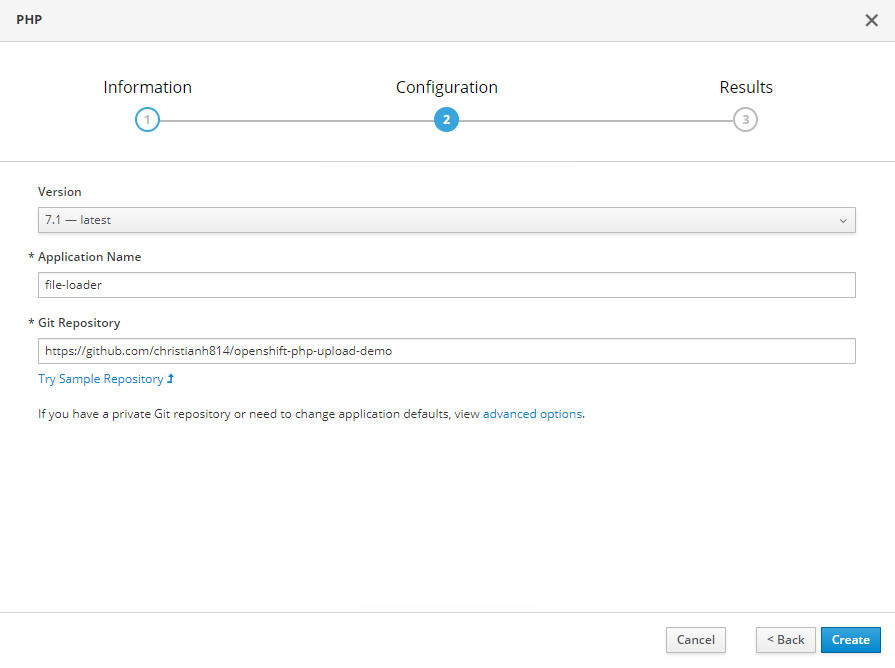
- Enter the "file-uploader" project in the console of OpenShift 3 and find "PHP" in the Service Catalog. Then create a file-uploader application from the following image.
Where Git Repository - https://github.com/christianh814/openshift-php-upload-demo
- Enter the Deployment named "file-uploader" and view the Configuration column. Modify the number of Replicas in the figure below to three.
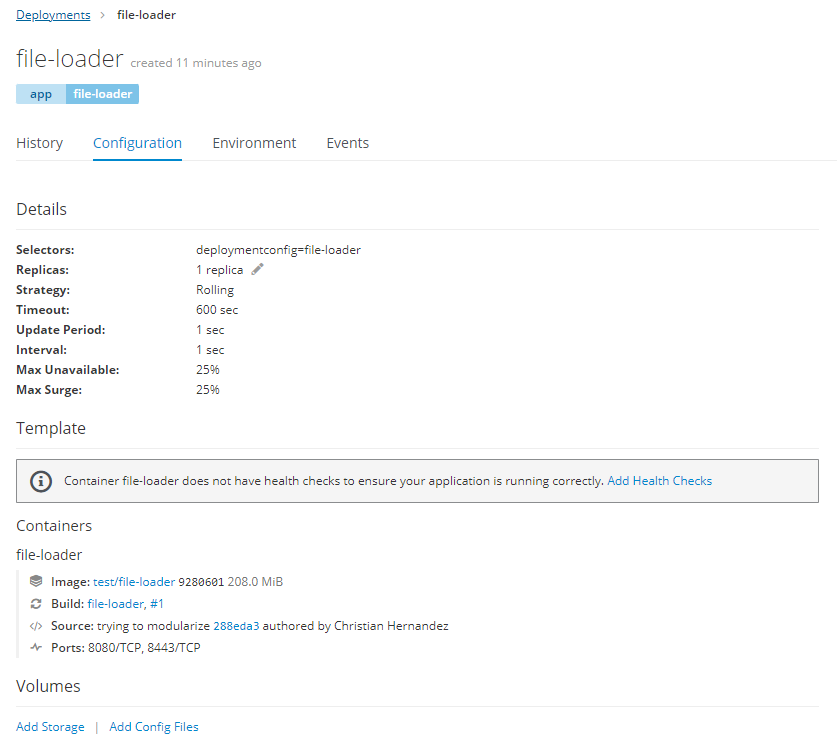
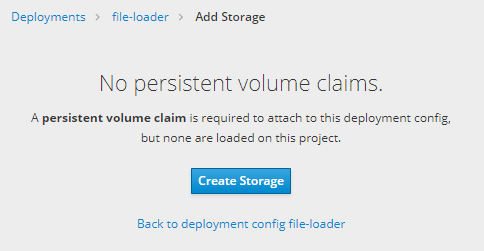
- Then click the "Add Storage" link below the image above and click "Create Storage" on the jumped "Add Storage" page.
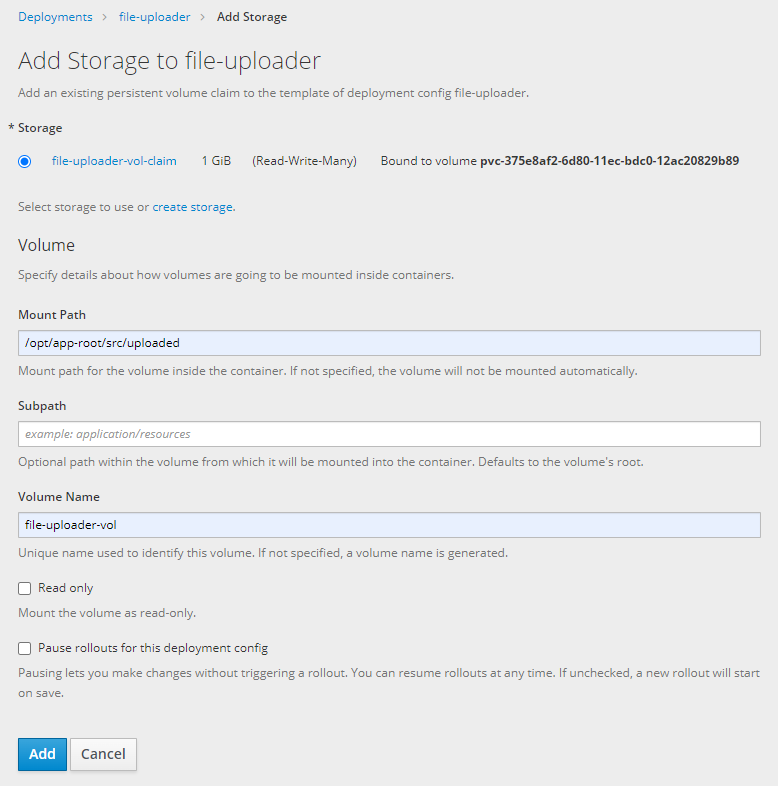
- On the Create Storage page, first create a PVC named "file-uploader-vol-claim", then use the new PVC in Deployment as shown below.
- Finally, access the application through Route.
View cluster configuration
- The migration-controller token in ServiceAccount was found. This token will then be referenced using OCP3-TOKEN and used to access this OpenShift 3 cluster.
$ oc sa get-token migration-controller -n openshift-migration
eyJhbGciOiJSUzI1NiIsImtpZCI6IiJ9.eyJpc3MiOiJrdWJlcm5ldGVzL3NlcnZpY2VhY2NvdW50Iiwia3ViZXJuZXRlcy5pby9zZXJ2aWNlYWNjb3VudC9uYW1lc3BhY2UiOiJvcGVuc2hpZnQtbWlncmF0aW9uIiwia3ViZXJuZXRlcy5pby9zZXJ2aWNlYWNjb3VudC9zZWNyZXQubmFtZSI6Im1pZ3JhdGlvbi1jb250cm9sbGVyLXRva2VuLTJmNmhrIiwia3ViZXJuZXRlcy5pby9zZXJ2aWNlYWNjb3VudC9zZXJ2aWNlLWFjY291bnQubmFtZSI6Im1pZ3JhdGlvbi1jb250cm9sbGVyIiwia3ViZXJuZXRlcy5pby9zZXJ2aWNlYWNjb3VudC9zZXJ2aWNlLWFjY291bnQudWlkIjoiNmQyNmVjN2UtMWQzYS0xMWViLWI2ZjQtMTYzZjM1MzNlNTFmIiwic3ViIjoic3lzdGVtOnNlcnZpY2VhY2NvdW50Om9wZW5zaGlmdC1taWdyYXRpb246bWlncmF0aW9uLWNvbnRyb2xsZXIifQ.Nf134JLn9cMmNORxZC8ilJN9W43sj0_tj_B5c3Bf6l-Z4mcdXnjgR1NLH11qqJc7-9H9bgTfm8lza0kQZgEcsNIY47nxPoezkKGoOXVKEpTsaP_inykHRr6iqUuZgKiCu9I0n8st27dG0VYE8bpboPOlO8iITTH7VHbLVnWEKgk-_5CKnSmycsgFoqrfWYSEi9qbnxi2PkrQ3wLhic8RmItvCgpbvr62eV2z5Q82Gxtf9x4-RPLK5_vFtKHvK8vXjs2mw-jihM_LBuxRLbQCI64_F5MRUowFp8zUIaAuqCDtUVAPukJq6dt91tPTXg_YuSZGHV5s_NVeSIb1PDqUWg
- Obtain the API address for the OpenShift 3 cluster, which will be referenced later using the OCP3-API.
$ oc whoami --show-server
https://master.bdvwt.sandbox725.opentlc.com:443
Configure environment for migration target OpenShift 4
Install MTC Operator
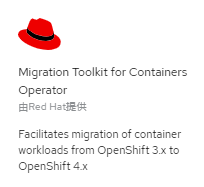
- Install the Migration Toolkit for Containers Operator using the default configuration. Note: By default, it is installed in the openshift-migration project.
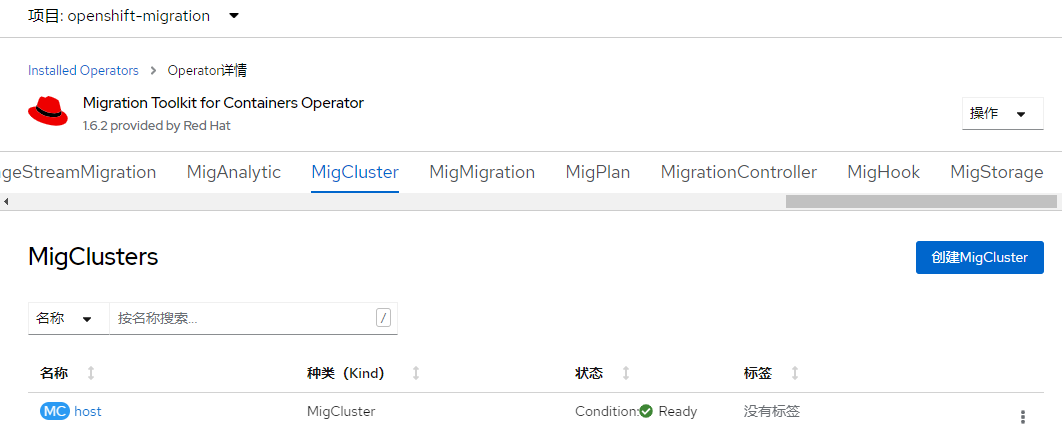
- Once Operator is installed, you can see that the current OpenShift cluster has been treated as a MigCluster object.
Create Migration Controller
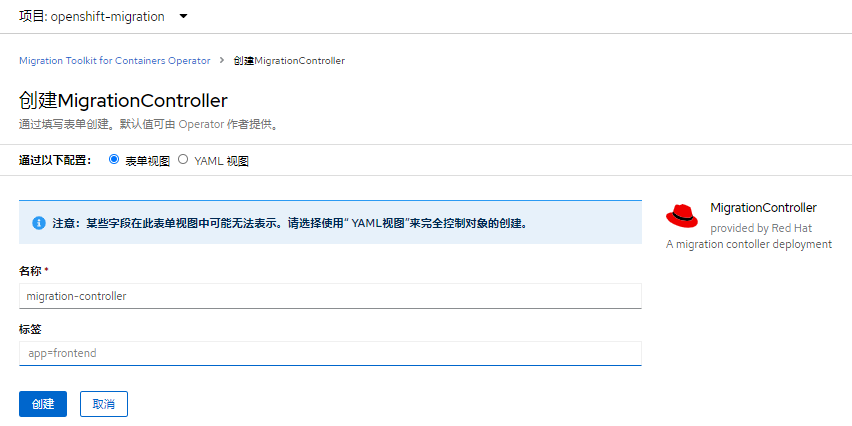
- Create a new Migration Controller object in the openshift-migration project using the default configuration provided by MTC Operator.
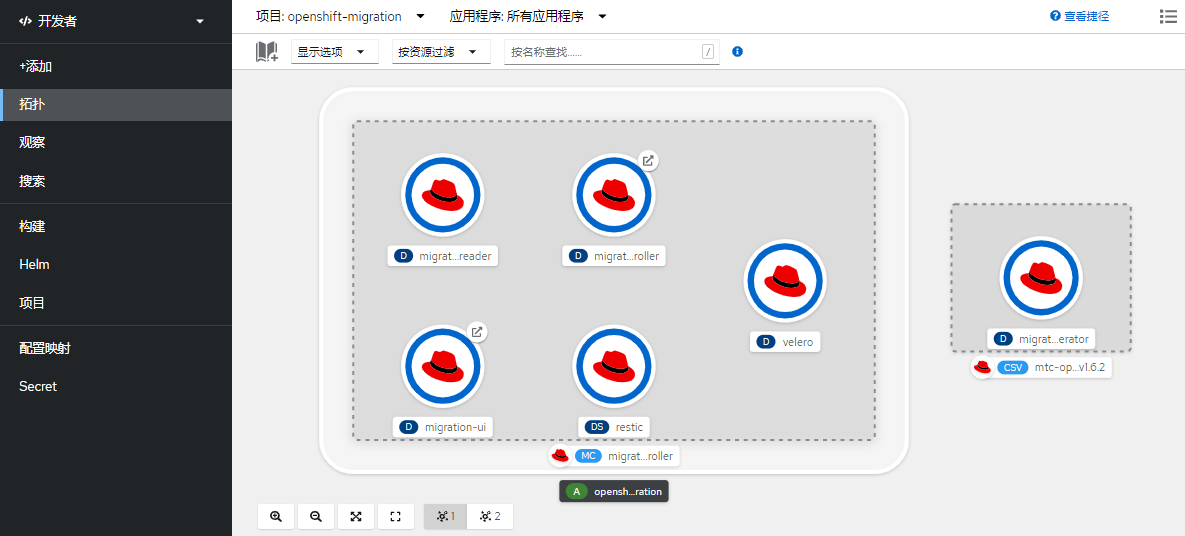
- View the Pod s running in the openshift-migration project, or the status of deployed Resources in the Topology of the Developer view, or in the Resouurces column of the migration-controller.
$ oc get pods -n openshift-migration
NAME                                    READY   STATUS    RESTARTS      AGE
migration-controller-94fdc5cb7-ktpgz    2/2     Running   0             16m
migration-log-reader-5548595dbb-jlplm   2/2     Running   0             16m
migration-operator-56cb9bfdc4-mdfnr     1/1     Running   0             26m
migration-ui-7f8b778fb6-vh4fh           1/1     Running   0             13m
restic-hcdhn                            1/1     Running   0             17m
velero-7b7986f4cf-4p45z                 1/1     Running   0             17m
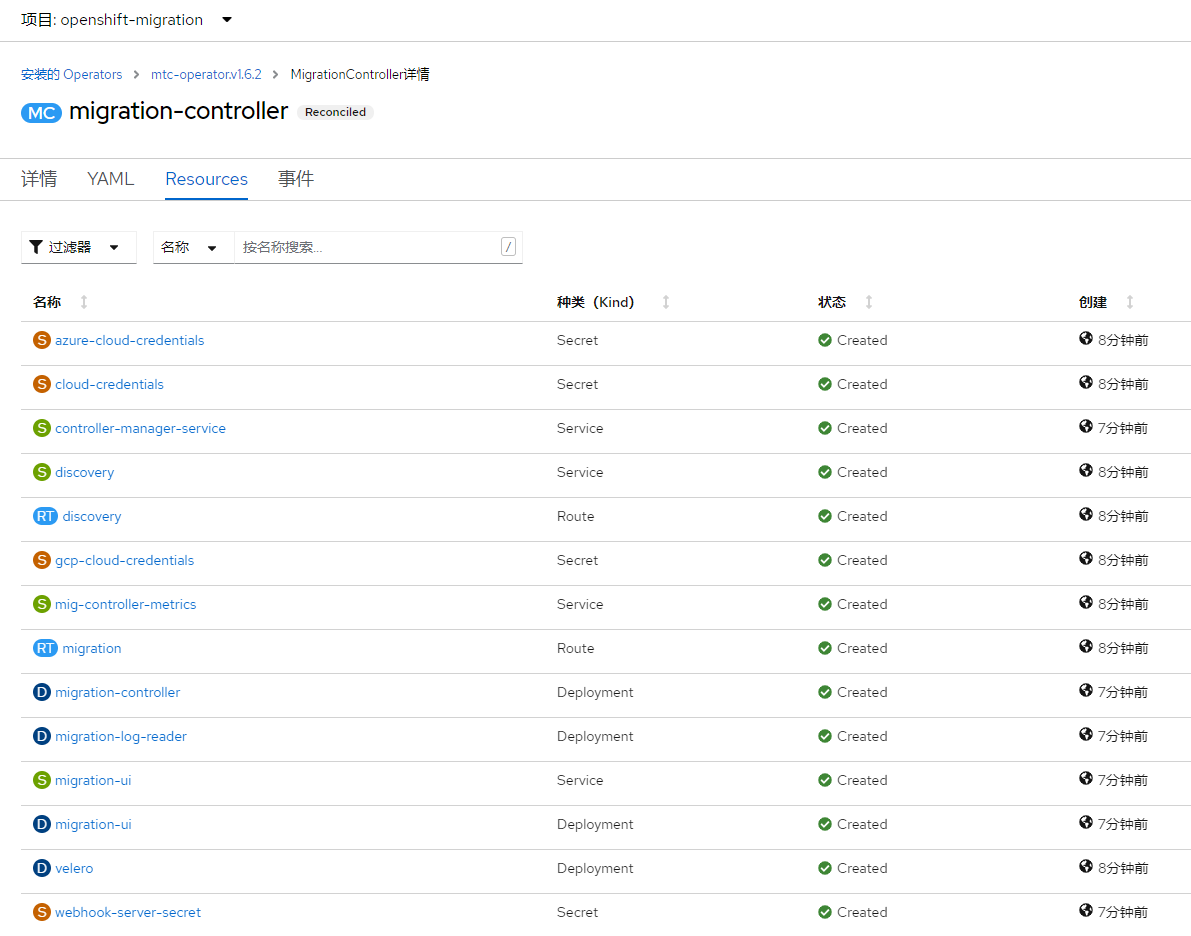
- You can see the console of the Migration Toolkit for Containers by looking at the route address named "migration" and then accessing the route address with a browser.
$ oc get route migration -n openshift-migration  -o jsonpath=https://{.spec.host}
https://migration-openshift-migration.apps.cluster-n8rwq.n8rwq.sandbox1048.opentlc.com
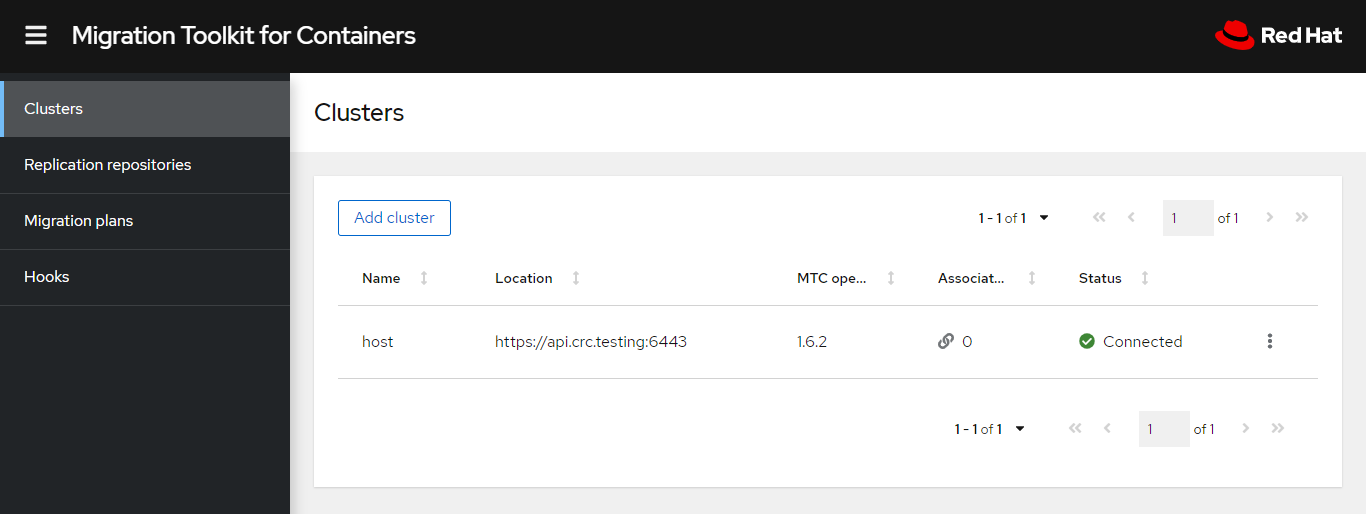
Add Replication Repository (MigStorage)
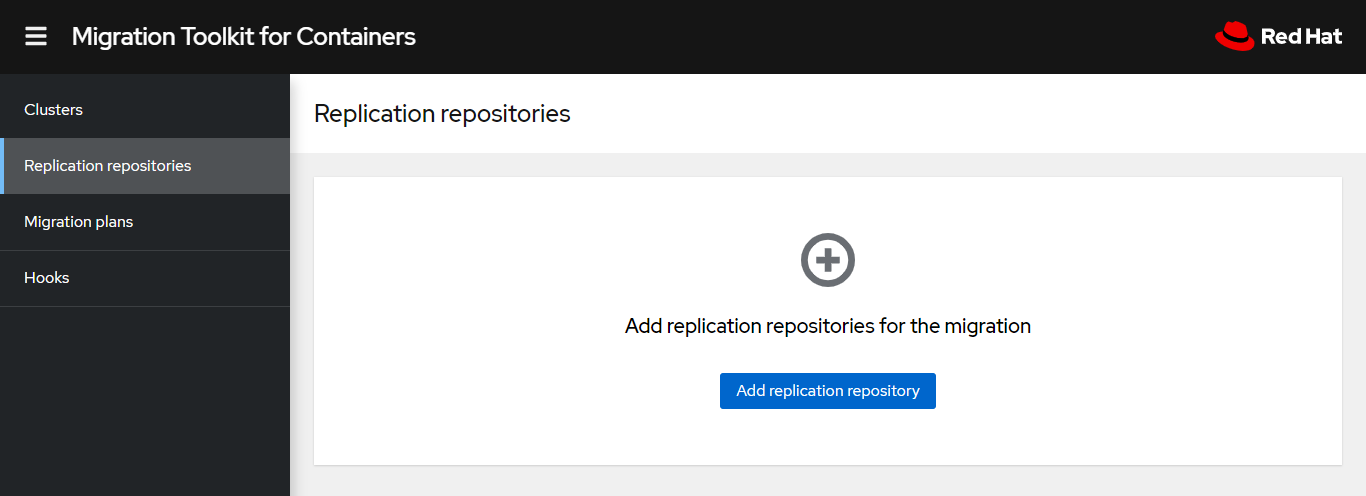
- Enter the Replication repositories menu in the MTC console, then click to enter "Add replication repository".
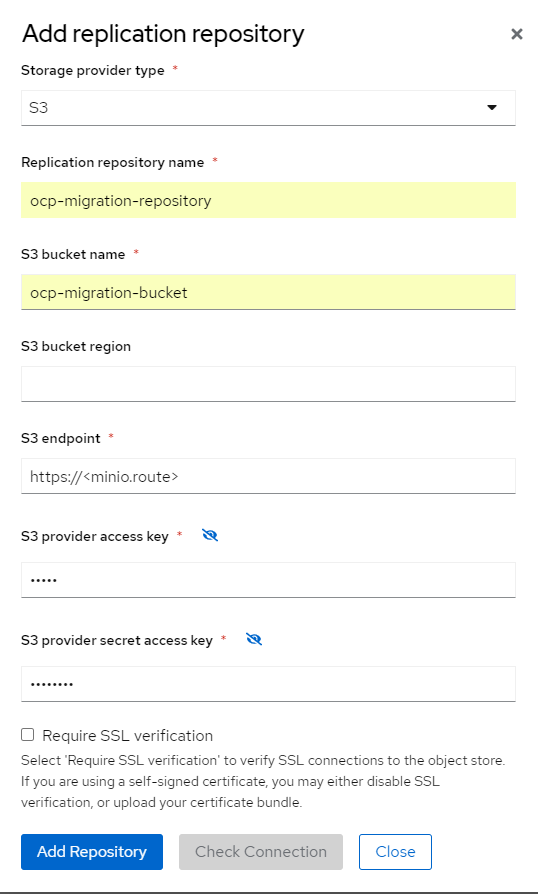
- In the Add replication repository window, fill in the configuration as follows and click Add Repository to display "Connection successful".
Storage provider type : S3
Replication repository name: ocp-migration-repository
S3 bucket name: ocp-migration-bucket
S3 endpoint: Routing address of MINIO service
S3 provider access key: minio
S3 provider secret access key: minio123
- When finished, you can find the created igStore object in the MTC Operator of the OpenShift console.
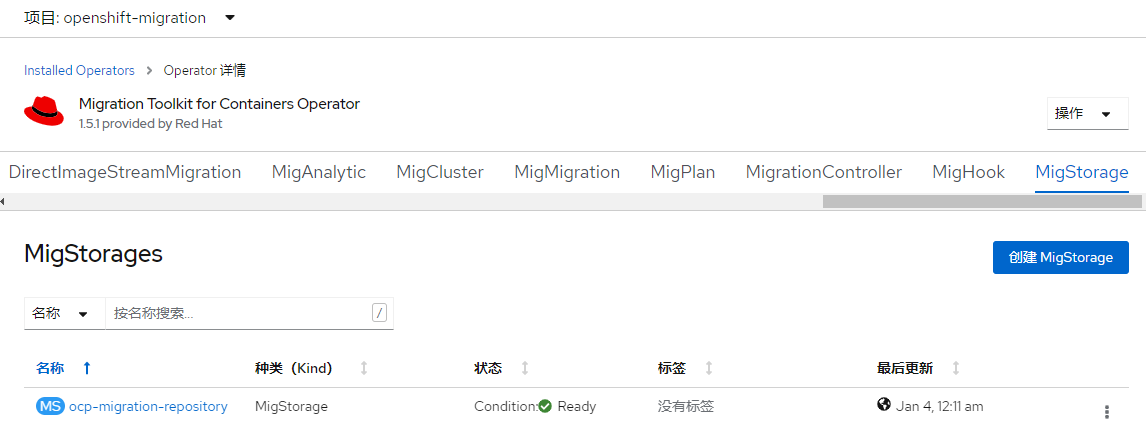
Add Migrated OpenShift Cluster
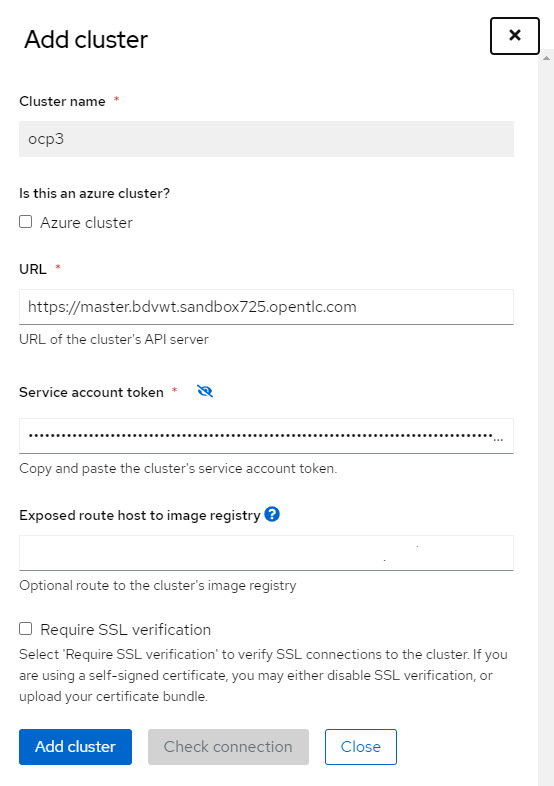
- Enter the Clusters menu in the MTC console and click Add Cluster. Provide the following configuration in the Add cluster window:
Cluster name: ocp3
URL: https://OCP3-API
Service account token: OCP3-TOKEN
Then click the "Add cluster" button and "Connection successful" will be displayed when successful.
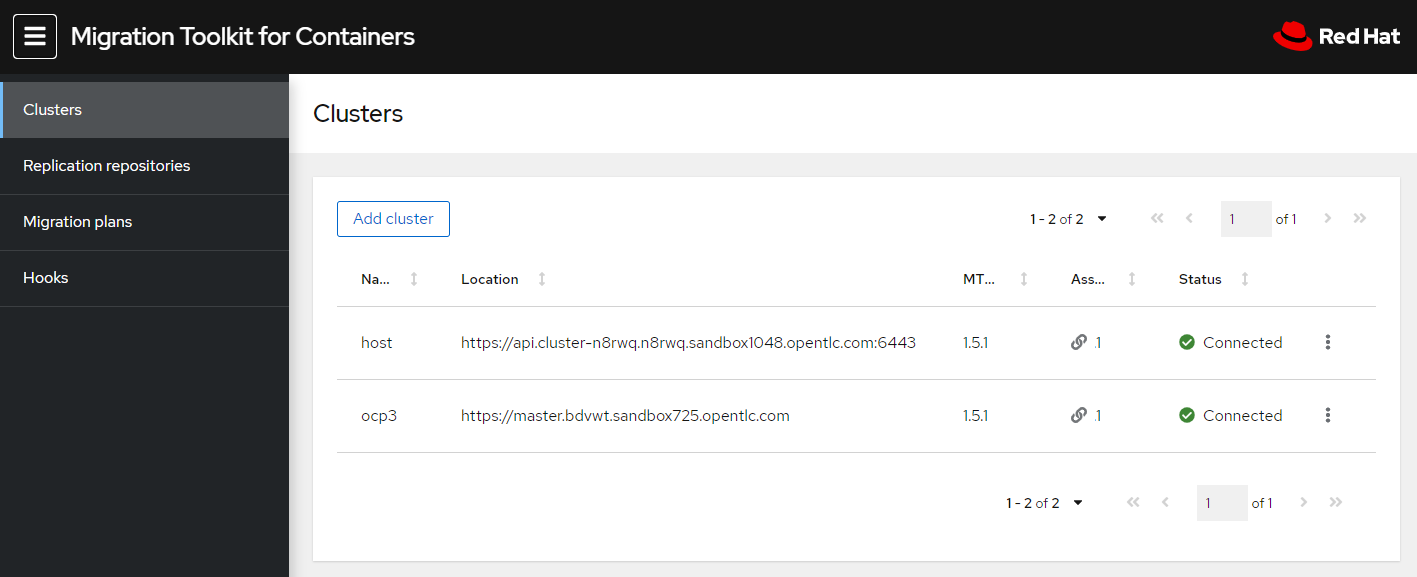
- "ocp3" in Clusters is the source cluster for migration and "host" is the target cluster for migration.
Add Migration Plan
-
Enter the Migration plan in the MTC console and click Add migration plan.
-
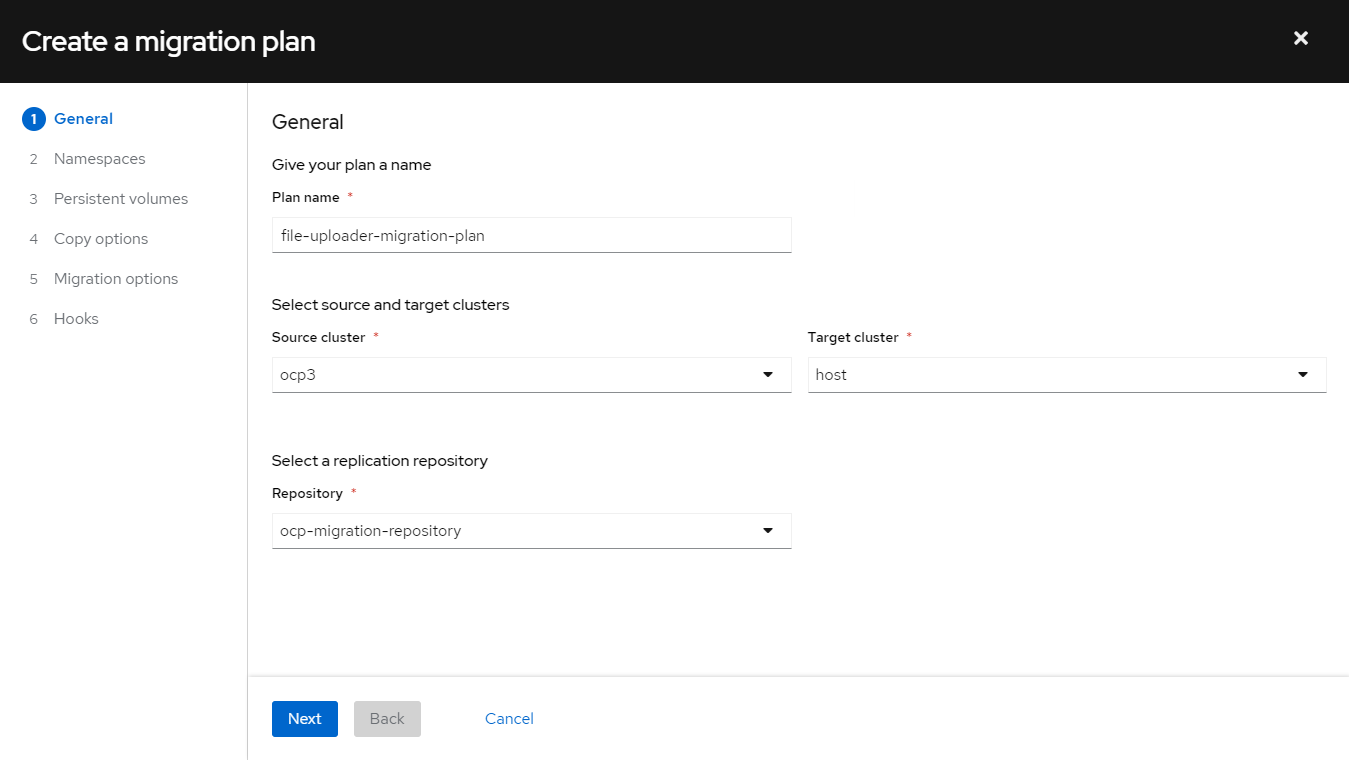
Follow the following General steps in the Create a migration plan window:
Plan name: file-uploader-mig-plan
Source cluster: ocp3
Target cluster: host
Repository: ocp-migration-repository
-
Check "file-uploader" in the Namespaces step.
-
In the Migration type of the Persistent volumes step, select Copy.
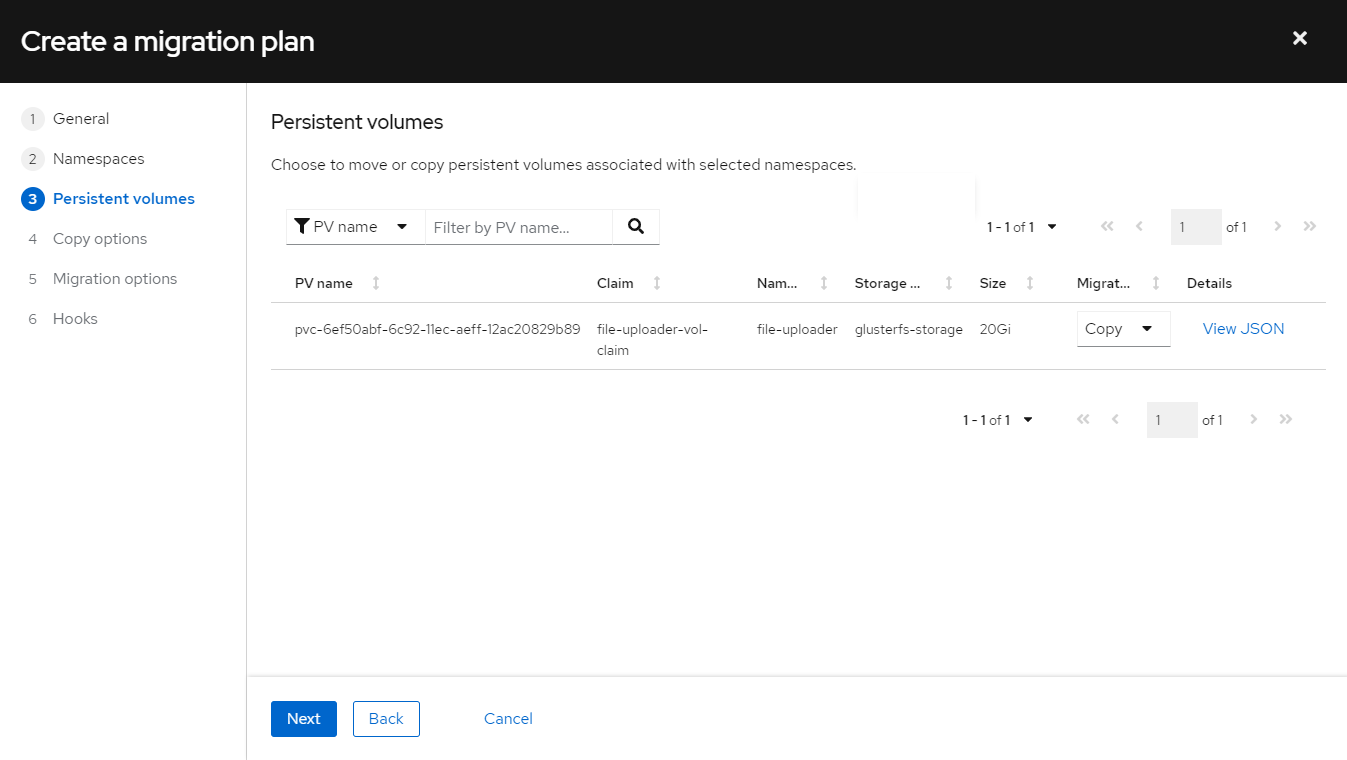
-
Select Filesystem copy in the Copy options step's Copy method, and then select a StoreClass for the target cluster in the Target storage class.
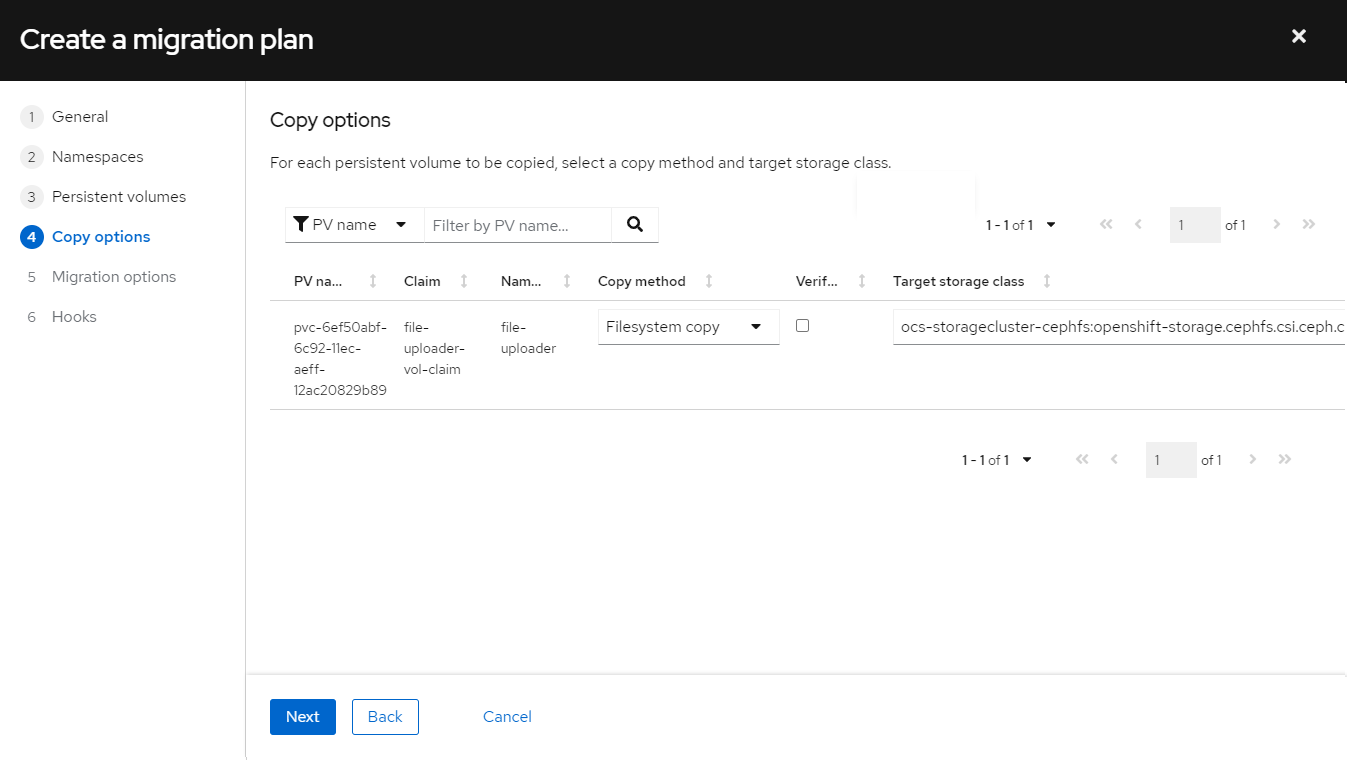
-
Accept the default in steps 5 and 6 to complete.
Apply migration and fallback
Execute migration plan
- Select "Migrate" from the following menu in the file-uploader-migration-plan migration plan.
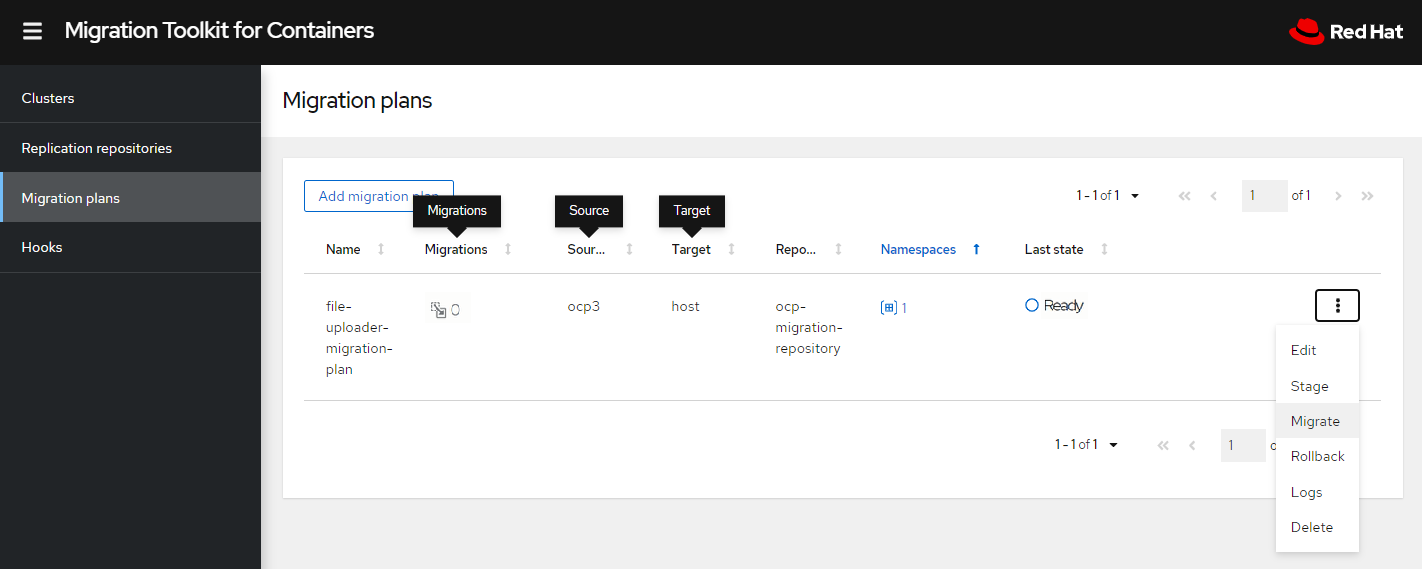
- In the pop-up window, click "Migrate".
- Go to the link in the "Migrations" column above to view the progress of the migration and know that it has been completed.
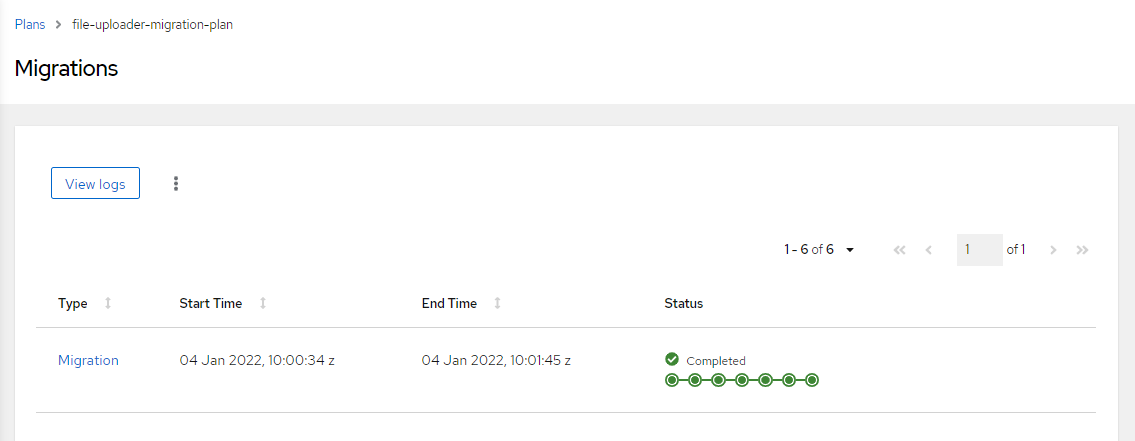
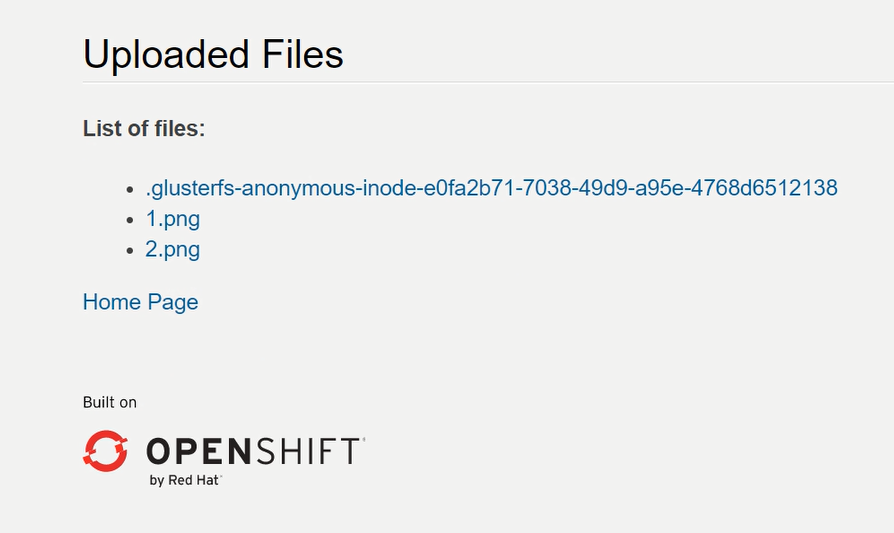
- Verify that you have a file-uploader project in the target OpenShift 4 cluster and that the file-uploader application is accessible and that you have previously uploaded files.
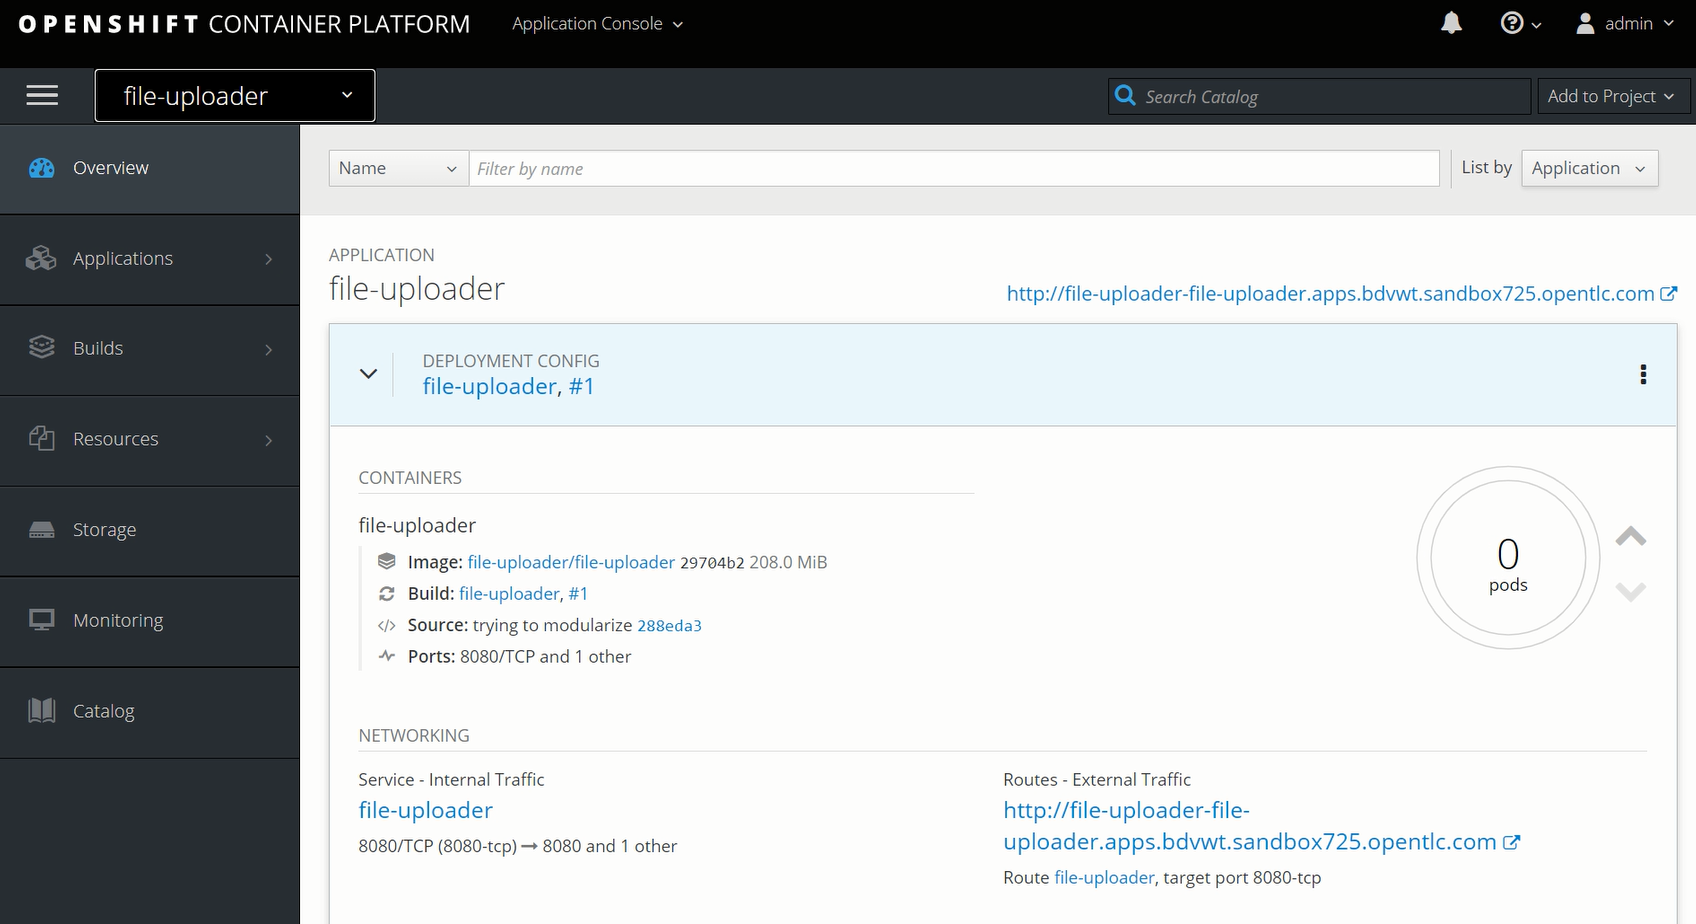
- Confirm that the number of PD in the file-uploader application for the migration source OpenShift 3 cluster has been reduced to "0" at this time, while the number of PD in the file-uploader application for the migration target OpenShift 4 cluster is "3".
Backward Migration
- Select "Rollback" from the following menu in the file-uploader-migration-plan migration plan.
- View execution until complete.
- Confirm that the file-uploader application for migration target OpenShift 4 is no longer accessible, and the file-uploader application for migration source OpenShift 3 has resumed access.