Operation bar and fragment of Android studio
Action bar and Fragment are new interface controls introduced by Android 3.0. To some extent, they are produced to meet the needs of interface design of large screen devices such as Android tablets. It has been further developed in Android 4.0 system, which can well support devices with different screen sizes, and can change the display content according to different screen sizes.
action bar
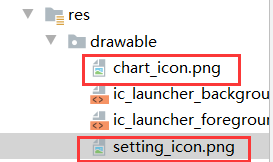
First, import the selected operation bar attribute image under the drawable folder


The character resource file strings. In the values folder Add character settings in XML

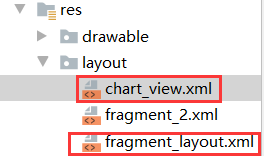
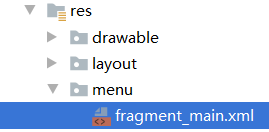
Create a new fragment in the layout folder_ layout. XML as the main interface and operation bar icon file chart_view.xml
In fragment_ layout. Use linear layout in XML file
<?xml version="1.0" encoding="utf-8"?>
<LinearLayout xmlns:app="http://schemas.android.com/apk/res-auto"
    android:layout_width="match_parent"
    android:layout_height="match_parent"
    android:orientation="vertical"
    xmlns:android="http://schemas.android.com/apk/res/android" >
     <TextView
        android:id="@+id/textView"
        android:layout_width="match_parent"
        android:layout_height="wrap_content"
        android:gravity="center"
        android:textSize="30dp"
        android:text="Operation bar test" />

    <ImageView
        android:id="@+id/imageView"
        android:layout_width="match_parent"
        android:layout_height="wrap_content"
        android:layout_marginTop="15dp"
        android:background="@drawable/ic_launcher_background" />
</LinearLayout>
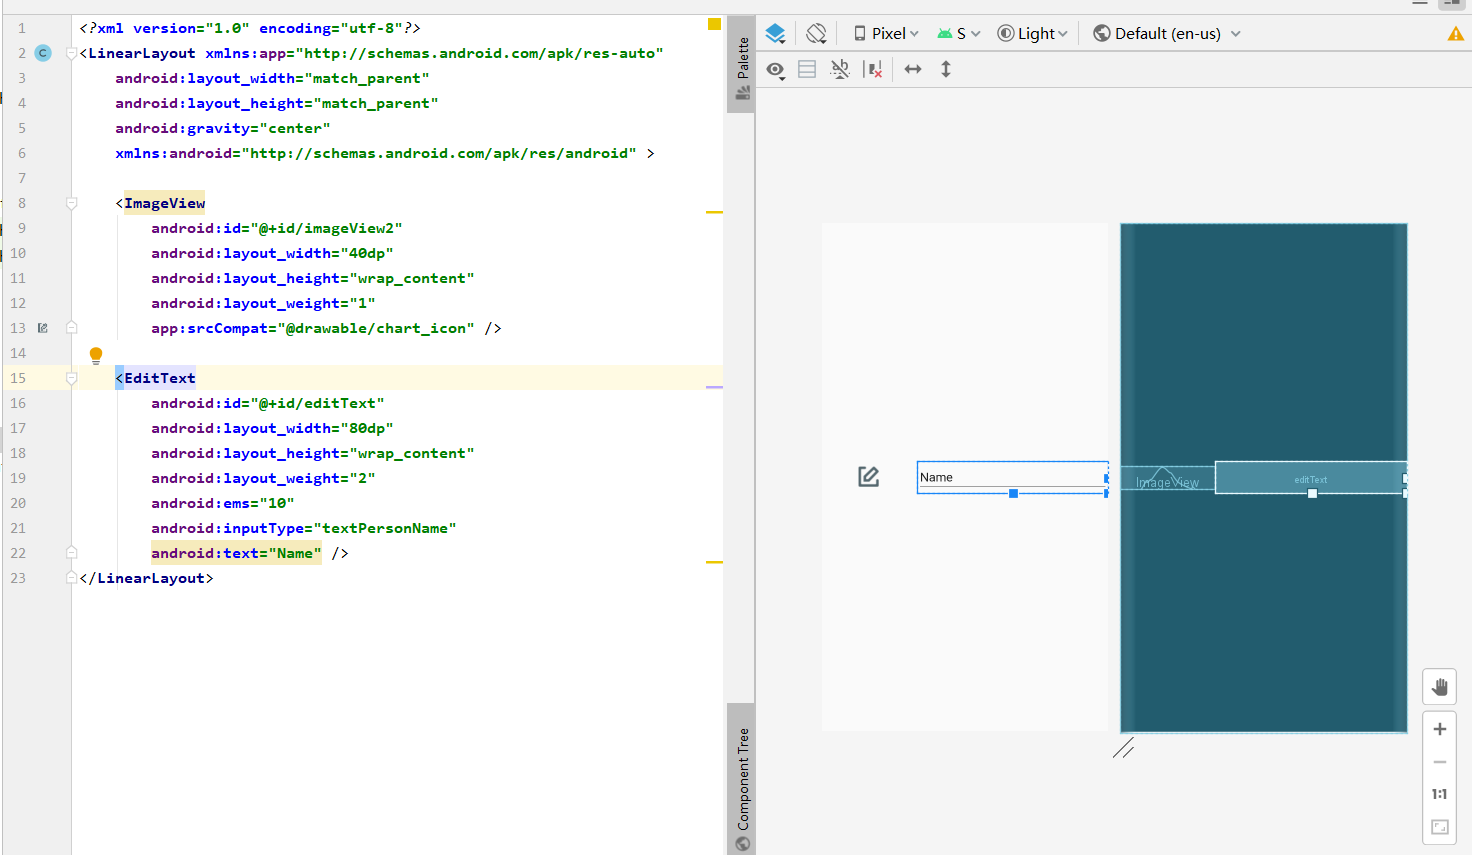
In chart_ view. Use linear layout in XML, display in the middle, add picture and text controls, and put chart in drawable folder_ icon. PNG file import.
<?xml version="1.0" encoding="utf-8"?>
<LinearLayout xmlns:app="http://schemas.android.com/apk/res-auto"
    android:layout_width="match_parent"
    android:layout_height="match_parent"
    android:gravity="center"
    xmlns:android="http://schemas.android.com/apk/res/android" >

    <ImageView
        android:id="@+id/imageView2"
        android:layout_width="40dp"
        android:layout_height="wrap_content"
        android:layout_weight="1"
        app:srcCompat="@drawable/chart_icon" />

    <EditText
        android:id="@+id/editText"
        android:layout_width="80dp"
        android:layout_height="wrap_content"
        android:layout_weight="2"
        android:ems="10"
        android:inputType="textPersonName"
        android:text="Name" />
</LinearLayout>
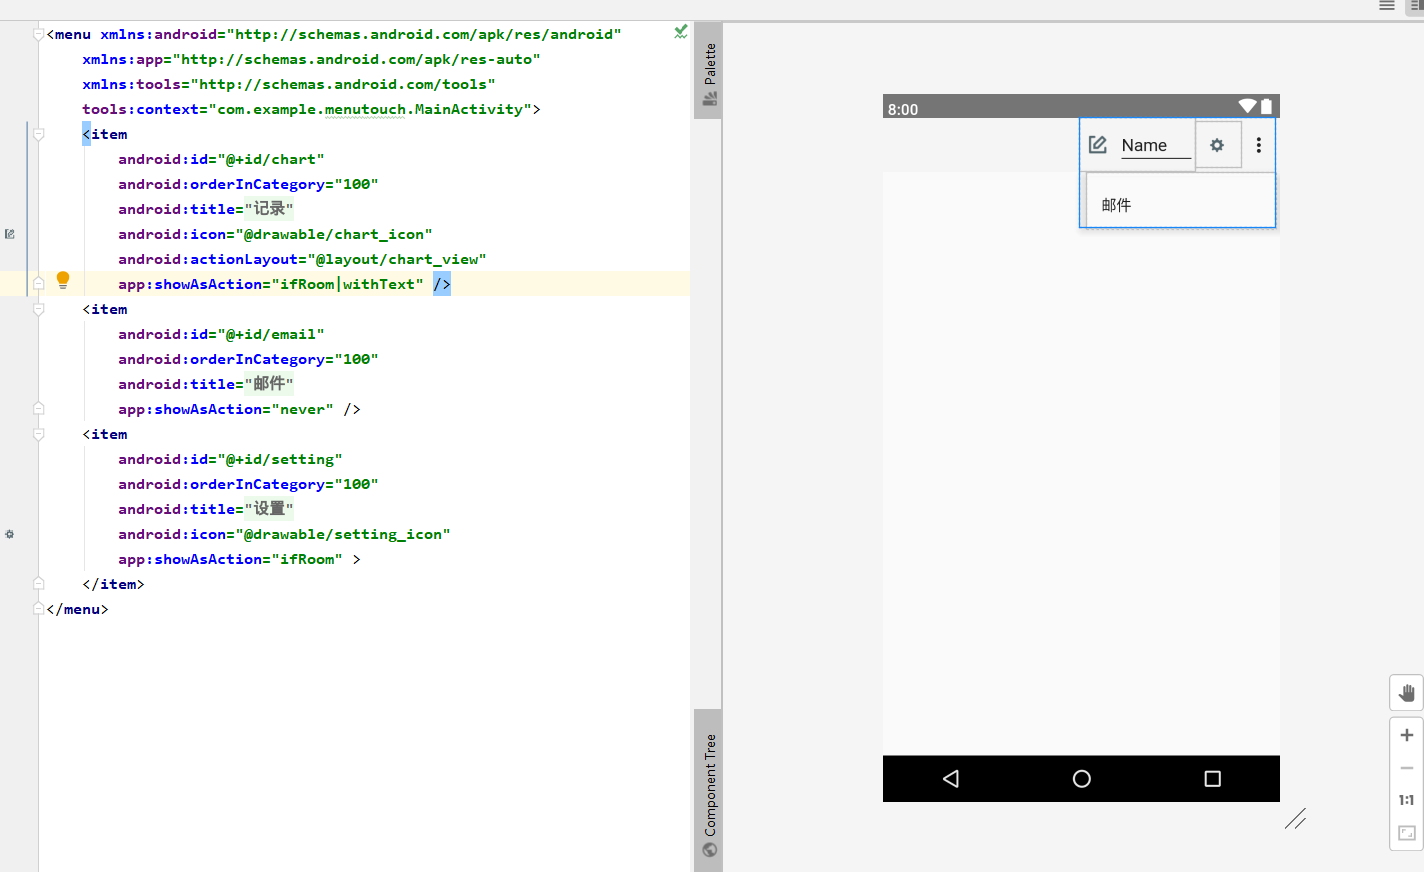
Change the original menu file menu in the menu folder_ main. XML file, renamed fragment_ main. XML, and add multiple first level menu options item on the original code, including record, mail and setting
There are three options in app:showAsAction:
1. Always: always displayed on the interface
2. never: not displayed on the interface, only in the three points on the right
3. ifRoom: if there is a position, it will be displayed, otherwise it will appear in the three points on the right
Add the icon file chart of the record to the record item_ icon. PNG. Chart written for icon file_ view. XML file. The subsequent icon operation is similar.
<menu xmlns:android="http://schemas.android.com/apk/res/android"
    xmlns:app="http://schemas.android.com/apk/res-auto"
    xmlns:tools="http://schemas.android.com/tools"
    tools:context="com.example.menutouch.MainActivity">

    <!-- stay item Add picture code to android:icon="@drawable/chart_icon"
                                              android:actionLayout="@layout/chart_view"
           take app:showAsAction="never"Medium never Change to"ifRoom|withText" -->

    <item
        android:id="@+id/chart"
        android:orderInCategory="100"
        android:title="@string/action_chart"
        android:icon="@drawable/chart_icon"
        android:actionLayout="@layout/chart_view"
        app:showAsAction="ifRoom|withText" />
    <item
        android:id="@+id/email"
        android:orderInCategory="100"
        android:title="@string/action_email"
        app:showAsAction="never" />
    <item
        android:id="@+id/setting"
        android:orderInCategory="100"
        android:title="@string/action_setting"
        android:icon="@drawable/setting_icon"
        app:showAsAction="ifRoom|withText" >
    </item>
</menu>
Create a new fragmentteachactivity. In the java folder java file

package com.example.menutouch;

import android.os.Bundle;
import android.view.Menu;
import android.view.MenuInflater;
import android.view.MenuItem;

import androidx.annotation.NonNull;
import androidx.annotation.Nullable;
import androidx.appcompat.app.AppCompatActivity;

public class FragmentTeachActivity extends AppCompatActivity {
    @Override
    protected void onCreate(@Nullable Bundle savedInstanceState) {
        super.onCreate(savedInstanceState);
        setContentView(R.layout.fragment_layout);
    }

    @Override
    public boolean onCreateOptionsMenu(Menu menu) {
        MenuInflater mi =getMenuInflater();
        mi.inflate(R.menu.fragment_main,menu);//Add the menu item created in the menu resource to the menu
        return super.onCreateOptionsMenu(menu);
    }

    @Override
    public boolean onOptionsItemSelected(@NonNull MenuItem item) {
        return super.onOptionsItemSelected(item);
    }
}
At androidmanifest XML file, you need to manually add a minimum and target SDK version of 19. The main import interface is fragmentteachactivity java

  <?xml version="1.0" encoding="utf-8"?>
<manifest xmlns:android="http://schemas.android.com/apk/res/android"
    package="com.example.menutouch">
    <uses-sdk
        android:minSdkVersion="19"
        android:targetSdkVersion="19" />
    <application
        android:allowBackup="true"
        android:icon="@mipmap/ic_launcher"
        android:roundIcon="@mipmap/ic_launcher_round"
        android:supportsRtl="true"
        android:theme="@style/AppTheme">
        <activity android:name=".FragmentTeachActivity">
            <intent-filter>
                <action android:name="android.intent.action.MAIN"/>
                <category android:name="android.intent.category.LAUNCHER"/>
            </intent-filter>
        </activity>
    </application>
</manifest>
Click Run
fragment
Fragment, referred to as fragment, was proposed by Android 3.0 (API 11). In order to be compatible with the lower version, a set of Fragment API has also been developed in the support-v4 library, which is at least compatible with Android 1.6. The purpose is to adjust flexibly on large screen equipment.
First, create two different fragment files in layout, fragment1 XML and fragment2 xml
<!-- fragment1.xml-->
<?xml version="1.0" encoding="utf-8"?>
<LinearLayout xmlns:app="http://schemas.android.com/apk/res-auto"
    android:layout_width="match_parent"
    android:layout_height="match_parent"
    android:orientation="vertical"
    xmlns:android="http://schemas.android.com/apk/res/android" >

    <TextView
        android:id="@+id/textView2"
        android:layout_width="match_parent"
        android:layout_height="wrap_content"
        android:layout_marginLeft="10dp"
        android:layout_marginRight="10dp"
        android:layout_marginTop="15dp"
        android:textSize="30sp"
        android:gravity="center"
        android:text="first fragment" />

    <EditText
        android:id="@+id/editText3"
        android:layout_width="match_parent"
        android:layout_height="wrap_content"
        android:layout_marginLeft="10dp"
        android:layout_marginRight="10dp"
        android:layout_marginTop="15dp"
        android:ems="10"
        android:inputType="textPersonName"
        android:text=" " />

    <TextView
        android:id="@+id/textView3"
        android:layout_width="match_parent"
        android:layout_height="300dp"
        android:layout_marginLeft="10dp"
        android:layout_marginRight="10dp"
        android:layout_marginTop="15dp"
        android:background="@drawable/ic_launcher_background"
        android:text=" " />

    <ImageButton
        android:id="@+id/imageButton2"
        android:layout_width="match_parent"
        android:layout_height="wrap_content"
        android:layout_marginLeft="10dp"
        android:layout_marginRight="10dp"
        android:layout_marginTop="15dp"
        android:background="@drawable/ic_launcher_background" />
</LinearLayout>
<!-- fragment2.xml-->
<?xml version="1.0" encoding="utf-8"?>
<LinearLayout xmlns:app="http://schemas.android.com/apk/res-auto"
    android:layout_width="match_parent"
    android:layout_height="match_parent"
    android:orientation="vertical"
    xmlns:android="http://schemas.android.com/apk/res/android" >

    <TextView
        android:id="@+id/textView4"
        android:layout_width="match_parent"
        android:layout_height="wrap_content"
        android:layout_marginLeft="10dp"
        android:layout_marginRight="10dp"
        android:layout_marginTop="15dp"
        android:textSize="30sp"
        android:gravity="center"
        android:text="the second fragment" />

    <EditText
        android:id="@+id/editText3"
        android:layout_width="match_parent"
        android:layout_height="wrap_content"
        android:layout_marginLeft="10dp"
        android:layout_marginRight="10dp"
        android:layout_marginTop="15dp"
        android:ems="10"
        android:inputType="textPersonName"
        android:text=" " />

    <Switch
        android:id="@+id/switch1"
        android:layout_width="match_parent"
        android:layout_height="wrap_content"
        android:layout_marginLeft="10dp"
        android:layout_marginRight="10dp"
        android:layout_marginTop="15dp"
        android:text="Switch" />

    <Switch
        android:id="@+id/switch2"
        android:layout_width="match_parent"
        android:layout_height="wrap_content"
        android:layout_marginLeft="10dp"
        android:layout_marginRight="10dp"
        android:layout_marginTop="15dp"
        android:text="Switch" />

    <Switch
        android:id="@+id/switch3"
        android:layout_width="match_parent"
        android:layout_height="wrap_content"
        android:layout_marginLeft="10dp"
        android:layout_marginRight="10dp"
        android:layout_marginTop="15dp"
        android:text="Switch" />

    <ImageButton
        android:id="@+id/imageButton2"
        android:layout_width="match_parent"
        android:layout_height="wrap_content"
        android:layout_marginLeft="10dp"
        android:layout_marginRight="10dp"
        android:layout_marginTop="15dp"
        android:background="@drawable/ic_launcher_background" />
</LinearLayout>
Create a new main layout file fragment in layout_ main. XML, fragment1 XML and fragment2 Connect the XML layout to the main layout file.
<!-- fragment_main.xml>
<?xml version="1.0" encoding="utf-8"?>
<LinearLayout android:layout_width="match_parent"
    android:layout_height="match_parent"
    xmlns:android="http://schemas.android.com/apk/res/android" >
    <fragment
        android:id="@+id/fragment1"
        android:name="com.example.menutouch.Fragment1"
        android:layout_width="0dp"
        android:layout_weight="1"
        android:layout_height="match_parent"></fragment>
    <fragment
        android:id="@+id/fragment2"
        android:name="com.example.menutouch.Fragment2"
        android:layout_width="0dp"
        android:layout_weight="1"
        android:layout_height="match_parent"></fragment>
</LinearLayout>
In the Java folder, create a new fragment1 xml,fragment2.xml and fragment_main.xml corresponding java file fragment1 java,fragment2.java and fragment12activity Java file
<!-- fragment1.java>
package com.example.menutouch;

import android.app.Fragment;
import android.os.Bundle;
import android.view.LayoutInflater;
import android.view.View;
import android.view.ViewGroup;

import androidx.annotation.Nullable;

public class Fragment1 extends Fragment {
    @Nullable
    @Override
    public View onCreateView(LayoutInflater inflater, @Nullable ViewGroup container, Bundle savedInstanceState) {
        return inflater.inflate(R.layout.fragment_1,container,false);
    }
}
<!--fragment2.java>
package com.example.menutouch;

import android.app.Fragment;
import android.os.Bundle;
import android.view.LayoutInflater;
import android.view.View;
import android.view.ViewGroup;

import androidx.annotation.Nullable;

public class Fragment2 extends Fragment {
    @Nullable
    @Override
    public View onCreateView(LayoutInflater inflater, @Nullable ViewGroup container, Bundle savedInstanceState) {
        return inflater.inflate(R.layout.fragment_2,container,false);
    }
}
<!--fragmen12Activity>
package com.example.menutouch;

import android.app.Activity;
import android.os.Bundle;

import androidx.annotation.Nullable;

public class Fragment12Activity extends Activity {
    @Override
    protected void onCreate(@Nullable Bundle savedInstanceState) {
        super.onCreate(savedInstanceState);
        setContentView(R.layout.fragment_main_layout);
    }
}
Finally, write Android mainfest XML file
<?xml version="1.0" encoding="utf-8"?>
<manifest xmlns:android="http://schemas.android.com/apk/res/android"
    package="com.example.menutouch">

    <application
        android:allowBackup="true"
        android:icon="@mipmap/ic_launcher"
        android:roundIcon="@mipmap/ic_launcher_round"
        android:supportsRtl="true"
        android:theme="@style/AppTheme">
        <activity android:name=".Fragment12Activity">
            <intent-filter>
                <action android:name="android.intent.action.MAIN"/>
                <category android:name="android.intent.category.LAUNCHER"/>
            </intent-filter>
        </activity>
    </application>
</manifest>

Tab navigation bar
In the chapter of interface control, the function of using TabHost and TabActivity to realize Tab navigation bar has been introduced, but because TabActivity has expired, a new method is introduced here, which uses operation bar and Fragment to realize Tab navigation bar.
First, create a new project tab_fragment, delete unnecessary files (see Menu of Android studio for details), write two fragment files in the layout folder, and follow fragment 1 and 2 in the fragment column above xml.
In the Java folder, write the corresponding java file tabfrag1 for the layout file in layout Java and tagfrag2 Java file.
<!--TabFrag1.java-->
package com.example.fragment;

import android.app.Fragment;
import android.os.Bundle;
import android.view.LayoutInflater;
import android.view.View;
import android.view.ViewGroup;

import androidx.annotation.Nullable;

public class TabFrag1 extends Fragment{
    @Nullable
    @Override
    public View onCreateView(LayoutInflater inflater, @Nullable ViewGroup container, Bundle savedInstanceState) {
        return inflater.inflate(R.layout.fragment_1,container,false);
    }
}
<!--TabFrag2.java -->
package com.example.fragment;
import android.app.Fragment;
import android.os.Bundle;
import android.view.LayoutInflater;
import android.view.View;
import android.view.ViewGroup;
import androidx.annotation.Nullable;

public class TabFrag2 extends Fragment{
    @Nullable
    @Override
    public View onCreateView(LayoutInflater inflater, @Nullable ViewGroup container, Bundle savedInstanceState) {
        return inflater.inflate(R.layout.fragment_2,container,false);
    }
}
In the Java folder, write tabfragmentactivity Java main interface, embedding two fragment layouts.
package com.example.fragment;
import android.os.Bundle;
import androidx.annotation.Nullable;
import androidx.appcompat.app.ActionBar;
import androidx.appcompat.app.AppCompatActivity;
import androidx.fragment.app.Fragment;
import androidx.fragment.app.FragmentTransaction;
public class TabfragmentActivity extends AppCompatActivity {
private ActionBar actionBar =null;//Operation bar variable
@Override
protected void onCreate(@Nullable Bundle savedInstanceState) {
super.onCreate(savedInstanceState);
init();
}
private void init()
{
actionBar =getSupportActionBar();
//Set the action bar to Tab paging mode
actionBar.setNavigationMode(ActionBar.NAVIGATION_MODE_TABS);
//Make the title of the action bar not displayed
actionBar.setDisplayOptions(0,ActionBar.DISPLAY_SHOW_TITLE);
FragmentTransaction ft =getSupportFragmentManager().beginTransaction();
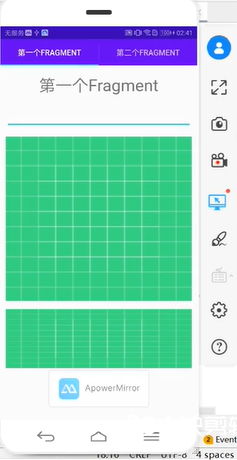
actionBar.addTab(actionBar.newTab().setText("first Fragment").setTabListener(new ActionBar.TabListener() {
@Override
public void onTabSelected(ActionBar.Tab tab, FragmentTransaction ft) {
Fragment fragment =getSupportFragmentManager().findFragmentByTag("f1");
if (fragment == null){
fragment =Fragment.instantiate(TabfragmentActivity.this,TabFrag1.class.getName(),null);
ft.add(android.R.id.content,fragment,"f1");//When the fragment does not exist at the first run, it is created and loaded into the container
}else{
ft.attach(fragment);//When it is not the first time to display, you need to fix the fragment into the container
}
}
@Override
public void onTabUnselected(ActionBar.Tab tab, FragmentTransaction ft) {
Fragment fragment =getSupportFragmentManager().findFragmentByTag("f1");
if (fragment != null){
ft.detach(fragment);
}
}
@Override
public void onTabReselected(ActionBar.Tab tab, FragmentTransaction ft) {
}
}));
actionBar.addTab(actionBar.newTab().setText("the second Fragment").setTabListener(new ActionBar.TabListener() {
@Override
public void onTabSelected(ActionBar.Tab tab, FragmentTransaction ft) {
Fragment fragment =getSupportFragmentManager().findFragmentByTag("f2");
if (fragment == null){
fragment =Fragment.instantiate(TabfragmentActivity.this,TabFrag2.class.getName(),null);
ft.add(android.R.id.content,fragment,"f2");//When the fragment does not exist at the first run, it is created and loaded into the container
}else{
ft.attach(fragment);//When it is not the first time to display, you need to fix the fragment into the container
}
}
@Override
public void onTabUnselected(ActionBar.Tab tab, FragmentTransaction ft) {
Fragment fragment =getSupportFragmentManager().findFragmentByTag("f2");
if (fragment != null){
ft.detach(fragment);
}
}
@Override
public void onTabReselected(ActionBar.Tab tab, FragmentTransaction ft) {
}
}));
}
}
Main startup interface andeoidmainfest The code in the XML file needs to delete the inherent column format
<?xml version="1.0" encoding="utf-8"?>
<manifest xmlns:android="http://schemas.android.com/apk/res/android"
    package="com.example.fragment">

    <application
        android:allowBackup="true"
        android:icon="@mipmap/ic_launcher"
        android:label="@string/app_name"
        android:roundIcon="@mipmap/ic_launcher_round"
        android:supportsRtl="true"
        android:theme="@style/AppTheme">
        <activity
            android:name=".TabfragmentActivity">
            <intent-filter>
                <action android:name="android.intent.action.MAIN"/>
                <category android:name="android.intent.category.LAUNCHER"/>
            </intent-filter>
        </activity>
    </application>

</manifest>
Click Run