catalogue
1, Event basis
1. Event overview
2. Event overview
analysis:
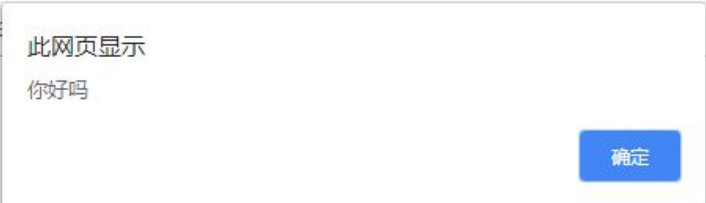
3. Perform event steps
4. Common mouse events
| Mouse event | Trigger condition |
|---|---|
| onclick | Click the left mouse button to trigger |
| onmouseover | Mouse over trigger |
| onmouseout | Mouse away trigger |
| onfocus | Get mouse focus trigger |
| onblur | Loss of mouse focus trigger |
| onmousemove | Mouse movement trigger |
| onmouseup | Mouse bounce trigger |
| onmousedown | Mouse press trigger |
2, Operation of property
1. Get property value
You can use the "element. Attribute" method to obtain the built-in attribute value in the DOM object, but the DOM object cannot directly use the point syntax to obtain the value of the user-defined attribute, so how to obtain the user-defined attribute value?
In DOM, you can use the getAttribute('attribute ') method to return the attribute value of the specified element.
<div id="demo" index="1" class="nav"></div>
  <script>
    var div = document.querySelector('div');
    console.log(div.id);                               // The result is: demo
     console.log(div.getAttribute('id'));     // The result is: demo
    console.log(div.getAttribute('index')); // The results are: 1
  </script>
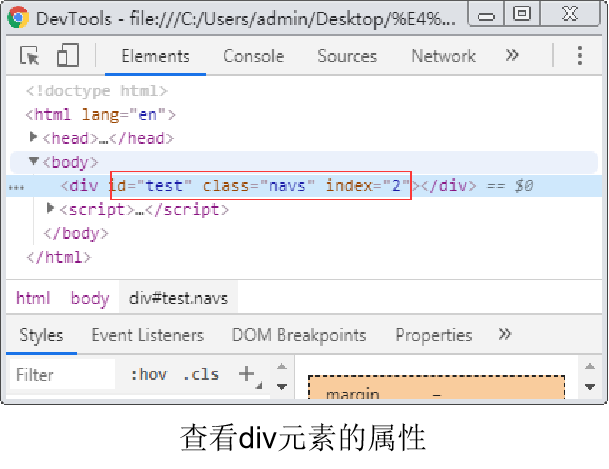
2. Set attribute value
In the DOM object, you can set the built-in attribute value by using the method of "element. Attribute = 'value'", and provide the method of "element.setAttribute('attribute ',' value ')" for custom attributes.
<div></div>
  <script>
    var div = document.querySelector('div');
    div.id = 'test';                        // Set the id value to test
    div.className = 'navs';        // Set the class name to navs
    div.setAttribute('index', 2);  // Set the property name to index and the value to 2
  </script>
The renderings are as follows
In addition, you can also use setAttribute() to set the class name of the element.
div.setAttribute('class', 'footer');
[class is attribute footer is the class name]
3. Remove attribute
Use "element.removeAttribute('attribute ')" in DOM to remove element attributes.
<div id="test" class="footer" index="2"></div>
  <script>
    var div = document.querySelector('div');
    div.removeAttribute('id');        // Remove the id attribute of the div element
    div.removeAttribute('class');   // Remove class attribute of div element
    div.removeAttribute('index'); // Remove the index attribute of the div element
  </script>
4. Case Tab bar Toggle
Case requirements: the tag bar is widely used in the website. Its advantage is that it can display multiple pieces of content in a limited space, and users can switch between multiple content blocks through tags.
(1) Write HTML code:
<div class="tab">
  <div class="tab_list">
 </div> // Label part
  <div class="tab_con">            // Label content section
    <div class="item" style="display: block;">Content of product introduction module</div>
    <div class="item">Specification and packaging module content</div>
    <div class="item">Content of after sales guarantee module</div>
    <div class="item">Content of commodity evaluation (50000) module</div>
    <div class="item">Mobile community module content</div>
  </div>
</div>
(2) Write CSS style code
<style>
        * {
            margin: 0;
            padding: 0;
        }

        li {
            list-style: none;
        }

        .tab {
            width: 1000px;
            margin: 100px auto;
        }

        .tab_list {
            height: 40px;
            border: 1px solid gray;
            background-color: rgb(233, 235, 233);
        }

        .tab_list li {
            float: left;
            height: 40px;
            line-height: 40px;
            padding:0 55px;
            cursor: pointer;
        }
        .tab_list .current{
            background-color: red;
            color: honeydew;
        }
        .items{
            display: none;
        }
    </style>
(3) Write JS code to get the object elements of tag part and content part
<script>
     //  Gets all element objects in the label section
     var tab_list = document.querySelector('.tab_list');
     var lis = tab_list.querySelectorAll('li');
     // Gets all content objects in the content section
     var items = document.querySelectorAll('.item');
</script>
(4) Write JS code and bind the click event with the for loop
for (var i = 0; i < lis.length; i++) {        // for loop binding click event
    lis[i].setAttribute('index', i);	   //  Start setting index numbers for the five small li
    lis[i].onclick = function () {  // Clear all li class classes and set the current class for yourself
      for (var i = 0; i < lis.length; i++) {  lis[i].className = ''; }
      this.className = 'current';
      //  two   The following display content module
      var index = this.getAttribute('index');
      for (var i = 0; i < items.length; i++) { items[i].style.display = 'none'; }
      items[index].style.display = 'block';
    }
 };
Display effect:

Case study: