elaborate
In actual use, useContext and useReducer can achieve effects similar to Redux, and for some simple personal projects, the following scheme can be used to replace Redux, which is simpler than redux.
Because useContext and useReducer have been studied in my previous articles, we focus on how to simulate the effect of Redux. If you haven't mastered the basic grammar yet, you can review the knowledge points of the previous two articles.
Theoretical feasibility
Let's first look at the possibility of replacing Redux from the theoretical level. In fact, if you know something about the two functions, as long as we skillfully combine, this alternative scheme is completely feasible.
1. useContext: it can access the global state and avoid passing the state layer by layer. This conforms to one of Redux's rules, that is, the state is global and can be managed uniformly.
2. useReducer: updates the status of complex logic through action transmission, mainly to realize the Reducer part similar to that in Redux, so as to realize the feasibility of business logic.
After our theoretical analysis, it is completely feasible. Next, we will use a simple example to see the specific implementation method.
Let's first implement the useContext part (that is, state sharing), and then continue to implement the useReducer part (controlling business logic).
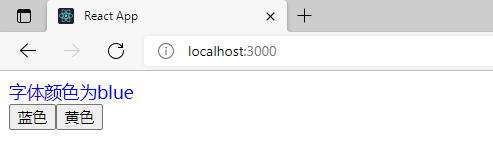
Let's take a look at today's case effect:
Writing basic UI components
Create a new folder in the / src directory, example6. After you have a folder, create a showarea JS file.
The code is as follows:
ReactHooksDemo\demo01\src\example6\ShowArea.js
import React from 'react';

function ShowArea(){

    return (<div style={{color:'blue'}}>Font color is blue</div>)

}

export default ShowArea
After writing the display area, create a new button JS file, used to write buttons. This is two buttons, one blue and one yellow. Don't write any other business logic first.
ReactHooksDemo\demo01\src\example6\Buttons.js
import React from 'react';

function Buttons(){
    return (
        <div>
            <button>blue</button>
            <button>yellow</button>
        </div>
    )
}

export default Buttons
Then write an example 6 that combines them JS component, introduce two newly compiled components ShowArea and Buttons, and wrap them with < div > tags.
import React, { useReducer } from 'react';
import ShowArea from './example6/ShowArea';
import Buttons from './example6/Buttons';

function Example6(){
    return (
        <div>
            <ShowArea />
            <Buttons />
        </div>
    )
}

export default Example6
After this step is completed, you need to go to index. In the / src directory JS JS file. Only after it is introduced can React correctly render the UI component just written.
ReactHooksDemo\demo01\src\index.js
import React from 'react';
import ReactDOM from 'react-dom';
import Example from './Example6';

ReactDOM.render(<Example />, document.getElementById('root'));
After this step, you can simply preview the UI effect. Although it is ugly, it can only meet the learning needs.
Although we are all front-end, there is no need to pursue beautiful pages in learning. The key is to understand the knowledge points. We write so many documents to serve the next knowledge points. In fact, these components are just a foil.
Write a color sharing component color js
With the UI component, you can write some business logic. Next, we implement state sharing by using useContext. Create a color in the example6 folder JS file, and then write the following code.
ReactHooksDemo\demo01\src\example6\Color.js
import React, { createContext } from 'react';

export const ColorContext = createContext({})

export const Color = props => {
    return (
        <ColorContext.Provider value={{color:"red"}}>
            {props.children}
        </ColorContext.Provider>
    )
}
createContext is introduced into the code to create a shared context ColorContext component, and then we will use {props.children} to display the corresponding sub components.
With this component, we can put EXAMPLE6 JS to rewrite so that she can share the state.
ReactHooksDemo\demo01\src\Example6.js
import React from 'react';
import ShowArea from './example6/ShowArea';
import Buttons from './example6/Buttons';
import { Color } from './example6/Color';   //Introducing Color components

function Example6(){
    return (
        <div>
            <Color>
                <ShowArea />
                <Buttons />
            </Color>
        </div>
    )
}

export default Example6
Then rewrite showarea JS file, we will introduce useContext and color The ColorContext declared in JS allows the component to receive global variables.
ReactHooksDemo\demo01\src\example6\ShowArea.js
import React , { useContext } from 'react';
import { ColorContext } from './Color';

function ShowArea(){
    const {color} = useContext(ColorContext)
    return (<div style={{color:color}}>Font color is{color}</div>)

}

export default ShowArea
At this time, the state is shared through useContext. You can see the effect in the browser.

Above, we used useContext to realize the ability of Redux state sharing. This lesson will see how to use useReducer to control business logic.
In color JS
We put the code of color (state) management in color.js, so we add a reducer in the file to process the logic of color update.
First, specify a reducer function, which is an ordinary function in JavaScript, which has been described in detail when talking about useReducer.
With reducer, useReducer is used in the Color component, so that the Color component has the ability to share state and process business logic, which is almost the same as the previous Redux.
Then modify the sharing status. Let's look at the code:
ReactHooksDemo\demo01\src\example6\Color.js
import React, { createContext,useReducer } from 'react';

export const ColorContext = createContext({})

export const UPDATE_COLOR = "UPDATE_COLOR"

const reducer= (state,action)=>{
    switch(action.type){
        case UPDATE_COLOR:
            return action.color
        default:
            return state
    }
}

export const Color = props=>{
    const [color,dispatch]=useReducer(reducer,'red')
    return (
        <ColorContext.Provider value={{color,dispatch}}>
            {props.children}
        </ColorContext.Provider>
    )
}
Note that at this time, the shared status becomes color and dispatch. If you don't share the dispatch, you can't complete the corresponding events of the button.
Modify status through dispatch
At present, the program has the business logic ability to handle the shared state. Next, you can click buttons JS uses dispatch to complete the corresponding operation of the button.
First introduce useContext, ColorContext and UPDATE_COLOR, and then write the onClick event.
The code is as follows:
ReactHooksDemo\demo01\src\example6\Buttons.js
import React ,{useContext} from 'react';
import {ColorContext,UPDATE_COLOR} from './Color'

function Buttons(){
    const { dispatch } = useContext(ColorContext)
    return (
        <div>
            <button onClick={()=>{dispatch({type:UPDATE_COLOR,color:"blue"})}}>blue</button>
            <button onClick={()=>{dispatch({type:UPDATE_COLOR,color:"yellow"})}}>yellow</button>
        </div>
    )
}

export default Buttons
In this way, the code is written. The effect of Redux is realized with useContext and useReducer. The code writing process is simpler than that of Redux, but it is also difficult.
