There are two scripts for testing in the source code: test Py and evaluate_gpu.py . Where, test Py load through the script train Py trained model to extract the features of query and gallery images; This article describes the script test Py.
1. Load model and data
Firstly, the trained model needs to be loaded. Here, the pedestrian re recognition model with output category of 751 based on Resnet50 is used_ Net as an example.
model_structure = ft_net(751)
model = load_network(model_structure)
Then you need to load the preprocessed gallery and query datasets
data_transforms = transforms.Compose([
        transforms.Resize((256,128), interpolation=3),
        transforms.ToTensor(),
        transforms.Normalize([0.485, 0.456, 0.406], [0.229, 0.224, 0.225])
image_datasets = {x: datasets.ImageFolder( os.path.join(data_dir,x) ,data_transforms) for x in ['gallery','query']}
dataloaders = {x: torch.utils.data.DataLoader(image_datasets[x], batch_size=opt.batchsize,
                                             shuffle=False, num_workers=0) for x in ['gallery','query']}
Load the preprocessed data set and the trained model, and then use the function extract_feature extraction
with torch.no_grad():
    gallery_feature = extract_feature(model,dataloaders['gallery'])
    query_feature = extract_feature(model,dataloaders['query'])
2. Complete feature extraction
extract_feature is test Py is a very important function, which is used to extract the features of the picture. Let's analyze it line by line
def extract_feature(model,dataloaders):
    features = torch.FloatTensor()
    count = 0
    # Load dataset
    for data in dataloaders:
        img, label = data
        n, c, h, w = img.size()
        count += n
        # Count the number of pictures in the dataset
        print(count)
        ff = torch.FloatTensor(n,512).zero_().cuda()
        for i in range(2):
            if(i==1):
            	# Rollover Image
                img = fliplr(img)
            # Change the picture into Variable and prepare to load it into the network
            input_img = Variable(img.cuda())
            # Zoom size multiple_scale
            for scale in ms:
                if scale != 1:
                    # bicubic is only  available in pytorch>= 1.1
                    input_img = nn.functional.interpolate(input_img, scale_factor=scale, mode='bicubic', align_corners=False)
                # Model reasoning
                outputs = model(input_img)
                # Splicing multi-scale prediction results
                ff += outputs
        # norm feature normalization
            fnorm = torch.norm(ff, p=2, dim=1, keepdim=True)
            ff = ff.div(fnorm.expand_as(ff))
		# Returns the extracted feature
        features = torch.cat((features,ff.data.cpu()), 0)
    return features
3. Realize feature normalization
fnorm = torch.norm(ff, p=2, dim=1, keepdim=True)
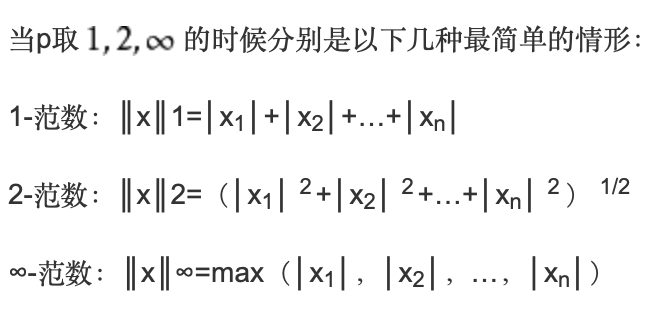
Here, L2 norm, i.e. 2-norm normalization, is performed in the first dimension of the input tensor ff. Each element in the eigenvector is divided by the L2 norm of the vector.
Torch. Is used in pytorch Norm calculates the norm of the tensor.
fnorm = torch.norm(input, p='fro', dim=None, keepdim=False, out=None, dtype=None)
- input tensor
- P is the power index value in norm calculation. When p = 2, it is 2 norm
- Dim specifies the dimension to be calculated. If dim is an integer value, the vector norm is calculated. When the input tensor input exceeds 2 dimensions, the vector norm will be calculated in the last dimension
- keepdim indicates whether the dimension dim of the output tensor is retained
- out output tensor
- dtype returns the expected data type of the tensor
Divide the eigenvector by the L2 norm of the vector, expand_ The as function extends the norm fnorm to the same dimension as the tensor ff.
ff = ff.div(fnorm.expand_as(ff))
Then use tensor Div completes division.
Tensor.div(value, *, rounding_mode=None)
Finally, use torch Splicing input tensor of cat in the 0th dimension
features = torch.cat((features,ff.data.cpu()), 0)
4. Generate Matlab file
Through the above steps, the features of query and gallery pictures are extracted, and the feature matrix is stored in pytorch_result.mat file.
# Save to Matlab for check
result = {'gallery_f':gallery_feature.numpy(),'gallery_label':gallery_label,'gallery_cam':gallery_cam,'query_f':query_feature.numpy(),'query_label':query_label,'query_cam':query_cam}
scipy.io.savemat('pytorch_result.mat',result)
In order to evaluate the effect of the model, the label and camera of the picture should also be recorded.
Get is used here_ The ID function obtains label and camera information through the picture name.
def get_id(img_path):
    camera_id = []
    labels = []
    for path, v in img_path:
        #filename = path.split('/')[-1]
        filename = os.path.basename(path)
        label = filename[0:4]
        camera = filename.split('c')[1]
        if label[0:2]=='-1':
            labels.append(-1)
        else:
            labels.append(int(label))
        camera_id.append(int(camera[0]))
    return camera_id, labels

gallery_path = image_datasets['gallery'].imgs
query_path = image_datasets['query'].imgs

gallery_cam,gallery_label = get_id(gallery_path)
query_cam,query_label = get_id(query_path)
The generated Matlab file will be evaluated by the script_ gpu. Py is used to calculate the evaluation index of the model.