Personal data, for learning purposes only
Modification time - 21:11:31, February 19, 2022
Course of study: OpenCV4 image processing and video analysis practical tutorial
Lecturer: Jia Zhigang
13 custom filtering
opencv knowledge points:
- Convolute image with kernel - filter2D
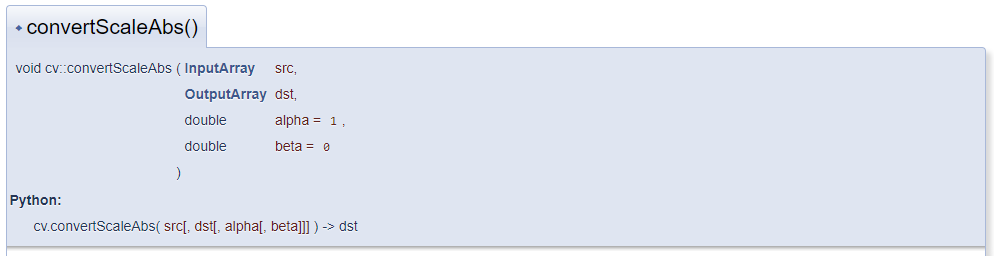
- Scaling takes absolute value and converts it to 8 bits - convertScaleAbs
Problems solved in this lesson:
- What is custom filtering?
- If the mean convolution of user-defined filtering is realized?
- If the non-mean convolution of user-defined filtering is realized?
1. Custom filtering
We know that the meaning of image convolution under different convolution kernels is different, so convolution kernels play a very important role in the convolution process.
Convolution is performed through a user-defined convolution kernel. The term of this method is: customize filter
It should be noted that:
When we give different convolution kernels, the type of output image must be changed, otherwise unexpected situations will occur.
For different convolution kernels, the depth of the output image should be given different data types, such as:
- CV_32F -- 32-bit floating point
- CV_32S -- 32-bit signed integer
In OpenCV, API is used for custom filtering
- filter2D
The details are as follows
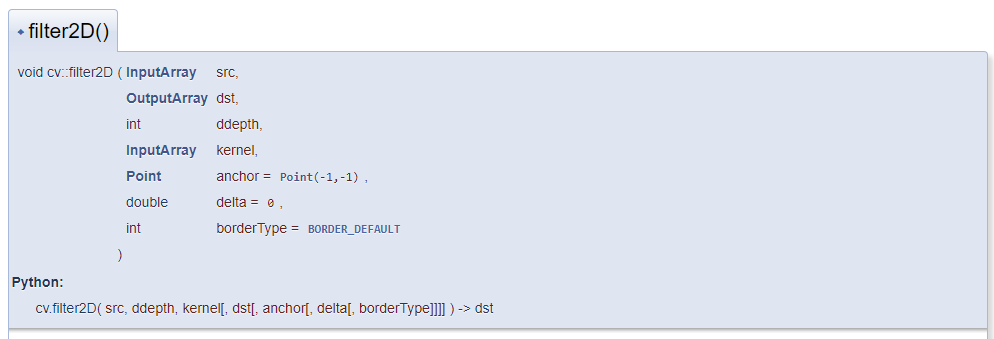
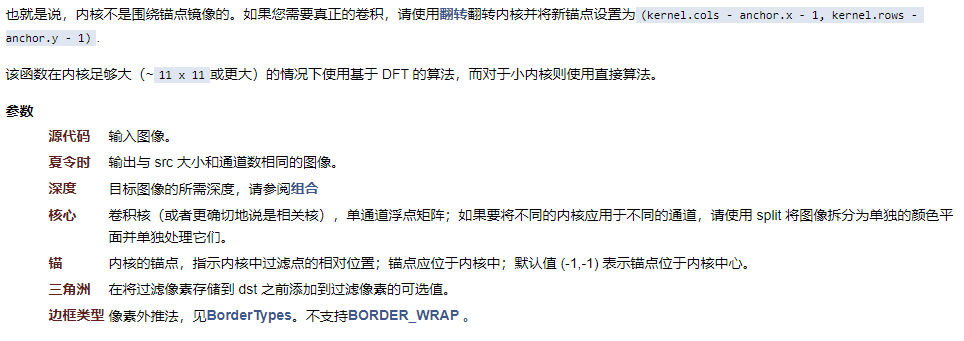
filter2D
filter2D
	Convolute the image with the kernel
		7 parameters in total
			1st parameter input
			Second parameter output
			The third parameter is the depth of the output image(-1 Representation and input image (always)
			Fourth parameter convolution kernel
			5th parameter anchor
					(Indicates the relative position of the filter point in the kernel;
					  The anchor point shall be located in the core;
					  Default value Point(-1,-1),Indicates that the anchor point is in the center of the kernel)
			6th parameter delta Variable (brightness can be adjusted)
			7th parameter borderType
2. User defined filtering demonstration
Mean convolution
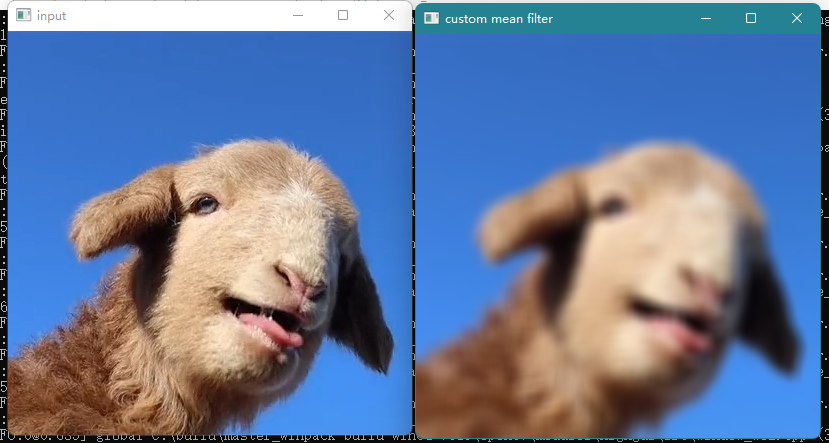
First, let's demonstrate the mean convolution of custom filtering
#include <opencv2/opencv.hpp>
#include <iostream>

using namespace cv;
using namespace std;

int main(int argc, char** argv) {
	Mat src = imread("D:/WorkSpace/Opencv/images/hahaha.jpg");
	if (src.empty()) {
		printf("could not find image file");
		return -1;
	}
	namedWindow("input", WINDOW_AUTOSIZE);
	imshow("input", src);

	// Custom filter mean convolution
	int k = 15;
	Mat mkernel = Mat::ones(k, k, CV_32F) / (float)(k * k);//The example creates CVs_ 32F type convolution kernel

	Mat dst;
	filter2D(src, dst, -1, mkernel, Point(-1, -1), 0, BORDER_DEFAULT);
	imshow("custom mean filter", dst);

	waitKey(0);
	destroyAllWindows();
	return 0;
}
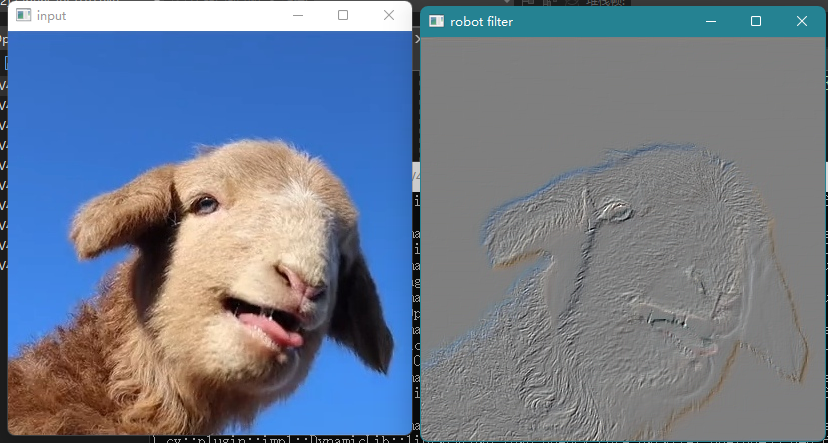
Non mean convolution
Next, we demonstrate the non mean convolution of custom filtering
#include <opencv2/opencv.hpp>
#include <iostream>
using namespace cv;
using namespace std;
int main(int argc, char** argv) {
Mat src = imread("D:/WorkSpace/Opencv/images/hahaha.jpg");
if (src.empty()) {
printf("could not find image file");
return -1;
}
namedWindow("input", WINDOW_AUTOSIZE);
imshow("input", src);
// Non mean filtering
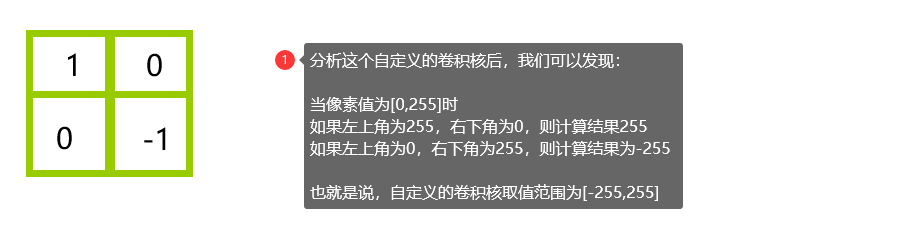
Mat robot = (Mat_<int>(2, 2) << 1, 0, 0, -1);
/*
Create an image with 2 rows and 2 columns, and then initialize the data flow
*/
Mat result;
filter2D(src, result, CV_32F, robot, Point(-1, -1), 127, BORDER_DEFAULT);
convertScaleAbs(result, result);
/*
CV_32F Type, the data has positive and negative, and the image display will be very bad
We can format it with convertScaleAbs
*/
imshow("robot filter", result);
waitKey(0);
destroyAllWindows();
return 0;
}
A detailed explanation of why formatting is required
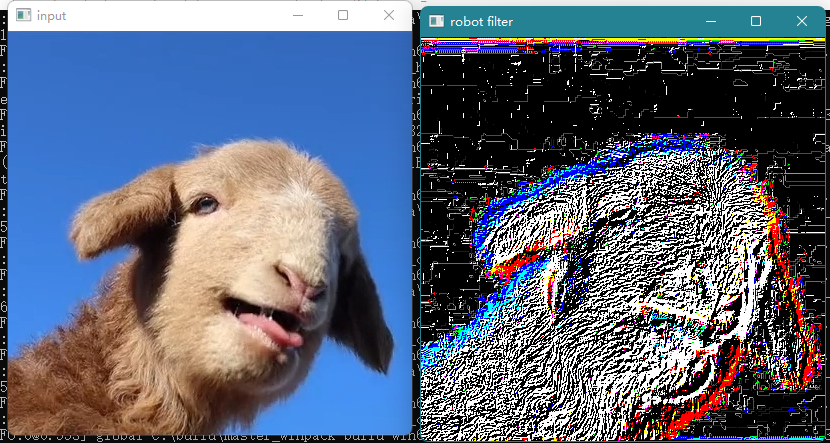
As you can see, the original CV_8U type cannot be satisfied. The output image depth should be changed to other, such as CV_32F
But CV_ The direct output of 32F image will be very bad, and the effect is as follows
The formatted image will be much better. The effect is as follows
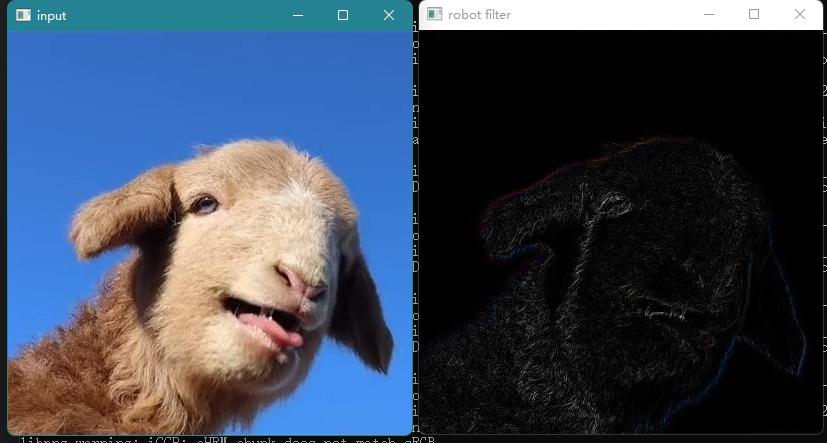
The image is very dark. We set delta = 127. The effect is as follows
API used in this lesson
filter2D


convertScaleAbs


Mat_<float> A(30,30);
randu(A, Scalar(-100), Scalar(100));
Mat_<float> B = A*5 + 3;
B = abs(B);
// Mat_< Float > b = ABS (a * 5 + 3) can also complete this work,
// But it assigns a temporary matrix
