Personal data, for learning purposes only
Modification time - 17:40:15, January 21, 2022
Course of study: OpenCV4 C + + quick start video 30 lectures
Video Teacher: Jia Zhigang
07 scroll bar operation demonstration - parameter transfer adjustment
opencv knowledge points:
- Parameter passing - createTrackbar
- Concept - brightness and contrast
- Clever use of image fusion - addWeighted
Problems solved in this lesson:
- How to use the parameter passing of createTrackbar?
- What is the connotation of adjusting brightness / contrast?
- How to use image fusion addWeighted to adjust brightness / contrast?
1. Parameter transfer
Improvement on the code of the last lesson
static void on_track(int light, void* userdata) {
Mat image = *((Mat*)(userdata));
Mat dst = Mat::zeros(image.size(), image.type());
Mat m = Mat::zeros(image.size(), image.type());
m = Scalar(light, light, light);
//add(image, m, dst);
subtract(image, m, dst);
imshow("Brightness adjustment", dst);
}
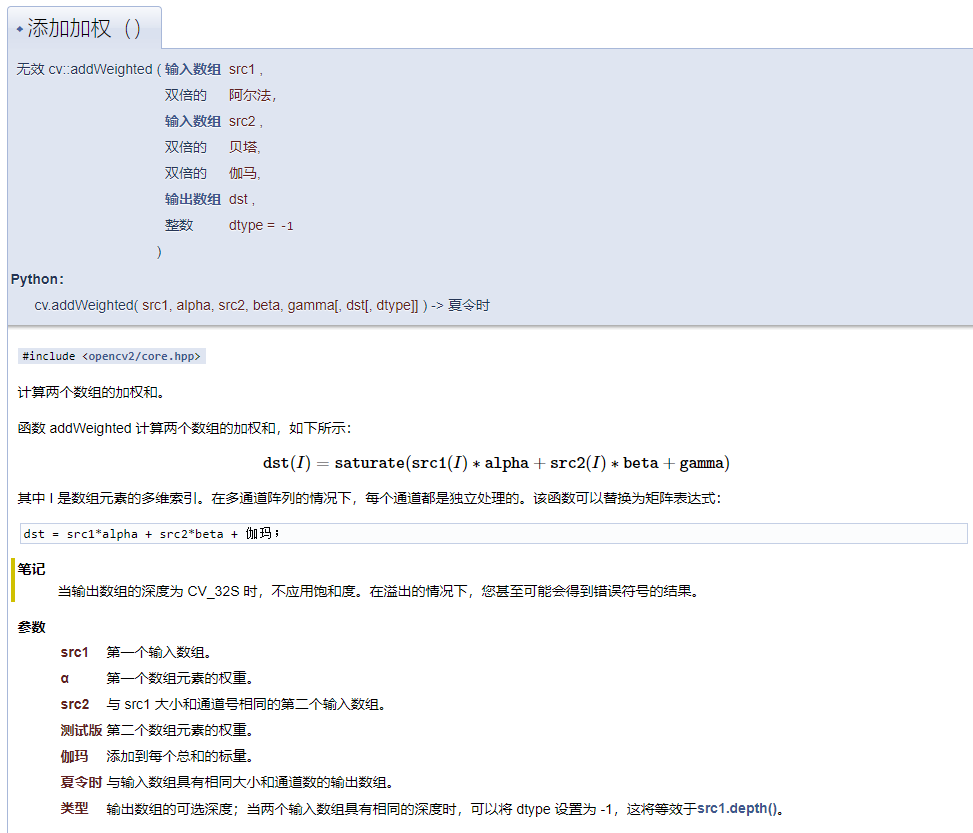
void QuickDemo::tracking_bar_demo(Mat& image) {
namedWindow("Brightness adjustment", WINDOW_AUTOSIZE);
int lightness = 50;
int max_light = 100;
createTrackbar("Value Bar:", "Brightness adjustment", &lightness, max_light, on_track,(void*)(&image));
on_track(lightness, &image);
}
Reasonably use the sixth parameter userdata to transfer parameters, so as to adjust brightness
2. Brightness and contrast
brightness
Adjusting the brightness is the adjustment of the overall pixel value, which is equivalent to adding a number (positive or negative)
The value of pixels is changing, so overflow should be considered
contrast ratio
Adjusting contrast is to adjust the difference between pixels, which is equivalent to multiplying by a number,
When the value of pixels changes, the difference between pixels also changes. Spillover should also be considered
3. Skillfully use picture fusion
Complete code
static void on_light(int lightness, void* userdata) {
Mat image = *((Mat*)(userdata));
Mat dst = Mat::zeros(image.size(), image.type());
Mat m = Mat::zeros(image.size(), image.type());
addWeighted(image, 1.0, m, 0, lightness, dst);
/*
addWeighted
7 parameters in total
First parameter first input
The second parameter is the weight of the first input
3rd parameter 2nd input
The fourth parameter is the weight of the second input
The fifth parameter is the scalar to be added to each number
6th parameter output
Optional depth of the 7th parameter output
*/
/*
From the formula: dst = src1 * alpha + src2 * beta + gamma
Set the first weight 1 and the second weight 0
Equivalent to image fusion, there is only the first component
Set the scalar to be added to lightness
Brightness adjustment can be realized
*/
imshow("brightness/Contrast adjustment", dst);
}
static void on_contrast(int contrast, void* userdata) {
Mat image = *((Mat*)(userdata));
Mat dst = Mat::zeros(image.size(), image.type());
Mat m = Mat::zeros(image.size(), image.type());
double contra = contrast / 100.0;
/*
The initial value of contrast 1 here is a number in the range of [0,2]
*/
addWeighted(image, contra, m, 0, 0, dst);
/*
From the formula: dst = src1 * alpha + src2 * beta + gamma
Set the first weight cotrast and the second weight 0
Equivalent to image fusion, there is only the first component
At the same time, the contrast can be adjusted
*/
imshow("brightness/Contrast adjustment", dst);
}
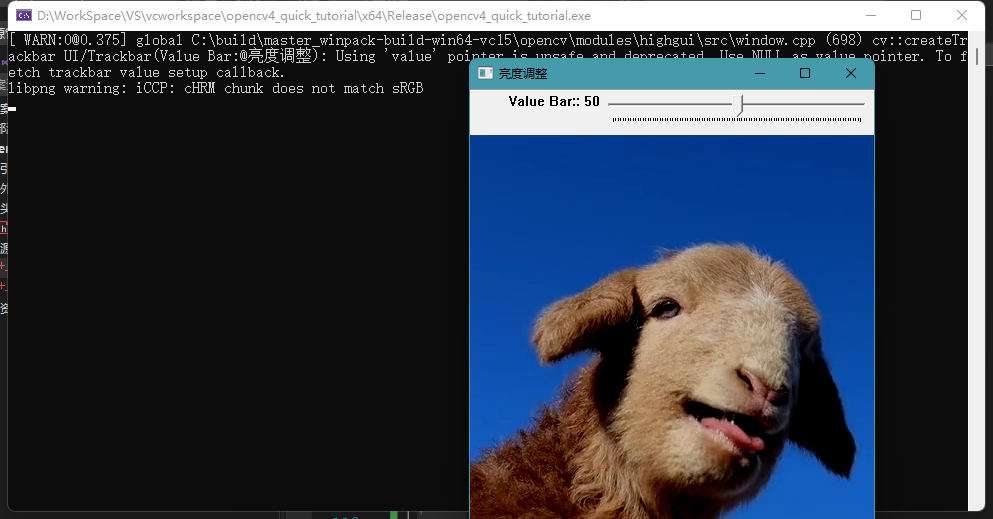
void QuickDemo::tracking_bar_demo(Mat& image) {
namedWindow("brightness/Contrast adjustment", WINDOW_AUTOSIZE);
int lightness = 50;
int max_light = 100;
int contrast = 100;
int max_contrast = 200;
createTrackbar("Value Bar:", "brightness/Contrast adjustment", &lightness, max_light, on_light, (void*)(&image));
createTrackbar("Contrast Bar:", "brightness/Contrast adjustment", &contrast, max_contrast, on_contrast, (void*)(&image));
//on_light(lightness, &image);
//on_contrast(lightness, &image);
/*
These two codes are not used now. It is unnecessary in the course
Because createTrackbar adopts the method of parameter transmission, the initial position + user data has been transmitted
There's no need to pass it here
*/
}
About brightness
The code for adjusting brightness is as follows
static void on_light(int lightness, void* userdata) {

	Mat image = *((Mat*)(userdata));
	Mat dst = Mat::zeros(image.size(), image.type());
	Mat m = Mat::zeros(image.size(), image.type());

	addWeighted(image, 1.0, m, 0, lightness, dst);
	/*
	addWeighted
		7 parameters in total
			First parameter first input
			The second parameter is the weight of the first input
			3rd parameter 2nd input
			The fourth parameter is the weight of the second input
			The fifth parameter is the scalar to be added to each number
			6th parameter output

			Optional depth of the 7th parameter output
	*/
	/*
	From the formula: dst = src1 * alpha + src2 * beta + gamma
	Set the first weight 1 and the second weight 0
		Equivalent to image fusion, there is only the first component
	Set the scalar to be added to lightness
		Brightness adjustment can be realized
	*/
	imshow("brightness/Contrast adjustment", dst);

}
The adjustment of brightness is explained as follows
The weight of the first figure is alpha, and the weight is always 1
The weight of the second figure is beta, and the weight is always 0
Only the brightness is turned up here, so explain why it turns on?
The added gmama scalar increases the value of each pixel point (here, addWeighted will be truncated at [0255])
The value of each pixel is approaching 255, so it will turn bright
How do you darken it?
We just need to make the gamma scalar negative, so we can reduce the value of each pixel
The value of each pixel is approaching 0, so it will darken
Since the code in the course only increases the brightness, we can improve it to increase / decrease the brightness
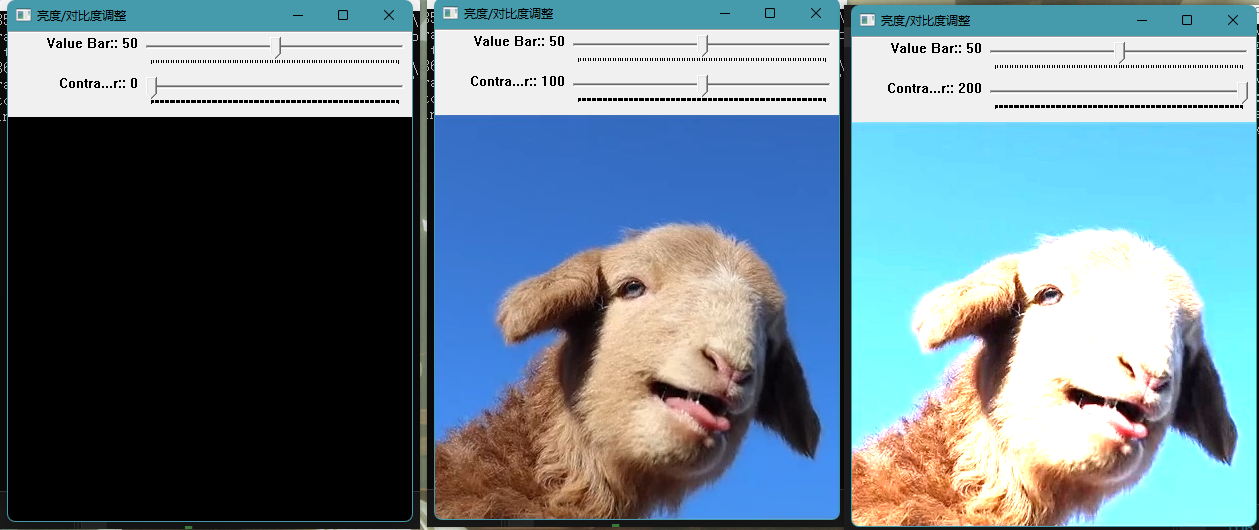
static void on_light(int lightness, void* userdata) {

	Mat image = *((Mat*)(userdata));
	Mat dst = Mat::zeros(image.size(), image.type());
	Mat m = Mat::zeros(image.size(), image.type());

	double light = lightness - 50.0;
	/*
		gamma The range becomes [- 50,50]
		In this way, we can increase / decrease the brightness,
	*/

	addWeighted(image, 1.0, m, 0, light, dst);

	imshow("brightness/Contrast adjustment", dst);

}
The middle is the original drawing
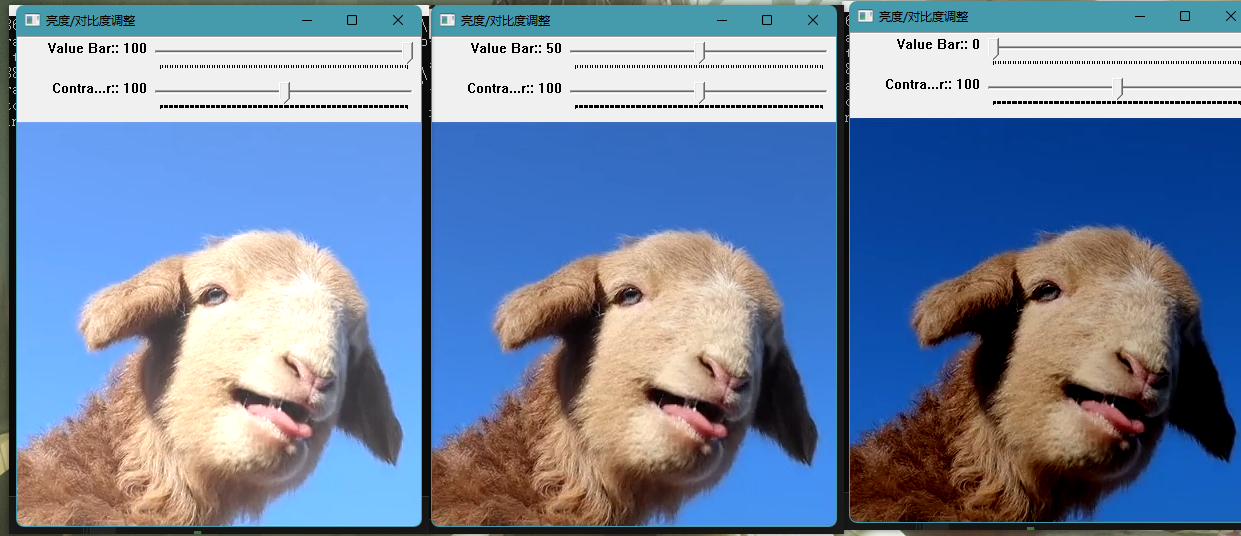
About contrast
The code for adjusting contrast is as follows
static void on_contrast(int contrast, void* userdata) {

	Mat image = *((Mat*)(userdata));
	Mat dst = Mat::zeros(image.size(), image.type());
	Mat m = Mat::zeros(image.size(), image.type());

	double contra = contrast / 100.0;
	/*
	The initial value of contrast 1 here is a number in the range of [0,2]
	*/
	addWeighted(image, contra, m, 0, 0, dst);
	/*
	From the formula: dst = src1 * alpha + src2 * beta + gamma
	Set the first weight cotrast and the second weight 0
		Equivalent to image fusion, there is only the first component
	*/

	imshow("brightness/Contrast adjustment", dst);

}
The adjustment of contrast is explained as follows
The weight of the first graph is alpha, and the initial weight is 1
The weight of the second figure is beta, and the weight is always 0
Why does it turn black?
When the weight alpha of the first graph changes, when the alpha changes from 1.0 → 0,
Each pixel of the image * this change aplha
This means that the value of the pixels in the first image is getting smaller, close to 0, and the difference between the pixels is also getting smaller
It turns black
Why does it turn white?
When the weight alpha of the first graph changes, when the alpha changes from 1.0 → 2.0,
Each pixel of the image * this change aplha
This means that the value of the pixels in the first image is getting larger, close to 255, and the difference between the pixels is also getting larger
It turns white
The middle is the original drawing
API used in this lesson
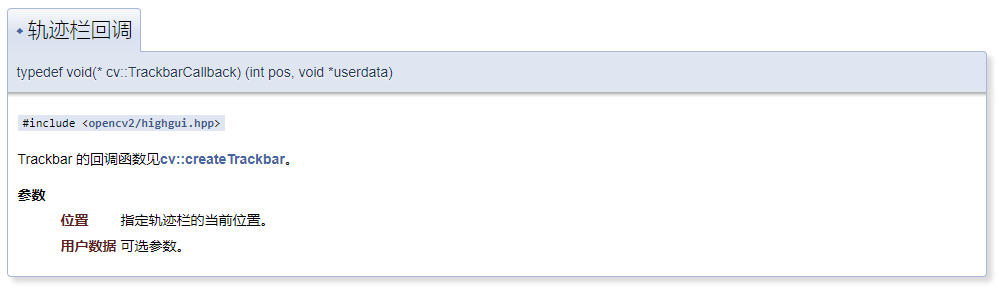
1.creatTrackbar

2.TrackbarCallback
3.addWeighted