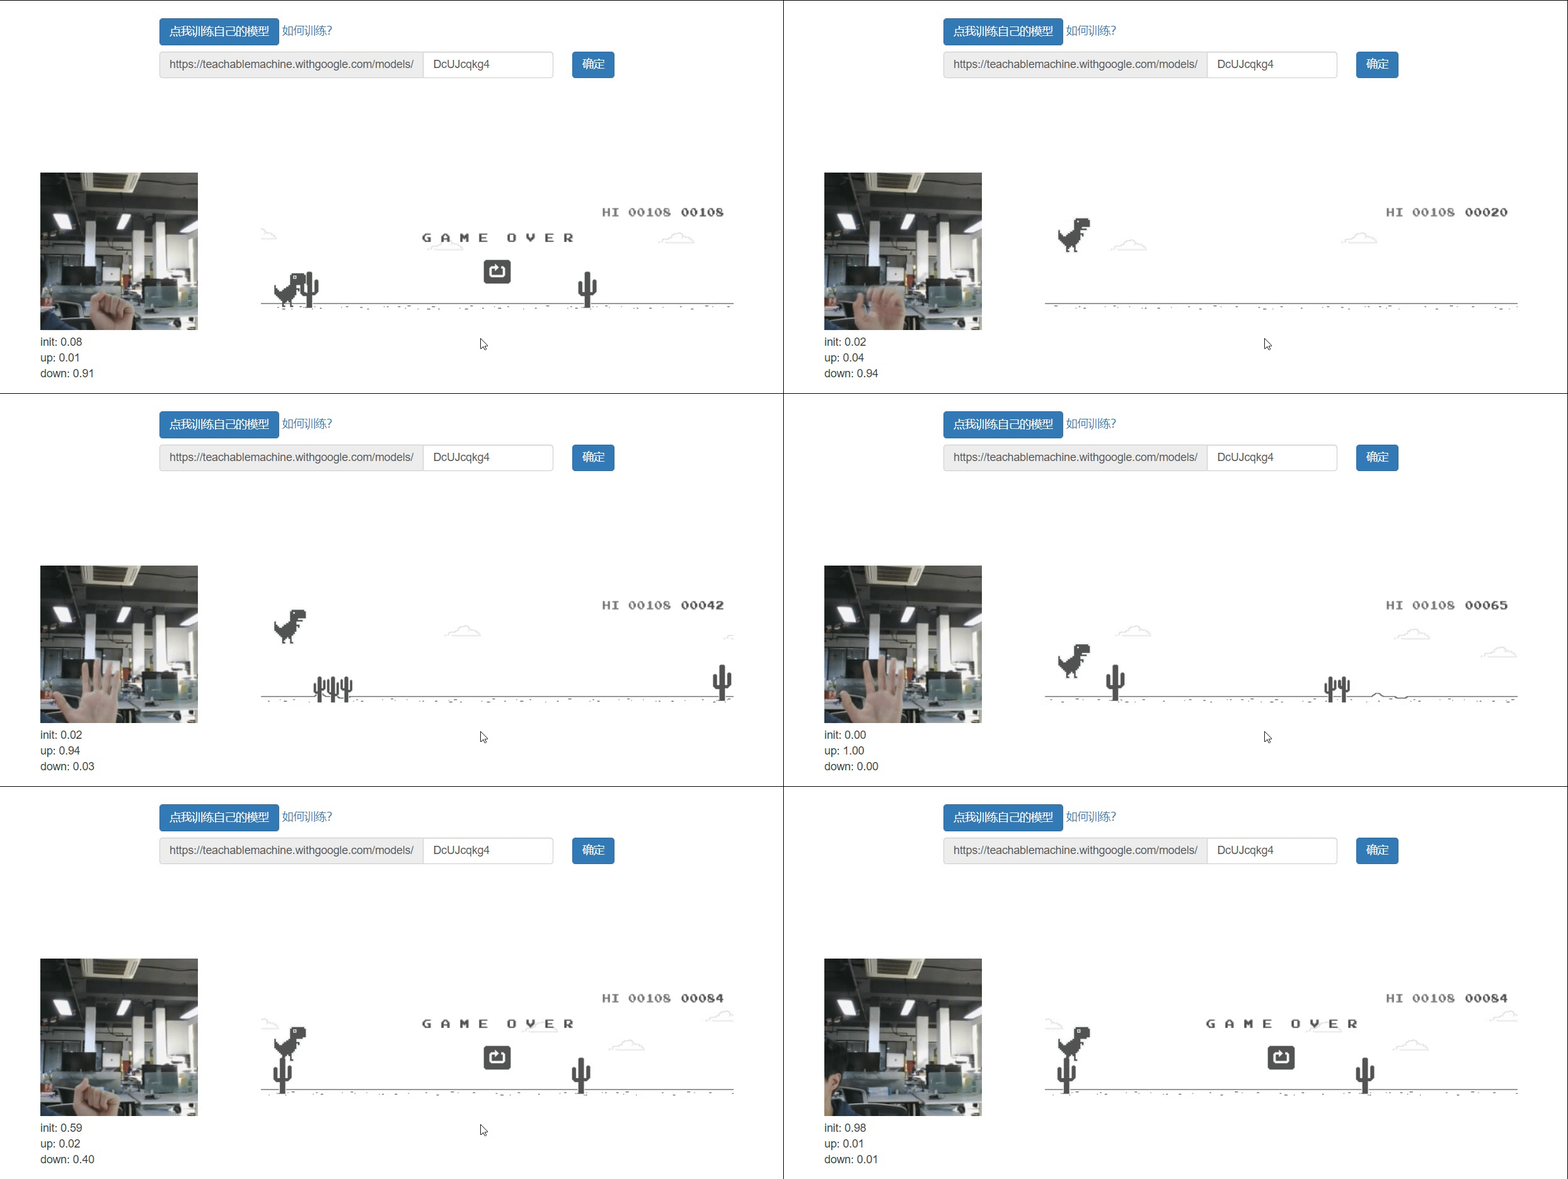
Let's see the effect first

text
Recently, when learning the knowledge of machine learning, I wanted to do something to play, and then I came into contact with TensorFlow, a machine learning framework that encapsulates some common algorithms of machine learning.
However, it is still troublesome to implement a set of processes by ourselves. We can use Google's open source Teachable Machine To train the model. I have to praise the creativity of Google engineers, so that we can train the model without writing a line of code. Of course, if you want to further apply it, you still need some code capabilities.
After playing Teachable Machine for a while, I came up with some interesting ideas. Can I combine Teachable Machine and Chrome offline games to play through image recognition? Obviously, I can. I just need to get the source code of Chrome offline game. After querying some information, I finally found him. https://source.chromium.org/chromium/chromium/src/+/master:components/neterror/resources/offline.js
The next step is the transformation time. We can learn how to use Teachable Machine on the official website of Teachable Machine. The following is the official Code:
<div>Teachable Machine Image Model</div>
<button type="button" onclick="init()">Start</button>
<div id="webcam-container"></div>
<div id="label-container"></div>
<script src="https://cdn.jsdelivr.net/npm/@tensorflow/tfjs@1.3.1/dist/tf.min.js"></script>
<script src="https://cdn.jsdelivr.net/npm/@teachablemachine/image@0.8/dist/teachablemachine-image.min.js"></script>
<script type="text/javascript">
    // More API functions here:
    // https://github.com/googlecreativelab/teachablemachine-community/tree/master/libraries/image

    // the link to your model provided by Teachable Machine export panel
    const URL = "./my_model/";

    let model, webcam, labelContainer, maxPredictions;

    // Load the image model and setup the webcam
    async function init() {
        const modelURL = URL + "model.json";
        const metadataURL = URL + "metadata.json";

        // load the model and metadata
        // Refer to tmImage.loadFromFiles() in the API to support files from a file picker
        // or files from your local hard drive
        // Note: the pose library adds "tmImage" object to your window (window.tmImage)
        model = await tmImage.load(modelURL, metadataURL);
        maxPredictions = model.getTotalClasses();

        // Convenience function to setup a webcam
        const flip = true; // whether to flip the webcam
        webcam = new tmImage.Webcam(200, 200, flip); // width, height, flip
        await webcam.setup(); // request access to the webcam
        await webcam.play();
        window.requestAnimationFrame(loop);

        // append elements to the DOM
        document.getElementById("webcam-container").appendChild(webcam.canvas);
        labelContainer = document.getElementById("label-container");
        for (let i = 0; i < maxPredictions; i++) { // and class labels
            labelContainer.appendChild(document.createElement("div"));
        }
    }

    async function loop() {
        webcam.update(); // update the webcam frame
        await predict();
        window.requestAnimationFrame(loop);
    }

    // run the webcam image through the image model
    async function predict() {
        // predict can take in an image, video or canvas html element
        const prediction = await model.predict(webcam.canvas);
        for (let i = 0; i < maxPredictions; i++) {
            const classPrediction =
                prediction[i].className + ": " + prediction[i].probability.toFixed(2);
            labelContainer.childNodes[i].innerHTML = classPrediction;
        }
    }
</script>
There are two points to pay attention to when analyzing the source code:
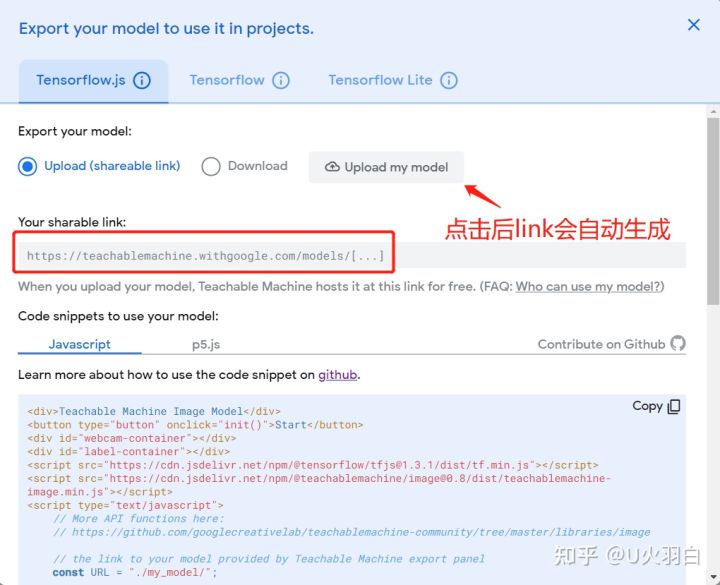
- The URL here is the address of the model. You can use the address generated on the website. Of course, you can save it and put it on your own object storage service
// the link to your model provided by Teachable Machine export panel
const URL = "./my_model/";
Generate model address on official website

2. Real time prediction data can be obtained here
// run the webcam image through the image model
async function predict() {
    // predict can take in an image, video or canvas html element
    const prediction = await model.predict(webcam.canvas);
    for (let i = 0; i < maxPredictions; i++) {
        const classPrediction =
            prediction[i].className + ": " + prediction[i].probability.toFixed(2);
        labelContainer.childNodes[i].innerHTML = classPrediction;
    }
}
The most likely results can be obtained in the following ways
let maxPrediction = prediction[0];
prediction.forEach(p => {
    if(p.probability > maxPrediction.probability) {
        maxPrediction = p;
    }
});
maxPrediction here is the most likely result. maxPrediction.className can get the name of the result
The next step is to combine the code of Google Chrome offline game. The steps are very simple. When the name of the recognition result is up, let the little dinosaur jump, and when it is down, let the little dinosaur squat. The following is the specific code
let state;
if(!state || maxPrediction.className === 'up') {
    console.log(maxPrediction.className);
    runner.tRex.speedDrop = false;
    runner.tRex.setDuck(false);
    //  Play sound effect and jump on starting the game for the first time.
    if (!runner.tRex.jumping && !runner.tRex.ducking) {
        runner.playSound(runner.soundFx.BUTTON_PRESS);
        runner.tRex.startJump(runner.currentSpeed);
    }
    state = 'up';
}
if(state === 'up' && maxPrediction.className === 'down') {
    console.log(maxPrediction.className);
    if (runner.tRex.jumping) {
        // Speed drop, activated only when jump key is not pressed.
        runner.tRex.setSpeedDrop();
    } else if (!runner.tRex.jumping && !runner.tRex.ducking) {
        // Duck.
        runner.tRex.setDuck(true);
    }
    state = 'down';
}
In this way, the behavior of small dinosaurs can be controlled through image recognition.
Project address
The following is the address of the project. Interested students can have a look.
The game can be played online without downloading https://blog.huajiayi.top/ai-t-rex-runner/
The accuracy of inputting your own model will be higher. The training methods of the model can be seen here https://github.com/huajiayi/ai-t-rex-runner