It is only used for secondary publication, research, publication and other illegal materials. It is only used for secondary publication, research, profit-making and other illegal materials.
background
When I visited sketchfab, I saw many examples of two-dimensional plane to three-dimensional model, so I followed their example and used three JS + react technology stack to convert two-dimensional cartoon pictures into three-dimensional visual effects. The content of this paper mainly includes: three Group hierarchical model, MeshPhongMaterial highlight mesh material, sine cosine function to create model movement track, etc.
effect
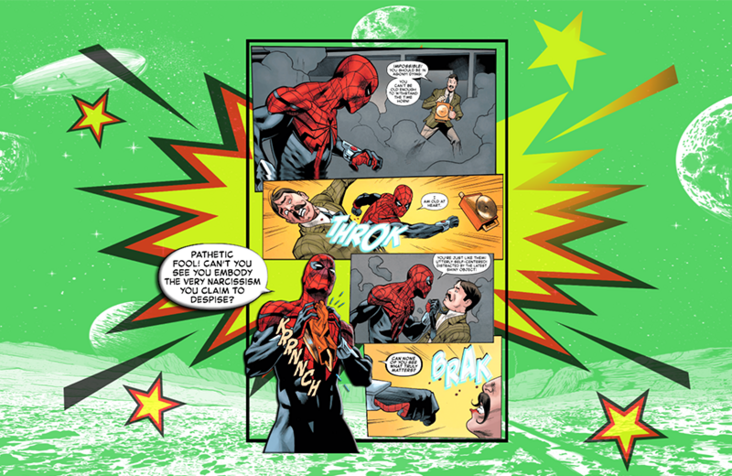
The effect is as follows: 👇 As shown in the figure below: the page mainly includes background picture, cartoon picture and main body 💥 Boom explosion background picture composition, press and hold the left mouse button to move the model to obtain different views, so that the picture has a 3D depth of field effect visually.
Adapted:
- 💻 PC end
- 📱 Mobile terminal
👀 Online preview: https://dragonir.github.io/3d...
realization
The implementation of this article is relatively simple, which is basically the same as that of my previous articles. The process is also relatively simple, mainly because the material preparation process is relatively complex. Let's take a look at the specific implementation method.
Material production
Prepare a picture you like as the original material. The picture content can be divided into multiple levels to achieve 3D depth of field effect. In this example, a cartoon picture is used, which can be divided into multiple levels.
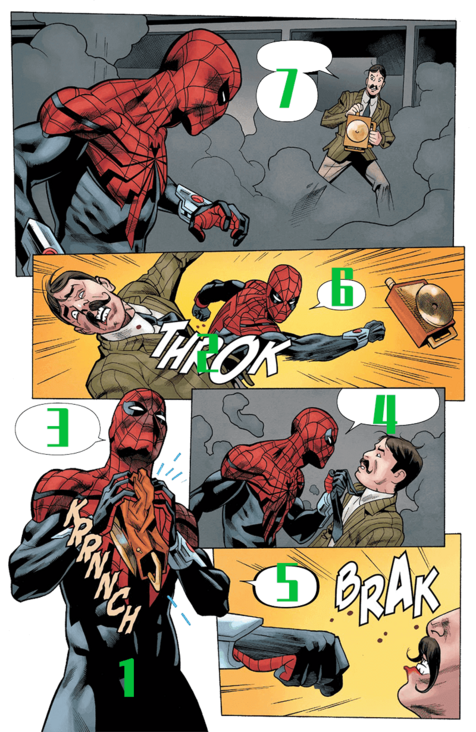
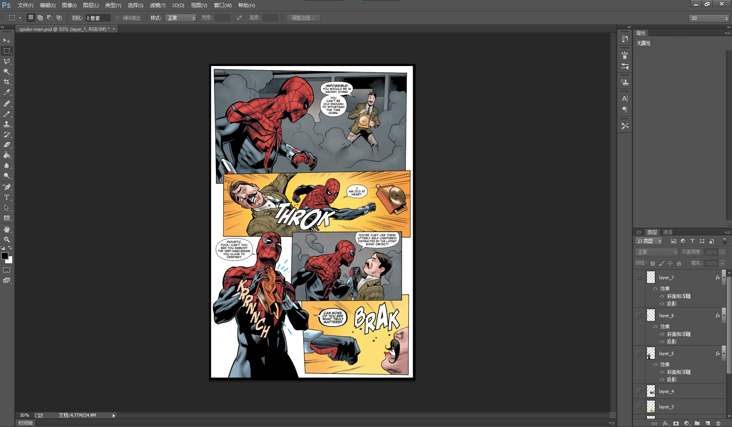
Open the picture in Photoshop, create several layers according to the number of layers you need, and copy the map to each layer, then edit each layer according to the division of the deep level of the layer scene, delete the redundant part with magic wand tool and lasso tool, and then export each layer separately as material. I'm divided into 👆 The above seven layers, plus a border, have a total of eight layers.
Resource introduction
OrbitControls is used for lens track control and TWEEN is used for lens gap animation.
import React from 'react';
import * as THREE from "three";
import { OrbitControls } from "three/examples/jsm/controls/OrbitControls";
import { TWEEN } from "three/examples/jsm/libs/tween.module.min.js";
Scene initialization
Initialize render container, scene, camera, light source. The initial position of the camera is set to (- 12, 0, 0) on the left, so as to realize the flipping animation effect by using TWEEN later.
// scene
container = document.getElementById('container');
renderer = new THREE.WebGLRenderer({ antialias: true });
renderer.setPixelRatio(window.devicePixelRatio);
renderer.setSize(window.innerWidth, window.innerHeight);
container.appendChild(renderer.domElement);
scene = new THREE.Scene();
// Add background picture
scene.background = new THREE.TextureLoader().load(background);
// camera
camera = new THREE.PerspectiveCamera(60, window.innerWidth / window.innerHeight, 0.1, 1000);
camera.position.set(-12, 0, 0);
camera.lookAt(new THREE.Vector3(0, 0, 0));
// Direct light
light = new THREE.DirectionalLight(0xffffff, 1);
light.intensity = .2;
light.position.set(10, 10, 30);
light.castShadow = true;
light.shadow.mapSize.width = 512 * 12;
light.shadow.mapSize.height = 512 * 12;
light.shadow.camera.top = 100;
light.shadow.camera.bottom = - 50;
light.shadow.camera.left = - 50;
light.shadow.camera.right = 100;
scene.add(light);
// Ambient light
ambientLight = new THREE.AmbientLight(0xdddddd);
scene.add(ambientLight);
Create comic body
First, create a Group to add the layer grid, then traverse the layer background image array and create the grid of each face in the loop body. The grid uses the plane cube PlaneGeometry and the material uses the physical material MeshPhysicalMaterial. Set the same x-axis and y-axis values and different z-axis values for each grid position to create the depth of field effect. Finally, add the Group to the Scene.
var layerGroup = new THREE.Group();
let aspect = 18;
for (let i=0; i<layers.length; i++) {
  let mesh = new THREE.Mesh(new THREE.PlaneGeometry(10.41, 16), new THREE.MeshPhysicalMaterial({
    map: new THREE.TextureLoader().load(layers[i]),
    transparent: true,
    side: THREE.DoubleSide
  }));
  mesh.position.set(0, 0, i);
  mesh.scale.set(1 - (i / aspect), 1 - (i / aspect), 1 - (i / aspect));
  layerGroup.add(mesh);
  // written words
  if (i === 5) {
    mesh.material.metalness = .6;
    mesh.material.emissive = new THREE.Color(0x55cfff);
    mesh.material.emissiveIntensity = 1.6;
    mesh.material.opacity = .9;
  }
  // Session box
  if (i === 6) {
    mesh.scale.set(1.5, 1.5, 1.5);
    animateLayer = mesh;
  }
}
layerGroup.scale.set(1.2, 1.2, 1.2);
At this step, the effect is shown in the figure below:
💡 THREE.Group hierarchy model
Grids with the same body can be merged together through Group to improve operation efficiency. Three. The base class of JS hierarchical model Group is Object3D, which is three The base class of most objects in JS provides a series of attributes and methods to manipulate objects in three-dimensional space. If you can pass add(object) method, which adds the object as a child object.
However, it is better to use group as the parent object, because group is more semantic than Object3D. Group can be used as the parent object of point, line, mesh and other models to build a hierarchical model.
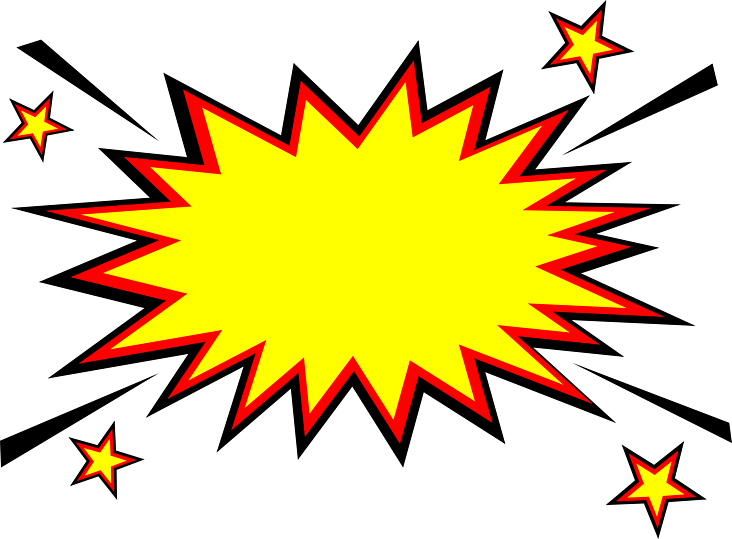
Create Boom background
In order to enhance the visual effect, I added one 💥 The Boom explosion graphic plane is used as the background. When moving with the mouse, you can see that the pattern has a metal gradient effect with the change of light. This effect is mainly realized through the special and shininess attributes of the highlight material MeshPhongMaterial.
const boom = new THREE.Mesh(new THREE.PlaneGeometry(36.76, 27.05), new THREE.MeshPhongMaterial({
  map: new THREE.TextureLoader().load(boomImage),
  transparent: true,
  shininess: 160,
  specular: new THREE.Color(0xff6d00),
  opacity: .7
}));
boom.scale.set(.8, .8, .8);
boom.position.set(0, 0, -3);
layerGroup.add(boom)
scene.add(layerGroup);
Effect after adding:
💡 MeshPhongMaterial highlight mesh material
MeshPhongMaterial is a material used for glossy surfaces with specular highlights. The material uses a non physical Blinn Phong model to calculate reflectivity. Unlike the Lambertian model used in meshlambertian material, this material can simulate glossy surfaces with specular highlights, such as painted wood.
Constructor:
MeshPhongMaterial(parameters: Object)
parameters: optional, an object that defines the appearance of a Material, with one or more attributes. Any attribute of a Material can be passed in from here (including any attribute inherited from Material).
Special properties:
- . emissive[Color]: the radiation color of a material is basically an inherent color that is not affected by other lighting. The default is black.
- . emissiveMap[Texture]: sets the glow map. The default value is null. The radiation map color is adjusted by the radiation color and intensity.
- . emissiveIntensity[Float]: radiation intensity. Adjust the luminous color. The default is 1.
- . envMap[TextureCube]: environment map. The default value is null.
- . isMeshPhongMaterial[Boolean]: used to check whether this class or derived class is Phong mesh material. The default value is true.
- . lightMap[Texture]: lightmap. The default value is null.
- . lightMapIntensity[Float]: bake the intensity of light. The default value is 1.
- . reflectivity[Float]: how much the environment map affects the surface. The default value is 1, and the valid range is between 0 (no reflection) and 1 (full reflection).
- . refractionRatio[Float]: the refractive index of the air divided by the refractive index of the material. The refractive index shall not exceed 1. The default value is 0.98.
- .shininess[Float]: . The higher the degree of highlight, the brighter the value. The default value is 30.
- . skinning[Boolean]: whether the material uses skin. The default value is false.
- . special [Color]: the specular Color of the material. The default value is the Color of 0x111111. This defines the gloss and gloss Color of the material.
- . specularMap[Texture]: the specular map value affects how specular highlights and environment maps affect the surface. The default value is null.
📌 When using Phong shading model to calculate shading, the shadow of each pixel is calculated. Compared with Gouraud model used by MeshLambertMaterial, the result of this model is more accurate, but at the expense of some performance.
Lens control, zoom adaptation, animation
Make up the animation between shots and switch the shots to the correct position.
Animations.animateCamera(camera, controls, { x: 0, y: 0, z: 20 }, { x: 0, y: 0, z: 0 }, 3600, () => { });Lens control. In this example, the angles of model translation and horizontal and vertical rotation are shown to achieve the best preview effect.
controls = new OrbitControls(camera, renderer.domElement);
controls.target.set(0, 0, 0);
controls.enableDamping = true;
controls.enablePan = false;
// Vertical rotation angle limit
controls.minPolarAngle = 1.2;
controls.maxPolarAngle = 1.8;
// Horizontal rotation angle limit
controls.minAzimuthAngle = -.6;
controls.maxAzimuthAngle = .6;
Screen zoom fit.
window.addEventListener('resize', () => {
  camera.aspect = window.innerWidth / window.innerHeight;
  camera.updateProjectionMatrix();
  renderer.setSize(window.innerWidth, window.innerHeight);
}, false);
For the session box layer mesh, I added the animation effect of moving left and right on a smooth curve, mainly by modifying its position on the x-axis and y-axis.
function animate() {
  requestAnimationFrame(animate);
  renderer.render(scene, camera);
  controls && controls.update();
  TWEEN && TWEEN.update();
  // Session box swing animation
  step += 0.01;
  animateLayer.position.x = 2.4 + Math.cos(step);
  animateLayer.position.y = .4 + Math.abs(Math.sin(step));
}
💡 Sine cosine function to create model movement track
Use the step variable and in the function math Cos () and math With the help of sin (), create a smooth track. step+= 0.01 defines the bounce speed of the ball.
So far, the complete implementation of this example has been described. If you are interested, you can try to transform your favorite pictures into 3D views. Please, use three JS show pictures like this, cool! 😂
🔗 Full code: https://github.com/dragonir/3...
summary
The knowledge points in this paper mainly include the following new knowledge:
- THREE.Group hierarchy model
- MeshPhongMaterial highlight mesh material
- Sine cosine function to create model movement track
Want to know about scene initialization, lighting, shadows, base geometry, meshes, materials and other three JS related knowledge, you can read my previous articles. Please indicate the original address and author. If you think the article is helpful to you, don't forget to click three times 👍.
appendix
- [1]. Three.js to realize the 2022 Winter Olympics Theme 3D interesting page 🐼
- [2]. 1000 powder! Use three JS make an exclusive 3D Medal 🥇
- [3]. Three.js to realize the 3D creative page of the Spring Festival in the year of the tiger
- [4]. Three.js to realize the 3D dynamic Logo of Facebook metauniverse
- [5]. Three.js to achieve 3D panoramic detective games
- [6]. Three.js to achieve cool acid style 3D pages
- [7]. Conversion of 3dx model to blender supported format