1. Project Overview
Overall Content: This project is the portal interface framework design of Android APP, which contains four tables pages, and can easily implement the click-and-switch function between tables pages.
Technology used: Use layout and fragment ation to click on controls.
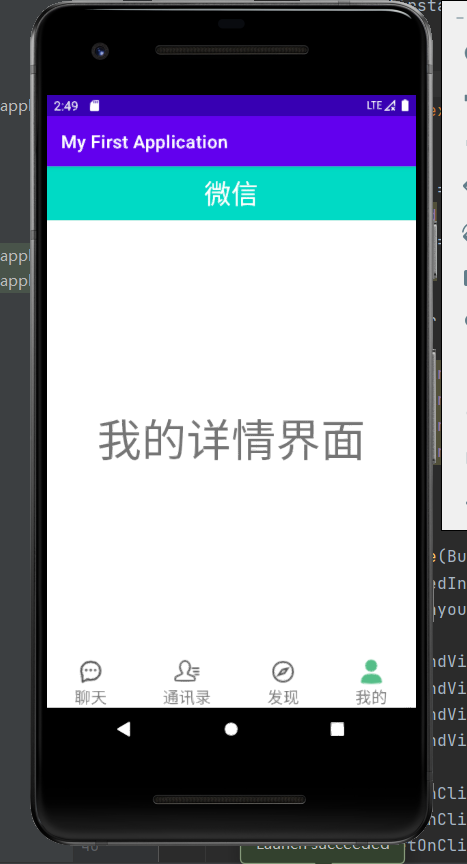
Overall page effect:
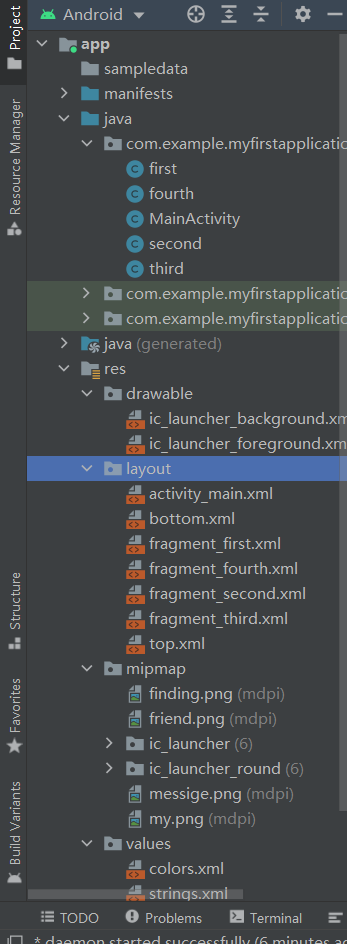
Code directory structure:
2. Design display of each page (layout)
1. Top page interface: design of top.xml page
(1) Create a new file named top.xml in the layout, drag a LinearLayout on both sides of the layout widget, and then drag a textView under LinearLayout to enter
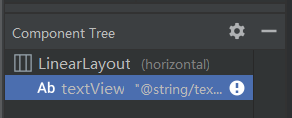
(2) Then design the font and background color a little bit, code as follows:
<?xml version="1.0" encoding="utf-8"?>
<LinearLayout xmlns:android="http://schemas.android.com/apk/res/android"
    android:layout_width="match_parent"
    android:layout_height="wrap_content">

    <TextView
        android:id="@+id/textView"
        android:layout_width="0dp"
        android:layout_height="60dp"
        android:layout_weight="1"
        android:background="@color/teal_200"
        android:gravity="center"
        android:text="@string/textView"
        android:textAlignment="center"
        android:textColor="@color/white"
        android:textSize="30sp" />
</LinearLayout>
(3) The results are as follows:

2. Bottom page interface: design of bottom.xml page
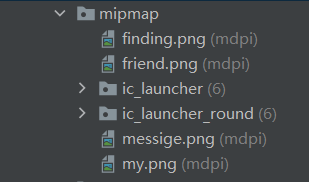
(1) The four small icons you will need are ready to drag into the mipmap:
(2) Create a new file named tbottom.xml in the layout, drag a horizontal line of inearLayout on both sides of the layout widget, and then drag four vertical lines of inearLayout under LinearLayout to enter. Select one image for each line of Layout:
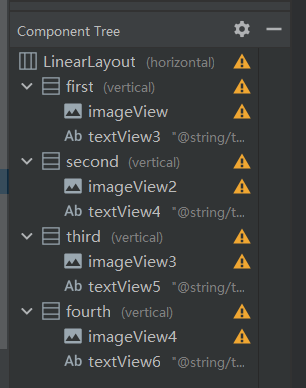
(3) Then design the font and relative layout slightly, as follows:
<?xml version="1.0" encoding="utf-8"?>
<LinearLayout xmlns:android="http://schemas.android.com/apk/res/android"
    xmlns:app="http://schemas.android.com/apk/res-auto"
    android:layout_width="match_parent"
    android:layout_height="wrap_content"
    android:backgroundTint="@android:color/darker_gray">

    <LinearLayout
        android:id="@+id/first"
        android:layout_width="wrap_content"
        android:layout_height="wrap_content"
        android:layout_weight="1"
        android:orientation="vertical">

        <ImageView
            android:id="@+id/imageView"
            android:layout_width="match_parent"
            android:layout_height="wrap_content"
            app:srcCompat="@mipmap/messige" />

        <TextView
            android:id="@+id/textView3"
            android:layout_width="match_parent"
            android:layout_height="wrap_content"
            android:gravity="center"
            android:text="@string/textView3"
            android:textSize="18sp" />

    </LinearLayout>

    <LinearLayout
        android:id="@+id/second"
        android:layout_width="wrap_content"
        android:layout_height="wrap_content"
        android:layout_weight="1"
        android:orientation="vertical">

        <ImageView
            android:id="@+id/imageView2"
            android:layout_width="match_parent"
            android:layout_height="wrap_content"
            app:srcCompat="@mipmap/friend" />

        <TextView
            android:id="@+id/textView4"
            android:layout_width="match_parent"
            android:layout_height="wrap_content"
            android:gravity="center"
            android:text="@string/textView4"
            android:textSize="18sp" />
    </LinearLayout>

    <LinearLayout
        android:id="@+id/third"
        android:layout_width="wrap_content"
        android:layout_height="wrap_content"
        android:layout_weight="1"
        android:orientation="vertical">

        <ImageView
            android:id="@+id/imageView3"
            android:layout_width="match_parent"
            android:layout_height="wrap_content"
            app:srcCompat="@mipmap/finding" />

        <TextView
            android:id="@+id/textView5"
            android:layout_width="match_parent"
            android:layout_height="wrap_content"
            android:gravity="center"
            android:text="@string/textView5"
            android:textSize="18sp" />
    </LinearLayout>

    <LinearLayout
        android:id="@+id/fourth"
        android:layout_width="wrap_content"
        android:layout_height="wrap_content"
        android:layout_weight="1"
        android:orientation="vertical">

        <ImageView
            android:id="@+id/imageView4"
            android:layout_width="match_parent"
            android:layout_height="wrap_content"
            app:srcCompat="@mipmap/my" />

        <TextView
            android:id="@+id/textView6"
            android:layout_width="match_parent"
            android:layout_height="wrap_content"
            android:gravity="center"
            android:text="@string/textView6"
            android:textSize="18sp" />

    </LinearLayout>
</LinearLayout>
(4) The results are as follows:

3. Theme interface: activity_main.xml page design
(1) In the Layout widget, you want to drag a LinearLayout, drag a FragmentLayout under this layout and change its id to content, introduce the top.xml and bottom.xml of the previous top and bottom interfaces in code with include
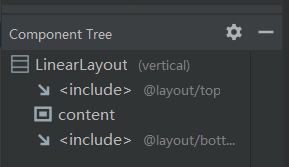
(2) The code is as follows:
<?xml version="1.0" encoding="utf-8"?>
<LinearLayout xmlns:android="http://schemas.android.com/apk/res/android"
    xmlns:app="http://schemas.android.com/apk/res-auto"
    xmlns:tools="http://schemas.android.com/tools"
    android:layout_width="match_parent"
    android:layout_height="match_parent"
    android:orientation="vertical"
    tools:context=".MainActivity">

    <include layout="@layout/top"></include>

    <FrameLayout
        android:id="@+id/content"
        android:layout_width="match_parent"
        android:layout_height="0dp"
        android:layout_weight="1"/>

    <include layout="@layout/bottom"></include>

</LinearLayout>
(3) The results are as follows:

4. Four fragment s page design
We previously placed four buttons in the bottom, and when each button clicked on the event triggered it would jump to the corresponding page (fragment), so we would design four separate pages
(1) Chat page design fragment_first.xml, the layout of components is as follows:
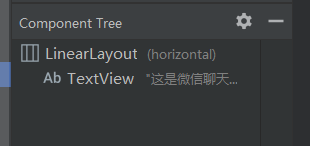
The code is as follows:
<?xml version="1.0" encoding="utf-8"?>
<LinearLayout xmlns:android="http://schemas.android.com/apk/res/android"
    xmlns:tools="http://schemas.android.com/tools"
    android:layout_width="match_parent"
    android:layout_height="match_parent"
    tools:context=".first">

    <!-- TODO: Update blank fragment layout -->
    <TextView
        android:layout_width="match_parent"
        android:layout_height="match_parent"
        android:gravity="center"
        android:text="This is the WeChat page"
        android:textSize="50sp" />

</LinearLayout>
The results are as follows:

(2) Address book page design fragment_second.xml, component layout as follows:
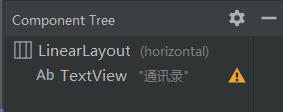
The code is as follows:
<?xml version="1.0" encoding="utf-8"?>
<LinearLayout xmlns:android="http://schemas.android.com/apk/res/android"
    xmlns:tools="http://schemas.android.com/tools"
    android:layout_width="match_parent"
    android:layout_height="match_parent"
    tools:context=".first">

    <!-- TODO: Update blank fragment layout -->
    <TextView
        android:layout_width="match_parent"
        android:layout_height="match_parent"
        android:gravity="center"
        android:text="Mail list"
        android:textSize="50sp" />

</LinearLayout>
The results are as follows:

(3) Friends Circle page design fragment_third.xml, the layout of the components is as follows:
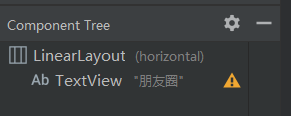
The code is as follows:
<?xml version="1.0" encoding="utf-8"?>
<LinearLayout xmlns:android="http://schemas.android.com/apk/res/android"
    xmlns:tools="http://schemas.android.com/tools"
    android:layout_width="match_parent"
    android:layout_height="match_parent"
    tools:context=".first">

    <!-- TODO: Update blank fragment layout -->
    <TextView
        android:layout_width="match_parent"
        android:layout_height="match_parent"
        android:gravity="center"
        android:text="Circle of friends"
        android:textSize="50sp" />

</LinearLayout>
The results are as follows:

(4) My page design, fragment_first.xml, has the following component layouts:
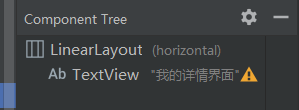
The code is as follows:
<?xml version="1.0" encoding="utf-8"?>
<LinearLayout xmlns:android="http://schemas.android.com/apk/res/android"
    xmlns:tools="http://schemas.android.com/tools"
    android:layout_width="match_parent"
    android:layout_height="match_parent"
    tools:context=".first">

    <!-- TODO: Update blank fragment layout -->
    <TextView
        android:layout_width="match_parent"
        android:layout_height="match_parent"
        android:gravity="center"
        android:text="My Detail Interface"
        android:textSize="50sp" />

</LinearLayout>
The results are as follows:

3. Key Steps and Core Technology Description
1. Bind the click switch method for the four click buttons
If you want to have jump pages, layout alone is not possible. You need to combine layout buttons with events, start listening for events when you click a button, and make jumps. You need to bind each linearLayout to a Java class, and write methods in a java file to make jumps. First, create four new java files and bind each linearLayout in a bottom separately.
WeChat Part java Code
package com.example.myfirstapplication;

import android.os.Bundle;

import androidx.fragment.app.Fragment;

import android.view.LayoutInflater;
import android.view.View;
import android.view.ViewGroup;


public class first extends Fragment {

    public first() {
        // Required empty public constructor
    }


    @Override
    public View onCreateView(LayoutInflater inflater, ViewGroup container,
                             Bundle savedInstanceState) {
        // Inflate the layout for this fragment
        return inflater.inflate(R.layout.fragment_first, container, false);
    }
}
Address Book Part java Code
package com.example.myfirstapplication;

import android.os.Bundle;
import android.view.LayoutInflater;
import android.view.View;
import android.view.ViewGroup;

import androidx.fragment.app.Fragment;


public class second extends Fragment {

    public second() {
        // Required empty public constructor
    }


    @Override
    public View onCreateView(LayoutInflater inflater, ViewGroup container,
                             Bundle savedInstanceState) {
        // Inflate the layout for this fragment
        return inflater.inflate(R.layout.fragment_second, container, false);
    }
}
Discover some java code
package com.example.myfirstapplication;

import android.os.Bundle;
import android.view.LayoutInflater;
import android.view.View;
import android.view.ViewGroup;

import androidx.fragment.app.Fragment;


public class third extends Fragment {

    public third() {
        // Required empty public constructor
    }


    @Override
    public View onCreateView(LayoutInflater inflater, ViewGroup container,
                             Bundle savedInstanceState) {
        // Inflate the layout for this fragment
        return inflater.inflate(R.layout.fragment_third, container, false);
    }
}
Some of my java code
package com.example.myfirstapplication;

import android.os.Bundle;
import android.view.LayoutInflater;
import android.view.View;
import android.view.ViewGroup;

import androidx.fragment.app.Fragment;


public class fourth extends Fragment {

    public fourth() {
        // Required empty public constructor
    }


    @Override
    public View onCreateView(LayoutInflater inflater, ViewGroup container,
                             Bundle savedInstanceState) {
        // Inflate the layout for this fragment
        return inflater.inflate(R.layout.fragment_fourth, container, false);
    }
}
2. Write the main function MainActivity
Now that you have four java classes, you can new their instance objects for click-and-switch events.
Create four new Fragment objects and use Fragment Manager to manage them
private Fragment first = new first();
private Fragment second = new second();
private Fragment third = new third();
private Fragment fourth = new fourth();

private FragmentManager fragmentManager;
Create four linearLayout objects and bind click listening events
private LinearLayout linearLayout1;
private LinearLayout linearLayout2;
private LinearLayout linearLayout3;
private LinearLayout linearLayout4;


@Override
protected void onCreate(Bundle savedInstanceState) {
    super.onCreate(savedInstanceState);
    setContentView(R.layout.activity_main);

    linearLayout1 = findViewById(R.id.first);
    linearLayout2 = findViewById(R.id.second);
    linearLayout3 = findViewById(R.id.third);
    linearLayout4 = findViewById(R.id.fourth);

    linearLayout1.setOnClickListener(this);
    linearLayout2.setOnClickListener(this);
    linearLayout3.setOnClickListener(this);
    linearLayout4.setOnClickListener(this);

    initFragment();
}
Initialize fragment
protected void initFragment() {
    fragmentManager = getSupportFragmentManager();
    FragmentTransaction transaction = fragmentManager.beginTransaction();
    transaction.add(R.id.content,first);
    transaction.add(R.id.content,second);
    transaction.add(R.id.content,third);
    transaction.add(R.id.content,fourth);
    hideFragment(transaction);
    transaction.show(second);
    transaction.commit();

}
Write hidden fragment code
protected void hideFragment(FragmentTransaction transaction){
    transaction.hide(first);
    transaction.hide(second);
    transaction.hide(third);
    transaction.hide(fourth);
}
Write click events
@Override
public void onClick(View v) {
    switch (v.getId()){
        case R.id.first:
            showFragment(1);
        case R.id.second:
            showFragment(2);
        case R.id.third:
            showFragment(3);
        case R.id.fourth:
            showFragment(4);
    }
Writing methods for presenting fragment s
private void showFragment(int i) {
    FragmentTransaction transaction = fragmentManager.beginTransaction();
    hideFragment(transaction);
    switch (i){
        case 1:
            transaction.show(first);
            break;
        case 2:
            transaction.show(second);
            break;
        case 3:
            transaction.show(third);
            break;
        case 4:
            transaction.show(fourth);
            break;
    }
    transaction.commit();
}
MainActivity Overall Code
package com.example.myfirstapplication;

import androidx.appcompat.app.AppCompatActivity;
import androidx.fragment.app.Fragment;
import androidx.fragment.app.FragmentManager;
import androidx.fragment.app.FragmentTransaction;

import android.os.Bundle;
import android.view.View;
import android.widget.LinearLayout;

public class MainActivity extends AppCompatActivity implements View.OnClickListener{


    private Fragment first = new first();
    private Fragment second = new second();
    private Fragment third = new third();
    private Fragment fourth = new fourth();

    private FragmentManager fragmentManager;

    private LinearLayout linearLayout1;
    private LinearLayout linearLayout2;
    private LinearLayout linearLayout3;
    private LinearLayout linearLayout4;


    @Override
    protected void onCreate(Bundle savedInstanceState) {
        super.onCreate(savedInstanceState);
        setContentView(R.layout.activity_main);

        linearLayout1 = findViewById(R.id.first);
        linearLayout2 = findViewById(R.id.second);
        linearLayout3 = findViewById(R.id.third);
        linearLayout4 = findViewById(R.id.fourth);

        linearLayout1.setOnClickListener(this);
        linearLayout2.setOnClickListener(this);
        linearLayout3.setOnClickListener(this);
        linearLayout4.setOnClickListener(this);

        initFragment();
    }

    protected void initFragment() {
        fragmentManager = getSupportFragmentManager();
        FragmentTransaction transaction = fragmentManager.beginTransaction();
        transaction.add(R.id.content,first);
        transaction.add(R.id.content,second);
        transaction.add(R.id.content,third);
        transaction.add(R.id.content,fourth);
        hideFragment(transaction);
        transaction.show(second);
        transaction.commit();

    }

    protected void hideFragment(FragmentTransaction transaction){
        transaction.hide(first);
        transaction.hide(second);
        transaction.hide(third);
        transaction.hide(fourth);
    }

    @Override
    public void onClick(View v) {
        switch (v.getId()){
            case R.id.first:
                showFragment(1);
            case R.id.second:
                showFragment(2);
            case R.id.third:
                showFragment(3);
            case R.id.fourth:
                showFragment(4);
        }
    }

    private void showFragment(int i) {
        FragmentTransaction transaction = fragmentManager.beginTransaction();
        hideFragment(transaction);
        switch (i){
            case 1:
                transaction.show(first);
                break;
            case 2:
                transaction.show(second);
                break;
            case 3:
                transaction.show(third);
                break;
            case 4:
                transaction.show(fourth);
                break;
        }
        transaction.commit();
    }
}
IV. Project Summary
This experiment is a fairly introductory project, but there are also many difficulties. For example, when listening for event binding, the four linearLayouts in the bottom are bound instead of the linearLayout in the fragment. This is a pit. Otherwise, if the project does not come up, what you need to understand is the binding monitoring in the java main function and the logic to listen for the implementation.A little click on an event, show that fragment after clicking, and hide the rest, all in writing. Practice typing more code and slowly find the logic.
5. Source Address
If the gitee source address cannot be opened, go to it manually: https://gitee.com/taomurong/ASFirstHomework