The calculation and statistics of power consumption is a troublesome and contradictory thing. Recording power consumption itself is also a matter of power consumption. With the increasing performance requirements of Android, the optimization of power consumption is particularly important. For a power-consuming application, users will undoubtedly uninstall without hesitation. So in this blog, we will learn about Android performance optimization together. Power optimization.
How does power consumption come about?
Power consumption, for example: when you open the screen, all the actions to work with CPU/GPU will wake up the screen, which will consume electricity. This is not the same as an application wake-up device.
(1) Wake-up screen
When the user's power screen, it means that the components of the system need to start working, and the interface needs to start rendering.
Power consumption in standby state: 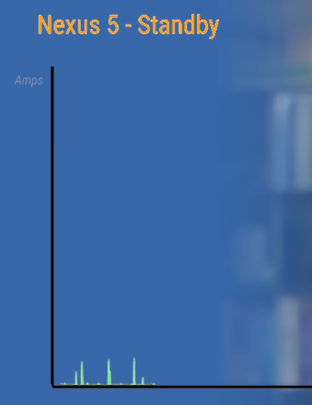
After using and waking up the screen: 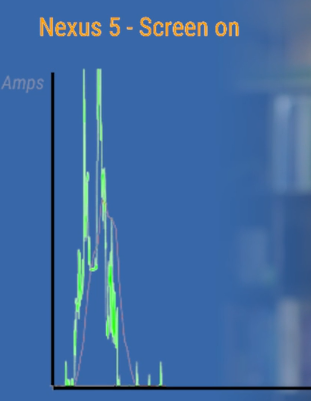
When the device is awakened from dormancy by the application, there will be a peak line of power usage.
When the work is finished, the device will take the initiative to sleep, which is very important. Keeping the screen awake for a long time will quickly consume the battery's power without using or rarely using it.
(2) Cellular wireless 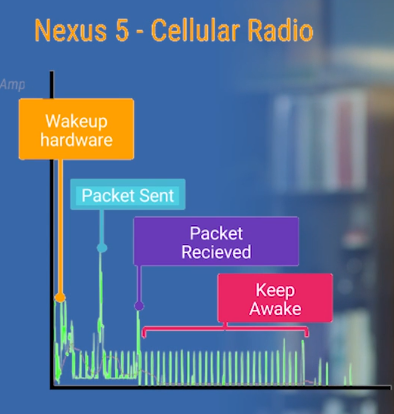
From this picture, we know that there are several peaks when using cellular wireless:
1. When a device sends data over a wireless network, there will be a wake-up peak to use hardware.
2. Next comes a high value, which is the amount of power consumed to send data packets.
3. Accepting data packets also consumes a lot of power and sees a peak.
The process of turning on wireless mode is very power-consuming, so in order to prevent frequent turn-on and turn-off power consumption, the hardware takes a helpless approach. It will keep the open mode for a short period of time to prevent data packets from being received in a short period of time, that is, the section of Keep Awake in the figure.
How to conduct electricity usage analysis?
(1) Electricity data collection
Android 5.0 and above devices allow us to use statistics through the adb command dump.
1. Because the power statistics are continuous, before counting our App to be tested, reset, connect to the device, and execute the command line:
$ adb shell dumpsys batterystats --reset
Battery stats reset.
2. Disconnect the test equipment and operate our App to be tested.
3. Reconnect the device and export the relevant statistics using the adb command:
// This command keeps recording the output. If you want to stop recording, press Ctrl+C to exit.
$ adb bugreport > bugreport.txt
Exported statistics are stored in bugreport.txt, where we can graphically display battery consumption with the following tools.
Note that the official SDK document export file is as follows:
adb shell dumpsys batterystats > batterystats.txt
View data using Python historian. py batterystats. TXT > batterystats. HTML
Battery Historian has been updated to version 2.0. It is recommended to use bug report to export data analysis. More information can be seen.
(2) Power analysis tool Battery Historian
Tool Open Source Address: https://github.com/google/battery-historian
According to gitbub, there are two ways to install the Battery History tool:
1. Install by installing the Docker environment. (Need to turn over the wall)
Docker only supports Windows 10 
Gitbub has commands and addresses like this:
docker -- run -p <port>:9999 gcr.io/android-battery-historian:2.1 --port 99992. Install by compiling the source code on gitbub.
(1)GO environment installation:
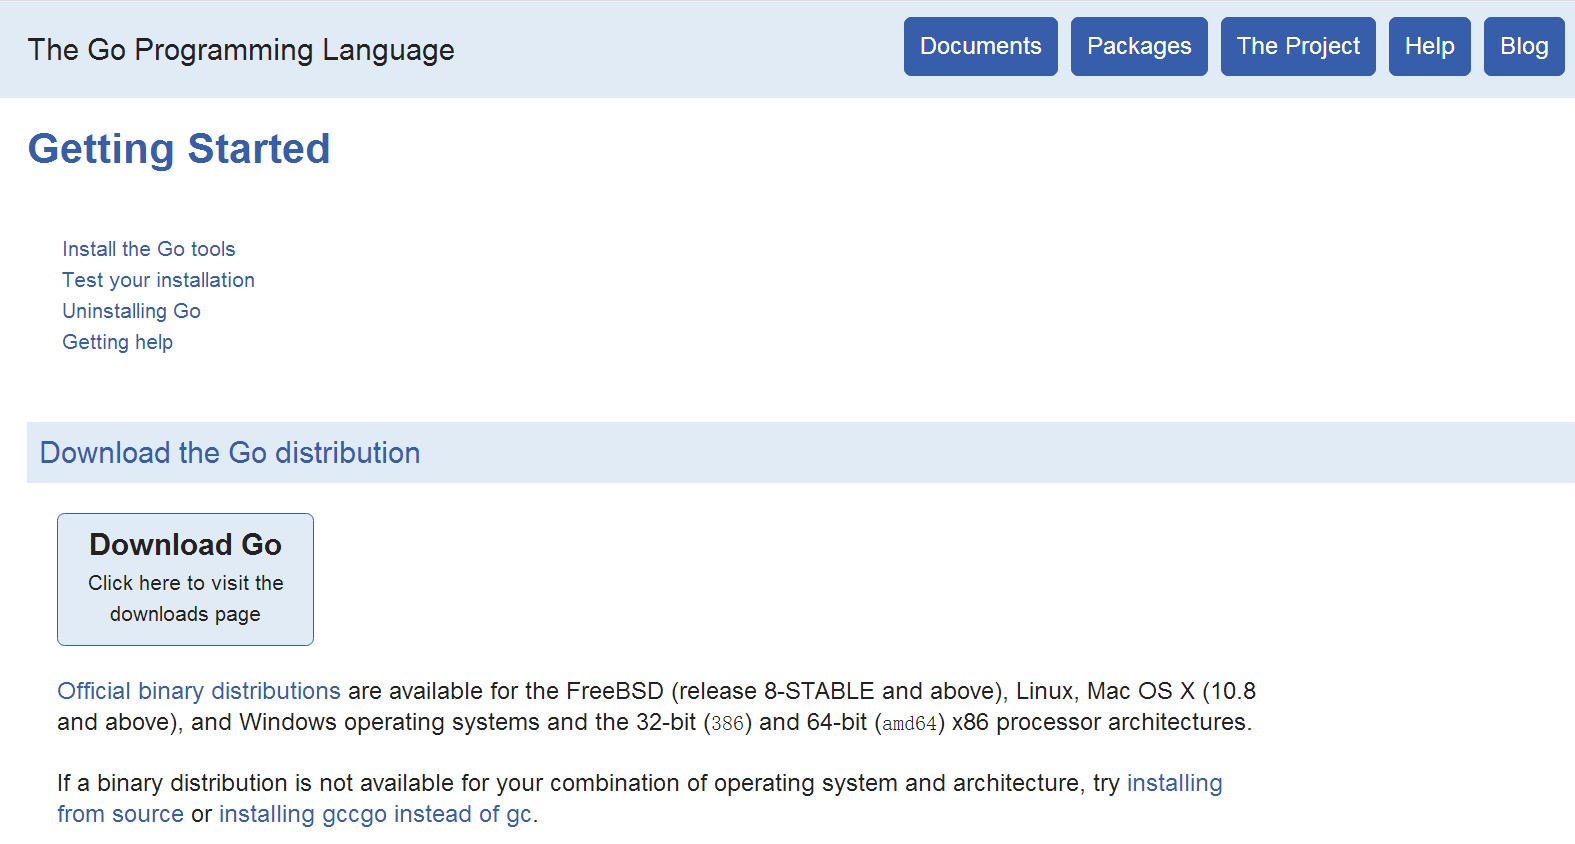
1. Download
Download directory: https://golang.org/doc/install
https://golang.org/doc/install?download=go1.7.3.windows-amd64.msi
2. Installing GO 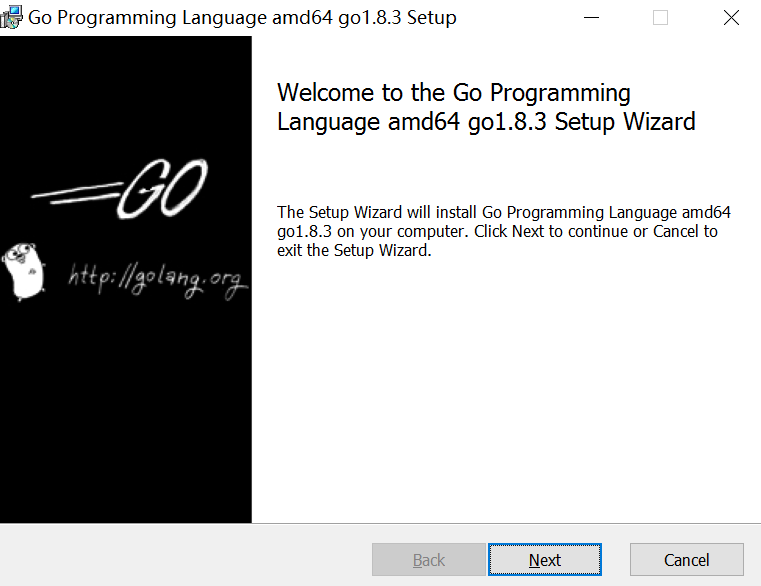
3. Configure GOROOT and GOPATH
a. GOROOT's function is to tell the Go command and other related tools where to find the Go package installed on your system, so the GO installation directory is configured here. 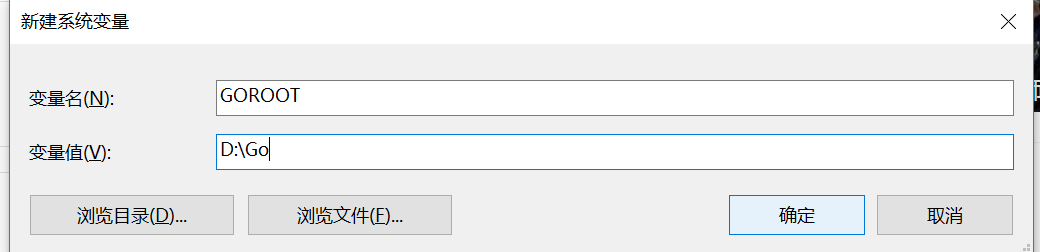
b.GOPATH can be simply understood as a catalog of projects, so create a GO engineering path 
C. Finally, configure the environment variable and put the bin directory of Go into the path environment variable.
D. Check if Go is installed successfully, open the command line and enter Go version 
(2) Install Git
1. Click Download [Download];( https://git-scm.com/ )
2. Install it step by step.
3. Installation Completion Check: Command line input git version 
(3) Install Python
1. Click Download[ download ] Note that only Python 2.7 is supported( https://www.python.org/ )
2. Installation completed;
3. Environment variable configuration, adding Path path, is the Python installation path
4. Enter the command line python-V (note capitalization V) to check if the installation was successful 
(4) Installing the Java environment
1. Click Download[ download];
2. Complete the installation.
(5) Download the Battery Historian source code and run it
Enter the command line go get-d-u github.com/google/battery-historian/...
** Download to GOPATH configuration directory
1. Enter under the $GOPATH/src/github.com/google/battery-history directory
$ cd $GOPATH/src/github.com/google/battery-historian2. Run Battery Historian
1) go run setup.go
$ go run setup.goWait for a few minutes or about 10 minutes. If the download is still unsuccessful, you can download it manually, as follows
** Download[ closure-library ] Unzip the closure-compiler and closure-library and flot-axislabels folders under the third_part folder in the GOROOT directory. / battery-historian third_party if not created manually.
2)go run cmd/battery-historian/battery-historian.go
$ go run cmd/battery-historian/battery-historian.go [--port <default:9999>]battery-historian uses
Data preparation
Battery History in bugreport is required for battery-history tools
1. Disconnect the adb service first, then open the adb service
adb kill-server is an important step, because when we do power recording when we develop, we open up a lot of things that can cause conflicts. For the sake of insurance, we restart adb.
adb devices automatically connect to find the phone. Of course, you can also use adb start-server
2. Data collection of reset batteries
Data, we need to start with the following commands to open the battery data acquisition and reset:
adb shell dumpsys batterystats --enable full-wake-history
adb shell dumpsys batterystats --reset
The above operation is equivalent to the initialization operation. If you don't do this, there will be a lot of interfering data and it will look painful. Then pull out the data line directly (to prevent the data line from interfering with charging and discharging data), and now do some testing, either manually or by running some automated case. After a period of time, we reconnected the phone to confirm that the adb was connected. Run the following command to save the bugreport information into the txt document.
adb bugreport > bugreport.txtOr you can use the following command:
adb shell dumpsys batterystats > batterystats.txt
adb shell dumpsys batterystats > com.example.android.demo.app > batterystats.txt
Add a package name to limit the output of the data we want to detect.
But the data of this txt is not very readable. Next we're going to use the battery-history tool.
Analytical data 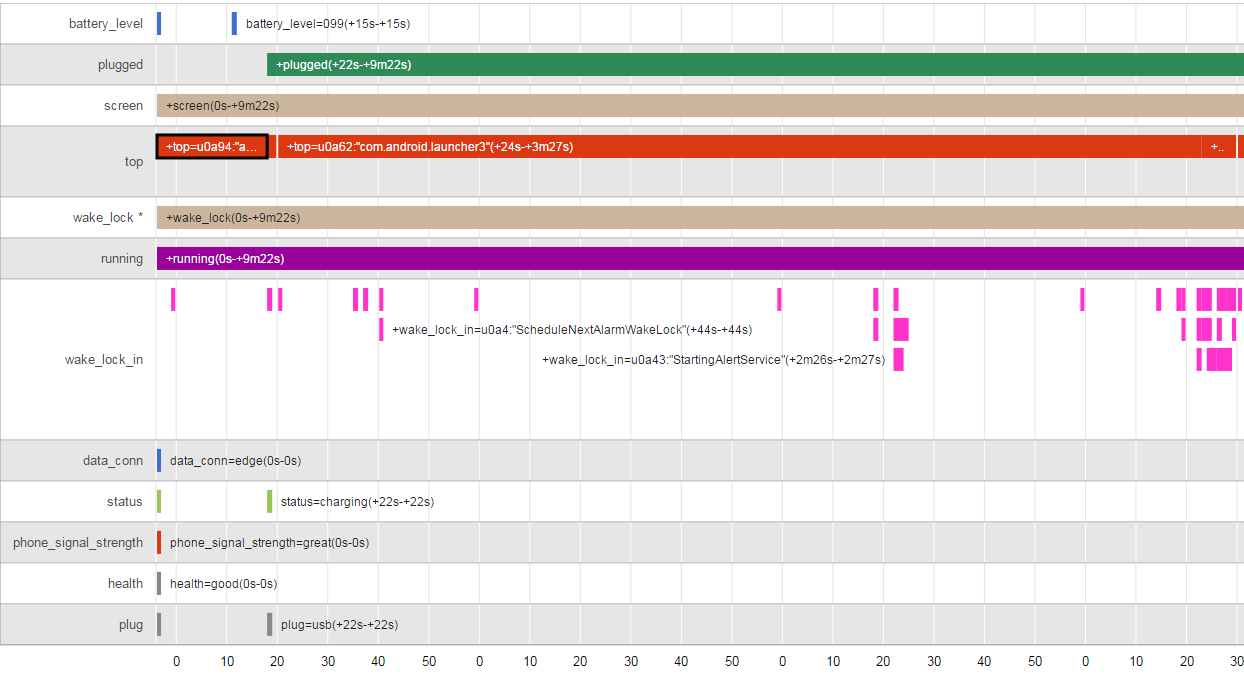
Significance of each parameter
First, we found the Battery History data bar in bugreport.txt, similar to the following information:
-------------------------------------------------------------------------------

DUMP OF SERVICE batterystats:

Battery History (2% used, 5980 used of 256KB, 45 strings using 2592):

                    0 (9) RESET:TIME: 2015-03-05-15-21-56

                    0 (2) 100 c0900422 status=discharging health=good plug=none temp=200 volt=4167 +running +wake_lock +sensor +screen data_conn=edge phone_signal_strength=great brightness=medium proc=u0a15:"android.process.acore"

                    0 (2) 100 c0900422 proc=u0a7:"com.android.cellbroadcastreceiver"

                    0 (2) 100 c0900422 proc=u0a53:"com.android.gallery3d"
You can find information in html from bugreport.txt.
Now let's analyze the significance of each indicator.
Abscissa

The 10 and 20 above represent seconds. It is a minute cycle and becomes zero at 60 seconds. The abscissa is a time range. The statistical data in our example starts with reset and ends with the time of getting bugreport content. How long did we collect the data? There is also information under the chart. (According to feedback from others, this coordinate interval will change with the length of time, so it should be based on your actual situation. This zoom level can be adjusted as follows:

Ordinates
| data item | Meaning |
|---|---|
| battery_level | The change of electricity can be seen from the quantity of electricity. |
| plugged | Charging status. This column shows whether or not the charge has been made and the time range of the charge. |
| screen | Whether the screen is lit or not can take into account the use of electricity during sleep and lighting |
| top | This column shows which app is at the top level at the current time, which is the app running on the current mobile phone. It is used to judge the impact of an app on the power consumption of the mobile phone, so that it can also determine the power consumption information of the app. This column records the start-up and running time of the application at a certain time, which is helpful for us to compare the impact of different applications on performance. |
| wake_lock | Wake_lock This property records the working time of the wake_lock module. Is there a time to stop waiting? |
| running | The state of the interface is mainly to judge whether it is idle or not. Used to judge the consumption of electricity in the state of no operation |
| Job | Background work, such as service operation |
| data_conn | Change of data connection mode, the edge above is to explain the use of gprs mode to connect the network. This data shows whether mobile phones use 2g, 3g, 4g or wifi for data exchange. This column shows the impact of different connection modes on power usage. |
| status | Battery status information, including charging, discharging, non-charging, full, unknown and other different states |
| phone_signal_strength | Change of mobile phone signal status. This column records the intensity of mobile phone signals, and then judges the impact of mobile phone signals on power. |
| health | Battery health information, which partly reflects how long the battery has been used |
| plug | Charging mode, usb or socket, and display connection time |
| Sync | Is it synchronized with the background? |
| phone_in_call | Whether to communicate or not |
| gps | Whether gps is on or not |
Optimizing Electricity Quantity
Track Battery Status & Battery Manager
We can get the current charging status of the mobile phone through the following code:
// It is very easy to subscribe to changes to the battery state, but you can get the current
// state by simply passing null in as your receiver. Nifty, isn't that?
IntentFilter filter = new IntentFilter(Intent.ACTION_BATTERY_CHANGED);
Intent batteryStatus = this.registerReceiver(null, filter);
int chargePlug = batteryStatus.getIntExtra(BatteryManager.EXTRA_PLUGGED, -1);
boolean acCharge = (chargePlug == BatteryManager.BATTERY_PLUGGED_AC);
if (acCharge) {
 Log.v(LOG_TAG,"The phone is charging!");
 }
The example above demonstrates how to get the charging status of the mobile phone immediately. After getting the charging status information, we can optimize some of the code pertinently. For example, we can judge that only when the current mobile phone is charging AC, it will perform some very power-consuming operations.
/** * This method checks for power by comparing the current battery state against all possible * plugged in states. In this case, a device may be considered plugged in either by USB, AC, or * wireless charge. (Wireless charge was introduced in API Level 17.) */
 private boolean checkForPower() {
IntentFilter filter = new IntentFilter(Intent.ACTION_BATTERY_CHANGED); Intent batteryStatus = this.registerReceiver(null, filter);
 // There are currently three ways a device can be plugged in. We should check them all.
boolean usbCharge = (chargePlug == BatteryManager.BATTERY_PLUGGED_USB);
boolean acCharge = (chargePlug == BatteryManager.BATTERY_PLUGGED_AC);
boolean wirelessCharge = false;
if (Build.VERSION.SDK_INT >= Build.VERSION_CODES.JELLY_BEAN_MR1)
{ wirelessCharge = (chargePlug ==   BatteryManager.BATTERY_PLUGGED_WIRELESS);
}
return (usbCharge || acCharge || wirelessCharge);
 }
Screen wake-up
Sometimes we need to change the default state of Android: for example, when playing games, we need to keep the screen always bright, for example, some download operations do not need the screen always bright, but need the CPU to run until the task is completed.
The best way is to use Flag of FLAG_KEEP_SCREEN_ON in Activity.
getWindow().addFlags(WindowManager.LayoutParams.FLAG_KEEP_SCREEN_ON);Another way is to use the android:keepScreenOn attribute in the layout file:
<RelativeLayout xmlns:android="http://schemas.android.com/apk/res/android"
    android:layout_width="match_parent"
    android:layout_height="match_parent"
    android:keepScreenOn="true">
    ...
</RelativeLayout>
Android: keep ScreenOn = "true" acts as FLAG_KEEP_SCREEN_ON. The advantage of using code is that you allow you to close the screen where you need it.
Note: In general, it is not necessary to artificially remove the flag of FLAG_KEEP_SCREEN_ON. Windows Manager will manage the operation of entering the background and returning to the front desk. If you do need to manually clear the normally bright flag, use getWindow (). clearFlags (Windows Manager. LayoutParams. FLAG_KEEP_SCREEN_ON)
Wakelock and Battery Drain
Assuming that your phone contains a large number of social applications, even if the phone is on standby, it will often be waked up by these applications to check for synchronization of new data information. One of the easiest ways to wake up a cell phone is to use the API of PowerManager.WakeLock to keep the CPU working and prevent the screen from darkening and closing. This allows the phone to wake up, perform work, and then go back to sleep. Knowing how to get WakeLock is simple, but releasing WakeLock in time is also very important, inappropriate use of WakeLock can lead to serious errors. For example, the data return time of network requests is uncertain, which leads to the fact that only 10 seconds of work has been waiting for an hour, which will waste electricity. This is why the wakelock.acquice() method with timeout parameters is critical.
wake_lock lock lock is mainly relative to the dormancy of the system, which means that if my program adds this lock to the CPU, the system will not dormancy. The purpose of this is to cooperate fully with the operation of our program. In some cases, if we don't do this, there will be some problems, such as the heartbeat of timely communication such as Wechat will stop network access shortly after the screen is turned off. So wake_lock locks are widely used in Wechat.
wake_lock: Two kinds of locks, one counting locks; the other non-counting locks (locks are locked many times and can be release d only once)
Wake-up locks can be divided into four types:
| Markup value | CPU | screen | keyboard |
|---|---|---|---|
| PARTIAL_WAKE_LOCK | open | Close | Close |
| Markup value | open | Darken | Close |
| Markup value | open | Brighten | Close |
| Markup value | open | Brighten | Brighten |
Since API level 17, FULL_WAKE_LOCK has been discarded. Instead, use FLAG_KEEP_SCREEN_ON.
Add wake-up lock permissions:
<uses-permission android:name="android.permission.WAKE_LOCK" />Direct use of wake-up locks:
PowerManager powerManager = (PowerManager) getSystemService(POWER_SERVICE);
WakeLock wakeLock = powerManager.newWakeLock(PowerManager.PARTIAL_WAKE_LOCK,"MyWakelockTag");
wakeLock.acquire();
Note: When using this class, you must ensure that acquire and release occur in pairs. Otherwise, when our business is no longer needed, when the CPU is awake, it will lose excess power.
But setting timeouts alone is not enough to solve the problem, such as how long is the appropriate timeout? When will the retry take place and so on? The correct way to solve the above problem may be to use an inaccurate timer. Usually, we set a time for an operation, but dynamic modification of the time may be better. For example, if there's another program that needs to wake up five minutes later than the time you set, it's best to wait until that time, when two tasks are bundled together at the same time, which is the core principle of the imprecise timer. We can customize planned tasks, but if the system detects a better time, it can delay your tasks to save power consumption.
JobScheduler
Job Schedule's aim is to batch some tasks that are not particularly urgent at a more appropriate time.
Customize a Service class that inherits from JobService
public class JobSchedulerService extends JobService{
    private String TAG = JobSchedulerService.class.getSimpleName();

    @Override
    public boolean onStartJob(JobParameters jobParameters) {
        Log.d(TAG, "onStartJob:" + jobParameters.getJobId());

        if(true) {
            // JobService runs on the main thread. If we need to process the time-consuming business logic here, we need to open a separate sub-thread to process and return true.
            // When a given task is completed, the system is informed by calling jobFinished(JobParameters params, boolean needsRescheduled).

            //Suppose you open a thread to download files
            new DownloadTask().execute(jobParameters);

            return true;

        }else {
            //If you just execute some simple logic in this method, you can return false.
            return false;
        }
    }

    /**
     * For example, our services set constraints to run in WIFI state, resulting in WIFI disconnecting the system during task operation.
     * We will be notified to stop running by dropping onStopJob(), which will not normally be returned.
     *
     * @param jobParameters
     * @return
     */
    @Override
    public boolean onStopJob(JobParameters jobParameters) {
        Log.d(TAG, "onStopJob:" + jobParameters.getJobId());

        //If you need the service to execute the service again when the agreed conditions are met again, return true and vice versa
        return true;
    }

    class DownloadTask extends AsyncTask<JobParameters, Object, Object> {
        JobParameters mJobParameters;

        @Override
        protected Object doInBackground(JobParameters... jobParameterses) {
            mJobParameters = jobParameterses[0];

            //For example, let's deal with a download task here.
            //Or deal with some of the more complex operational logic
            //...

            try {
                Thread.sleep(30*1000);
            } catch (InterruptedException e) {
                e.printStackTrace();
            }

            return null;
        }

        @Override
        protected void onPostExecute(Object o) {
            super.onPostExecute(o);
            //If true is returned in onStartJob(), the system must be informed of completion by executing jobFinished() after processing logic.
            //If you need to rearrange services, please be true, and vice versa
            jobFinished(mJobParameters, false);
        }
    }
}
Remember to configure Service in the Manifest file
<service android:name=".JobSchedulerService" android:permission="android.permission.BIND_JOB_SERVICE"/>Create a work plan
public class MainActivity extends Activity{
    private JobScheduler mJobScheduler;
    private final int JOB_ID = 1;

    @Override
    protected void onCreate(Bundle savedInstanceState) {
        super.onCreate(savedInstanceState);
        setContentView(R.layout.mai_layout);

        mJobScheduler = (JobScheduler) getSystemService(Context.JOB_SCHEDULER_SERVICE );

        //Constraints to trigger services are set by JobInfo.Builder, with at least one condition
        JobInfo.Builder jobBuilder = new JobInfo.Builder(JOB_ID, new ComponentName(this, JobSchedulerService.class));

        //Cyclic triggering, setting tasks to run periodically every three seconds
        jobBuilder.setPeriodic(3000);

        //Single timing trigger, set to trigger after three seconds. This is incompatible with setPeriodic(long time).
        // And using both functions at the same time will cause an exception to be thrown.
        jobBuilder.setMinimumLatency(3000);

        //The trigger starts after three seconds when the conditions set in the agreed time are not triggered. Similar to setMinimum Latency (long time),
        // This function is mutually exclusive from setPeriodic(long time), and if both functions are used at the same time, an exception will be thrown.
        jobBuilder.setOverrideDeadline(3000);

        //Is the trigger condition set after device restart still valid?
        jobBuilder.setPersisted(false);

        // It triggers only when the device is in a particular network state.
        // JobInfo.NETWORK_TYPE_NONE, whether or not the network can trigger, this is the default value;
        // JobInfo.NETWORK_TYPE_ANY, triggered when there is a network connection;
        // JobInfo.NETWORK_TYPE_UNMETERED, triggered in non-cellular networks;
        // JobInfo.NETWORK_TYPE_NOT_ROAMING can be triggered only when it is not roaming the network.
        jobBuilder.setRequiredNetworkType(JobInfo.NETWORK_TYPE_UNMETERED);

        //Setting the trigger when the mobile phone is charged
        jobBuilder.setRequiresCharging(true);

        //Setting the trigger when the phone is idle
        jobBuilder.setRequiresDeviceIdle(true);

        //Get the JobInfo object
        JobInfo jobInfo = jobBuilder.build();

        //Set up to start scheduling tasks, which will return a status code
        //JobScheduler.RESULT_SUCCESS, Success
        //JobScheduler.RESULT_FAILURE, Failure
        if (mJobScheduler.schedule(jobInfo) == JobScheduler.RESULT_FAILURE) {
            //Failure to arrange tasks
        }

        //Stop specifying JobId's work service
        mJobScheduler.cancel(JOB_ID);
        //Stop all work services
        mJobScheduler.cancelAll();
    }