1, Test SMTP service with telnet command
-
POP3
POP3 is the abbreviation of Post Office Protocol 3, that is, the third version of post office protocol. It specifies how to connect a personal computer to a mail server on the Internet and an electronic protocol for downloading e-mail. It is the first offline protocol standard for Internet e-mail. POP3 allows users to store e-mail from the server to the local host (i.e. their own computer) and delete the e-mail saved on the e-mail server. POP3 server is a mail receiving server following POP3 protocol to receive e-mail. (what's the difference between POP3 and IMAP?) -
SMTP (used this time)
The full name of SMTP is "Simple Mail Transfer Protocol", that is, simple mail transfer protocol. It is a set of specifications for transmitting mail from source address to destination address, which controls the transfer mode of mail. SMTP protocol belongs to TCP/IP protocol cluster. It helps each computer find the next destination when sending or forwarding letters. An SMTP server is a sending mail server that follows the SMTP protocol.
SMTP authentication, in short, requires that you must provide the account name and password before you can log in to the SMTP server, which makes those spammers have no opportunity.
The purpose of adding SMTP authentication is to prevent users from being invaded by spam. -
IMAP
The full name of IMAP is Internet Mail Access Protocol, that is, Interactive Mail Access Protocol. It is one of the mail access standard protocols similar to POP3. The difference is that after IMAP is enabled, the mail you receive from the e-mail client remains on the server. At the same time, the operations on the client will be fed back to the server, such as deleting mail, marking read, etc. the mail on the server will also take corresponding actions. Therefore, whether you log in to the mailbox from the browser or the mailbox from the client software, the mail and status you see are consistent.
1. Open the SMTP service of QQ mailbox
Click settings

Click account

Start pop3/smtp service

2. Open telnet client
telnet is not turned on by default under win10 and needs to be turned on manually.
1. Open control panel – > programs – > programs and features – > turn Windows features on or off
2. Find Telnet client – > Click tick – > OK
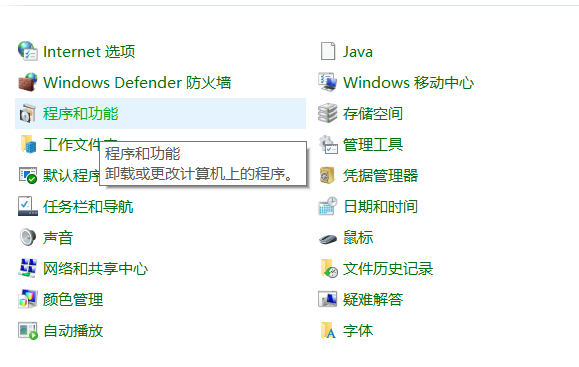
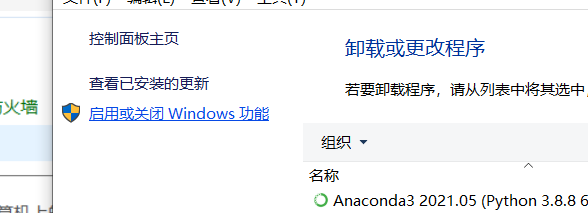
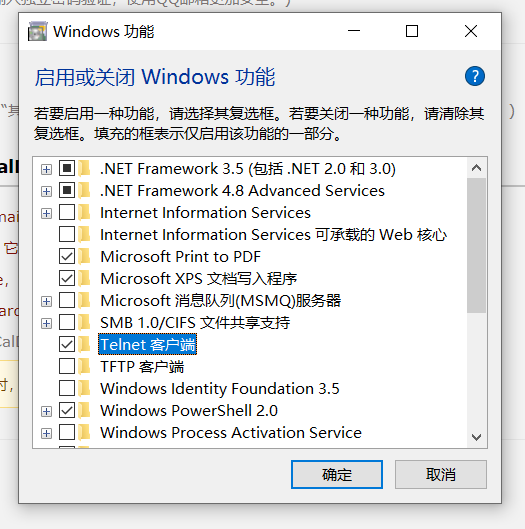
3.CMD uses telnet command to test SMTP service
Open cmd and enter: telnet SMTP qq. Com 25, connect to the mail server, as shown in the figure below

Enter Hello QQ Com to identify to the server
Enter auth login
Enter the base64 encoding of the mailbox( xxxxxxxxxx@qq.com Base64 encoding)
Enter the base64 code of the authorization code when IMAP/SMPT is enabled (the authorization code has no space)
base64 encoded website: http://tool.chinaz.com/Tools/Base64.aspx
Note: when copying the mailbox and authorization code, pay attention to delete the space and enter key
Enter the sender's email address mail from: xxxxxxxxxx@qq.com
Enter recipient email rcpt to: xxxxxxxxxx@qq.com
Enter data and press enter. After success, you can edit the message body
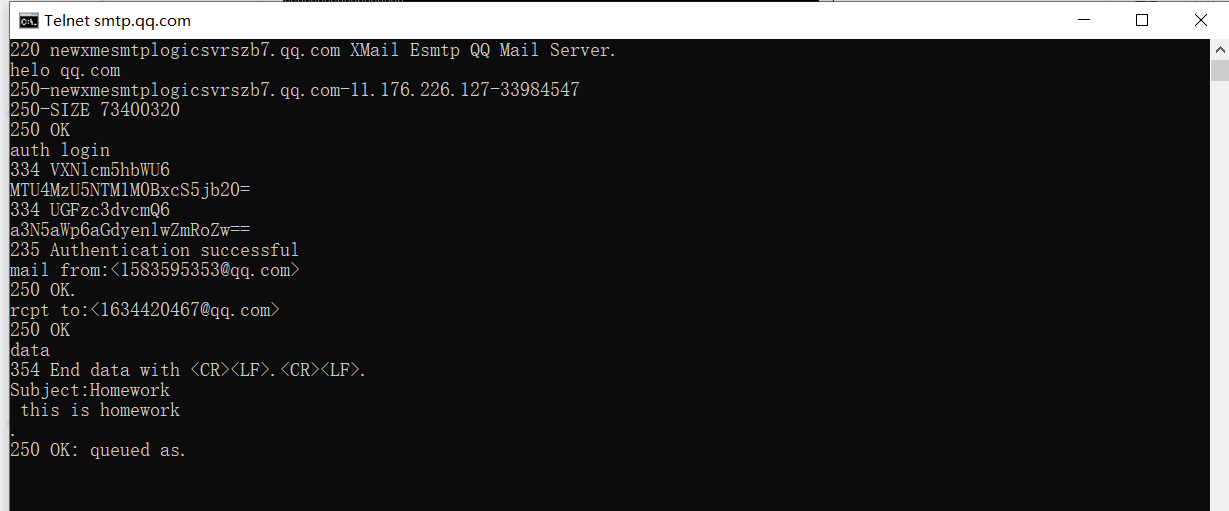
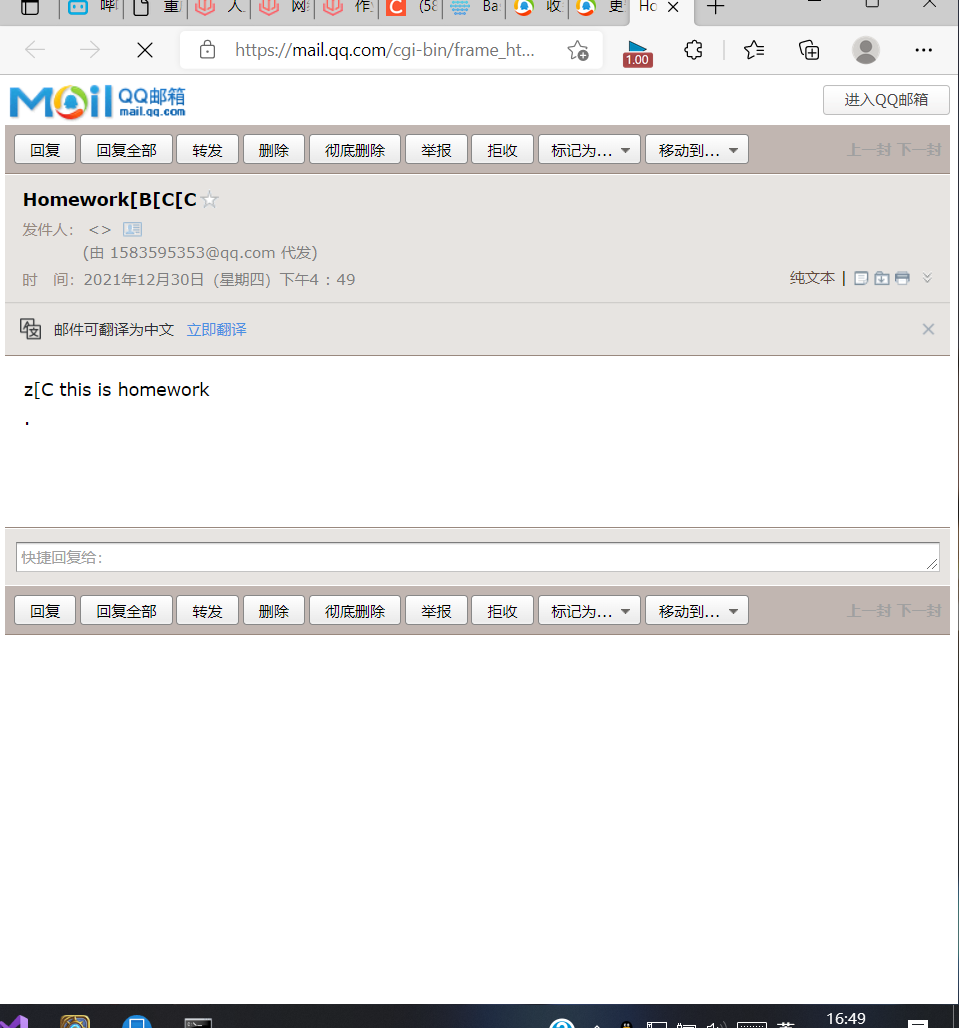
Sent successfully
2, FTP service
- FTP protocol
FTP File Transfer Protocol (FTP) is one of the protocols in the TCP/IP protocol group. The FTP protocol includes two components, one is the FTP server, and the other is the FTP client. The FTP server is used to store files. Users can use the FTP client to access resources on the FTP server through the FTP protocol. When developing websites, they usually use the FTP protocol to Web pages or programs are transferred to the web server. In addition, because FTP transmission efficiency is very high, it is generally used when transmitting large files on the network.
By default, FTP protocol uses 20 and 21 of TCP ports, of which 20 is used to transmit data and 21 is used to transmit control information. However, whether to use 20 as the data transmission port is related to the transmission mode used by FTP. If the active mode is adopted, the data transmission port is 20; If the passive mode is adopted, the specific port to be used should be determined through negotiation between the server and the client. - HTTP1.1 agreement
HTTP1. Hypertext Transfer Protocol Version 1.1
It is a transfer protocol used to transfer hypertext over the Internet. It is an HTTP application protocol running on the TCP/IP protocol cluster. It can make the browser more efficient and reduce network transmission. In addition to HTML files, any server also has an HTTP resident program to respond to application user requests. Your browser is an HTTP client and sends a request to the server. When a start file is entered in the browser or a hyperlink is clicked, the browser sends an HTTP request to the server, which is sent to the IP address specified by the URL. The resident program receives the request and sends back the required file after necessary operations.
HTTP1.1. Support continuous connection Through this connection, it is possible to send requests and get responses after establishing a TCP connection, and then send more requests and get more responses By allocating the cost of establishing and releasing TCP connections to multiple requests, the relative cost caused by TCP is greatly reduced for each request Moreover, a pipeline request can also be sent, that is, request 2 can be sent before the response after sending request 1 arrives It can also be considered that a connection sends multiple requests, and the client confirms whether to close the connection, while the server will think that these requests come from different clients.
In contrast, http1 0. After the connection is established, the browser sends a request, and then a response message is sent back The TCP connection is then released In the early days, Web pages usually contained only HTML text. In this case, this is enough However, Web pages generally contain a large number of icons, images and other eye-catching content, so it is too expensive to establish a TCP connection to transmit only one icon
1. Install ftp
Open Ubuntu
Enter root permission mode first
apt install vsftpd
2. Configuration parameters
vim /etc/vsftpd.conf
You only need to make the following simple modifications, and the modification results are as follows:
# Example config file /etc/vsftpd.conf
#
# The default compiled in settings are fairly paranoid. This sample file
# loosens things up a bit, to make the ftp daemon more usable.
# Please see vsftpd.conf.5 for all compiled in defaults.
#
# READ THIS: This example file is NOT an exhaustive list of vsftpd options.
# Please read the vsftpd.conf.5 manual page to get a full idea of vsftpd's
# capabilities.
#
#
# Run standalone?  vsftpd can run either from an inetd or as a standalone
# daemon started from an initscript.
listen=NO
#
# This directive enables listening on IPv6 sockets. By default, listening
# on the IPv6 "any" address (::) will accept connections from both IPv6
# and IPv4 clients. It is not necessary to listen on *both* IPv4 and IPv6
# sockets. If you want that (perhaps because you want to listen on specific
# addresses) then you must run two copies of vsftpd with two configuration
# files.
listen_ipv6=YES
#
# Allow anonymous FTP? (Disabled by default).
anonymous_enable=NO
#
# Uncomment this to allow local users to log in.
local_enable=YES
#
# Uncomment this to enable any form of FTP write command.
write_enable=YES
#
# Default umask for local users is 077. You may wish to change this to 022,
# if your users expect that (022 is used by most other ftpd's)
#local_umask=022
#
# Uncomment this to allow the anonymous FTP user to upload files. This only
# has an effect if the above global write enable is activated. Also, you will
# obviously need to create a directory writable by the FTP user.
#anon_upload_enable=YES
#
# Uncomment this if you want the anonymous FTP user to be able to create
# new directories.
#anon_mkdir_write_enable=YES
#
# Activate directory messages - messages given to remote users when they
# go into a certain directory.
dirmessage_enable=YES
#
# If enabled, vsftpd will display directory listings with the time
# in  your  local  time  zone.  The default is to display GMT. The
# times returned by the MDTM FTP command are also affected by this
# option.
use_localtime=YES
#
# Activate logging of uploads/downloads.
xferlog_enable=YES
#
# Make sure PORT transfer connections originate from port 20 (ftp-data).
connect_from_port_20=YES
#
# If you want, you can arrange for uploaded anonymous files to be owned by
# a different user. Note! Using "root" for uploaded files is not
# recommended!
#chown_uploads=YES
#chown_username=whoever
#
# You may override where the log file goes if you like. The default is shown
# below.
xferlog_file=/var/log/vsftpd.log
#
# If you want, you can have your log file in standard ftpd xferlog format.
# Note that the default log file location is /var/log/xferlog in this case.
xferlog_std_format=YES
#
# You may change the default value for timing out an idle session.
#idle_session_timeout=600
#
# You may change the default value for timing out a data connection.
#data_connection_timeout=120
#
# It is recommended that you define on your system a unique user which the
# ftp server can use as a totally isolated and unprivileged user.
#nopriv_user=ftpsecure
#
# Enable this and the server will recognise asynchronous ABOR requests. Not
# recommended for security (the code is non-trivial). Not enabling it,
# however, may confuse older FTP clients.
#async_abor_enable=YES
#
# By default the server will pretend to allow ASCII mode but in fact ignore
# the request. Turn on the below options to have the server actually do ASCII
# mangling on files when in ASCII mode.
# Beware that on some FTP servers, ASCII support allows a denial of service
# attack (DoS) via the command "SIZE /big/file" in ASCII mode. vsftpd
# predicted this attack and has always been safe, reporting the size of the
# raw file.
# ASCII mangling is a horrible feature of the protocol.
#ascii_upload_enable=YES
#ascii_download_enable=YES
#
# You may fully customise the login banner string:
ftpd_banner=Welcome to blah FTP service.
#
# You may specify a file of disallowed anonymous e-mail addresses. Apparently
# useful for combatting certain DoS attacks.
#deny_email_enable=YES
# (default follows)
#banned_email_file=/etc/vsftpd.banned_emails
#
# You may restrict local users to their home directories.  See the FAQ for
# the possible risks in this before using chroot_local_user or
# chroot_list_enable below.
chroot_local_user=YES
#
# You may specify an explicit list of local users to chroot() to their home
# directory. If chroot_local_user is YES, then this list becomes a list of
# users to NOT chroot().
# (Warning! chroot'ing can be very dangerous. If using chroot, make sure that
# the user does not have write access to the top level directory within the
# chroot)
#chroot_local_user=YES
chroot_list_enable=YES
# (default follows)
chroot_list_file=/etc/vsftpd.chroot_list
#
# You may activate the "-R" option to the builtin ls. This is disabled by
# default to avoid remote users being able to cause excessive I/O on large
# sites. However, some broken FTP clients such as "ncftp" and "mirror" assume
# the presence of the "-R" option, so there is a strong case for enabling it.
#ls_recurse_enable=YES
#
# Customization
#
# Some of vsftpd's settings don't fit the filesystem layout by
# default.
#
# This option should be the name of a directory which is empty.  Also, the
# directory should not be writable by the ftp user. This directory is used
# as a secure chroot() jail at times vsftpd does not require filesystem
# access.
secure_chroot_dir=/var/run/vsftpd/empty
#
# This string is the name of the PAM service vsftpd will use.
pam_service_name=ftp
# pam_service_name=vsftpd
#
# This option specifies the location of the RSA certificate to use for SSL
# encrypted connections.
rsa_cert_file=/etc/ssl/certs/ssl-cert-snakeoil.pem
rsa_private_key_file=/etc/ssl/private/ssl-cert-snakeoil.key
ssl_enable=NO

# Uncomment this to indicate that vsftpd use a utf8 filesystem.
utf8_filesystem=YES
3. Add user
mkdir /home/ftpuser
sudo useradd ftpuser -d /home/ftpuser -m
sudo passwd ftpuser     # To set the password, remember that if I set the password here, it is also ftpuser
mkdir /home/ftpuser/ftp
sudo chown -R ftpuser:ftpuser /home/ftpuser/ftp # Or save trouble chmod 777 -R /home/ftpuser/ftp
4. Configure login user
vim /etc/vsftpd.chroot_list
Just write ftpuser directly
service vsftpd restart # restart
3, VLC
Download address: https://www.videolan.org/index.zh_CN.html
Tiktok web page
Check
Select network media header
Copy url
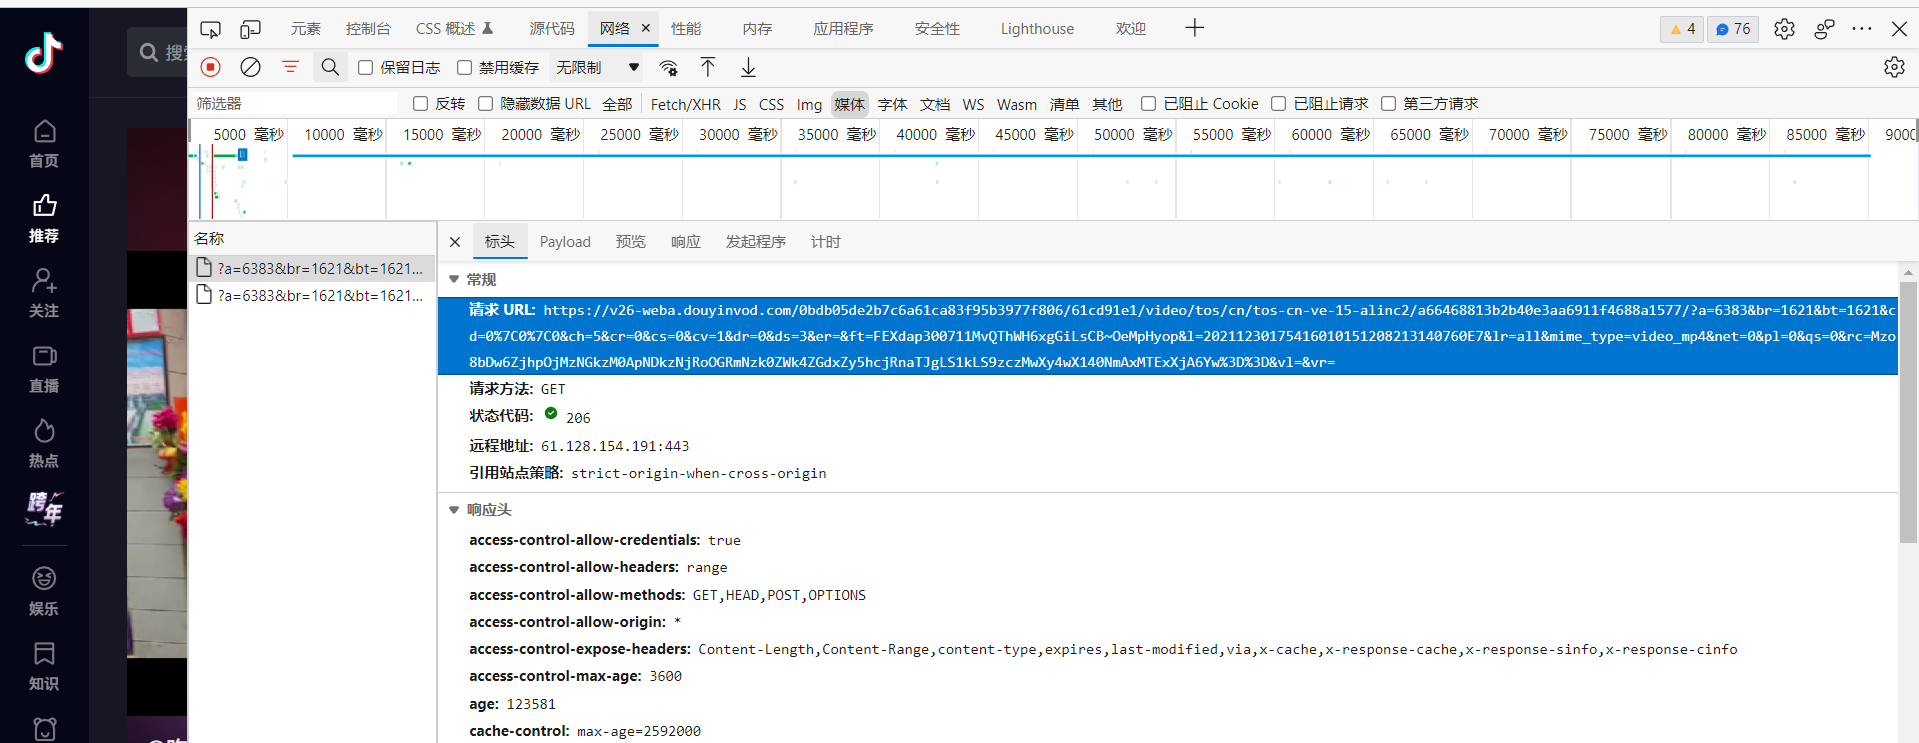
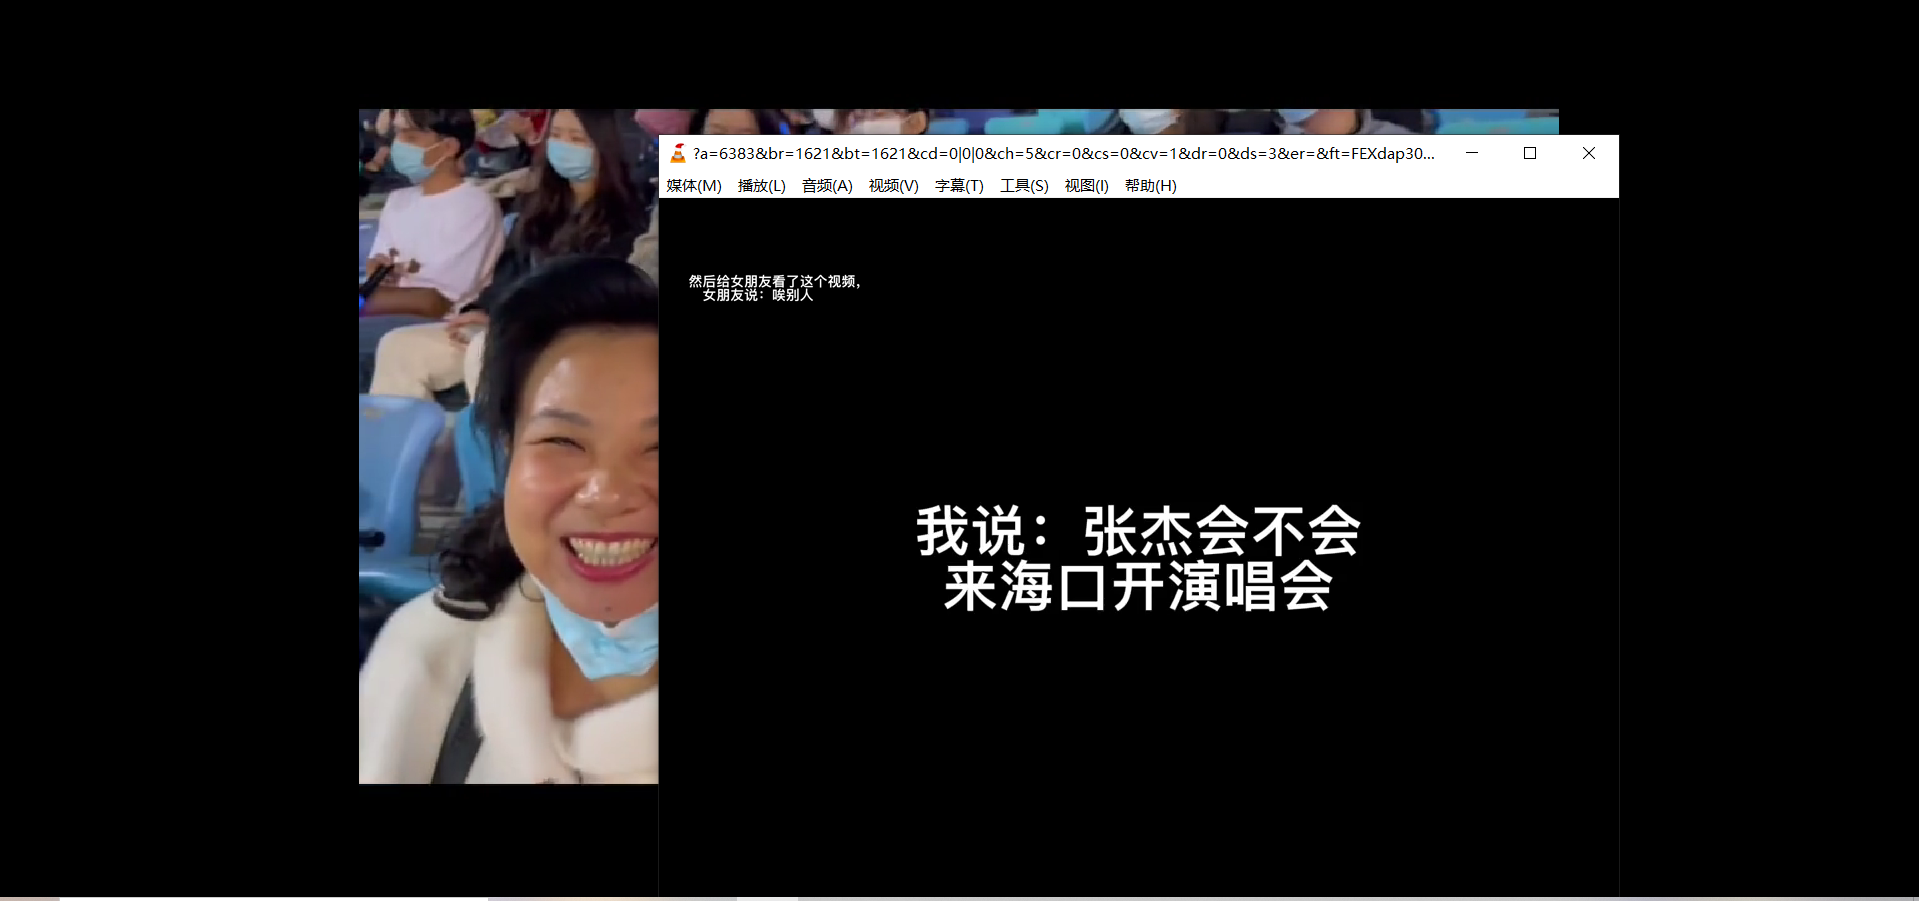
All vlc browsers were opened successfully
4, fiddler analysis video website
Tiktok page

fidder view
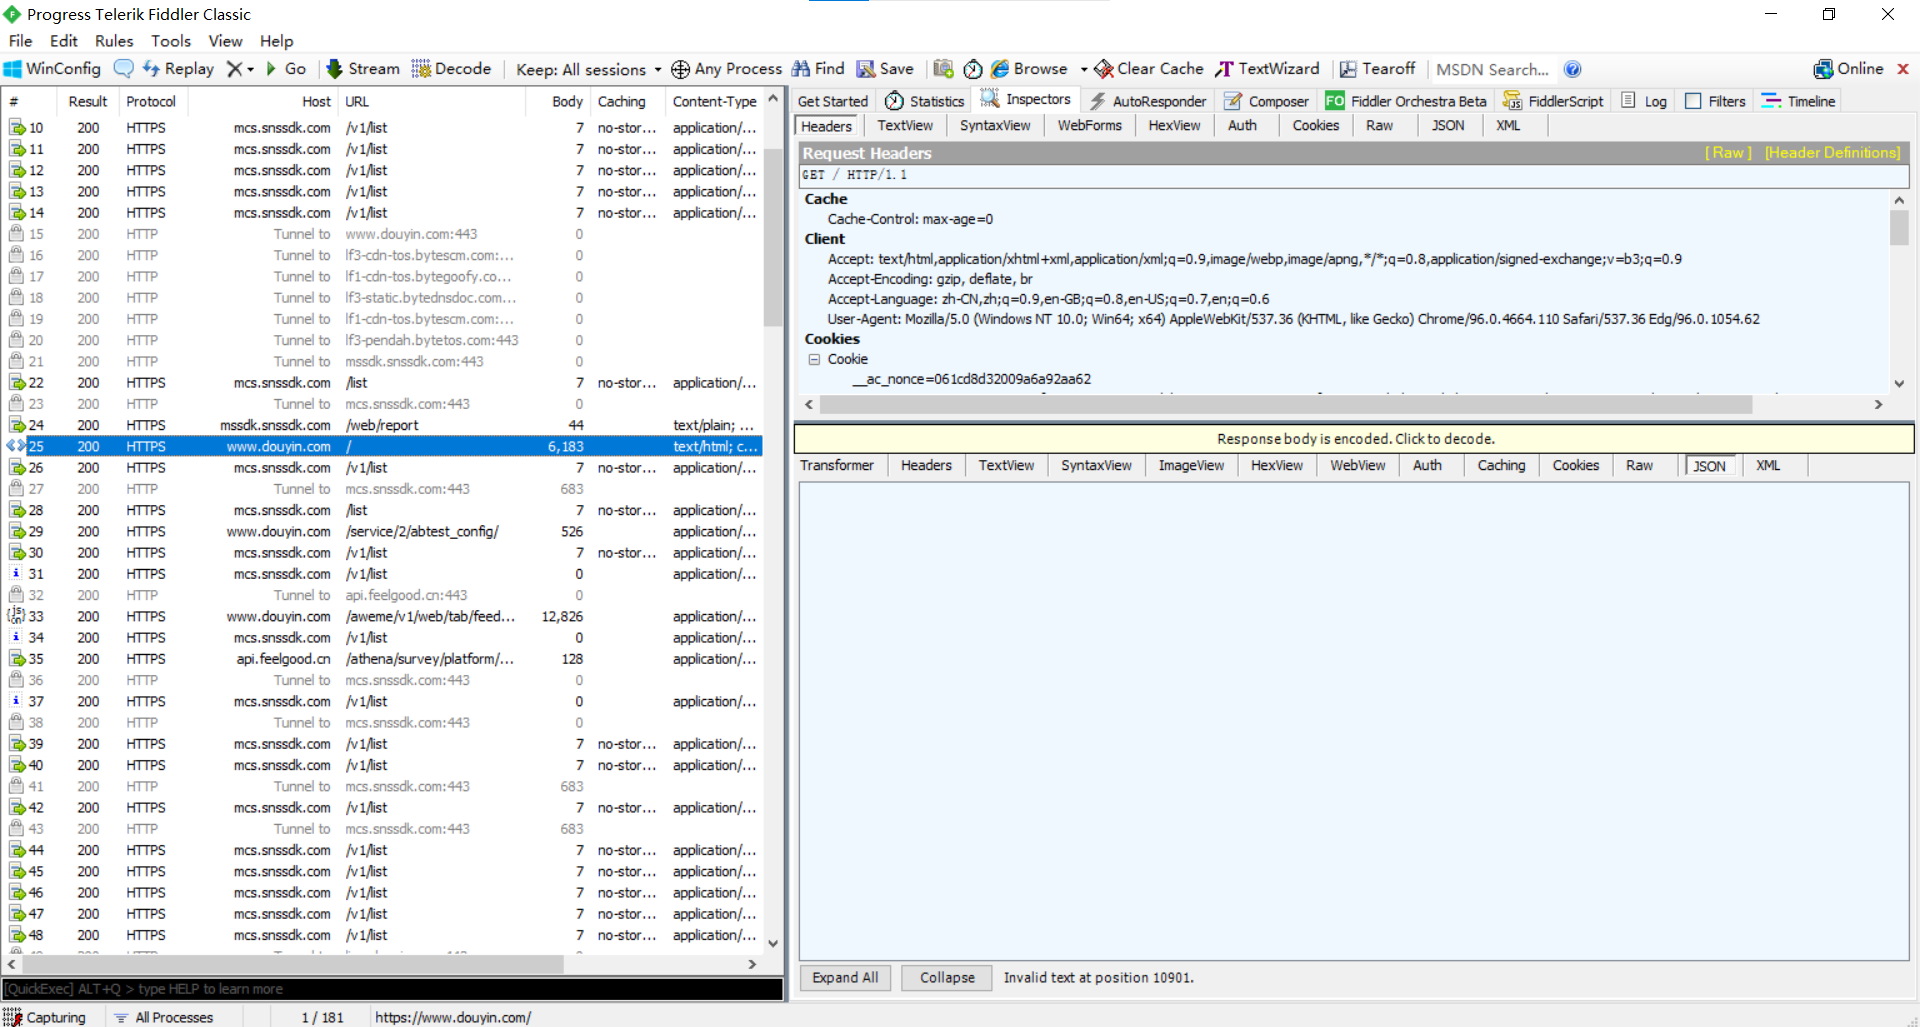
Analyze the first captured json package

This json package contains the details of six videos, the videos you see and the next five videos

The three URLs of the first video package are video links

You can download it directly
Through these packets, we can find that the network streaming protocol of video is HTTPS