^_^
1. Configure local hadoop
Hadoop 2.7.5 link: https://pan.baidu.com/s/12ef3m0CV21NhjxO7lBH0Eg
Extraction code: hhhh
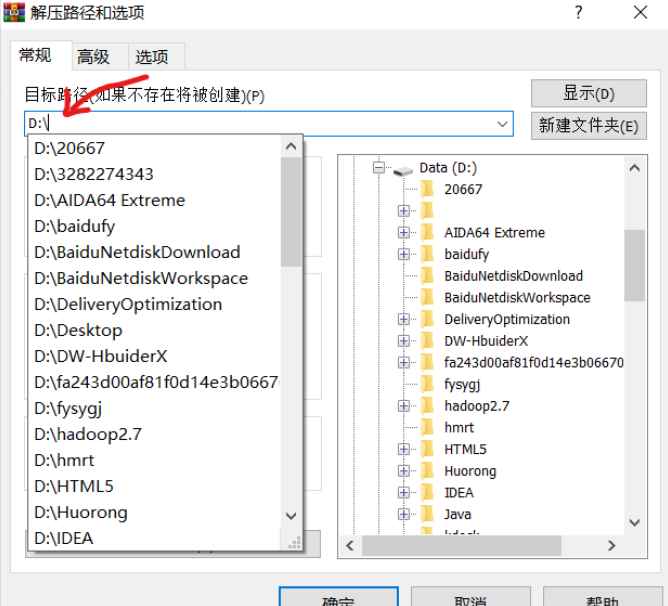
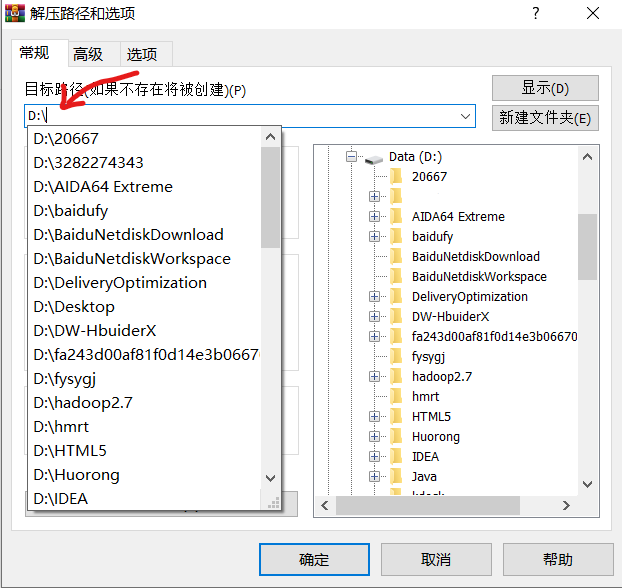
Unzip the downloaded hadoop package to disk D for easy search
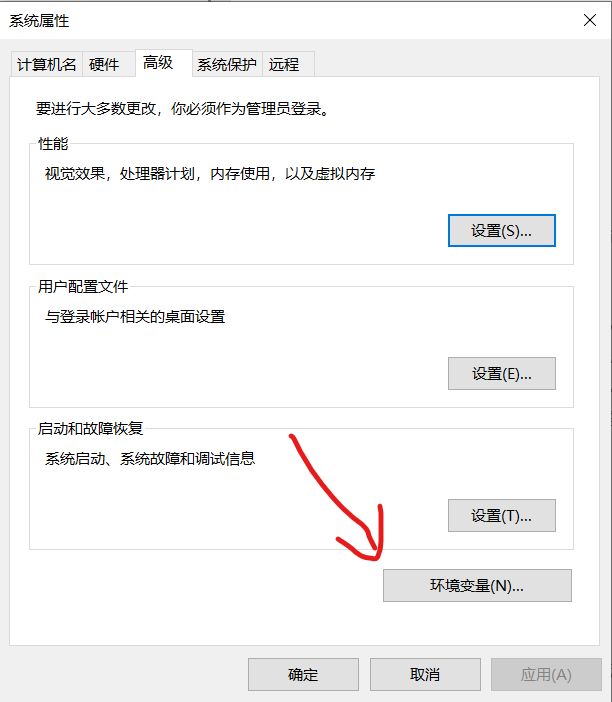
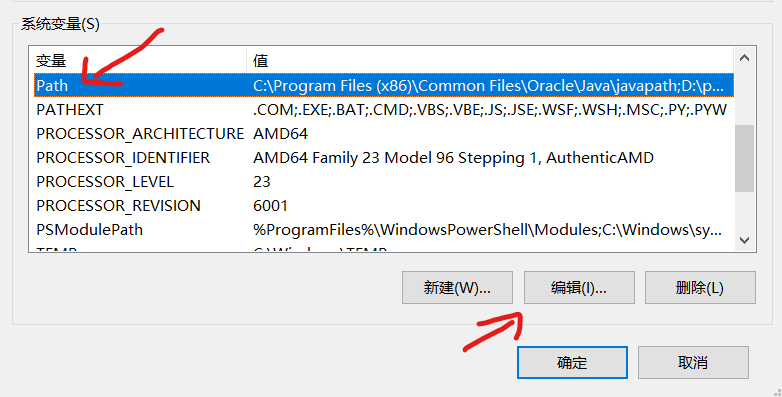
Then right-click the computer and click Properties → click Advanced system settings on the right → click environment variables → select the Path below, click Edit and then click New → enter the next level bin directory after hadoop package decompression, and copy the complete Path to it

Then log off the machine to make the file effective
Then you can open the command line with win+R and input: hadoop -version. Look at the version and output the version information
2. Configure Maven Ali source
Maven 3.6 link: https://pan.baidu.com/s/1_4MT6v2RZMiSccsUoMX_TQ
Extraction code: hhhh
Unzip the downloaded maven package to disk D for easy search
Then right-click the computer, click Properties → click Advanced system settings on the right → click environment variables → select the Path below, click Edit and then click New → enter the next level bin directory after maven package decompression, and copy the complete Path to it
Setting alicloud warehouse: enter the conf directory of Maven directory, and there is a settings.xml file. Add the following code
	<mirror>
      <id>nexus-aliyun</id>
      <mirrorOf>*</mirrorOf>
      <name>Nexus aliyun</name>
      <url>http://maven.aliyun.com/nexus/content/groups/public</url>
    </mirror>
Install JDK1.8
If already installed, you can skip this step
The machine originally has a JDK, but you need to use another JDK version of the installation steps:
The first step is to unzip the downloaded JDK package to the directory on disk D. install the JDK and select the installation directory. Two installation prompts will appear during the installation process. The first time is to install JDK and the second time is to install jre. It is recommended that both be installed in different folders in the same java folder.
Step 2 configure environment variables after installing JDK → computer properties → advanced system settings → environment variables
Step 3: system variable → new JAVA_HOME variable. The variable value is filled in the JDK installation directory: D:\Java\jdk1.8.0
Step 5 system variable → find Path variable → edit → create% JAVA_HOME%\bin
The machine does not have a JDK, which needs to be installed:
Step 1: unzip the downloaded JDK package to the directory on disk D, install the JDK, select the installation directory, and two installation prompts will appear during the installation process. The first time is to install JDK and the second time is to install jre. It is recommended that both be installed in different folders in the same java folder.
Step 2: configure environment variables after installing JDK → computer properties → advanced system settings → environment variables
Step 3: system variable → new JAVA_HOME variable. The variable value is filled in the JDK installation directory: D:\Java\jdk1.8.0
Step 4: system variable → find Path variable → edit → create% JAVA_HOME%\bin
Create a new variable value and fill in:% JAVA_HOME%\jre\bin
Step 5: system variable → new CLASSPATH variable
Fill in the variable value.;% JAVA_HOME%\lib;%JAVA_HOME%\lib\tools.jar (note the first point)
win+R opens the CMD command line and enters java -version. If the version information is displayed, the installation is successful
Start writing MR program
Step 1: open IDEA → New Project → select Maven → see a Project SDK above, where you can select the JDK version. We select 1.8 → click Next below
Step 2: set the Name of Maven project, and fill in MyMRCode → find in the Name column
Step 3: after the Maven project is created, a pom.xml file will be created, and then the following code will be inserted into the tag (the following version number will be modified according to the version of hadoop used. For example, if I use 2.7.5, I will modify the content in the tag to 2.7.5):
<dependencies>
		<dependency>
			<groupId>org.apache.hadoop</groupId>
			<artifactId>hadoop-common</artifactId>
			<version>2.7.5</version>
		</dependency>
		<dependency>
			<groupId>org.apache.hadoop</groupId>
			<artifactId>hadoop-hdfs</artifactId>
			<version>2.7.5</version>
		</dependency>
		<dependency>
			<groupId>org.apache.hadoop</groupId>
			<artifactId>hadoop-client</artifactId>
			<version>2.7.5</version>
		</dependency>
		<dependency>
			<groupId>org.apache.hadoop</groupId>
			<artifactId>hadoop-mapreduce-client-core</artifactId>
			<version>2.7.5</version>
		</dependency>
		<dependency>
			<groupId>junit</groupId>
			<artifactId>junit</artifactId>
			<version>4.12</version>
		</dependency>
</dependencies>
Then it will download the required resource package by itself and wait for the following progress bar to load, then it can further write the MR program!
WordCount case
Then create a new word.txt file in the mr/input / directory of disk D and write some words in it
Hello Hadoop
Hello Word
Hello MapReduce
Create a new package under the src folder of Maven project - > create a WordCountMapper class under this package
Map phase code example:
import java.io.IOException;

import org.apache.hadoop.io.IntWritable;
import org.apache.hadoop.io.LongWritable;
import org.apache.hadoop.io.Text;
import org.apache.hadoop.mapreduce.Mapper;
public class WordCountMapper extends Mapper<LongWritable, Text, Text, IntWritable> {
	/**
	 * Here is the method to implement the specific business logic in the mapper stage. The call of this method depends on whether the component reading the data has passed in data to MR
	 * If data is passed in, the map will be called once for each < K, V > pair
	 */
	@Override
	protected void map(LongWritable key, Text value, Mapper<LongWritable, Text, Text, IntWritable>.Context context)
			throws IOException, InterruptedException {
		// Get the incoming line and convert the data type to String
		String line = value.toString();
		// Cut this line according to the separator
		String[] words = line.split(" ");
		// Traverse the array and mark an array 1 for each word. For example: < word, 1 >
		for (String word : words) {
			// Use MR context to send the data processed in Map phase to Reduce phase as input data
			context.write(new Text(word), new IntWritable(1));
			//The first line of Hello Hadoop sends < Hello, 1 > < Hadoop, 1 >
		}
	}
}
Create a new WordCountReducer class in the
Code example:
import java.io.IOException;

import org.apache.hadoop.io.IntWritable;
import org.apache.hadoop.io.Text;
import org.apache.hadoop.mapreduce.Reducer;
public class WordCountReducer extends Reducer<Text, IntWritable, Text, IntWritable> {

	protected void reduce(Text key, Iterable<IntWritable> value,
			Reducer<Text, IntWritable, Text, IntWritable>.Context context) throws IOException, InterruptedException {
		//Define a counter
		int count = 0;
		//Traversing a set of iterators and adding up each quantity 1 constitutes the total number of words

		//
		for (IntWritable iw : value) {
			count += iw.get();
		}
		context.write(key, new IntWritable(count));
	}
}
Write another Runner class:
import org.apache.hadoop.conf.Configuration;
import org.apache.hadoop.fs.Path;
import org.apache.hadoop.io.IntWritable;
import org.apache.hadoop.io.Text;
import org.apache.hadoop.mapreduce.Job;
import org.apache.hadoop.mapreduce.lib.input.FileInputFormat;
import org.apache.hadoop.mapreduce.lib.output.FileOutputFormat;

public class Runner {

	public static void main(String[] args) throws Exception {
		// Encapsulate relevant information of this MR through Job
		Configuration conf = new Configuration();

		Job wcjob = Job.getInstance(conf);

		// Specify the MR Job jar package to run the main class
		wcjob.setJarByClass(Runner.class);
		// Specify all Mapper Reducer classes for this MR
		wcjob.setMapperClass(WordCountMapper.class);
		wcjob.setReducerClass(WordCountReducer.class);

		// Set the data types of the output key and value of our business logic Mapper class
		wcjob.setMapOutputKeyClass(Text.class);
		wcjob.setMapOutputValueClass(IntWritable.class);

		// Set the data types of the output key and value of our business logic Reducer class
		wcjob.setOutputKeyClass(Text.class);
		wcjob.setOutputValueClass(IntWritable.class);

		//Setting up the Combiner component
		wcjob.setCombinerClass(WordCountCombiner.class);


		// Specify the location of the data to process
		FileInputFormat.setInputPaths(wcjob, "D:/mr/input");
		// Specifies the location where the results after processing are saved
		FileOutputFormat.setOutputPath(wcjob, new Path("D:/mr/output"));

		// Submit the program and monitor the execution of the print program
		boolean res = wcjob.waitForCompletion(true);
		System.exit(res ? 0 : 1);
	}
}
Finally, run the Runner program again!
Then you can view the generated files in the output directory of disk D