Front and rear end separation project development
preface
Front end separation means that the front-end code and back-end code of an application are written separately. Why?
What are the problems if the front and rear end separation is not used?
In traditional java web development, the front end uses JSP and the back end uses servlet.
Front end - HTML static file - back end - JSP
The efficiency of this development method is very low. You can use the method of separating the front and rear ends for development
The United States can solve this problem.
The front end only needs to write client code independently, and the back end only needs to write server code independently
Data interface is enough. The front end accesses the data interface of the back end through Ajax requests, and displays the Model
To View.
The front-end and back-end developers only need to agree on the interface documents (URL, parameter, data type...) in advance
After that, it can be developed independently. The front end can fake data for testing, and there is no need to rely on the back end
End. It is completely independent of the back end, and the front and rear ends are independent of each other. The front and rear end applications are decoupled, which greatly improves the development efficiency.
Monomer – front end application + back end application
Front end application: responsible for data display and user interaction
Back end application: responsible for providing data processing interface.
Front end HTML -- Ajax -- Restful back end development

Technology stack
front end
1.vue.js
2.axios
3.element-ui
back-end
1.springboot
2.mybatis-plus
database
mysql
Installing the front-end environment
node.js to see if the installation is successful
node -v
No, you have to install it
Install Taobao image
npm install -g cnpm --registry=https://registry.npm.taobao.org
npm check whether the installation is successful
npm -v
Install Vue Vue cli scaffold
cnpm install vue-cli Or install the latest version cnpm i -g @vue/cli
Check whether Vue cli is installed successfully
vue --version
The possible problem is
’Set executionpolicy 'is not an internal or external command, nor is it a runnable program
terms of settlement
Open the power shell as an administrator and execute the following command:
set-ExecutionPolicy RemoteSigned

get-ExecutionPolicy
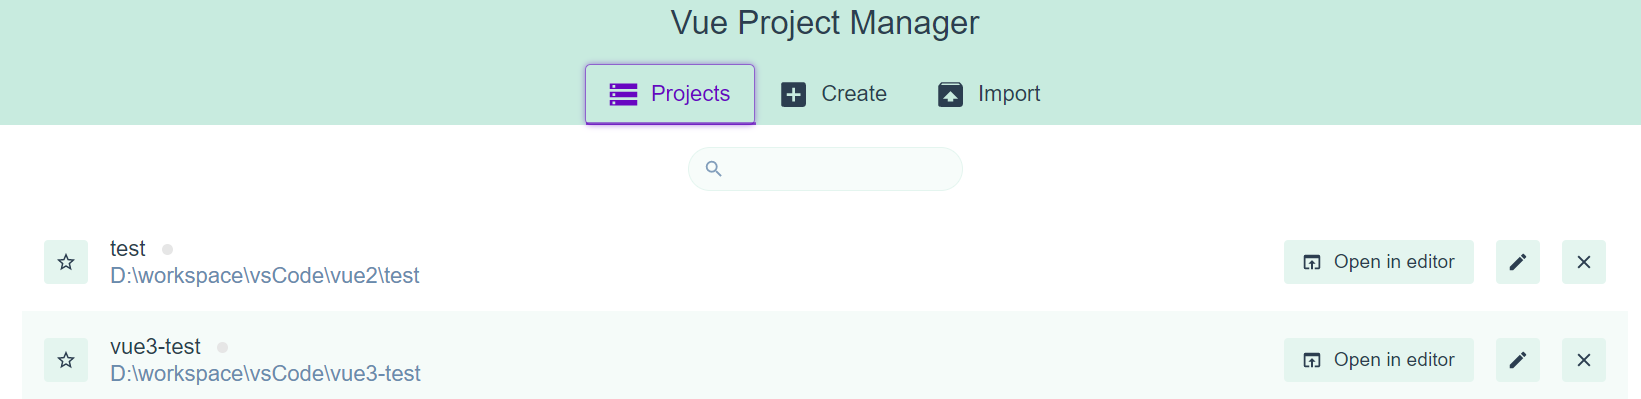
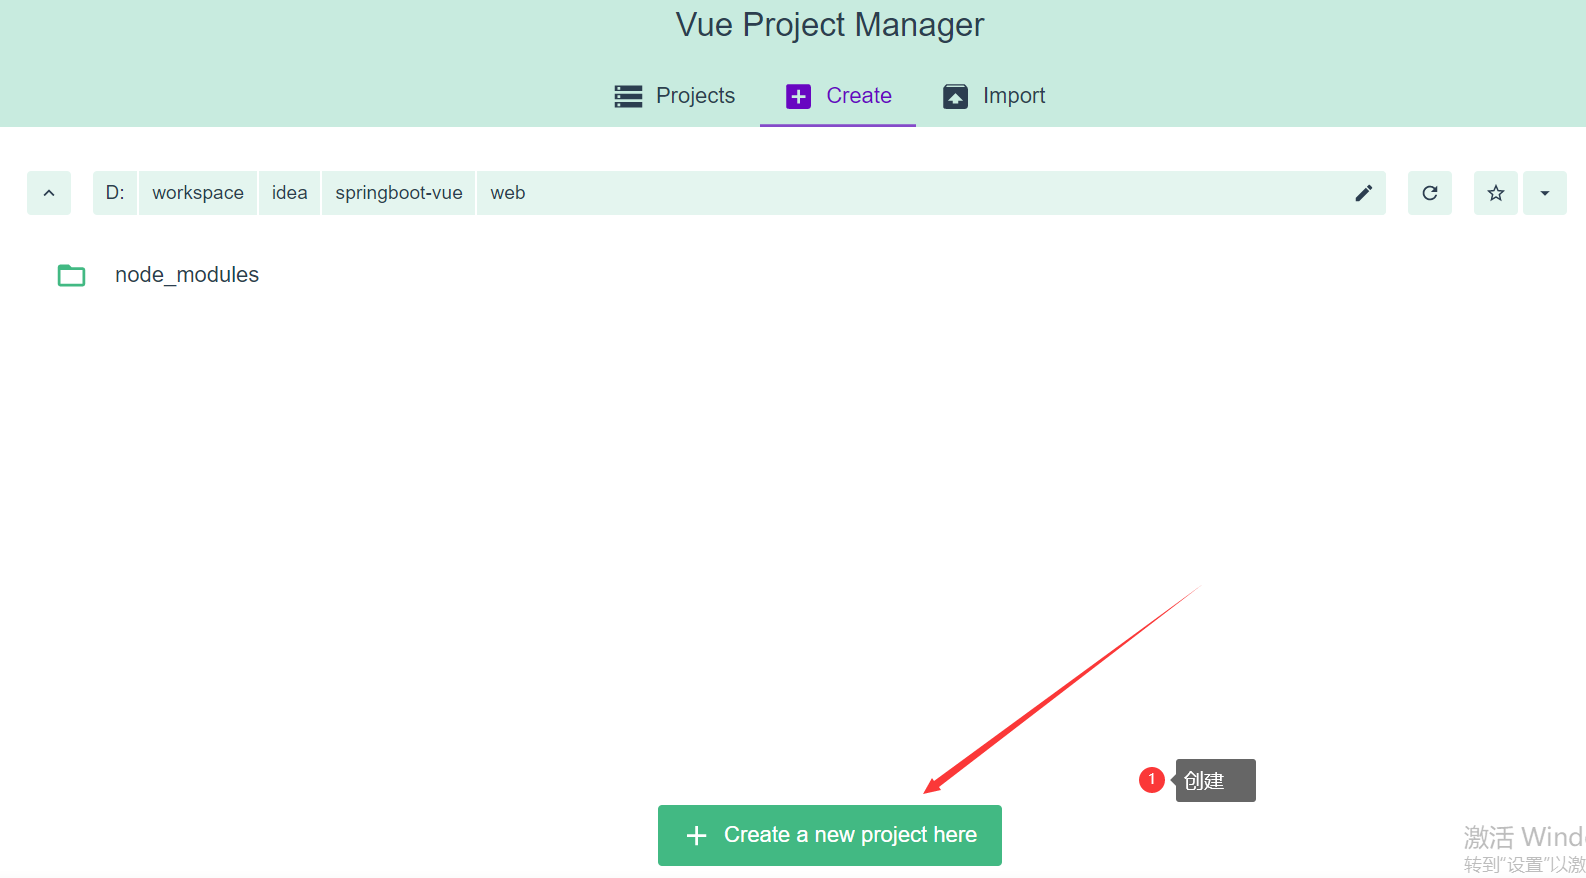
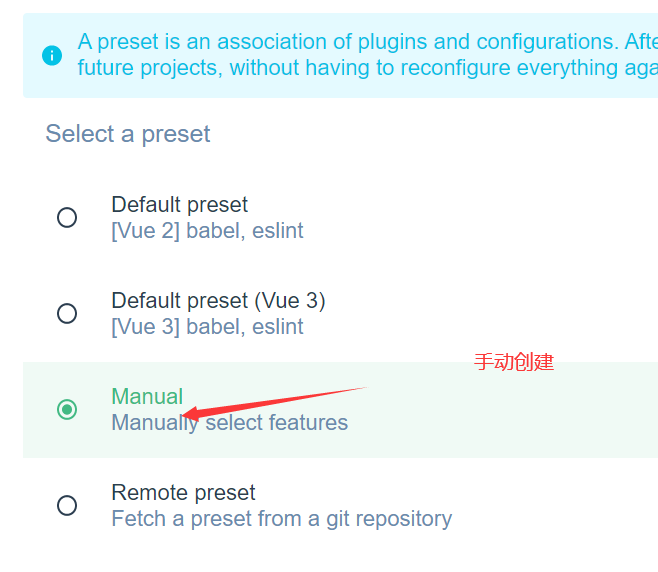
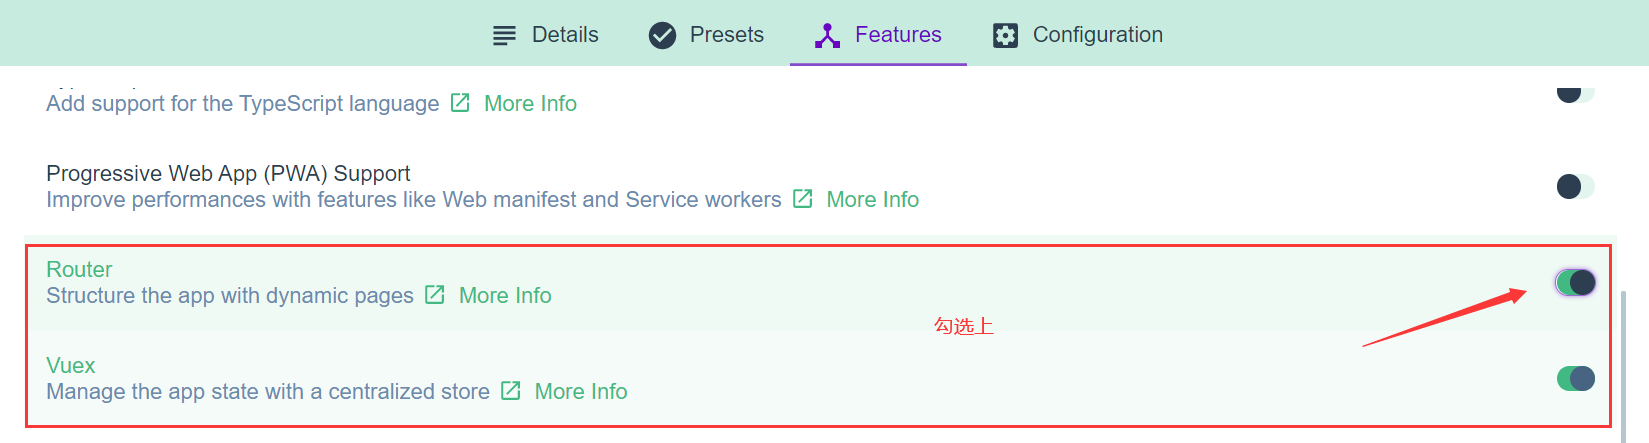
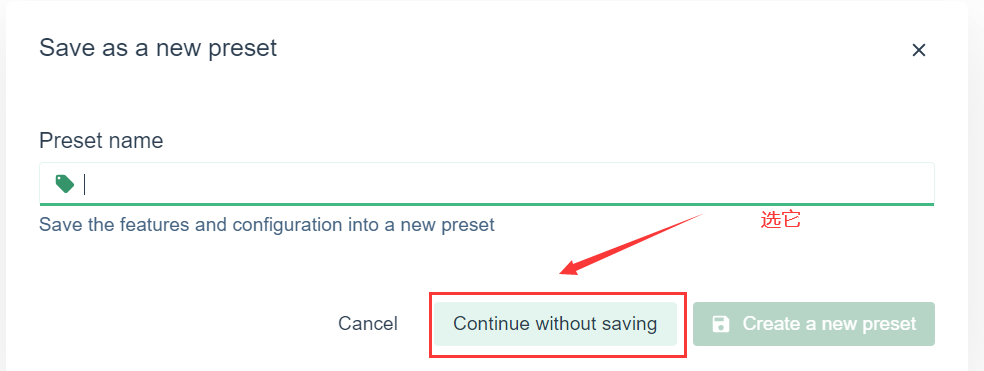
Create vue project
vue ui

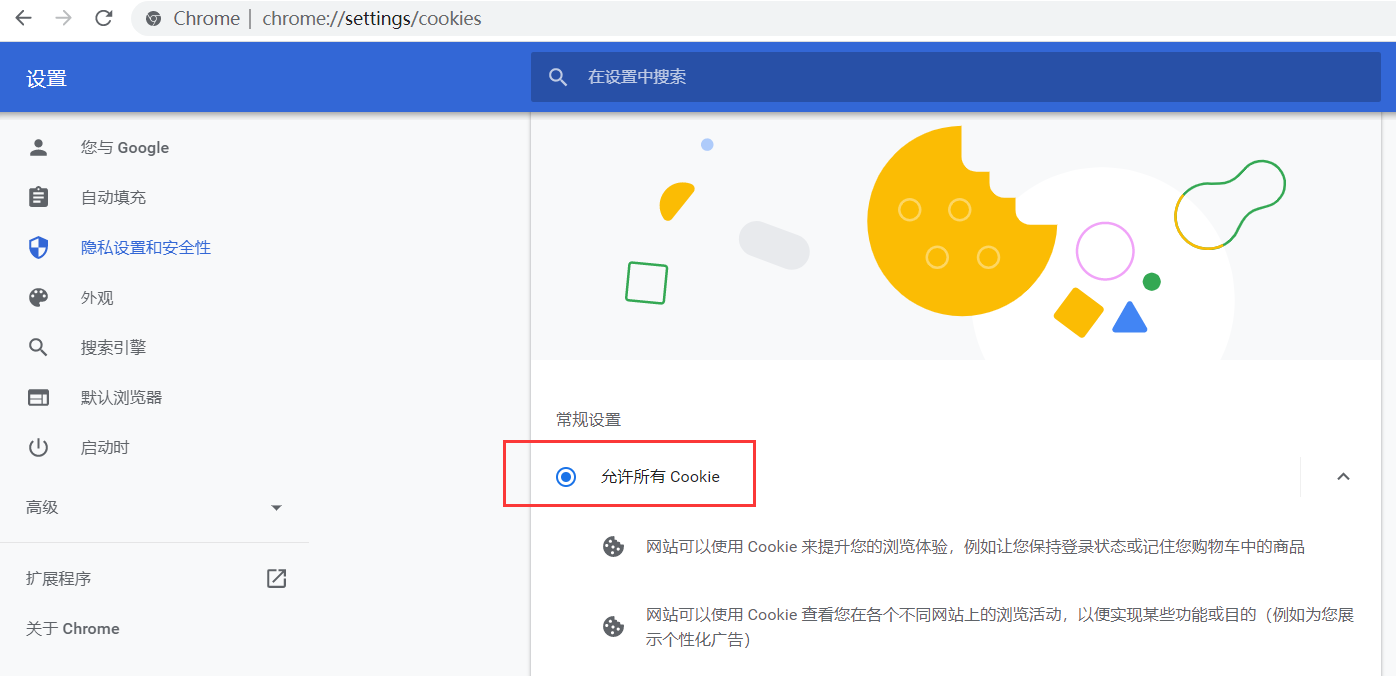
Possible problems
The vue ui command pops up a blank page
terms of settlement
Allow all cookie s in Chrome browser settings
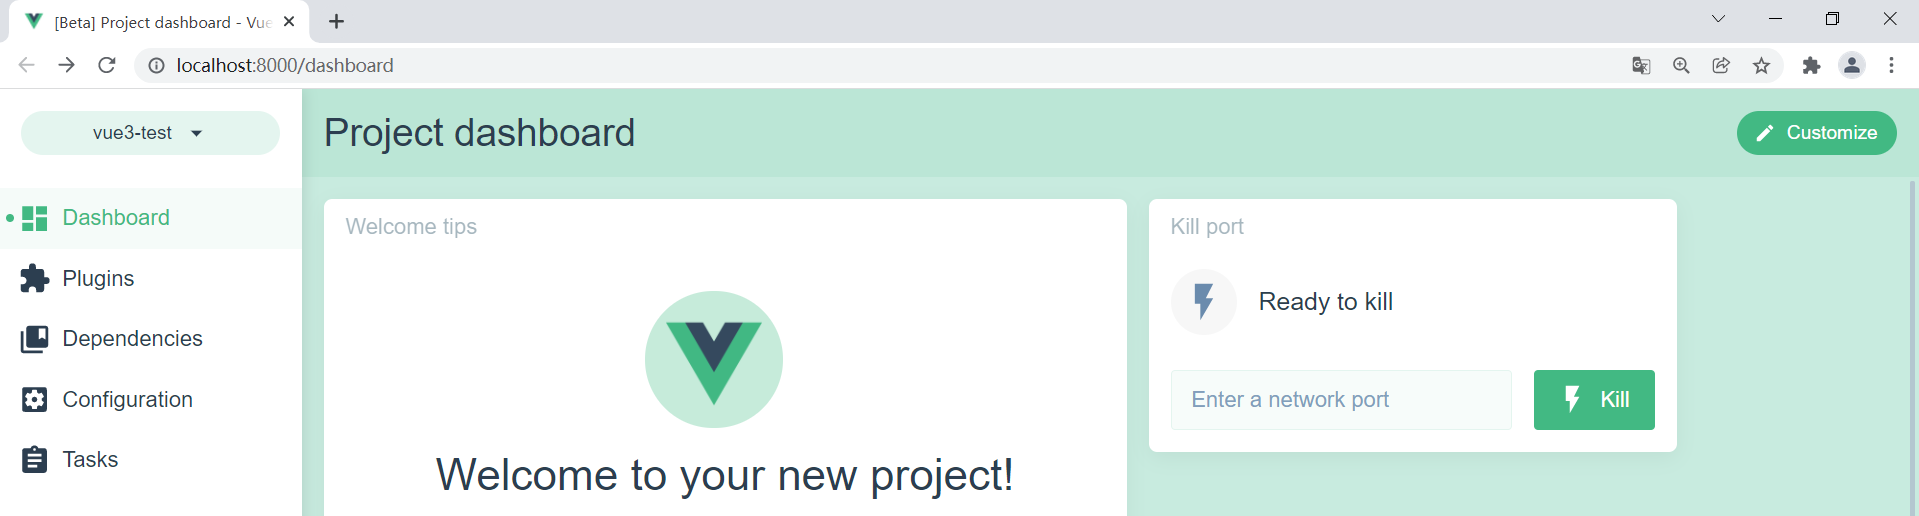
Execute command after resolution
vue ui
The following page appears:


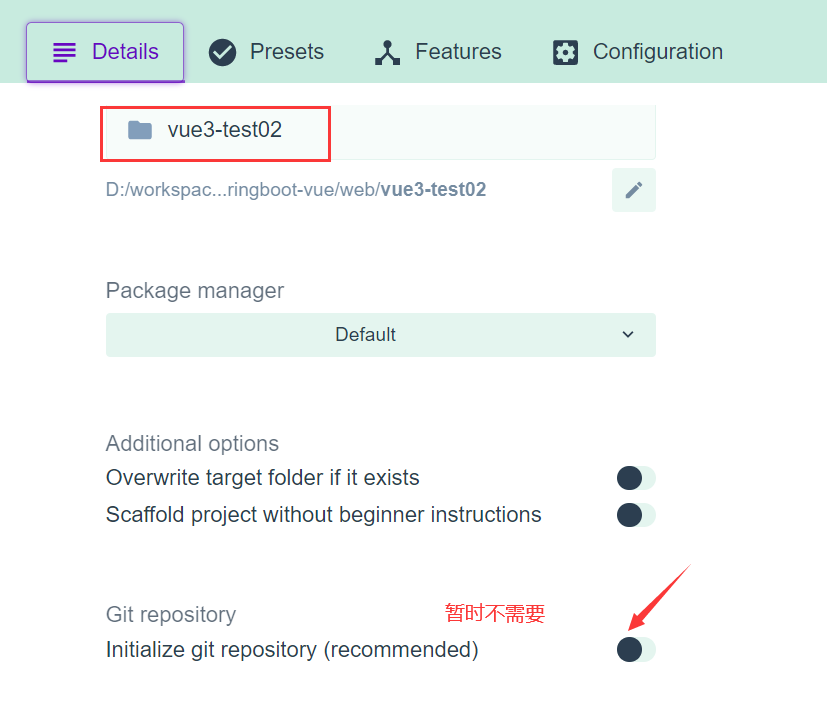

Open the created vue project with vscode;
1)Book.vue
Create a book. Under src/views vue
 <template>
     <div>
         <table>
             <tr>
                 <td>number</td>
                 <td>title</td>
                 <td>author</td>
             </tr>
             <tr>
                 {{msg}}
             </tr>
         </table>
     </div>
 </template>

 <script>
     export default {
         name: "Book",
         data(){
             return{
                 msg: 'Hello'
             }
         }
     }
 </script>

 <style scoped>

 </style>
2)index.js configuration
Open index. Under src/router js
index.js
- Import book vue
import Book from ".../views/Book"
- Configuration (must be preceded by a comma (,))
,{ path: '/book', component: Book }
import Vue from 'vue'
import VueRouter from 'vue-router'
import Home from '../views/Home.vue'
import Book from '../views/Book.vue'

Vue.use(VueRouter)

const routes = [
  {
    path: '/',
    name: 'Home',
    component: Home
  },
  {
    path: '/about',
    name: 'About',
    // route level code-splitting
    // this generates a separate chunk (about.[hash].js) for this route
    // which is lazy-loaded when the route is visited.
    component: () => import(/* webpackChunkName: "about" */ '../views/About.vue')
  },
  {
    path: '/book',
    name: 'Book',
    component: Book
  }
]

const router = new VueRouter({
  mode: 'history',
  base: process.env.BASE_URL,
  routes
})

export default router
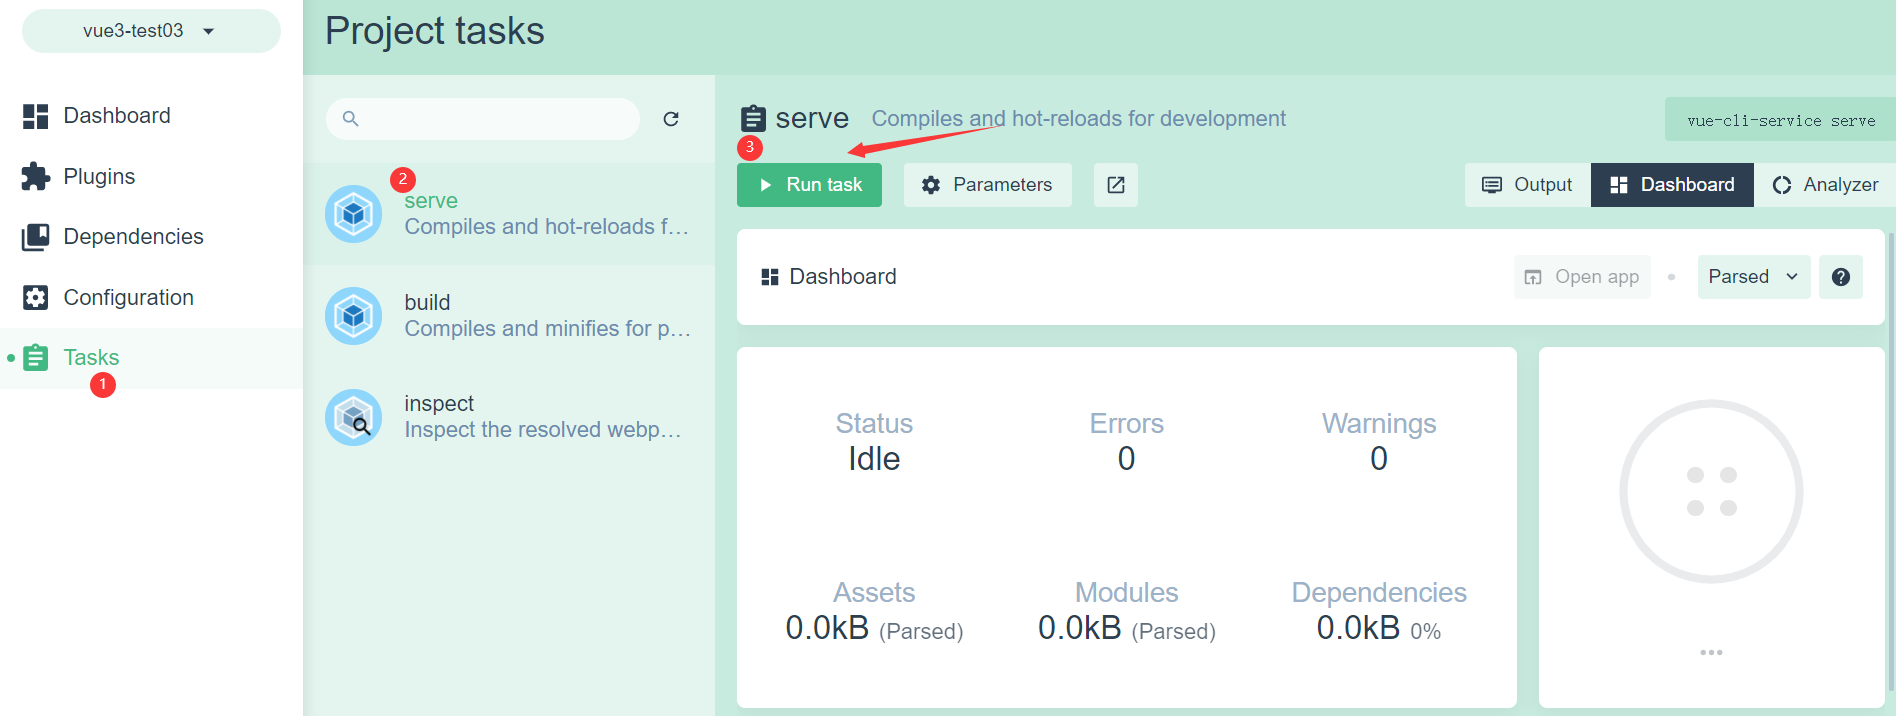
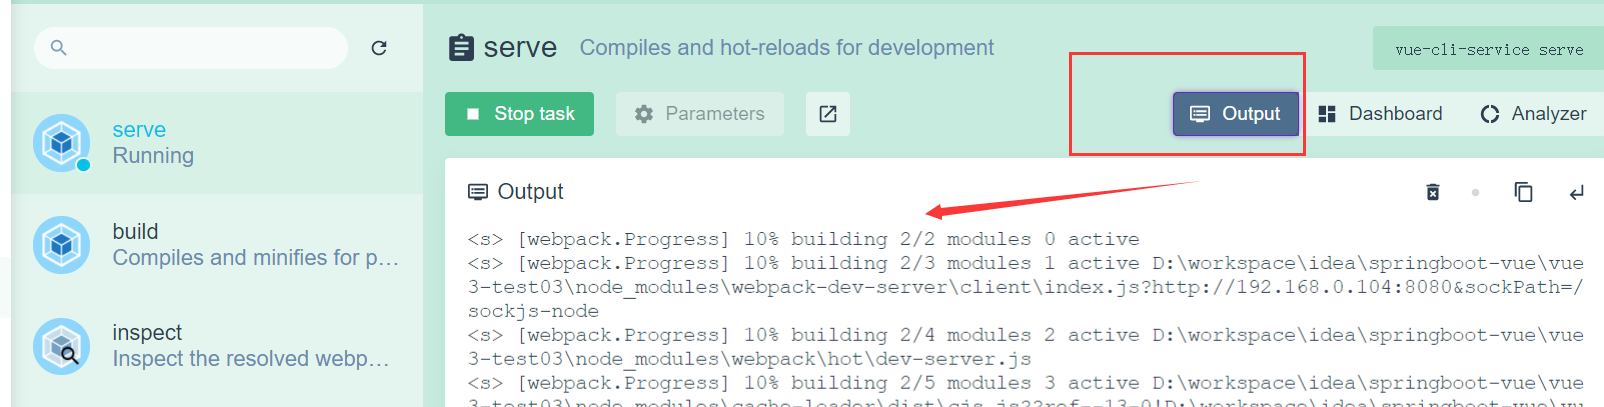
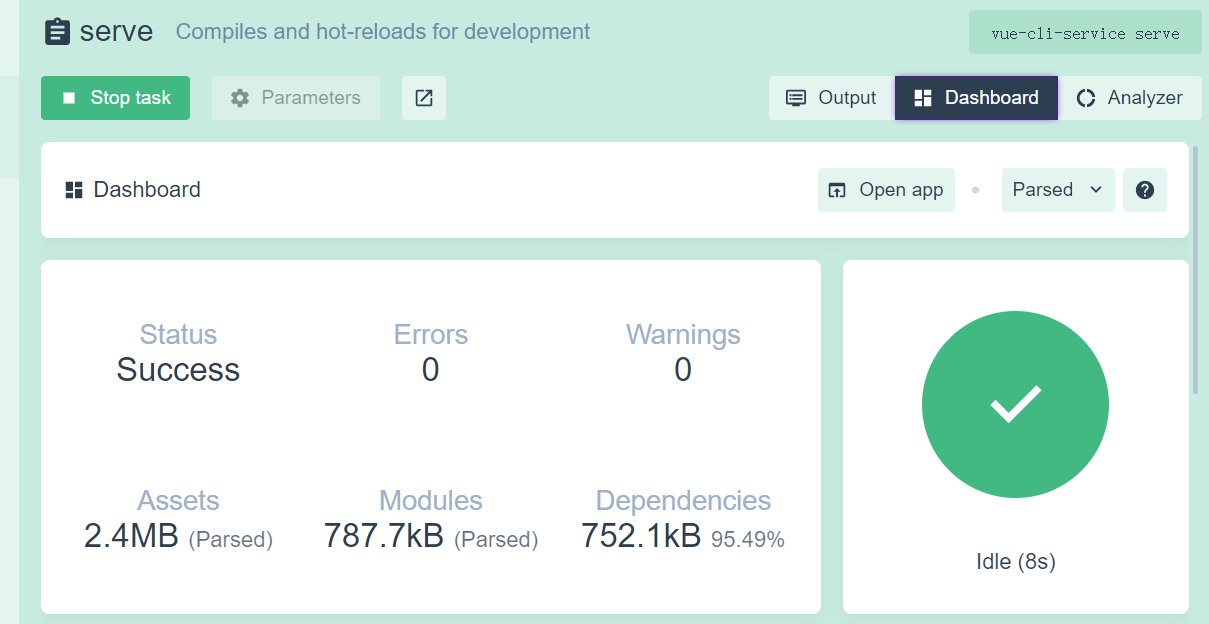
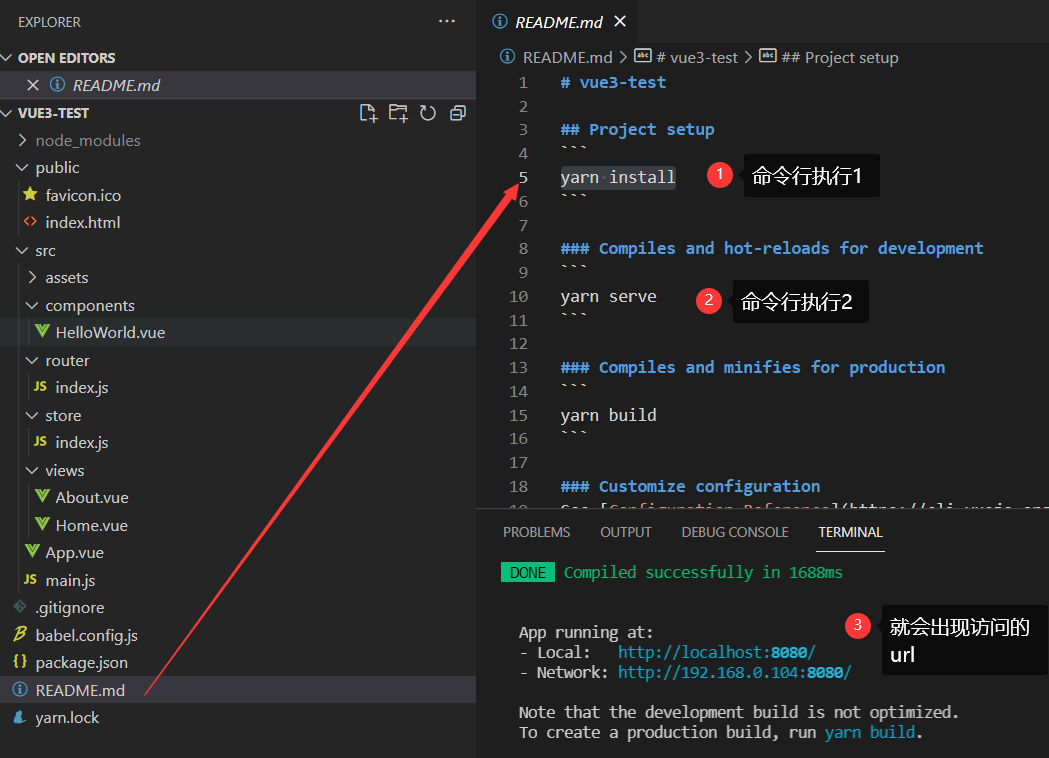
3) Testing
Enter npm run serve in Terminal
visit
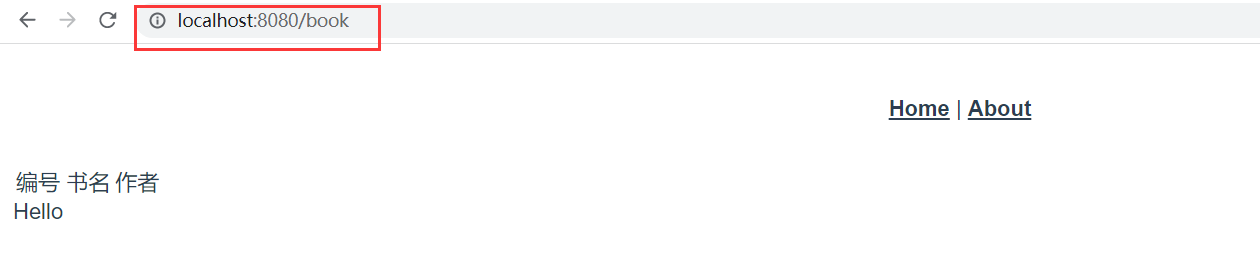
Display data
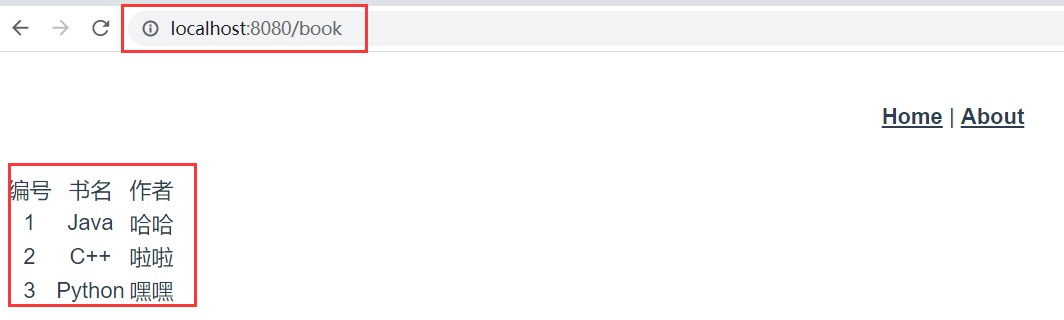
Book.vue
-
ergodic
books: the array to be traversed, item: the object to be traversed each time
< tr v-for="item in books ">
< td >{{item.id}}< /td >
< td >{{item.name}}< /td >
< td >{{item.author}}< /td >
< /tr > -
Add data to books
Books: [{ID: 1, name: 'Java', author: 'ha ha'}, {id: 2, name: 'C + +', author: 'la la'}, {id: 3, name: 'Python', author: 'ha ha'}]
<template>
     <div>
         <table>
             <tr>
                 <td>number</td>
                 <td>title</td>
                 <td>author</td>
             </tr>
             <!--books: The traversed array, item:Objects traversed each time-->
             <tr v-for="item in books">
                 <td>{{item.id}}</td>
                 <td>{{item.name}}</td>
                 <td>{{item.author}}</td>
             </tr>
         </table>
     </div>
 </template>
 <script>
     export default {
         name: "Book",
         data() {
             return {
                 msg: 'Hello',
                 books: [
                     {
                         id: 1,
                         name: 'Java',
                         author: 'ha-ha'
                     },
                     {
                         id: 2,
                         name: 'C++',
                         author: 'gossip'
                     },
                     {
                         id: 3,
                         name: 'Python',
                         author: 'hey'
                     }
                 ]
             }
         }

     }
 </script>

 <style scoped>

 </style>
Forever CRUD
As can be seen from the above demo, the data is constructed on the front-end page, not the data obtained from the database. Therefore, the front end needs to send an ajax request to get the data
Installing axios
vue add axios
Check whether the installation is successful
Installing element UI
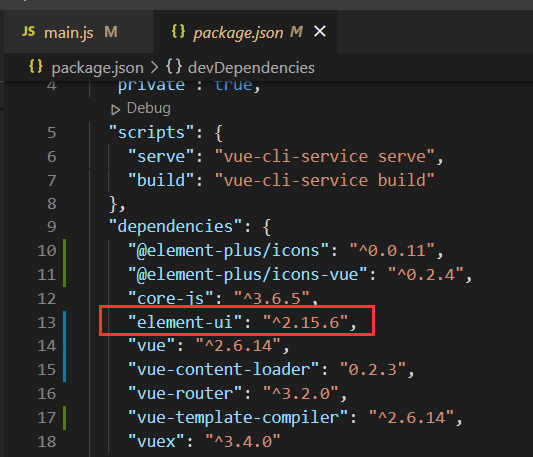
1. Under item, enter NPM install element UI - S
2. View the configuration file package JSON, whether there is the version number of the element UI component, as shown in the figure below
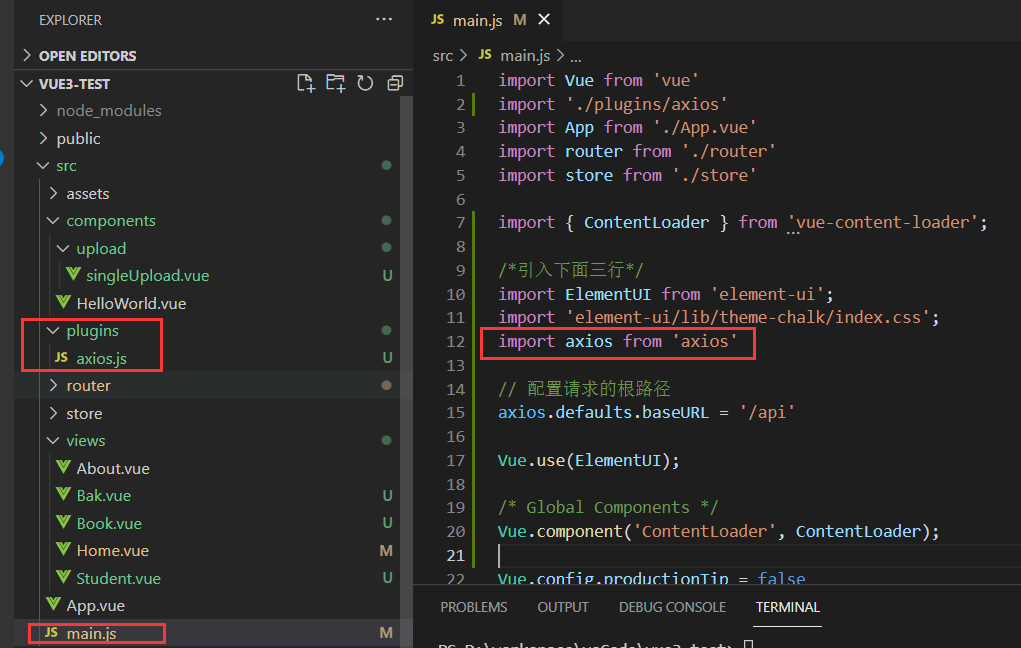
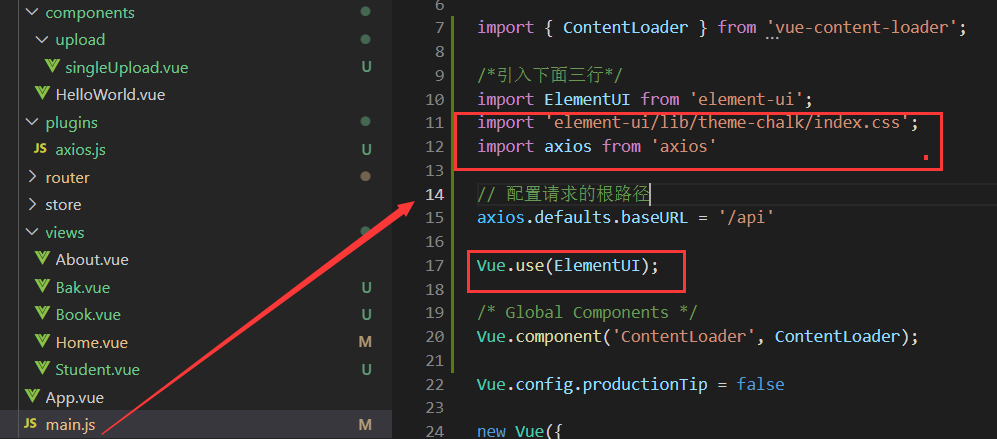
4. In main JS file:
import ElementUI from 'element-ui'
import 'element-ui/lib/theme-chalk/index.css'

Vue.use(ElementUI)
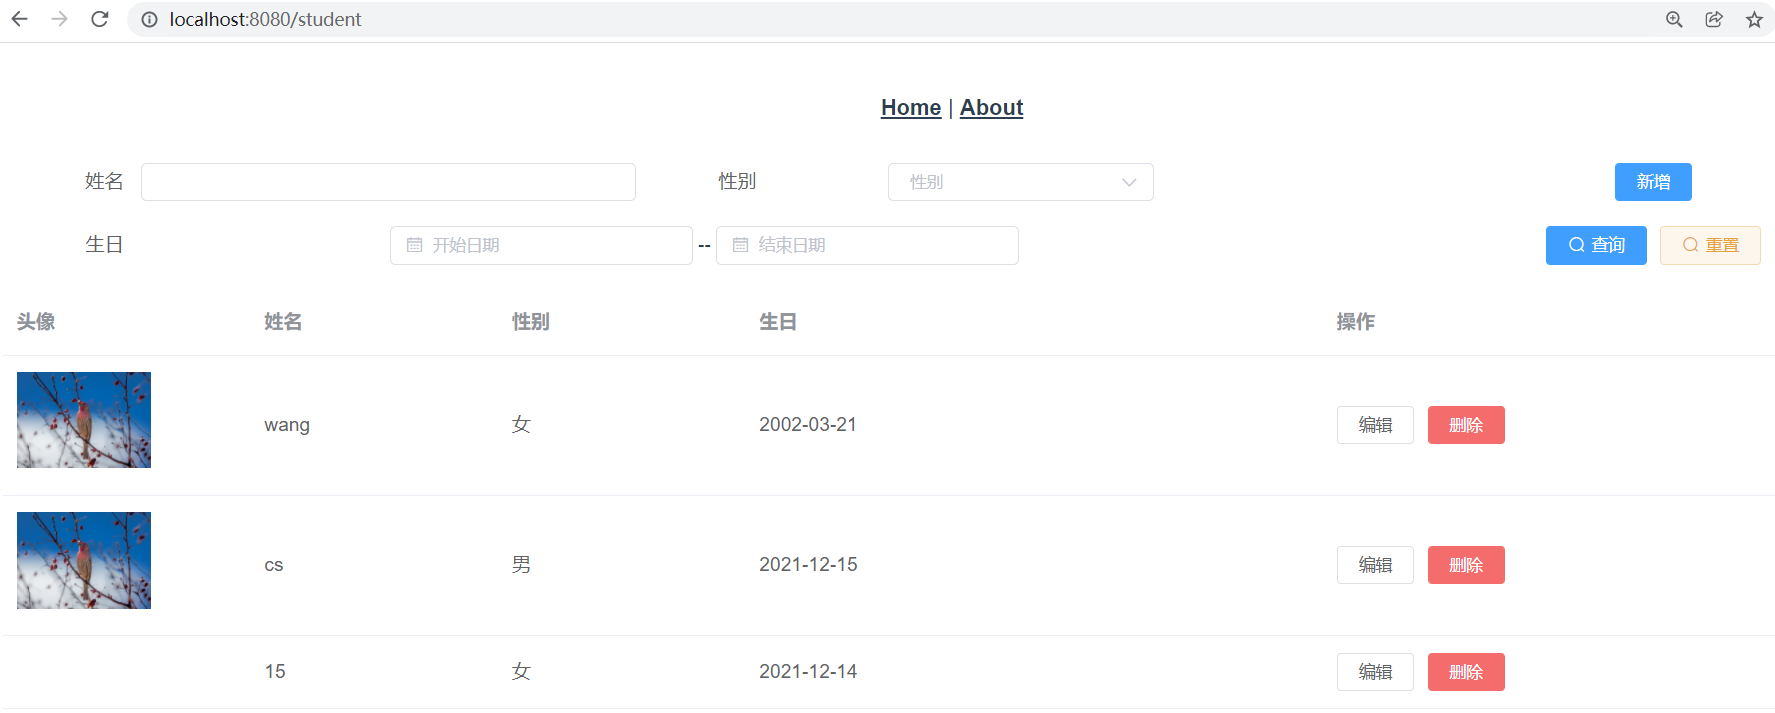
5. Use elementui component to develop student Vue page
demo display
6. At this time, using axios to send http requests to access background page data will cause cross domain problems due to the same origin policy of the browser
terms of settlement
@Configuration
public class CorsConfig implements WebMvcConfigurer {

    @Override
    public void addCorsMappings(CorsRegistry registry) {
        registry.addMapping("/**")
                .allowedOriginPatterns("*")
                .allowedMethods("GET","HEAD","POST","DELETE","OPTIONS","PUT")
                .allowCredentials(true)
                .maxAge(3600)
                .allowedHeaders("*");
    }
}
Development steps
(1) Create database test and student table
CREATE DATABASE /*!32312 IF NOT EXISTS*/`test` /*!40100 DEFAULT CHARACTER SET utf8 */;

USE `test`;

/*Table structure for table `student` */

DROP TABLE IF EXISTS `student`;

CREATE TABLE `student` (
  `id` int(10) NOT NULL AUTO_INCREMENT COMMENT 'ID Self increasing',
  `name` varchar(20) DEFAULT NULL COMMENT 'full name',
  `gender` tinyint(1) DEFAULT NULL COMMENT 'Gender 0 female 1 male',
  `birthday` date DEFAULT NULL COMMENT 'birthday',
  `headImageFilePath` varchar(100) DEFAULT NULL COMMENT 'Avatar path student avatar relative path',
  PRIMARY KEY (`id`)
) ENGINE=InnoDB AUTO_INCREMENT=50 DEFAULT CHARSET=utf8mb4;

/*Data for the table `student` */

insert  into `student`(`id`,`name`,`gender`,`birthday`,`headImageFilePath`) values

(3,'wang',0,'2002-03-21','https://fuss10.elemecdn.com/e/5d/4a731a90594a4af544c0c25941171jpeg.jpeg'),

(25,'cs',1,'2021-12-15','https://fuss10.elemecdn.com/e/5d/4a731a90594a4af544c0c25941171jpeg.jpeg'),

(49,'15',0,'2021-12-14','');
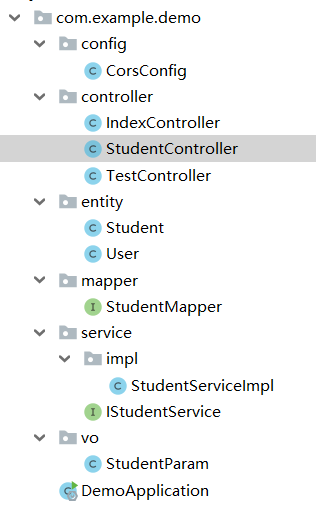
(2) Build the spring boot project, develop the curd interface according to the mvc mode, and use postman to send requests to ensure the normal execution of each interface

Project structure
(3) The front-end page places the corresponding back-end interface request corresponding to the operation.
for example
Back end correspondence
    @RequestMapping("/selectAll")
    public List<Student> selectAll(){
        return studentService.selectAll();
    }
The query request is sent by the foreground page
            loadData(){
                const _this = this;
                axios.get('http://127.0.0.1:8081/selectAll').then(function(resp){
                    _this.students = resp.data;
                }).catch((err) =>{
                    console.log(err);
                });
            },
Source code: Student page vue
<template>
    <div>
        <el-dialog title="Student information" :visible.sync="dialogFormVisible">
            <el-form :model="form">
                <el-form-item label="name" :label-width="formLabelWidth">
                    <el-input v-model="form.name" autocomplete="off"></el-input>
                </el-form-item>
                <el-form-item label="Gender" :label-width="formLabelWidth">
                    <el-select v-model="form.gender" placeholder="Please select gender">
                        <!-- The drop-down menu is displayed in the form of a loop key Must be added, otherwise an error may occur, which is equivalent to a unique ID -->
                        <el-option v-for="sextype in sexType"
                            :key="sextype.type"
                            :label="sextype.name"
                            :value="sextype.type">
                        </el-option>
                    </el-select>
                </el-form-item>
                <el-form-item label="birthday" :label-width="formLabelWidth">
                    <el-date-picker type="date" placeholder="date" value-format="yyyy-MM-dd" v-model="form.birthday"></el-date-picker>
                </el-form-item>
                <el-form-item label="head portrait" :label-width="formLabelWidth">
                    <!-- <el-input v-model="form.headImageFilePath"></el-input>          -->
                    <!-- File upload -->
                    <single-upload v-model="form.headImageFilePath"></single-upload>
                </el-form-item>
            </el-form>
            <div slot="footer" class="dialog-footer">
                <el-button @click="cancel">Cancel</el-button>
                <el-button type="primary" @click="update">determine</el-button>
            </div>
        </el-dialog>

        <el-form :model="queryParam" ref="form" label-width="100px" class="demo-ruleForm" size="mini">
            <el-row>
                <el-col :span="8">
                    <el-form-item label="full name">
                        <el-input v-model="queryParam.name"></el-input>
                    </el-form-item>
                </el-col>
                <el-col :span="8">
                    <el-form-item label="Gender">
                        <el-select v-model="queryParam.gender" placeholder="Gender">
                        <el-option label="male" value="1"></el-option>
                        <el-option label="female" value="0"></el-option>
                        </el-select>
                    </el-form-item>
                </el-col>
                <el-col :span="8">
                    <el-form-item>
                        <el-button type="primary" @click="add">newly added</el-button>
                    </el-form-item>
                </el-col>
            </el-row>
            <el-row>
                <el-col :span="16">
                    <el-form-item label="birthday">
                        <el-date-picker type="date" placeholder="Start date" value-format="yyyy-MM-dd" v-model="queryParam.startDate"></el-date-picker>
                        --
                        <el-date-picker type="date" placeholder="End date" value-format="yyyy-MM-dd" v-model="queryParam.endDate" ></el-date-picker>
                    </el-form-item>
                </el-col>
                <el-col :span="8">
                    <el-form-item>
                        <el-button type="primary" @click="searchQuery" icon="el-icon-search">query</el-button>
                        <el-button type="warning" @click="resetForm" icon="el-icon-search" plain>Reset</el-button>
                    </el-form-item>
                </el-col>
            </el-row>
        </el-form>
        <el-table
            :data="students"
            style="width: 100%">
            <el-table-column
                prop="id"
                label="ID"
                v-if="false"
                width="180">
            </el-table-column>
            <el-table-column
                prop="headImageFilePath"
                label="head portrait"
                width="180">
                <template slot-scope="scope">
                    <img :src="scope.row.headImageFilePath"  min-width="70" height="70" />
                </template>
            </el-table-column>
            <el-table-column
                prop="name"
                label="full name"
                width="180">
            </el-table-column>

            <el-table-column
                prop="gender"
                label="Gender"
                width="180">
                <template slot-scope="scope">
                    <!-- adopt Scoped slot Can get row, column, $index and store(table Internal status management) data
                        use|Split, get from the front, pass it to the back, and then pass it through filters obtain -->
                    <span>{{scope.row.gender | sexTypeFilter}}</span>
                </template>
            </el-table-column>
            <el-table-column
                prop="birthday"
                value-format="yyyy-MM-dd"
                label="birthday">
            </el-table-column>
            <el-table-column label="operation">
                <template slot-scope="scope">
                    <el-button
                    size="mini"
                    @click="handleEdit(scope.$index, scope.row)">edit</el-button>
                    <el-button
                    size="mini"
                    type="danger"
                    @click="handleDelete(scope.$index, scope.row)">delete</el-button>
                </template>
            </el-table-column>
        </el-table>
    </div>
</template>

<script>
// @ is an alias to /src
import SingleUpload from '@/components/upload/singleUpload.vue'
    // The data of the filter is written outside the data, because the filter cannot call this
    const sexType = [
       { "type":1, "name":'male'},
       { "type":0, "name":'female'}
    ]
    export default {
        name: "Student",
        components:{
            SingleUpload
        },
        data(){
            return {
                sexType,
                input: '',
                students: [

                ],
                fits: ['fill'],
                url: 'https://fuss10.elemecdn.com/e/5d/4a731a90594a4af544c0c25941171jpeg.jpeg',
                imageUrl: '',
                dialogFormVisible: false,
                formLabelWidth: '80px',
                flag: '', // Because editing and adding share the same pop-up frame element, flag is used to distinguish them
                form: {
                    name: '',
                    gender: '',
                    birthday:'',
                    headImageFilePath:''
                },
                queryParam: {
                    name: '',
                    gender: '',
                    birthday:'',
                    starDate: '',
                    endDate: ''
                }
            }
        },
        //Filter, number type and Chinese character conversion
        //Both methods can be used. type is the incoming number, which is compared with the filter data
        // sexType.find(obj=>{
        // return obj.type === type})
        filters:{
            sexTypeFilter(type){
                const sexTy = sexType.find(obj => obj.type === type)
                return sexTy ? sexTy.name : null
            },
        },
        created(){
            // this.loadData();
            this.searchQuery();
        },
        methods: {
            loadData(){
                const _this = this;
                axios.get('http://127.0.0.1:8081/selectAll').then(function(resp){
                    _this.students = resp.data;
                }).catch((err) =>{
                    console.log(err);
                });
            },
            add(){
                this.flag = 1;
                this.form = {
                    name: '',
                    gender: '',
                    birthday:'',
                    headImageFilePath:''
                },
                //   After setting, click the button to display the dialog box
                this.dialogFormVisible = true;
            },
            cancel(){
                this.dialogFormVisible = false;
            },
            update(){
                if(this.flag == 1){
                    // Submit the information we added to the total data
                    this.students.push(this.form);
                    this.save();
                }else{
                    this.updateOne();
                }
                this.dialogFormVisible = false;
            },
            save(){
                axios.post('http://127.0.0.1:8081/add',this.form).then((resp) =>{

                }).catch((err) =>{
                    console.log(err);
                });
            },
            updateOne(){
                var s = this.form;
                axios.post('http://127.0.0.1:8081/update',this.form).then((resp) =>{

                }).catch((err) =>{
                    console.log(err);
                });
            },
            searchQuery(){
                var that = this;
                axios.post('http://127.0.0.1:8081/selectAllbyCondition',this.queryParam).then((resp) =>{
                     that.students = resp.data;
                }).catch((err) =>{
                    console.log(err);
                });
            },
            resetForm(){
                this.flag = '';
                this.queryParam = {};
            },
            handleEdit(index, row) {
                this.flag = 2;
                // Pass the index of the data to realize the echo of the data
                this.form = this.students[index];
                // Sets the visibility of the dialog box
                this.dialogFormVisible = true;

            },
            handleDelete(index, row) {
                var id = row.id;
                axios.delete('http://127.0.0.1:8081/delete'+'/'+id)
                .then(() => {
                    this.students.splice(index, 1);
                    this.$message({
                        type: "success",
                        message: "Delete succeeded!"
                    });
                }).catch((err) =>{
                    console.log(err);
                });
            }
        },
    }
</script>

<style>

</style>
There are many details, which need readers' practical experience
Project structure
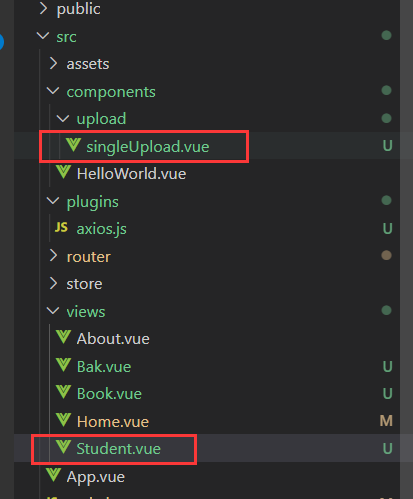
Single file upload vue
<template>
  <el-upload
  class="avatar-uploader"
  action="https://jsonplaceholder.typicode.com/posts/"
  :show-file-list="false"
  :on-success="handleAvatarSuccess"
  :before-upload="beforeAvatarUpload"
>
  <img v-if="imageUrl" :src="imageUrl" class="avatar" />
  <i v-else class="el-icon-plus avatar-uploader-icon"></i>
</el-upload>
</template>

<script>
  export default {
    data() {
      return {
        imageUrl: '',
        file:'',
        headers: {
            'Content-Type': 'multipart/form-data', // Default value
        },
        // Picture upload parameters
        // actionUrl: this.$axios.defaults.baseURL + '/file/uploadImage',

      }
    },
    methods: {
      handleAvatarSuccess(res, file) {
        debugger;
        this.imageUrl = URL.createObjectURL(file.raw)
      },
      beforeAvatarUpload(file) {
        debugger;
        var s = file;

        const isJPG = file.type === 'image/jpeg' || file.type === 'image/png' || file.type === 'image/jpg'
        const isLt2M = file.size / 1024 / 1024 < 2

        if (!isJPG) {
          this.$message.error('Upload avatar pictures can only be JPG format!')
        }
        if (!isLt2M) {
          this.$message.error('The size of uploaded avatar image cannot exceed 2 MB!')
        }
        return isJPG && isLt2M
      },
    },
  }
</script>
<style>
  .avatar-uploader .el-upload {
    border: 1px dashed #d9d9d9;
    border-radius: 6px;
    cursor: pointer;
    position: relative;
    overflow: hidden;
  }
  .avatar-uploader .el-upload:hover {
    border-color: #409eff;
  }
  .avatar-uploader-icon {
    font-size: 28px;
    color: #8c939d;
    width: 178px;
    height: 178px;
    line-height: 178px;
    text-align: center;
  }
  .avatar {
    width: 178px;
    height: 178px;
    display: block;
  }
</style>
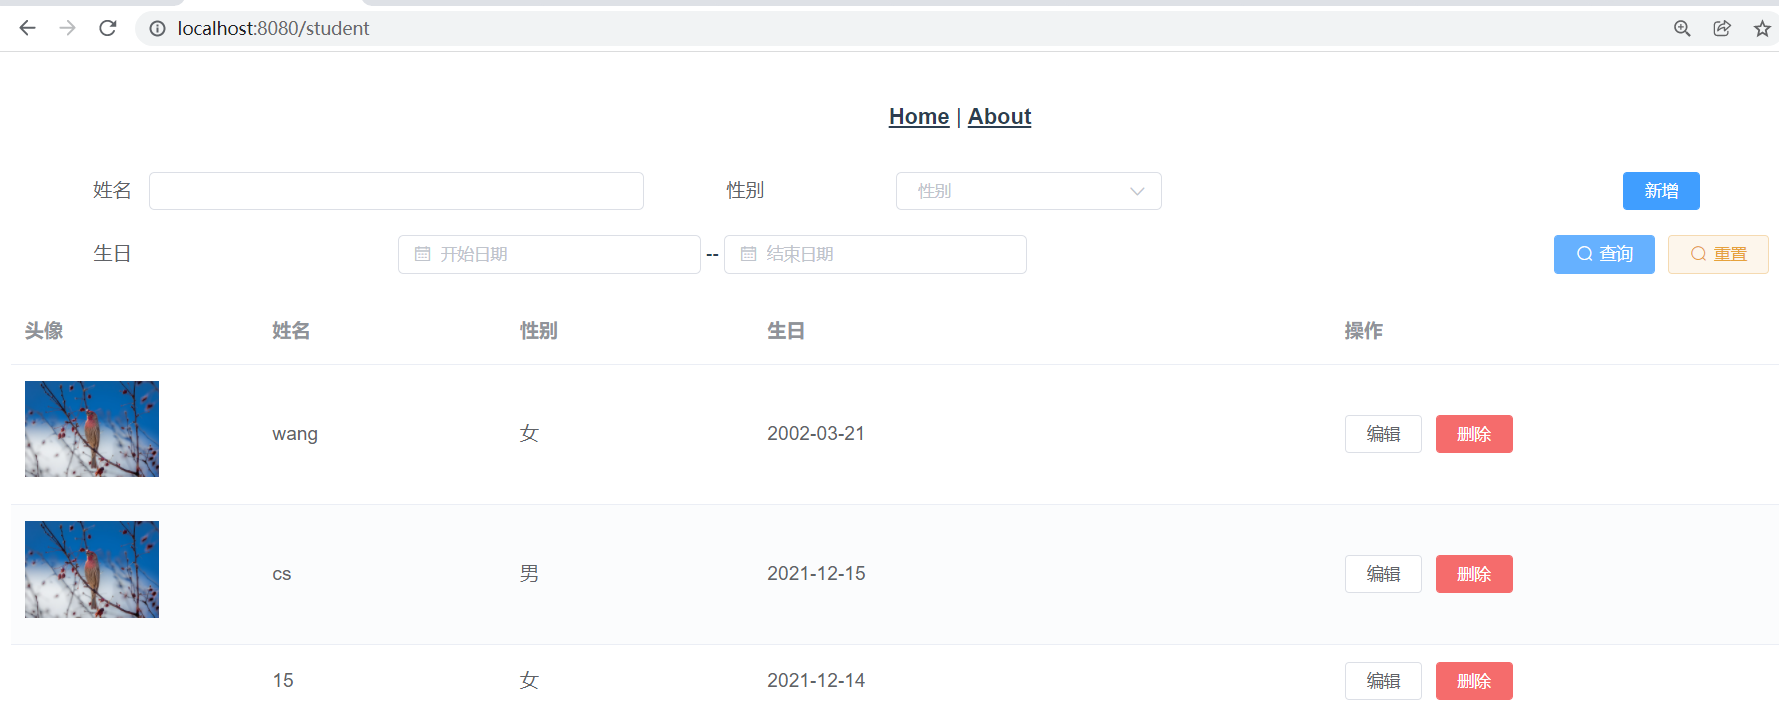
Show
Page loading
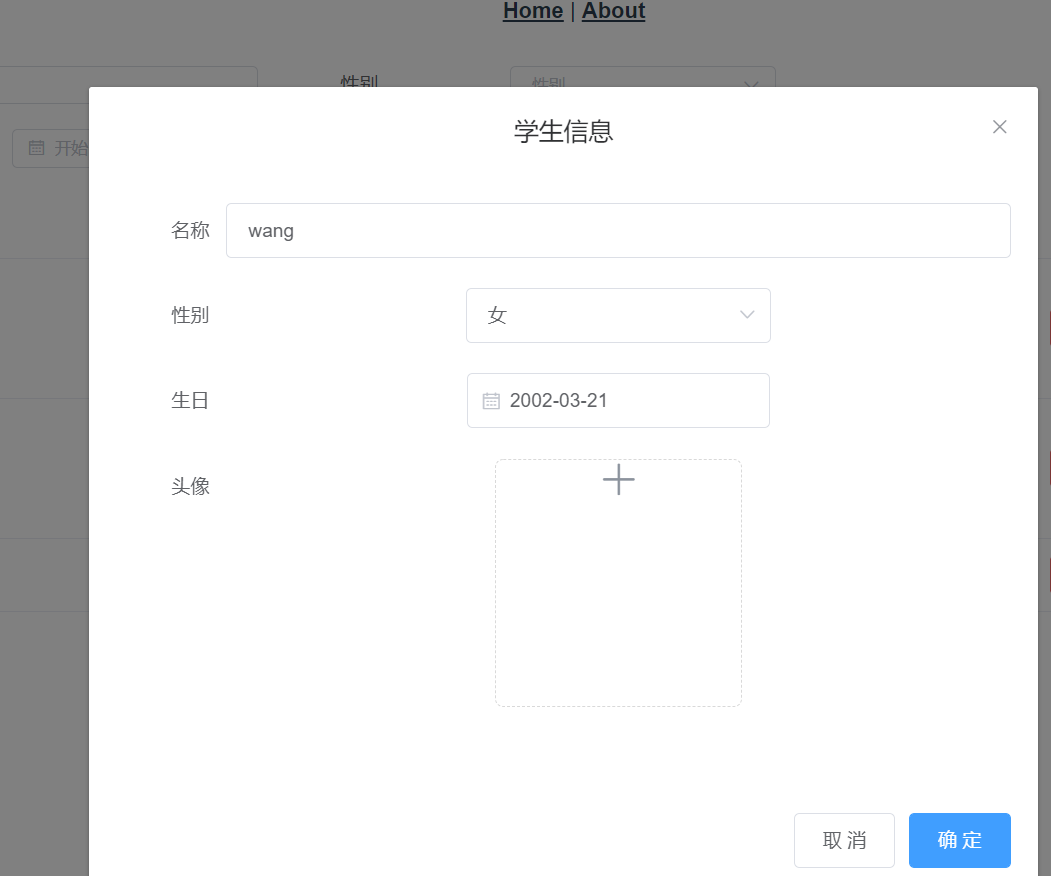
edit
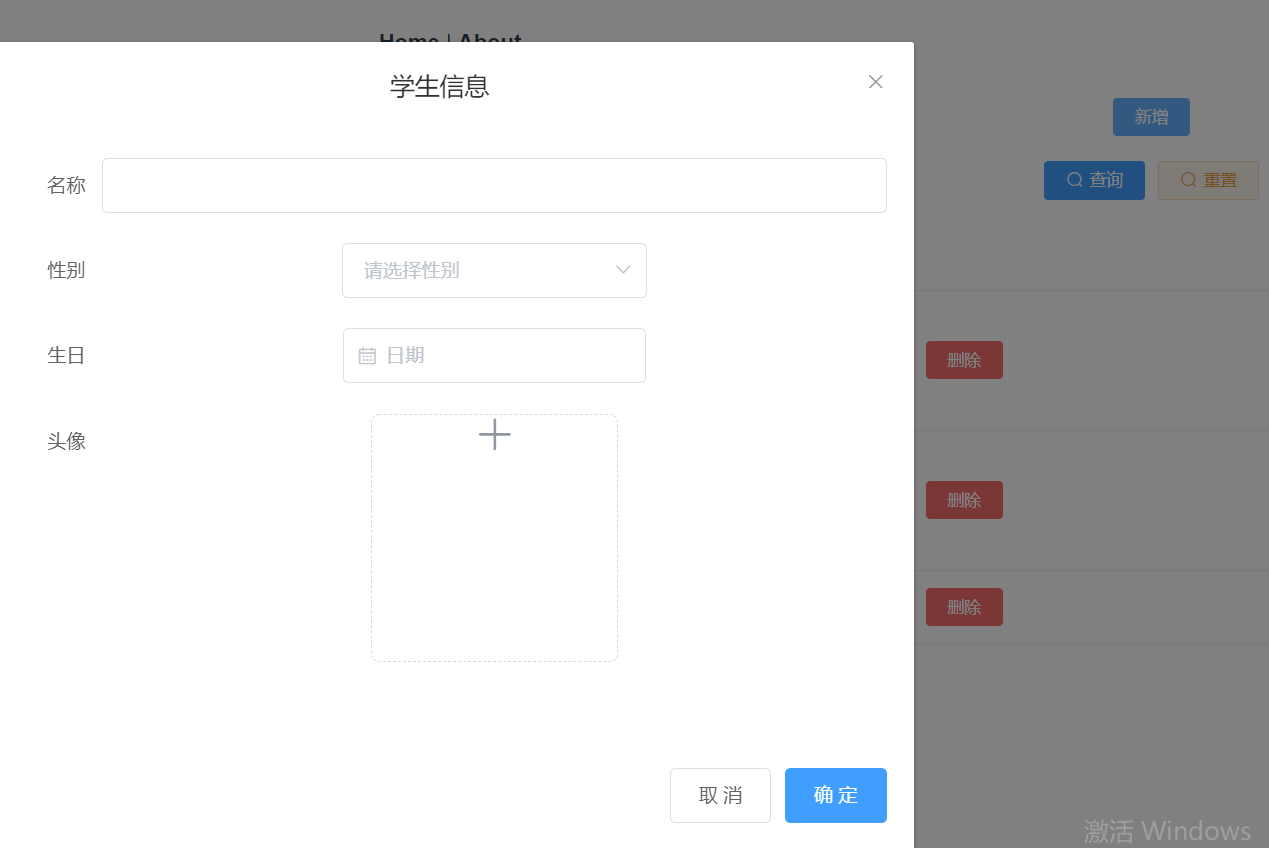
add to
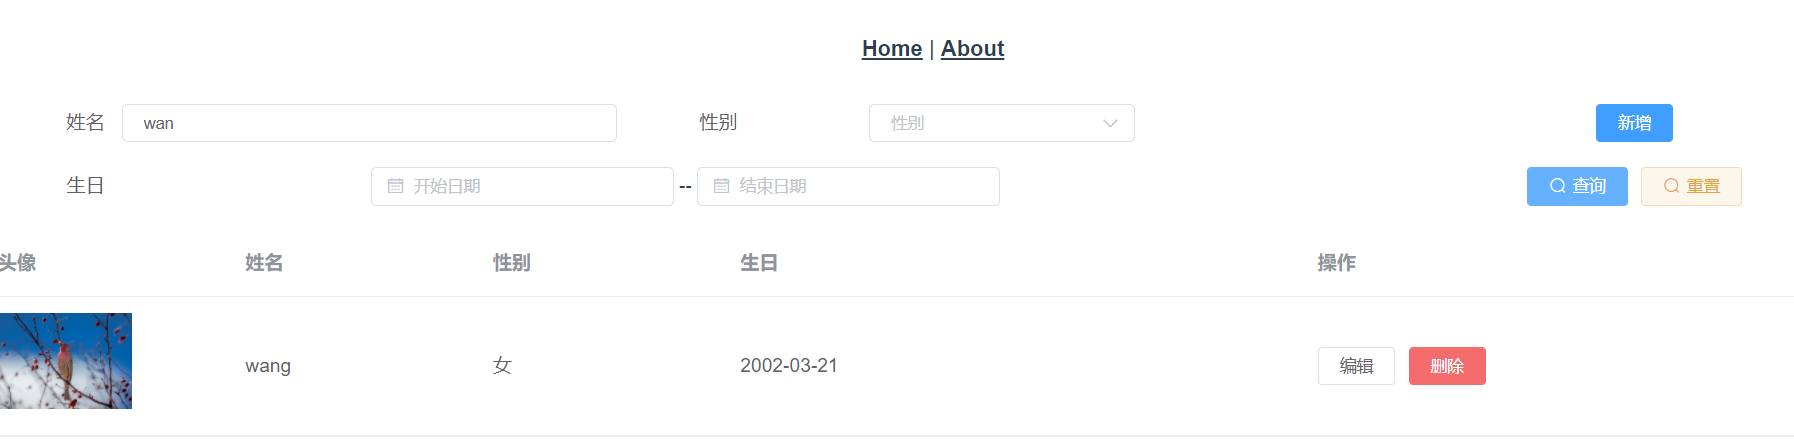
Condition query
Delete. If you can't see the effect, it won't be displayed.