For image download, domain name resolution and time synchronization, please click Alibaba cloud open source mirror station
Ansible principle
Ansible is an open source automation platform. It is a simple automation language that can perfectly describe the IT application infrastructure in * * Ansible Playbook * *. It is also an automation engine that can run Ansible Playbook.
Ansible can manage powerful automated tasks and adapt to many different workflows and environments. At the same time, ansible new users can use it very quickly to improve work efficiency.
To put it bluntly, other hosts are deployed (controlled) in batches. The controlled host is called the master, and the controlled host is the controlled node
The host of the control node can be Linux or Unix
The host of the controlled node can be Linux, Unix and Windows
Ansible Playbook is like a task book. It adopts YAML text file editing and is easy to read
When you need to use ansible, you only need to download ansible and python on the control node and python on the controlled node (Python version requirements: python27+ / python35 +)
The control node also needs to write * * Ansible list * * and Ansible configuration file. The list groups the controlled nodes. The configuration file specifies the path of the list, the user and connection details of SSH connection, etc
We also need to make some relevant configurations for SSH connection, such as sending public key to facilitate our password free login. For convenience, we configure password free sudo for the users of the controlled node
Build environment
Basic configuration
The basic configuration is mainly some simple configuration. In order to facilitate our experiments, we have also made unified regulations
In order to facilitate our experiment, we choose three different versions of operating systems to do the experiment, which are:
[root@master:~]$ cat /etc/redhat-release
Rocky Linux release 8.5 (Green Obsidian)

[root@node12:~]$ cat /etc/redhat-release
CentOS Linux release 7.8.2003 (Core)

[root@node13:~]$ cat /etc/redhat-release
CentOS Stream release 8
Of course, it can also be other versions. The official websites to download are: Netease open source mirror station, Tsinghua University open source mirror station and Alibaba open source mirror station
Select the version and name its host name as follows to distinguish the control node from the controlled node:
[root@master:~]$ hostname
master

[root@node12:~]$ hostname
node12

[root@node13:~]$ hostname
node13
Configure IP for it. The host bits are 11, 12 and 13 respectively
[root@master:~]$ ip address show ens33
2: ens33: <BROADCAST,MULTICAST,UP,LOWER_UP> mtu 1500 qdisc fq_codel state UP group default qlen 1000
    link/ether 00:0c:29:67:de:22 brd ff:ff:ff:ff:ff:ff
    inet 192.168.32.11/24 brd 192.168.32.255 scope global noprefixroute ens33
       valid_lft forever preferred_lft forever
    inet6 fe80::20c:29ff:fe67:de22/64 scope link noprefixroute
       valid_lft forever preferred_lft forever

[root@node12:~]$ ip address show ens33
2: ens33: <BROADCAST,MULTICAST,UP,LOWER_UP> mtu 1500 qdisc pfifo_fast state UP group default qlen 1000
    link/ether 00:0c:29:b1:4a:7d brd ff:ff:ff:ff:ff:ff
    inet 192.168.32.12/24 brd 192.168.32.255 scope global noprefixroute ens33
       valid_lft forever preferred_lft forever
    inet6 fe80::10eb:4b68:b809:f62f/64 scope link noprefixroute
       valid_lft forever preferred_lft forever

[root@node13:~]$ ip address show ens33
2: ens33: <BROADCAST,MULTICAST,UP,LOWER_UP> mtu 1500 qdisc fq_codel state UP group default qlen 1000
    link/ether 00:0c:29:b1:6e:60 brd ff:ff:ff:ff:ff:ff
    inet 192.168.32.13/24 brd 192.168.32.255 scope global noprefixroute ens33
       valid_lft forever preferred_lft forever
    inet6 fe80::20c:29ff:feb1:6e60/64 scope link noprefixroute
       valid_lft forever preferred_lft forever
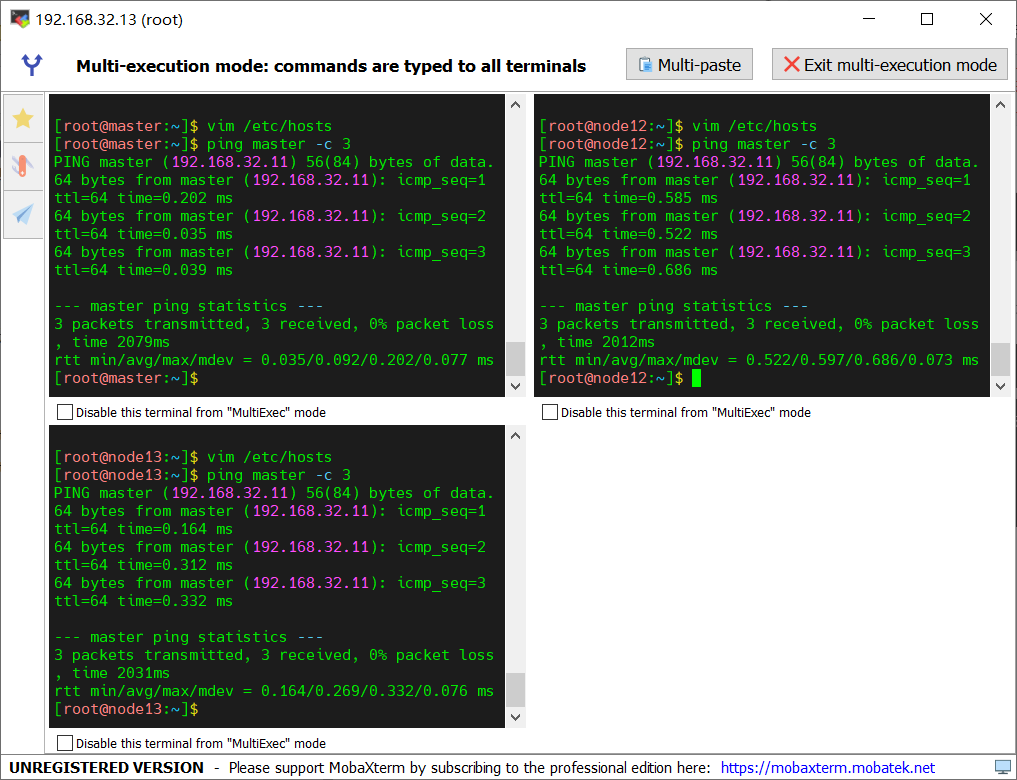
Write the DNS resolution to their respective / etc/hosts files (take master as an example here)
[root@master:~]$ cat /etc/hosts
127.0.0.1   localhost localhost.localdomain localhost4 localhost4.localdomain4
::1         localhost localhost.localdomain localhost6 localhost6.localdomain6
192.168.32.11 master
192.168.32.12 node12
192.168.32.13 node13
ping command test
Add users for each host, add student users for each host, and add additional class users for the control node
[root@master:~]$ id student
uid=1000(student) gid=1000(student) groups=1000(student)
[root@master:~]$ id class
uid=1001(class) gid=1001(class) groups=1001(class)

[root@node12:~]$ id student
uid=1000(student) gid=1000(student) groups=1000(student)

[root@node13:~]$ id student
uid=1000(student) gid=1000(student) groups=1000(student)
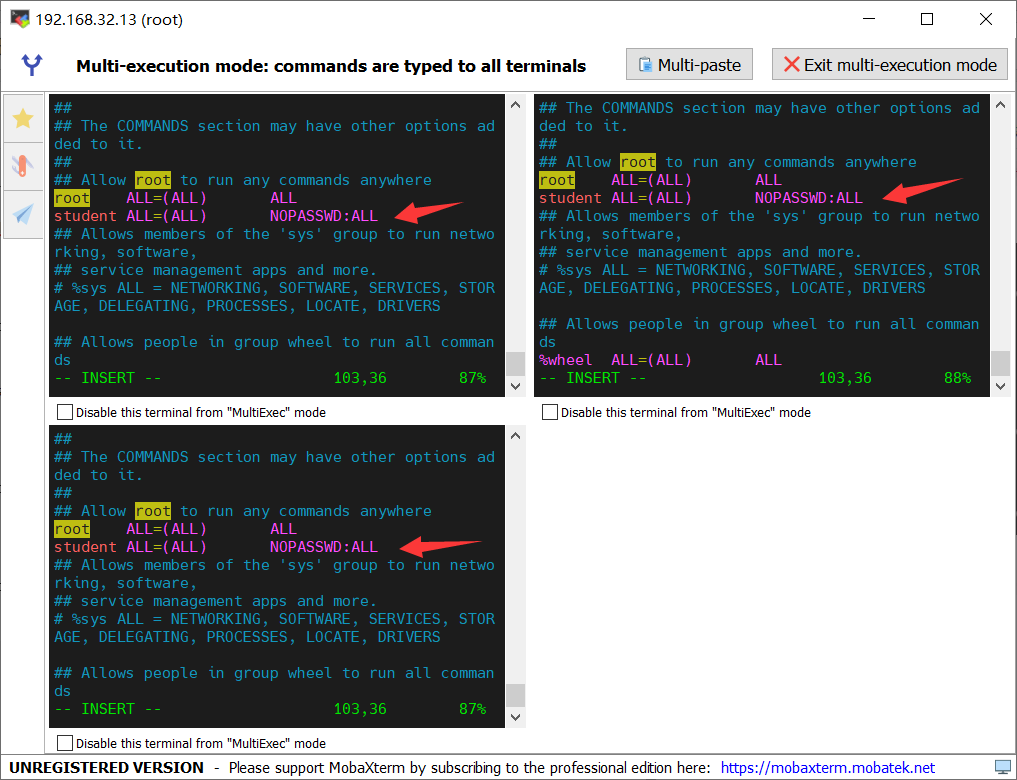
Configure secret free sudo for each student user: vim /etc/sudoers
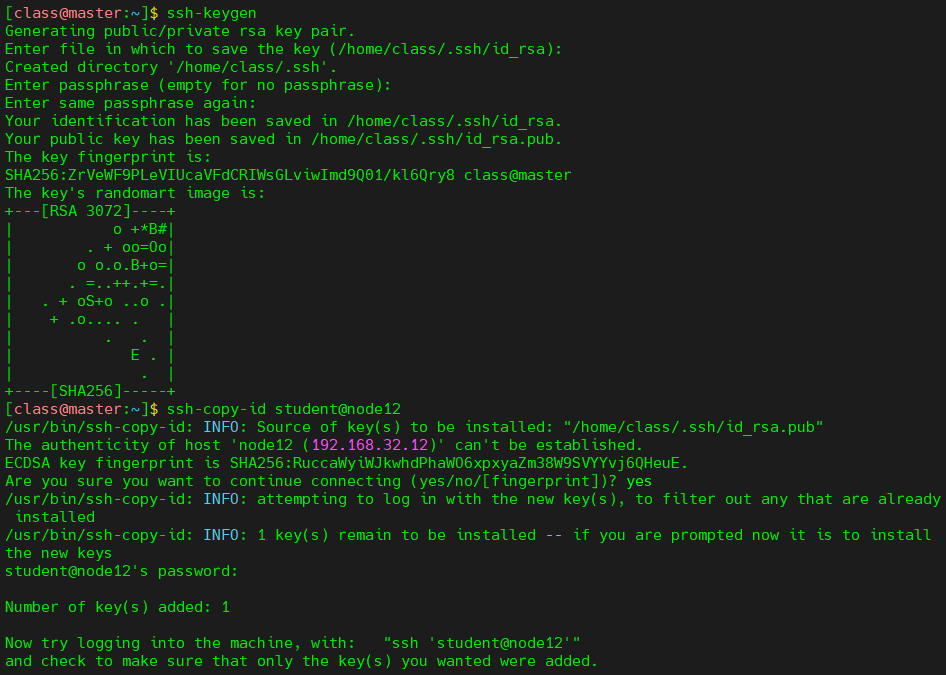
SSH: the control node generates a public-private key and transmits the public key to the student user of the controlled node
##User generated with class
# Generate key
ssh-keygen
# Public key transmission
ssh-copy-id student@master
ssh-copy-id student@node12
ssh-copy-id student@node13
View their home directories
[class@master:~]$ ll /home/class/.ssh/
total 12
-rw------- 1 class class 2602 Feb 19 19:58 id_rsa
-rw-r--r-- 1 class class  566 Feb 19 19:58 id_rsa.pub
-rw-r--r-- 1 class class  364 Feb 19 19:58 known_hosts
[root@master:~]$ ll /home/student/.ssh/
total 4
-rw------- 1 student student 566 Feb 19 19:58 authorized_keys

[root@node12:~]$ ll /home/student/.ssh/
total 4
-rw------- 1 student student 566 Feb 19 19:59 authorized_keys

[root@node13:~]$ ll /home/student/.ssh/
total 4
-rw------- 1 student student 566 Feb 19 19:59 authorized_keys
Environment configuration
Environment configuration is mainly the downloading of software packages
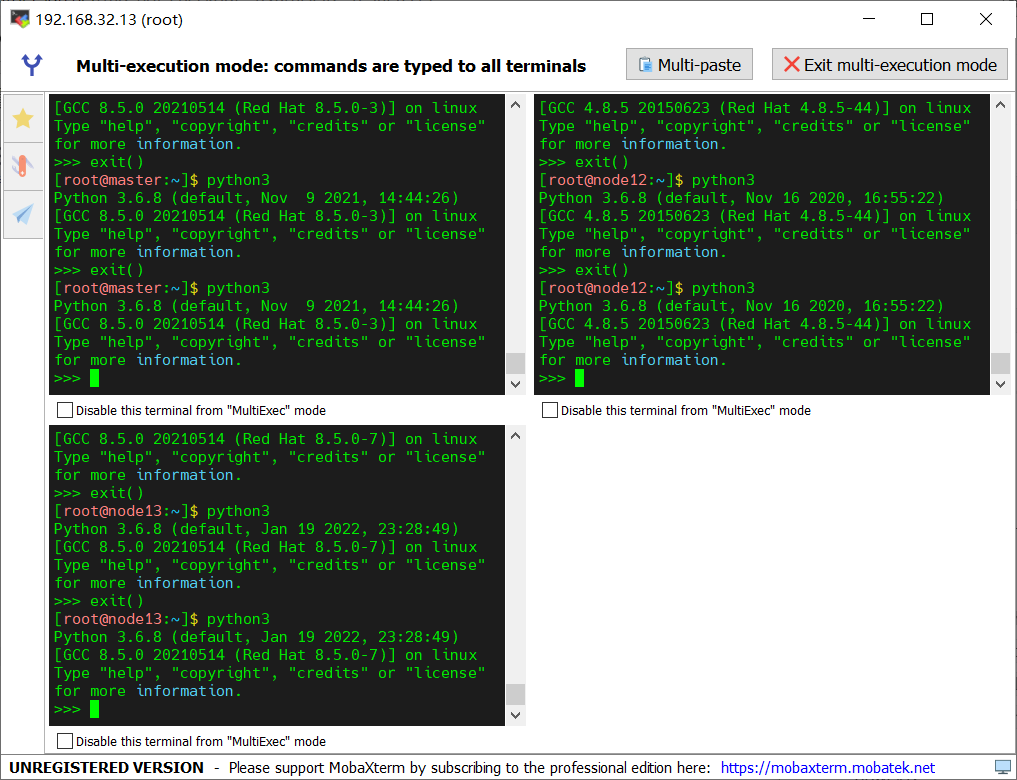
Let's download python36 for the three hosts: Yum install pyton36 / Yum module install pyton36
The next step is to install Ansible on the control node. Before installing, we need to write the yum source: VIM / etc / yum repos. d/epel. repo
[epel]
name=epel
baseurl=https://mirrors.aliyun.com/epel/8/Everything/x86_64/
gpgcheck=0
Next: yum install ansible -y

View version: ansible --version
[root@master:~]$ ansible --version
ansible 2.9.27
  config file = /etc/ansible/ansible.cfg
  configured module search path = ['/root/.ansible/plugins/modules', '/usr/share/ansible/plugins/modules']
  ansible python module location = /usr/lib/python3.6/site-packages/ansible
  executable location = /usr/bin/ansible
  python version = 3.6.8 (default, Nov  9 2021, 14:44:26) [GCC 8.5.0 20210514 (Red Hat 8.5.0-3)]
Preparation of documents
We need to write two files (excluding Ansible Playbook): list and configuration file
There are three types of configuration files:
./ansible.cfg						# The highest priority is in the working directory
~/.ansible.cfg						# Second, in the home directory, it is a hidden file
/etc/ansible/ansible.cfg			# Lowest priority
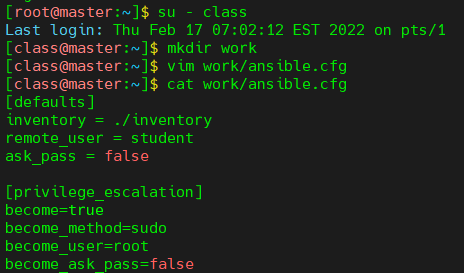
Then we will create a new directory as the working directory, write the configuration file under it and execute the Ansible command
Where the ansible command is used, there is the working directory
# The following is the content of the configuration file
[defaults]
inventory = ./inventory			; Specifies the path to the manifest
remote_user = student			; Specify which user to remotely control
ask_pass = false				; Set to login without password
# There should be spaces on both sides of the equal sign above and a blank line below

[privilege_escalation]
become=true						; Change to another user after logging in to the controlled host
become_method=sudo				; with sudo Change mode to other users( sudo,su)
become_user=root				; Become root user
become_ask_pass=false			; sudo No password is required
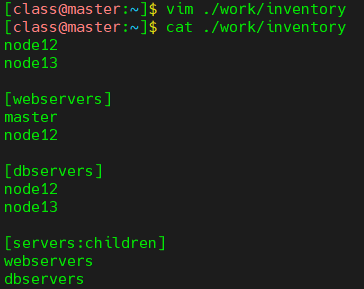
Write a list in the working directory: vim/ The default path of the work / inventory list is / etc/ansible/hosts, but we usually don't use it
node12
node13

# The following are the groups
[webservers]
master
node12

[dbservers]
node12
node13

# This is to combine two groups into one group
[servers:children]
webservers
dbservers
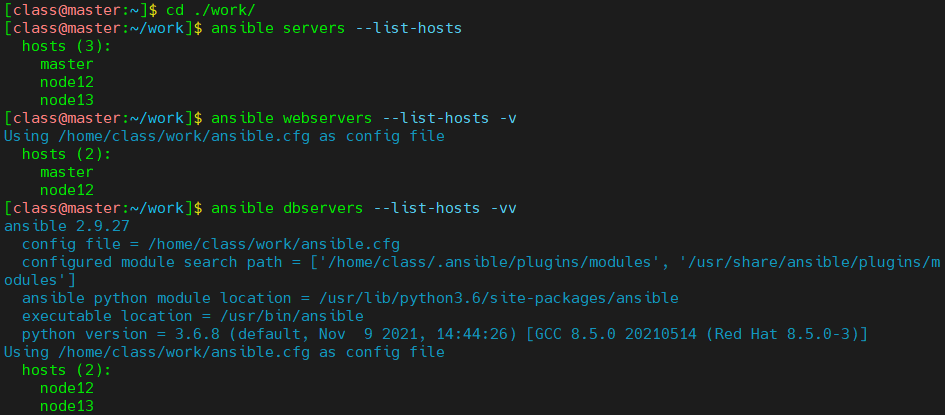
Test: ansible group name or host name -- List hosts [- VVV]
It must be executed in the working directory, otherwise the configuration file will be loaded according to the priority; We can follow the option - v later, which will give a gradually detailed process according to the number of v
experiment
1. Execute the id command targeting the all host group
2. Use the copy module to modify the / etc/motd file on all hosts. The content is welcome to ansible
3. Use the command module to view the contents of the / etc/motd file
4. Use the user module to create a user xiaoming with a uid of 2000
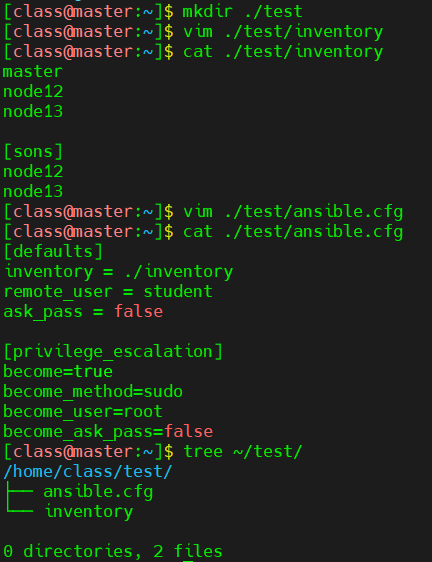
First create a working directory and edit the list and configuration file under it
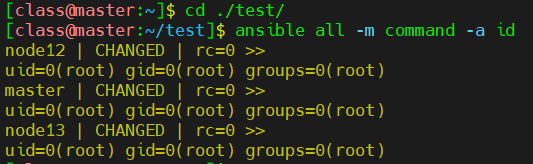
1. Execute the id command targeting the all host group: ansible all -m command -a id
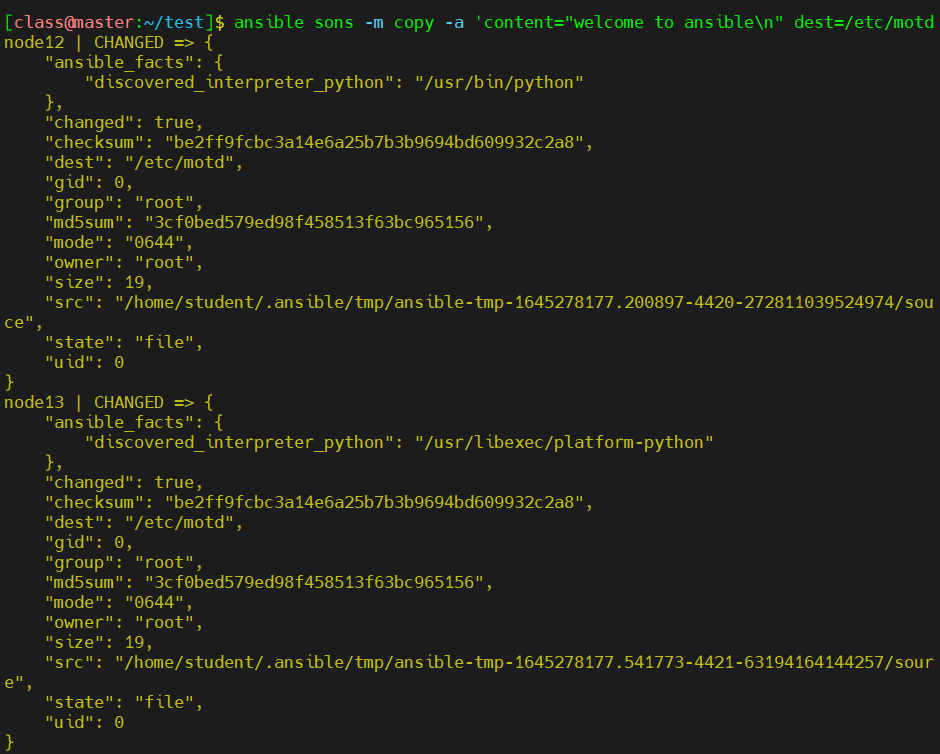
2. Use the copy module to modify the / etc/motd file on all hosts. The content is welcome to ansible: ansible sons -m copy -a 'content="welcome to ansible\n" dest=/etc/motd'
3. Use the · command module to view the contents of the / etc/motd file: ansible sons -m command -a 'cat /etc/motd'

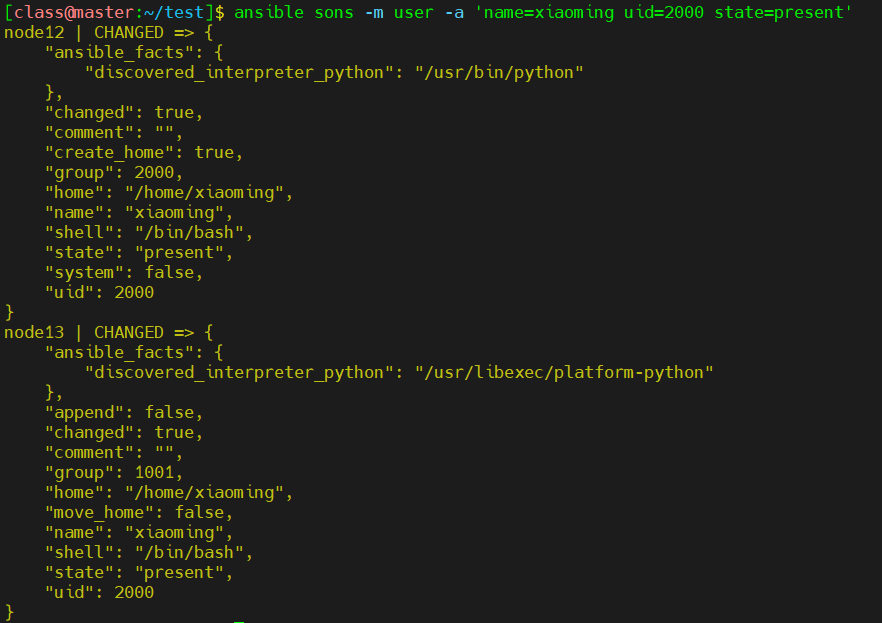
4. Use the user module to create a user xiaoming with uid of 2000: ansible sons -m user -a 'name=xiaoming uid=2000 state=present'
supplement
The usage of Ansible is: Ansible host pattern - M module [- a 'module arguments'] [- I inventory]
These are its temporary commands. Usually, we write these instructions in Ansible Playbook
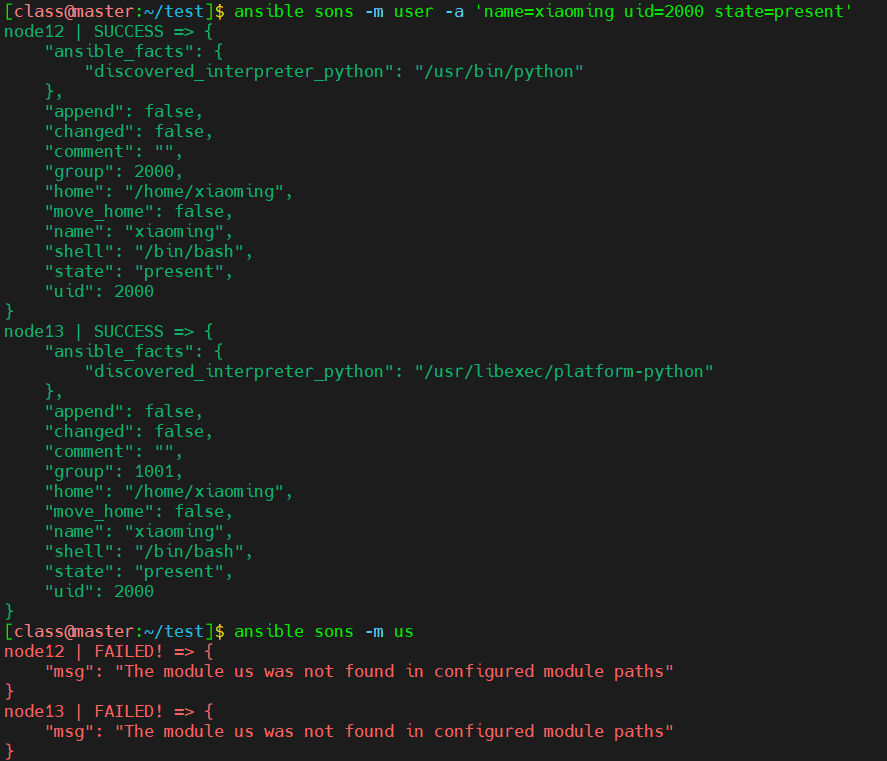
There are three return values. One is CHANGED, which indicates that the execution is successful and the change has been made; Another is * * SUCCESS * *, which means the execution is successful. It is checked that it is already in this state, so it has not been CHANGED; The last one is FAILED, which is execution error. Accordingly, their colors are also different
This article is transferred from: https://blog.csdn.net/SuichI314/article/details/123020414