I. Preface
Since the birth of the Linux operating system on October 5, 1991, many technological bulls have been interested in its open source and freedom. Every Linux enthusiast has contributed his part to it. Whether in the Linux kernel or open source software, it has provided a good learning and research environment for our future generations.
In this paper, by tailoring the existing Linux system, according to their own needs, build a small Linux system of their own, so that it can have some common small functions of Linux.
Two, principle
Start-up process introduction:
Before making a small Linux system, it is necessary to understand the Linux startup process again.
1. First of all, Linux should check whether the hardware device is malfunctioning through POST self-check.
2. If you have multiple boot disks, you need to select boot disks in BIOS
3. Start bootloader bootloader in MBR
4. Loading Kernel Files
5. Father process, ancestor init that executes all processes
6. Print Welcome Interface
In the startup process of Linux, two other files are needed to load the kernel files:
1) initrd, a disk device simulated with memory on CentOS 5
2) initramfs, a file system simulated by memory on CentOS 6
In the process of departure, what is init mainly used for?
init invokes the configuration file / etc/inittab, and then executes the system initialization script for / etc/rc.d/rc.sysinit.
Well, we already know the principle. Next, let's look at the specific ideas ().
Three, train of thought
1. We need to add a hard disk / dev/sdb to an existing Linux system and divide it into two partitions, one is / boot and the other is /, and format it. Of course, we need a clear concept that the hard disk we are adding now is / dev/sdb in the existing Linux system, but when we set everything up, we need to unplug the hard disk and put it on our new system. At this time, it is / dev/sda.
2. On the hard disk of / dev/sdb, we want to make it a stand-alone Linux system, in which all the files need to be copied in one by one. Moreover, as a future hard disk to be / dev/sda, there must be a grub file in it, so we need to install the grub file.
3. At the same time, as a Linux system that can run independently, the kernel must be indispensable! So we have to copy the kernel file and initramfs file to our / dev/sdb.
4. Now that our system has begun to take shape, the next step is to need 0.0 copies of the program, which we can achieve through a script. Specific scripts will be mentioned below.
When the above steps are completed, our homemade Linux will be completed. ~That's what we think. Next, let's start ()~*
IV. Operational steps
In this experiment, we take CentOS 6.9 as an example~
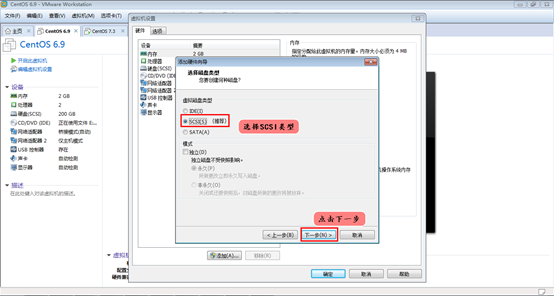
1. Target disk partition
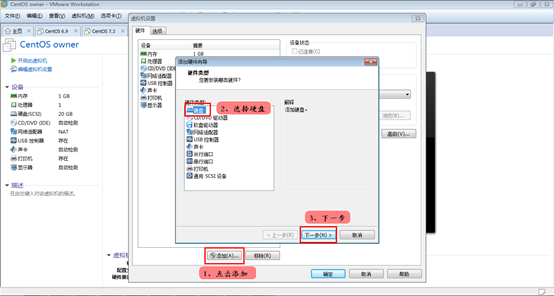
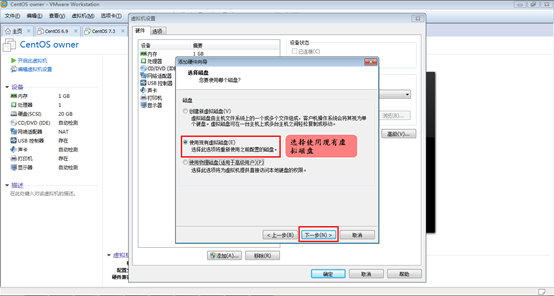
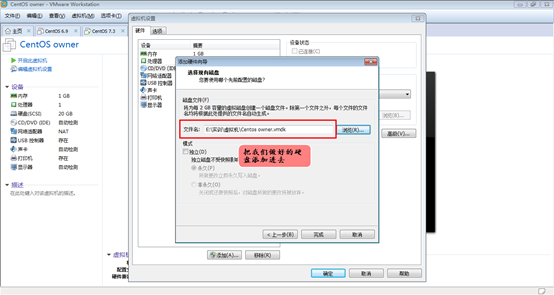
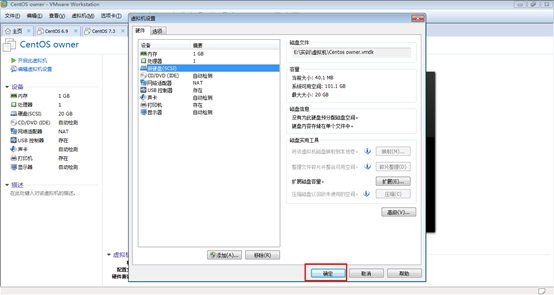
First, we add a 20G hard disk to the host.
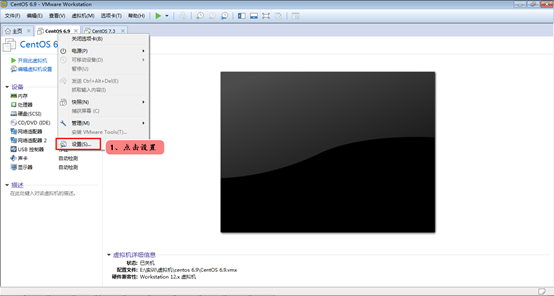
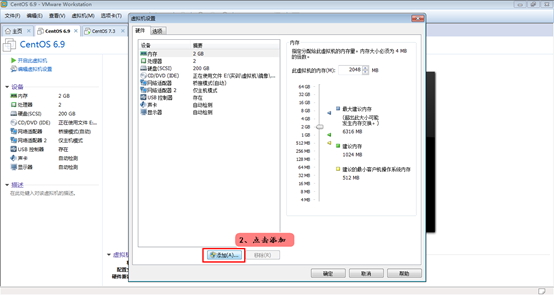
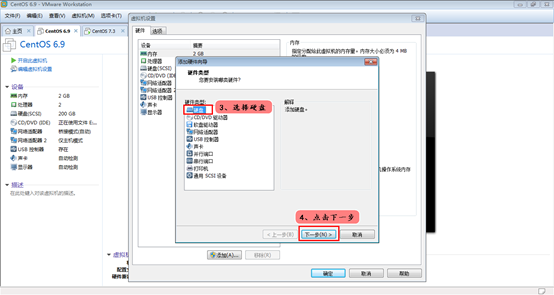
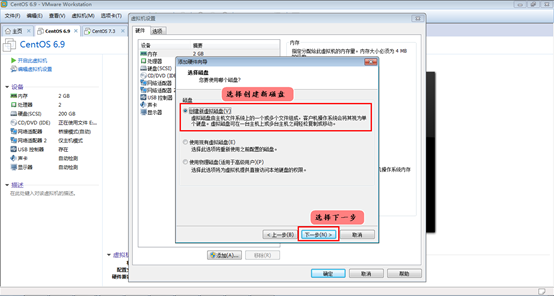
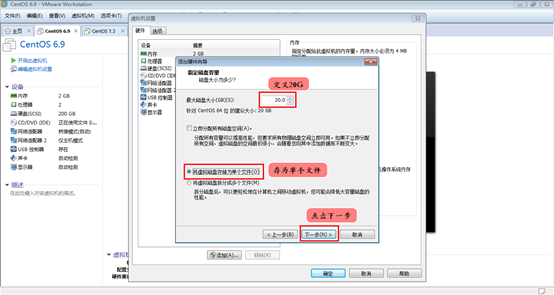

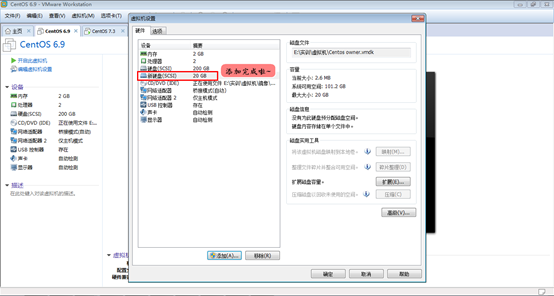
After adding, click OK, and then we open the host. Partition our / dev/sdb by fdisk:
 1 [root@localhost ~]# fdisk /dev/sdb
 2 Device contains neither a valid DOS partition table, nor Sun, SGI or OSF disklabel
 3 Building a new DOS disklabel with disk identifier 0x4fde4cd0.
 4 Changes will remain in memory only, until you decide to write them.
 5 After that, of course, the previous content won't be recoverable.
 6
 7
 8 Warning: invalid flag 0x0000 of partition table 4 will be corrected by w(rite)
 9
10
11 WARNING: DOS-compatible mode is deprecated. It's strongly recommended to
12 switch off the mode (command 'c') and change display units to
13 sectors (command 'u').
14
15
16 Command (m for help): n
17 Command action
18 e extended
19 p primary partition (1-4)
20 p
21 Partition number (1-4): 1
22 First cylinder (1-2610, default 1):
23 Using default value 1
24 Last cylinder, +cylinders or +size{K,M,G} (1-2610, default 2610): +100M
25
26
27 Command (m for help): n
28 Command action
29 e extended
30 p primary partition (1-4)
31 p
32 Partition number (1-4): 2
33 First cylinder (15-2610, default 15):
34 Using default value 15
35 Last cylinder, +cylinders or +size{K,M,G} (15-2610, default 2610):
36 Using default value 2610
37 #View partition
38 Command (m for help): p
39
40
41 Disk /dev/sdb: 21.5 GB, 21474836480 bytes
42 255 heads, 63 sectors/track, 2610 cylinders
43 Units = cylinders of 16065 * 512 = 8225280 bytes
44 Sector size (logical/physical): 512 bytes / 512 bytes
45 I/O size (minimum/optimal): 512 bytes / 512 bytes
46 Disk identifier: 0x4fde4cd0
47
48
49 Device Boot Start End Blocks Id System
50 /dev/sdb1 1 14 112423+ 83 Linux
51 /dev/sdb2 15 2610 20852370 83 Linux
52 #Save and exit
53 Command (m for help): w
54 The partition table has been altered!
Next, we format the partition of / dev/sdb:
1 [root@localhost ~]# mkfs.ext4 /dev/sdb1
2 [root@localhost ~]# mkfs.ext4 /dev/sdb2
When the formatting is complete, we create a folder. To mount:
1 [root@localhost ~]# mkdir -p /mnt/boot
2 [root@localhost ~]# mount /dev/sdb1 /mnt/boot/
Note: The new folder must be / mnt/boot
2. Install grub to target disk
We install it directly with the grub-install --root-directory=/mnt command. Using this command will install grub to boot the second phase of the file.
 1 [root@localhost ~]# grub-install --root-directory=/mnt /dev/sdb
 2 Probing devices to guess BIOS drives. This may take a long time.
 3 Installation finished. No error reported.
 4 This is the contents of the device map /mnt/boot/grub/device.map.
 5 Check if this is correct or not. If any of the lines is incorrect,
 6 fix it and re-run the script `grub-install'.
 7
 8
 9 (fd0)    /dev/fd0
10 (hd0)    /dev/sda
11 (hd1)    /dev/sdb
12 [root@localhost ~]# cd /mnt/boot
13 [root@localhost boot]# ls
14 grub lost+found
15 [root@localhost boot]# cd grub/
16 [root@localhost grub]# ls
17 device.map fat_stage1_5 iso9660_stage1_5 minix_stage1_5 stage1 ufs2_stage1_5
18 xfs_stage1_5 e2fs_stage1_5 ffs_stage1_5 jfs_stage1_5 reiserfs_stage1_5 stage2 vstafs_stage1_5
We can take a look at the binary to confirm whether we have successfully installed:
 1 [root@localhost ~]# hexdump -C -n 512 /dev/sdb
 2 00000000 eb 48 90 00 00 00 00 00 00 00 00 00 00 00 00 00 |.H..............|
 3 00000010 00 00 00 00 00 00 00 00 00 00 00 00 00 00 00 00 |................|
 4 *
 5 00000030 00 00 00 00 00 00 00 00 00 00 00 00 00 00 03 02 |................|
 6 00000040 ff 00 00 20 01 00 00 00 00 02 fa 90 90 f6 c2 80 |... ............|
 7 00000050 75 02 b2 80 ea 59 7c 00 00 31 c0 8e d8 8e d0 bc |u....Y|..1......|
 8 00000060 00 20 fb a0 40 7c 3c ff 74 02 88 c2 52 f6 c2 80 |. ..@|<.t...R...|
 9 00000070 74 54 b4 41 bb aa 55 cd 13 5a 52 72 49 81 fb 55 |tT.A..U..ZRrI..U|
10 00000080 aa 75 43 a0 41 7c 84 c0 75 05 83 e1 01 74 37 66 |.uC.A|..u....t7f|
11 00000090 8b 4c 10 be 05 7c c6 44 ff 01 66 8b 1e 44 7c c7 |.L...|.D..f..D|.|
12 000000a0 04 10 00 c7 44 02 01 00 66 89 5c 08 c7 44 06 00 |....D...f.\..D..|
13 000000b0 70 66 31 c0 89 44 04 66 89 44 0c b4 42 cd 13 72 |pf1..D.f.D..B..r|
14 000000c0 05 bb 00 70 eb 7d b4 08 cd 13 73 0a f6 c2 80 0f |...p.}....s.....|
15 000000d0 84 f0 00 e9 8d 00 be 05 7c c6 44 ff 00 66 31 c0 |........|.D..f1.|
16 000000e0 88 f0 40 66 89 44 04 31 d2 88 ca c1 e2 02 88 e8 |..@f.D.1........|
17 000000f0 88 f4 40 89 44 08 31 c0 88 d0 c0 e8 02 66 89 04 |..@.D.1......f..|
18 00000100 66 a1 44 7c 66 31 d2 66 f7 34 88 54 0a 66 31 d2 |f.D|f1.f.4.T.f1.|
19 00000110 66 f7 74 04 88 54 0b 89 44 0c 3b 44 08 7d 3c 8a |f.t..T..D.;D.}<.|
20 00000120 54 0d c0 e2 06 8a 4c 0a fe c1 08 d1 8a 6c 0c 5a |T.....L......l.Z|
21 00000130 8a 74 0b bb 00 70 8e c3 31 db b8 01 02 cd 13 72 |.t...p..1......r|
22 00000140 2a 8c c3 8e 06 48 7c 60 1e b9 00 01 8e db 31 f6 |*....H|`......1.|
23 00000150 31 ff fc f3 a5 1f 61 ff 26 42 7c be 7f 7d e8 40 |1.....a.&B|..}.@|
24 00000160 00 eb 0e be 84 7d e8 38 00 eb 06 be 8e 7d e8 30 |.....}.8.....}.0|
25 00000170 00 be 93 7d e8 2a 00 eb fe 47 52 55 42 20 00 47 |...}.*...GRUB .G|
26 00000180 65 6f 6d 00 48 61 72 64 20 44 69 73 6b 00 52 65 |eom.Hard Disk.Re|
27 00000190 61 64 00 20 45 72 72 6f 72 00 bb 01 00 b4 0e cd |ad. Error.......|
28 000001a0 10 ac 3c 00 75 f4 c3 00 00 00 00 00 00 00 00 00 |..<.u...........|
29 000001b0 00 00 00 00 00 00 00 00 d0 4c de 4f 00 00 00 01 |.........L.O....|
30 000001c0 01 00 83 fe 3f 0d 3f 00 00 00 4f 6e 03 00 00 00 |....?.?...On....|
31 000001d0 01 0e 83 fe ff ff 8e 6e 03 00 24 5d 7c 02 00 00 |.......n..$]|...|
32 000001e0 00 00 00 00 00 00 00 00 00 00 00 00 00 00 00 00 |................|
33 000001f0 00 00 00 00 00 00 00 00 00 00 00 00 00 00 55 aa |..............U.|
34 00000200
Successful installation.
3. Copy the kernel file and initrd file
Copy the kernel file and initrd file into the boot directory under / dev/sdb:
1 [root@localhost ~]# cp /boot/vmlinuz-2.6.32-696.el6.x86_64 /mnt/boot/
2 [root@localhost ~]# cp /boot/initramfs-2.6.32-696.el6.x86_64.img /mnt/boot/
4. Establishment of grub.conf file
We have transplanted the kernel and initrd files above, and we can write grub.conf files according to their versions:
1 [root@localhost ~]# vim /mnt/boot/grub/grub.conf
2 default=0
3 timeout=3
4 title linux owner
5 kernel /vmlinuz-2.6.32-696.el6.x86_64 root=UUID=1feac471-08c5-4b5b-aaff-bb6a1da60e26 selinux=0 init=/bin/bash
6 initrd /initramfs-2.6.32-696.el6.x86_64.img
Note that we need to turn selinux off and set init to tell the kernel not to look for the program again, otherwise the boot will be wrong.~
5. Create a first-level directory and copy files
At this point, we're missing catalogues and documents.~
Create a first-level directory after boot-up and mount / dev/sdb2 to / mnt/sysroot to make the directory the root directory:
 1 [root@localhost ~]# mkdir /mnt/sysroot
 2 [root@localhost ~]# mkdir -pv /mnt/sysroot/{etc,tmp,var,usr,sys,proc,opt,home,root,dev,mnt,media}
 3 mkdir: created directory `/mnt/sysroot/etc'
 4 mkdir: created directory `/mnt/sysroot/tmp'
 5 mkdir: created directory `/mnt/sysroot/var'
 6 mkdir: created directory `/mnt/sysroot/usr'
 7 mkdir: created directory `/mnt/sysroot/sys'
 8 mkdir: created directory `/mnt/sysroot/proc'
 9 mkdir: created directory `/mnt/sysroot/opt'
10 mkdir: created directory `/mnt/sysroot/home'
11 mkdir: created directory `/mnt/sysroot/root'
12 mkdir: created directory `/mnt/sysroot/dev'
13 mkdir: created directory `/mnt/sysroot/mnt'
14 mkdir: created directory `/mnt/sysroot/media'
Copy files, copy files we use scripts to execute, copy our usual commands, small copy here ls, ifconfig, bash, reboot, rm, modprobe, mount, ip, mkdir, touch, cat, vi, less, shutdown, insmod. We can use tree to see how these commands are replicated:
 1 [root@localhost sysroot]# tree /mnt/sysroot/
 2 /mnt/sysroot/
 3 ├── bin
 4 │   ├── bash
 5 │   ├── cat
 6 │   ├── ls
 7 │   ├── mkdir
 8 │   ├── mount
 9 │   ├── rm
10 │   └── touch
11 ├── dev
12 ├── etc
13 ├── home
14 ├── lib64
15 │   ├── ld-linux-x86-64.so.2
16 │   ├── libacl.so.1
17 │   ├── libattr.so.1
18 │   ├── libaudit.so.1
19 │   ├── libblkid.so.1
20 │   ├── libcap.so.2
21 │   ├── libcrypt.so.1
22 │   ├── libc.so.6
23 │   ├── libdbus-1.so.3
24 │   ├── libdl.so.2
25 │   ├── libfreebl3.so
26 │   ├── libgcc_s.so.1
27 │   ├── libm.so.6
28 │   ├── libnih-dbus.so.1
29 │   ├── libnih.so.1
30 │   ├── libnsl.so.1
31 │   ├── libpcre.so.0
32 │   ├── libpthread.so.0
33 │   ├── libresolv.so.2
34 │   ├── librt.so.1
35 │   ├── libselinux.so.1
36 │   ├── libsepol.so.1
37 │   ├── libtinfo.so.5
38 │   ├── libutil.so.1
39 │   └── libuuid.so.1
40 ├── lost+found
41 ├── media
42 ├── mnt
43 ├── opt
44 ├── proc
45 ├── root
46 ├── sbin
47 │   ├── ifconfig
48 │   ├── insmod
49 │   ├── ip
50 │   ├── modprobe
51 │   ├── reboot
52 │   └── shutdown
53 ├── sys
54 ├── tmp
55 ├── usr
56 │   ├── bin
57 │   │   ├── less
58 │   │   └── vim
59 │   └── lib64
60 │   ├── libgpm.so.2
61 │   └── perl5
62 │   └── CORE
63 │   └── libperl.so
64 └── var
65
66 20 directories, 42 files
Obviously we all copied it successfully.~
Attachment: Copy the script source code of the command
 1 #!/bin/base
 2 #----------------------------------
 3 #Filename:copycmd.sh
 4 #Revision:1.0
 5 #Date:2017-09-14
 6 #Author:Keer
 7 #Email:893348728@qq.com
 8 #Website:http://www.cnblogs.com/keerya/
 9 #Description: Copy commands to specified directories
10 #----------------------------------
11
12 #Defining variables
13 destdir=/mnt/sysroot
14 SETCOLOR_FAILURE="echo -en \\033[1;35;5m"
15 SETCOLOR_NORMAL="echo -en \\033[0m"
16
17 echo_jiantou() {
18 echo -en \\033[40G
19 $SETCOLOR_FAILURE
20 }
21
22 echo_copy() {
23 echo -en \\033[80G
24 $SETCOLOR_FAILURE
25 echo -n $"Replication completed!"
26 $SETCOLOR_NORMAL
27 }
28
29 #Defined function
30 #Copy command
31 copy_cmd(){
32 #       Defining variables
33         local cmd_path=`which --skip-alias $cmd`
34         local cmd_dir=`dirname $cmd_path`
35         local cmd_destdir=$destdir$cmd_dir
36         if [ ! -d $cmd_destdir ] ;then
37                 mkdir -pv $cmd_destdir &> /dev/null
38         fi
39         cp $cmd_path $cmd_destdir &> /dev/null
40         echo -e "\t$cmd_path `echo_jiantou` \t $cmd_destdir `echo_copy` "
41 }
42 #Copy library files to determine whether library files exist, if they exist, skip the cycle; if they do not exist, judge whether library files exist in the directory, if they exist, copy library files; if they do not exist, create a new directory and copy library files.  cp -v Display detailed operations for command execution
43 copy_libfile(){
44         local cmd_path=`which --skip-alias $cmd`
45         local lib_list=`ldd $cmd_path |egrep -o "/.* " `
46         for i in  $lib_list ;do
47                 local lib_dir=$destdir$i
48                 local lib_destdir=$destdir`dirname $i`
49                 echo -e "\t$i `echo_jiantou` \t $lib_destdir `echo_copy` "
50                 if [ -e $lib_dir ];then
51                         continue
52                 elif [ -d $lib_destdir ];then
53                         cp  $i $lib_destdir
54                 else
55                         mkdir -pv $lib_destdir &> /dev/null
56                         cp  $i $lib_destdir
57                 fi
58         done
59 }
60 #if/mnt/sysroot If not, create
61 if [ ! d $destdir ];then
62         mkdir $destdir
63 fi
64
65 #Dead cycle, empty screen
66 while true ; do
67         tput clear
68 #Formal:
69 cat <<-EOF
70 **********************************************************************
71 ***                      Command replication script                                ***
72 ***                     Please enter a command                               ***
73 ***                   Press q or quit Exit script                              ***
74 **********************************************************************
75 EOF
76
77         read -p "Please input a execute command: " cmd
78         if [ "$cmd" == 'q' -o "$cmd" == 'quit' ];then
79                 unset cmd destdir
80                 break
81         fi
82 #       Determine whether the input command exists
83         if [ -n "$cmd" ];then
84                 which --skip-alias "$cmd" &> /dev/null
85                 if [ $? -eq 0 ];then
86                         copy_cmd $cmd
87                         copy_libfile $cmd
88                 else
89                         echo "$cmd is not exist"
90                 fi
91         else
92                 echo "Please enter at leastone command"
93         fi
94         echo -e "Please enter \\033[31;1menter\\033[0m and we continue"
95         read input
96
97 done
6. Duplicate Network Card Driver
Our basic work has been completed. If we want to make this virtual machine with network card function, we must copy the network card driver. The specific operation is as follows:
1) Query the network card details:
 1 [root@localhost sysroot]# modinfo e1000
 2 filename: /lib/modules/2.6.32-696.el6.x86_64/kernel/drivers/net/e1000/e1000.ko
 3 version: 7.3.21-k8-NAPI
 4 license: GPL
 5 description: Intel(R) PRO/1000 Network Driver
 6 author: Intel Corporation, <linux.nics@intel.com>
 7 srcversion: A911791C4EFC2A93BCFCF6A
 8 alias: pci:v00008086d00002E6Esv*sd*bc*sc*i*
 9 alias: pci:v00008086d000010B5sv*sd*bc*sc*i*
10 alias: pci:v00008086d00001099sv*sd*bc*sc*i*
11 alias: pci:v00008086d0000108Asv*sd*bc*sc*i*
12 alias: pci:v00008086d0000107Csv*sd*bc*sc*i*
13 alias: pci:v00008086d0000107Bsv*sd*bc*sc*i*
14 ......
2) Copy the path of the network card module to the library file of / mnt/sysroot:
1 [root@localhost sysroot]# cp /lib/modules/2.6.32-696.el6.x86_64/kernel/drivers/net/e1000/e1000.ko /mnt/sysroot/lib64/
Above, all our operations have been completed. Now we can shut down and take the hard disk / dev/sdb down and put it on a new virtual machine.~
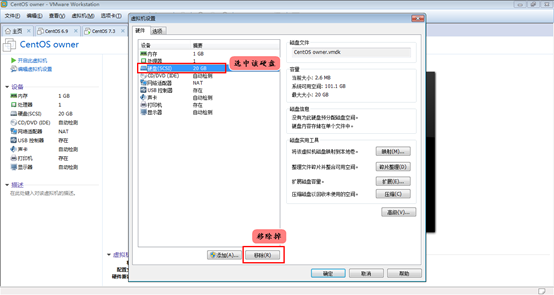
V. Test boot
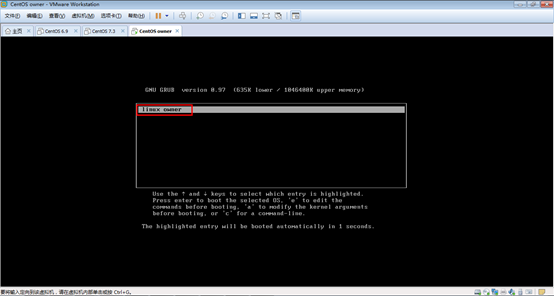
We create a new virtual machine and start it with a hard disk. We don't use it, delete it and add our own defined hard disk.

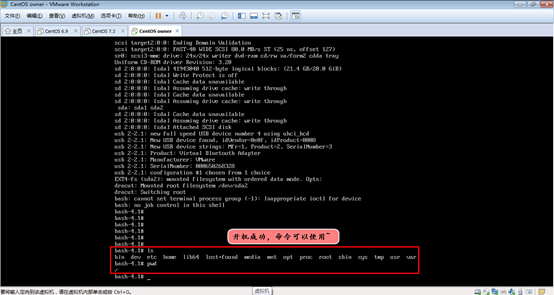
At this time, the hard drives we have made have been added. We can try to boot it. If the virtual machine can be turned on normally, our experiment is successful.~
6. Realizing Network Function

Because you forgot to copy ping when copying commands... So let's use another machine to ping the ip address:
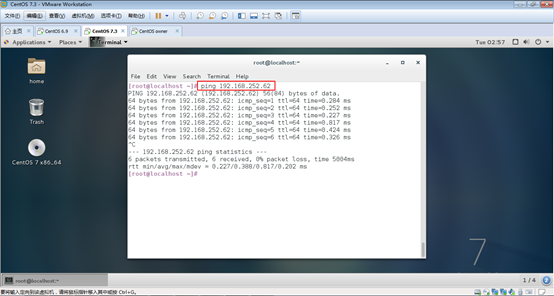
Pingtong~
At this point, we have completed all the operations of customizing Linux privately, and our homemade Linux can also be networked.~
All the experiments were successful! Sprinkle flowers