Alfred is a powerful artifact that can effectively improve the efficiency of MAC computers. It can be said that with Alfred, you can basically realize various operations without the mouse. Compared with the Mac's own focus search, it can be called a rolling advantage.
The following figure shows the Alfred icon on the official website: https://www.alfredapp.com/

Before introducing its use, let's first understand its basic functions.
Introduction to basic functions
First, use the shortcut key Alt + space to open the Alfred operation interface.

Alfred's common basic functions are document query, specified website search, clipboard history, integrated iTerm2, computer dictionary translation, integrated 1password, system function, enlarged display content, etc. Next, select several of them to make a simple display for you.
consult your documentation
You can query documents through the following four shortcuts:\
- Open: open file
- find: open document directory
- In: search in files
- tags: Specifies the file label
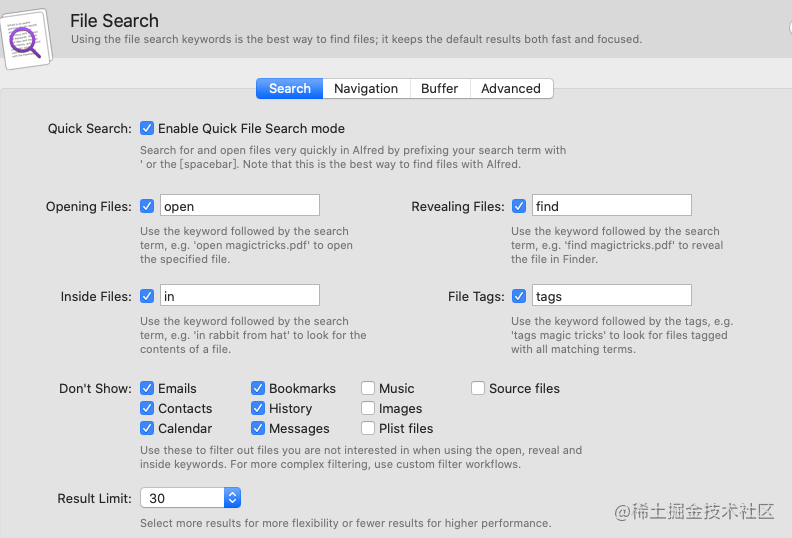
The following figure is an example of using the find command.

Specify a site to search
Alfred can specify search engine keywords to simplify search methods.
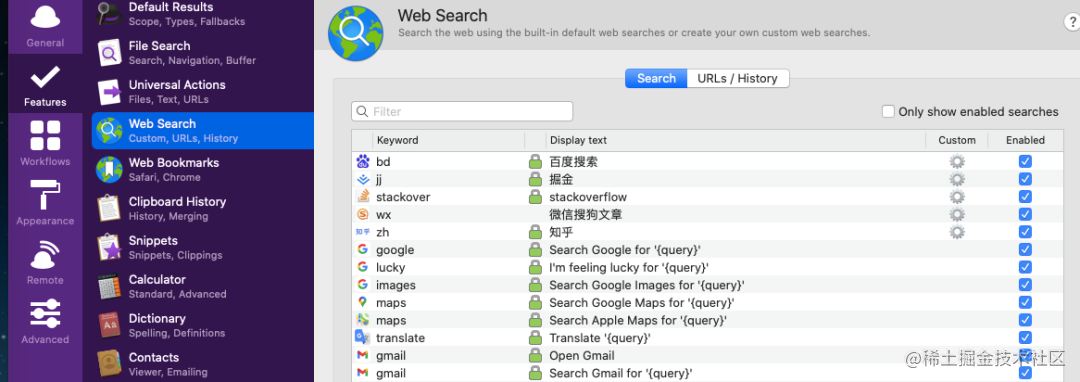
Take the custom Baidu search engine as an example. If we want bd as the keyword of Baidu search engine, we can configure it as follows:
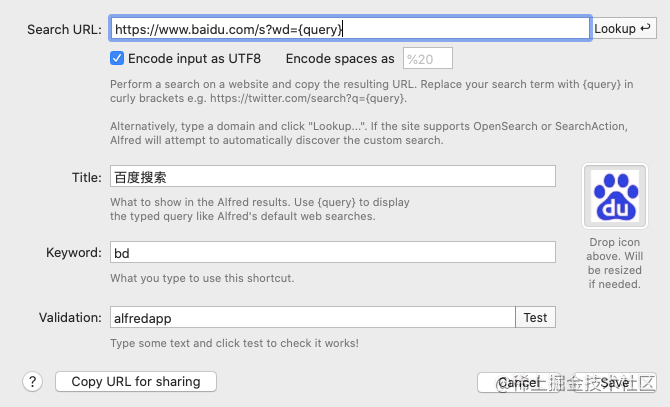
After completing the configuration, you can use the bd keyword to specify Baidu as the search engine.

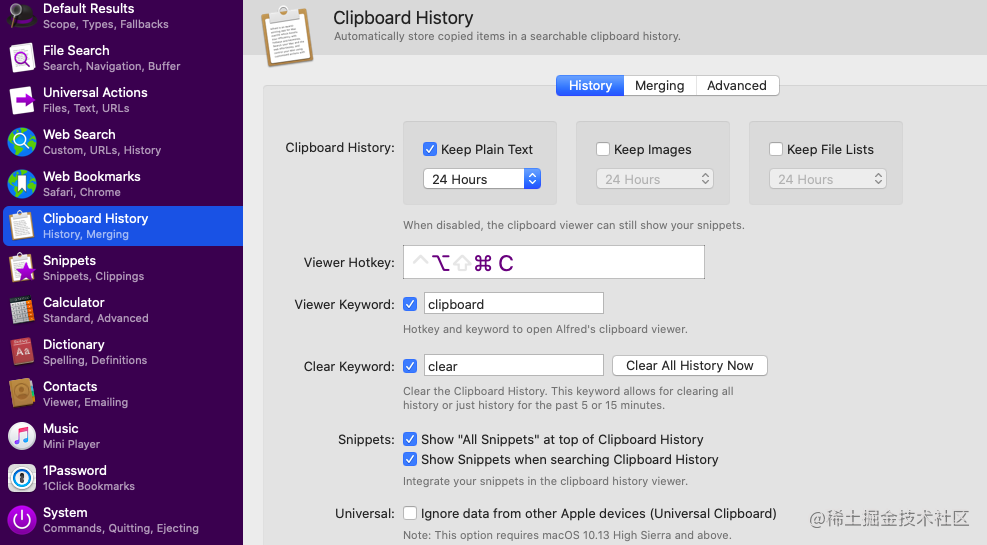
Clipboard history
We can set the length of time to save the file, activate the shortcut key of the clipboard, or activate it directly with clipboard and clear the clipboard with clear.
Integrated # iTerm2
As the best command-line tool for Mac, iTerm2 is also owned by Alfred.
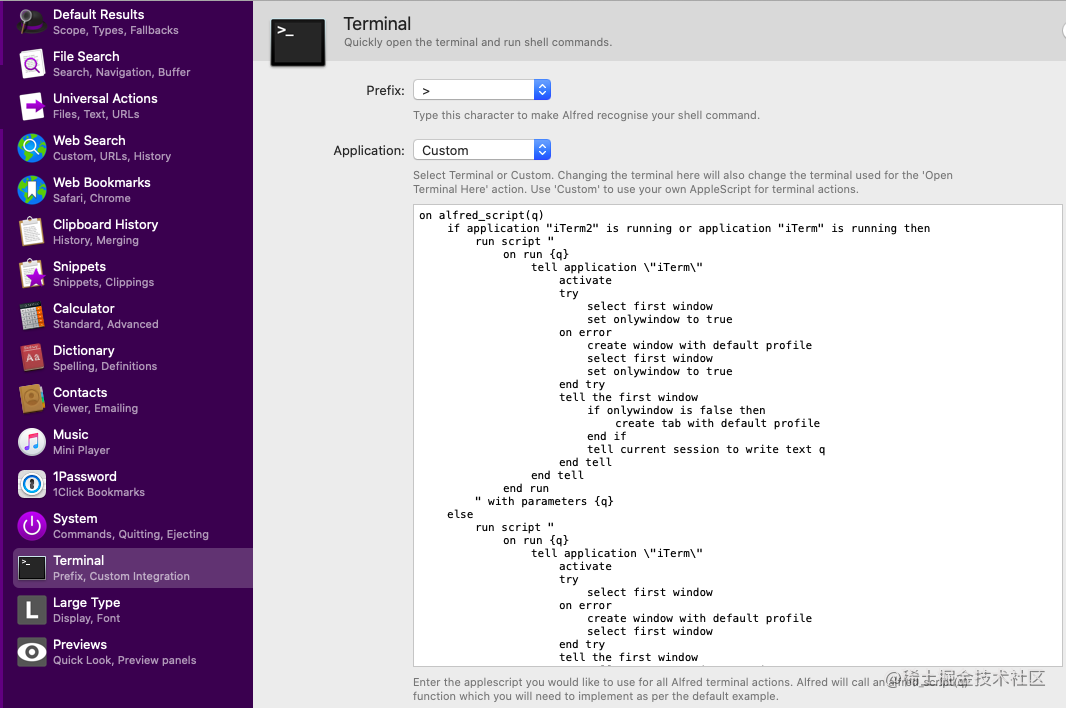
We can set custom commands for it, for example:
on alfred_script(q)
 if application "iTerm2" is running or application "iTerm" is running then
  run script "
   on run {q}
    tell application \"iTerm\"
     activate
     try
      select first window
      set onlywindow to true
     on error
      create window with default profile
      select first window
      set onlywindow to true
     end try
     tell the first window
      if onlywindow is false then
       create tab with default profile
      end if
      tell current session to write text q
     end tell
    end tell
   end run
  " with parameters {q}
 else
  run script "
   on run {q}
    tell application \"iTerm\"
     activate
     try
      select first window
     on error
      create window with default profile
      select first window
     end try
     tell the first window
      tell current session to write text q
     end tell
    end tell
   end run
  " with parameters {q}
 end if
end alfred_script
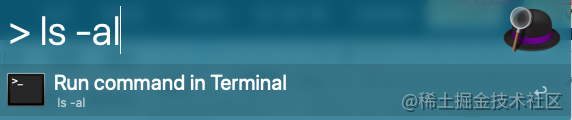
Entering {ls -al} enter will automatically execute the command in iTerm2.

Use workflow
After understanding the basic functions, the focus is to return to Alfred's workflow. The official provides interface documents for users to call\
Interface documentation: https://www.deanishe.net/alfred-workflow/api/index.html
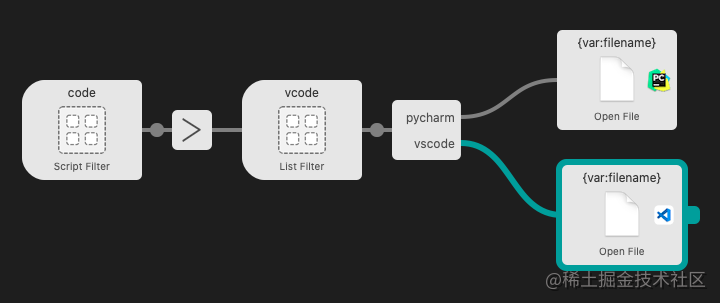
The above figure is a schematic diagram of Alfred's workflow. We can open the project folder by selecting "pycharm" or "vscode" according to the project directory by using the "code" command. Take Alfred's workflow as an example.

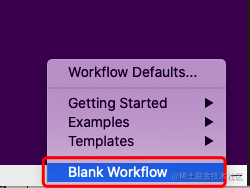
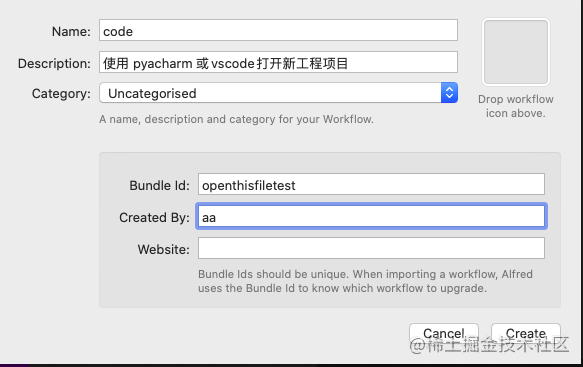
First, add a workflow and specify "Name" as "code".
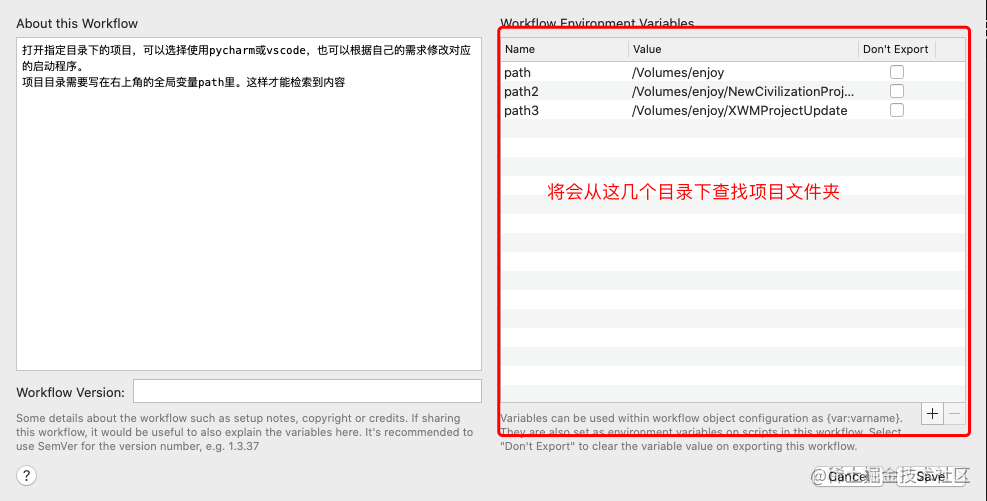
Then set the project directory public variable.
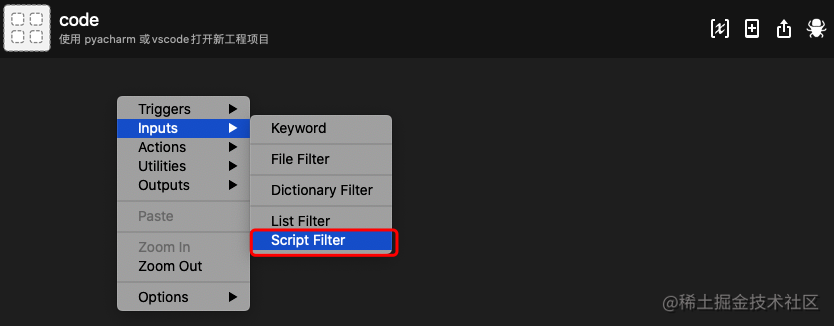
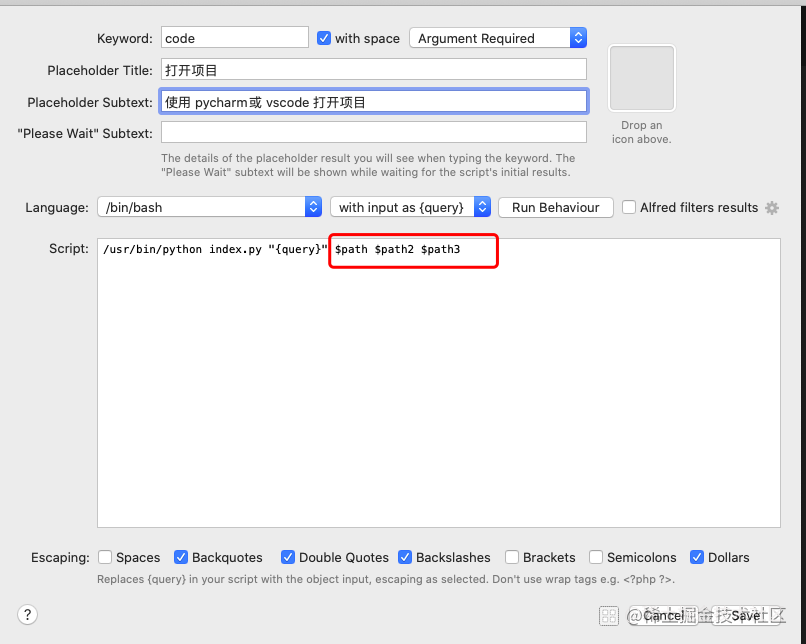
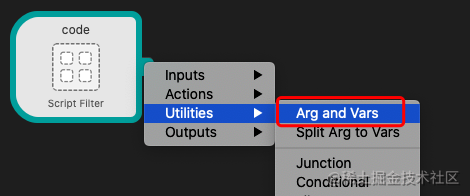
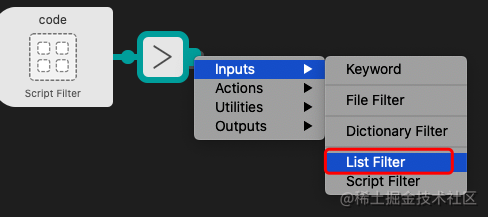
Right click to add a script filter script.
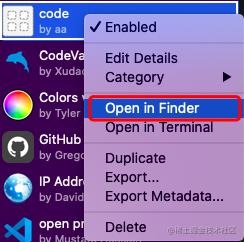
If you need to add a script file, you can right-click Open in Finder to open the directory of the workflow and download the latest version of Alfred workflow from GitHub( https://github.com/deanishe/alfred-workflow/releases/latest ), unzip and copy the workflow directory into the Open Workflow directory.
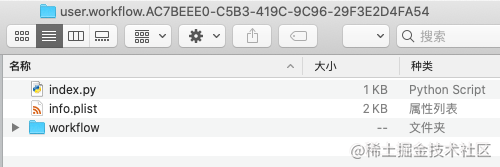
New index Py file, the code is as follows:
import sys
import os
from os import listdir
from os.path import isdir, join, expanduser

from workflow import Workflow3, web, ICON_WEB


# Get file list
def getFileList():
  args_list = wf.args
  result = []
  for path in args_list[1:]:
    # path = wf.args[1]
    log.debug('path: ' + path)
    path = expanduser(path)
    result.extend([{"file": f, "path": path} for f in listdir(path) if isdir(join(path, f))])
  return result

def main(wf):
  # Get search parameters
  searchKey = wf.args[0]
  log.debug('searchKey: ' + searchKey)
  # File list cache 3s
  fileList = wf.cached_data('projects', getFileList, max_age=3)
  # Filter directories based on query
  for item in fileList:
    if (searchKey and (searchKey in item.get('file'))):
      title = item.get('file')
      wf.add_item(title=title, subtitle=item.get('path'), arg=os.path.join(item.get('path'), title), valid=True)

  # Send Alfred what should be displayed
  wf.send_feedback()

if __name__ == '__main__':
  wf = Workflow3()
  log = wf.logger
  sys.exit(wf.run(main))
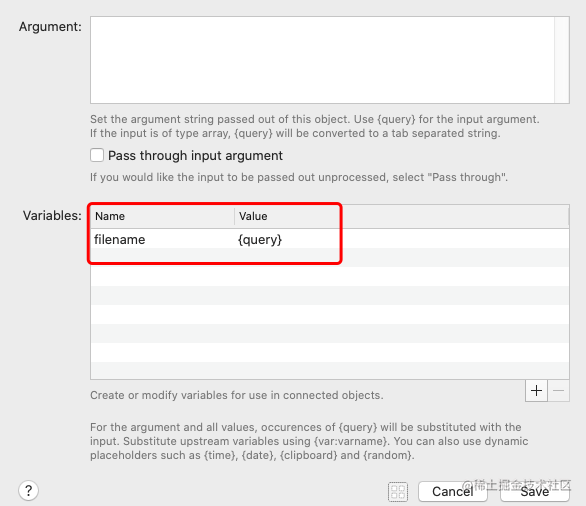
Return to the Alfred workflow and add the transfer parameter variable.
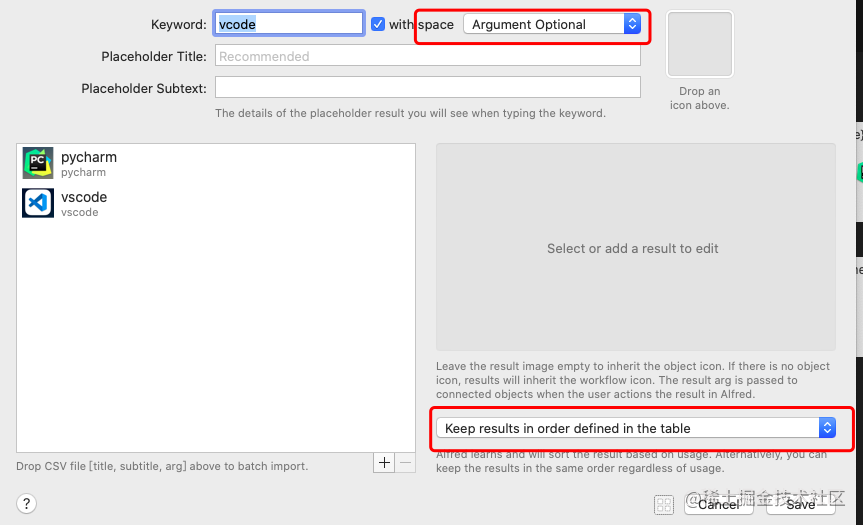
Add list selection and add user selection list.
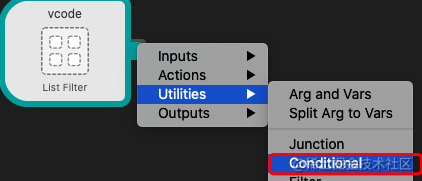
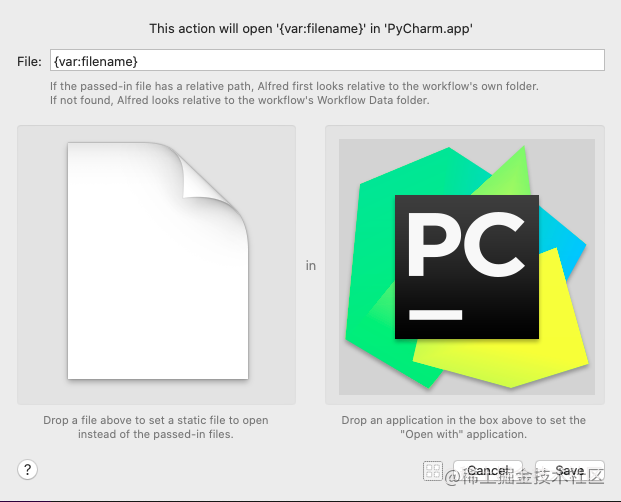
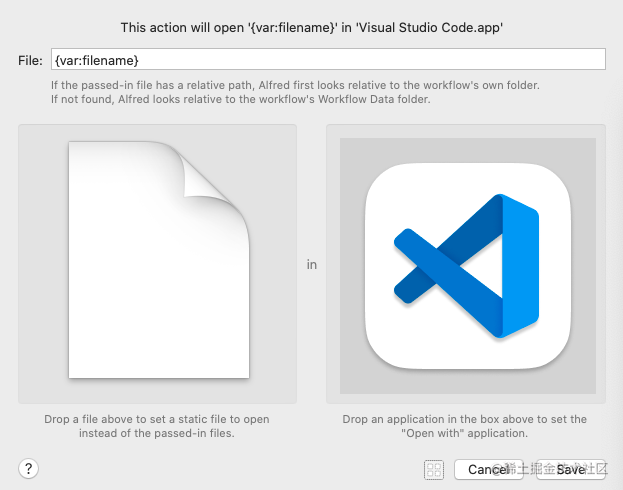
Add conditional judgment to identify which software the user selects.

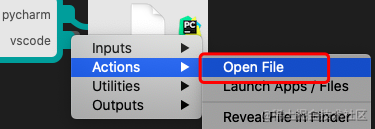
Then add two new branches, Open File operation, and use the corresponding program to open the file.
Finally, after completing all the settings, open the Alfred pop-up box, enter code + project directory, and start your Alfred journey.