Maven series of project management (I)
Introduction, installation and configuration
catalogue
-
1. Introduction
-
2. Installation deployment
-
2.1,Maven for Win
-
2.2,Maven for Mac
-
-
3. Local repository
-
4. Central repository
-
5. Start agent
-
6. Configuring Maven on Eclipse
1. Introduction
Maven is a project management tool, which includes a Project Object Model, a set of standards, a Project Lifecycle, a Dependency Management System, and logic used to run plug-in goal s defined in the life cycle phase. When you use maven, you use a well-defined Project Object Model to describe your project, and then Maven can apply crosscutting logic from a set of shared (or custom) plug-ins.
Maven has a life cycle, which is called when you run mvn install. This command tells Maven to perform a series of orderly steps until you reach the specified life cycle. One effect of traversing the life cycle is that Maven runs many default plug-in goals that do things like compiling and creating a JAR file.
In addition, Maven can easily help you manage project reports, generate sites, manage JAR files, and so on.
Official website: http://maven.apache.org/
2. Installation deployment
Download address: http://maven.apache.org/download.cgi
As shown in the figure: Maven download is complete.

2.1,Maven for Win
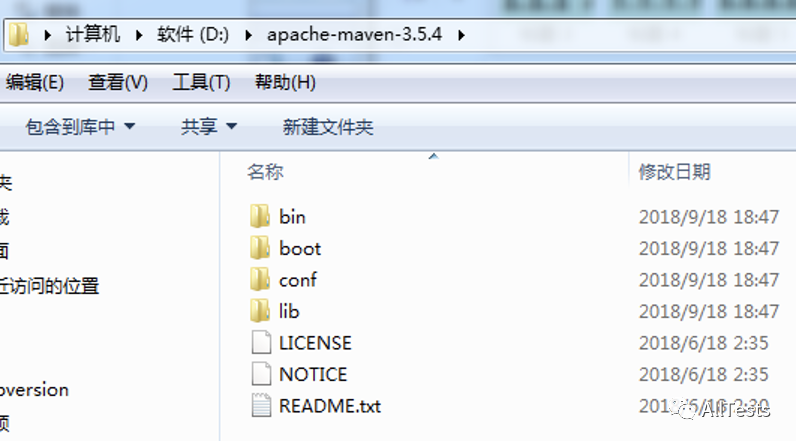
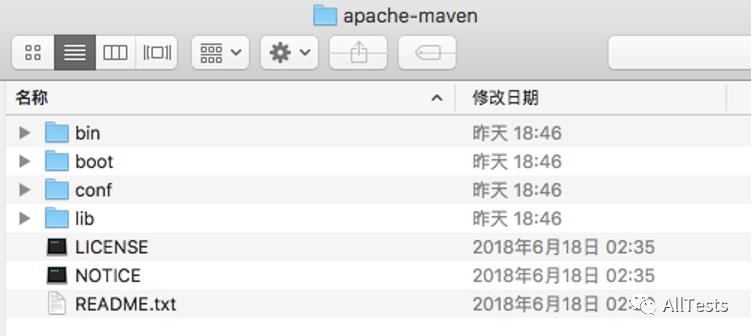
1. In Windows environment, apache-maven-3.5.4-bin.com tar. GZ can be unzipped to any directory (e.g. disk D).
2. Configure environment variables
Right click my computer and click Properties -- > advanced system configuration -- > Advanced -- > environment variable.
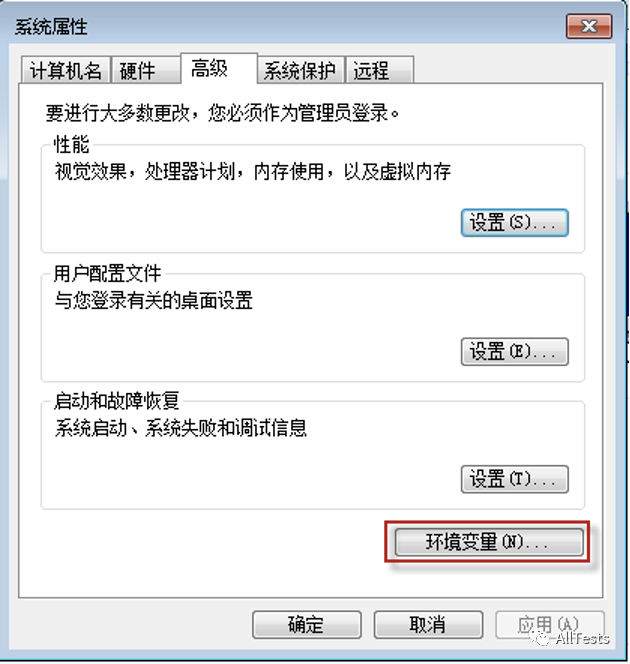
Click environment variable, and in the system variable:
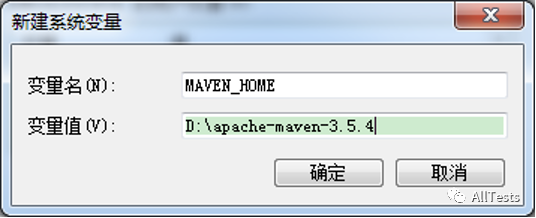
(1) Click new
Variable name filling MAVEN_HOME
 Variable value filling D:\apache-maven-3.5.4
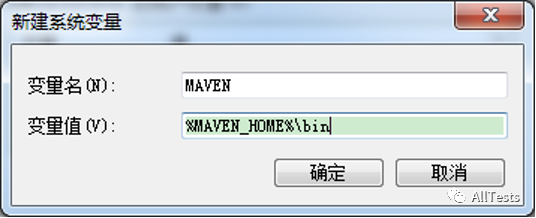
(2) Click new
Variable name filling MAVEN
 Variable value filling %MAVEN_HOME%\bin
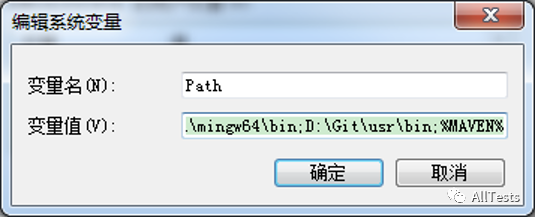
(3) Modify the Path and click Edit
Add at the end of variable value ;%MAVEN%
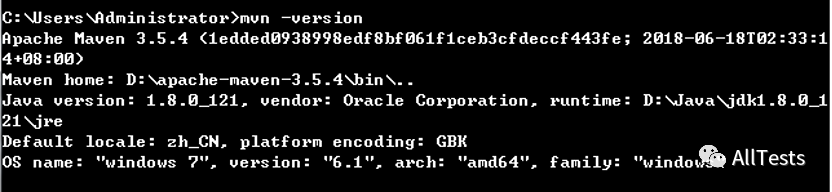
After confirmation, open the command line, enter mvn -version, and prompt the following information, indicating that the Maven environment variable configuration is successful.
2.2,Maven for Mac
1. In the Mac environment, apache-maven-3.5.4-bin tar. GZ extract it to any directory (for example: / users / Automation / Apache Maven).
2. Configure environment variables
(1) Open the terminal and enter the user's root directory.
(2) Enter the command ls -a at the terminal to query bash_ Whether the profile file exists. If it does not exist, create the file: touch bash_profile
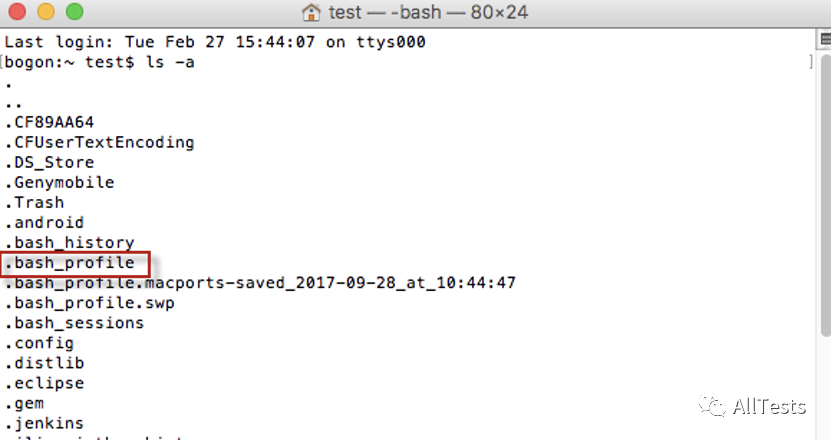
(3) Edit file VI ~ / bash_ Profile, the input contents are as follows:
export MAVEN_HOME=/Users/automation/apache-maven
 stay PATH Additional content :$MAVEN_HOME/bin
As shown in the figure:

(4) Save the file after editing, and then enter source ~ / bash_ Profile to make the environment variable effective.

(5) Enter mvn -version on the terminal and the following information will be prompted, indicating that the Maven environment variable is successfully configured.

3. Local resource library
Maven local resource library is used to store the dependencies (plug-in jar s and other files) of all projects. These files are downloaded to the local folder by Maven. Create a maven project, and all relevant files will be stored in your Maven local resource library.
By default, Maven's local resource Kummer thinks m2 directory folder.
Widnows: C:\Users\{username}\.m2 (username (current user name)
Linux/Mac: ~/.m2 (~/Is the directory address of the current user)
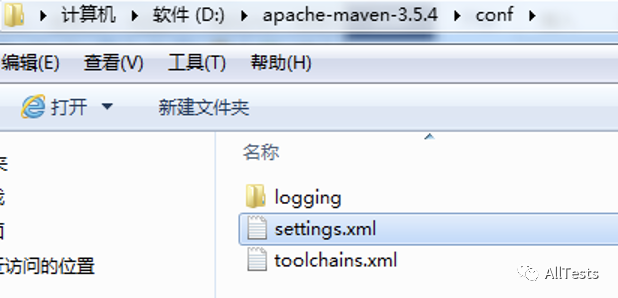
If you want to change the local resource library directory, you need to open the configuration file for settings (settings.xml file under conf directory in Maven installation directory).
settings.xml file content (find the location of local resource library settings):

Uncomment the local resource pool option, fill in your local resource pool path, and then save it.
As shown in the figure: set the address of the local resource library in the D:/MyMaven/m2 directory.

4. Central repository
When creating a maven project, Maven will check your POM XML file to determine which dependencies need to be downloaded. First, Maven will get the dependent resources from the local repository. If not found, it will get the dependent resources from the default Maven's central repository( https://repo.maven.apache.org/maven2/ )Find and download.
As shown in the figure: the default Maven central repository resource.

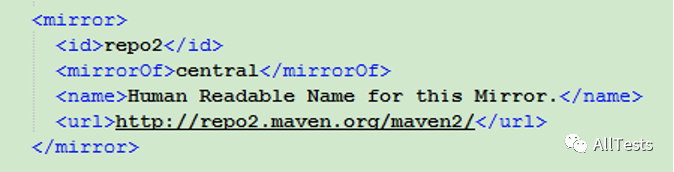
However, these central repositories often need to be connected to the Internet for access. Due to the restrictions on access to the Internet or the needs of security control, we often need to establish an image of the central repository and modify the settings under the conf directory in the Maven installation directory XML file (add image in).
As shown in the figure: add a mirror image.
id For mirrored Libraries id,It is used to uniquely identify the mirror library.
mirrorOf Is a mirrored remote library, central For mirror Maven of central Library. If the mirror library has more than one target remote library, you can use*Any remote representation library; external:*Indicates any absence localhost And remote libraries in the file system; r1,r2 express r1 Library or r2 Library;*,!r1 Means except r1 Any remote library other than the library.
name Is the name of the mirror library.
url Access address for the mirror library.
More mirrors:
<mirror>
    <id>repo2</id>
    <mirrorOf>central</mirrorOf>
    <name>Human Readable Name for this Mirror.</name>
    <url>http://repo2.maven.org/maven2/</url>
</mirror>

<mirror>
    <id>uk</id>
    <mirrorOf>central</mirrorOf>
    <name>Human Readable Name for this Mirror.</name>
    <url>http://uk.maven.org/maven2/</url>
</mirror>

<mirror>
    <id>ibiblio</id>
    <mirrorOf>central</mirrorOf>
    <name>Human Readable Name for this Mirror.</name>
    <url>http://maven.ibiblio.org/maven2/</url>
</mirror>

<mirror>
    <id>jboss</id>
    <mirrorOf>central</mirrorOf>
    <name>JBoss Public Repository Group</name>
    <url>http://repository.jboss.org/nexus/content/groups/public/</url>
</mirror>

<mirror>
    <id>jboss2</id>
    <mirrorOf>central</mirrorOf>
    <name>JBossJBPM Repository</name>
    <url>https://repository.jboss.org/nexus/content/repositories/releases/</url>
</mirror>
5. Start agent
If your environment needs an agent to access the Internet, Maven also needs to set an agent to access the Internet and download related dependencies.
Open the configuration file (settings.xml under the conf directory in the installation directory).
settings.xml file content (find proxy server settings location):
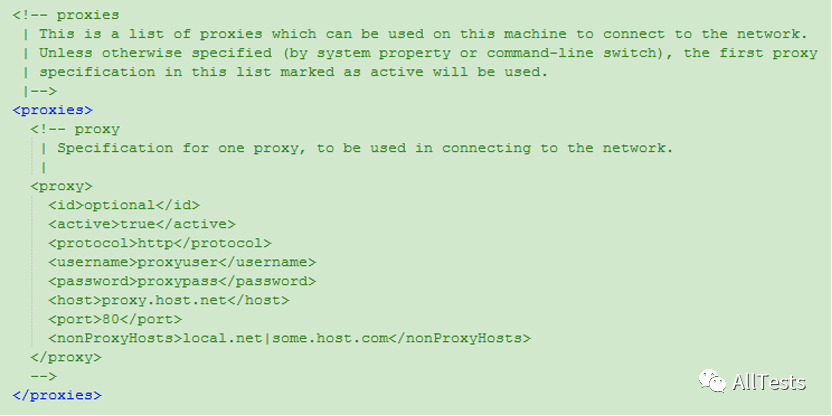
Cancel the comment proxy option, fill in your proxy server details, and then save.
proxies There can be more than one proxy Element, if more than one is declared proxy Element, the first one activated by default proxy Will take effect;
id Is a custom proxy name, active The value of is true Indicates that the agent is activated, protocol Represents the proxy protocol used. Here is http;
username Is the proxy user name, password Is the proxy password. If there is no proxy user name and password, comment out these two fields;
host Specify the host name, port Is the port;
nonProxyHost Specify which host names do not require a proxy and can be used|Symbol to separate multiple host names. In addition, the configuration also supports wildcards, such as*.google.com Indicates that all google.com Do not access the domain name at the end through the proxy.
As shown in the figure: proxy server information after setting.

6. Configuring Maven on Eclipse
Take Widnows as an example:
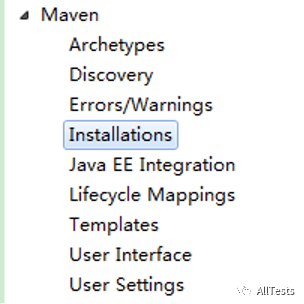
1. Open Eclipse and click window - > Preferences - > Maven - > installations.
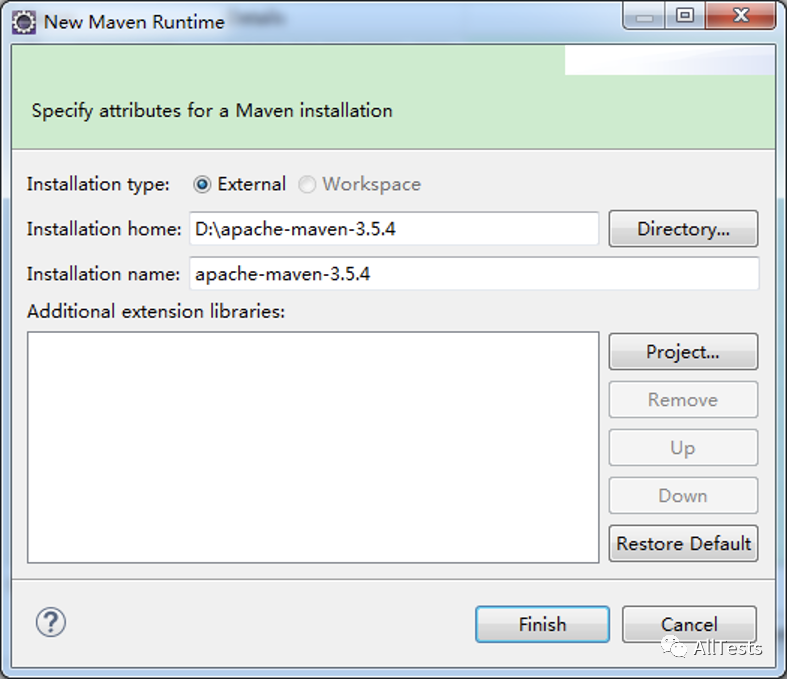
2. Click Add, fill in Maven's installation directory and name in the pop-up setting window, and click Finish.
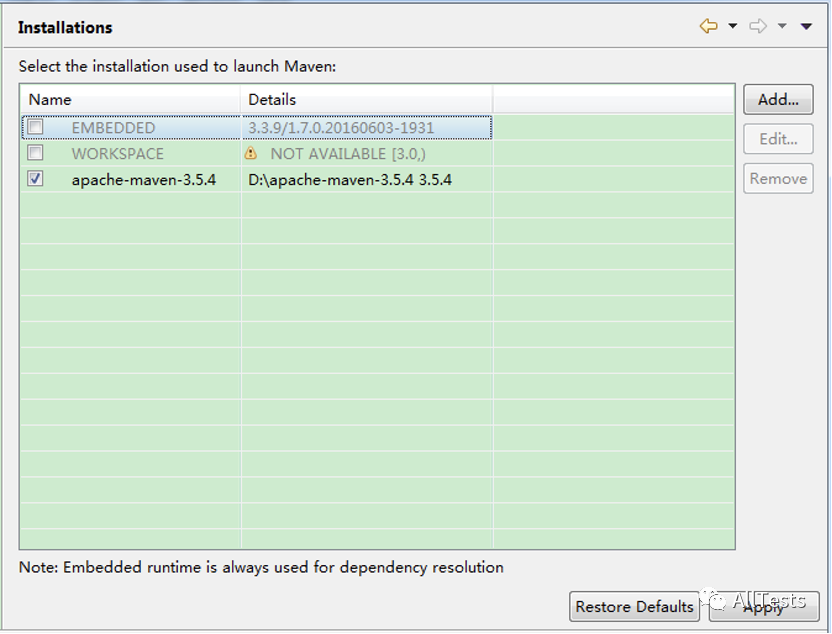
3. Select the newly added Maven settings and click Apply.
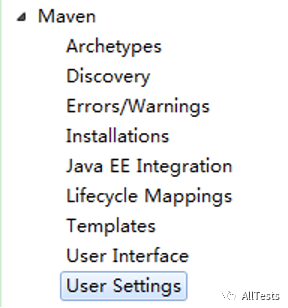
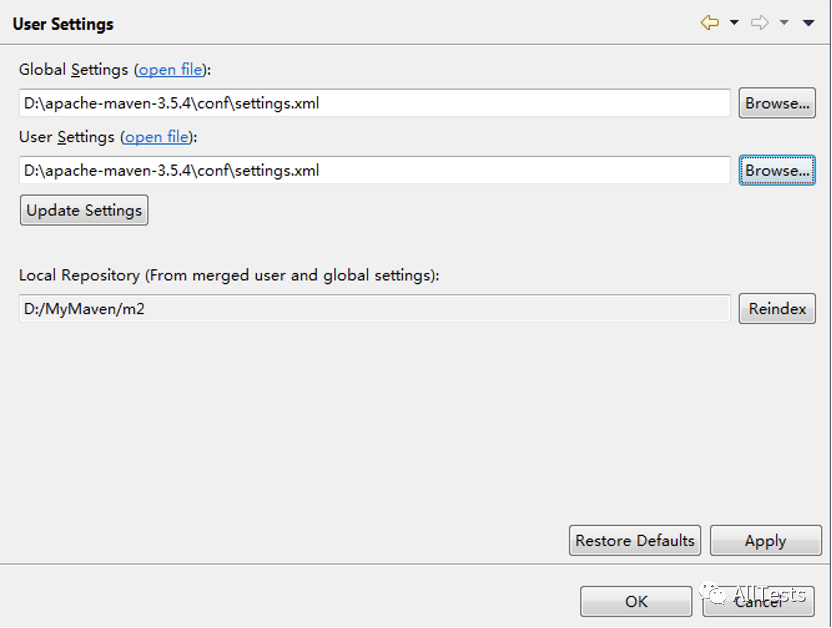
4. Click User Settings.
5. Global settings and personal settings are introduced into Maven's configuration file (settings.xml), click Apply, and then click OK.
If you think the article is good, please , like, share, watch and collect , because this will be the strongest driving force for me to continue to output more high-quality articles!
Here I recommend a software testing exchange group created by myself, QQ: 642830685. The group will share software testing resources, testing interview questions and testing industry information from time to time. You can actively exchange technology in the group, and big guys can answer questions and solve problems for you.