1, Create project
The source code of Mido mall project is managed by remote warehouse.
1. Prepare project code warehouse
1. Source hosting website
- Code cloud( https://gitee.com/) [domestic website, fast]
2. Create source code remote warehouse: meiduo_project
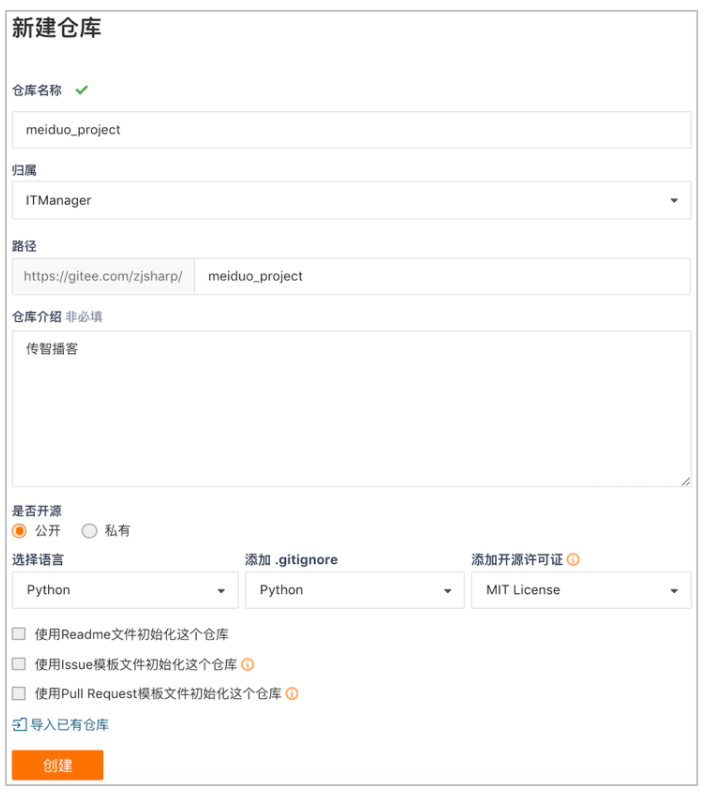
[add. idea to the ignore file. gitignore]
2. Clone project code warehouse
1. Enter the local project directory
$ mkdir ~/projects     # If you are in windows, just create a new one directly
$ cd projects/
2. Clone warehouse
$ git clone https://gitee.com/xxxxxx/meiduo_project.git
3. Create Mido mall project
1. Enter the local project warehouse
$ cd ~/projects/meiduo_project/
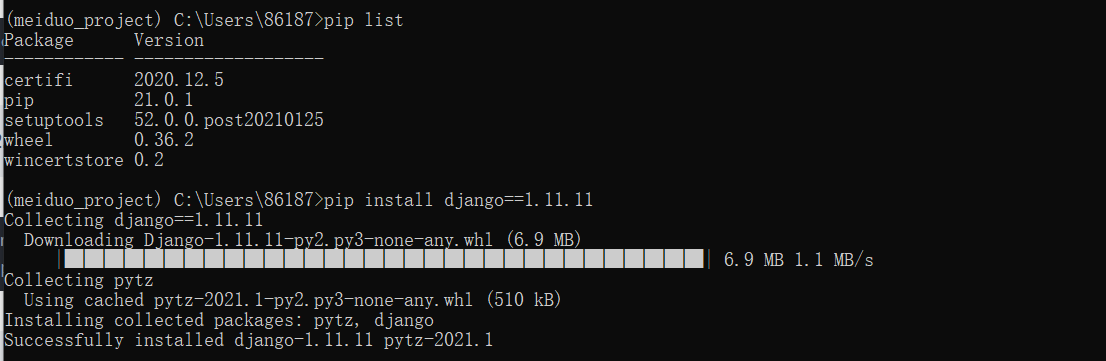
2. Create a virtual environment of Mido mall and install Django framework [you can directly create a project environment in anaconda]
$ mkvirtualenv -p python3 meiduo_mall
$ pip install django==1.11.11
3. Create Django project of Mido mall
$ django-admin startproject meiduo_mall
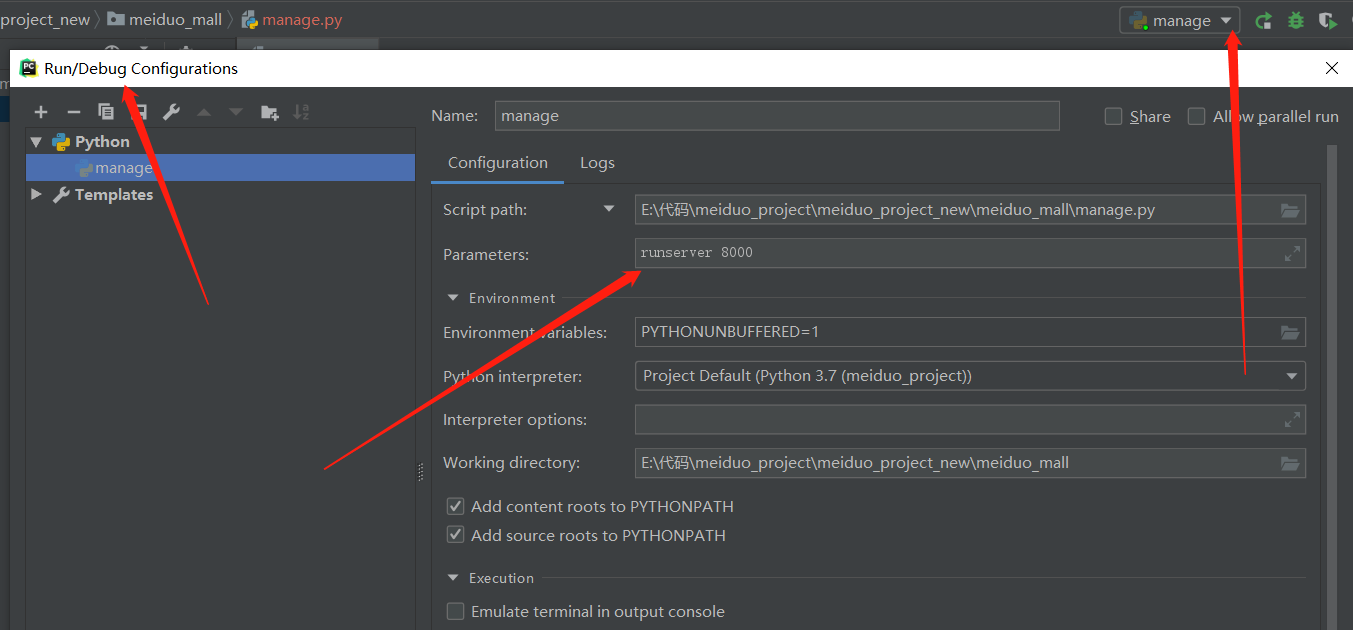
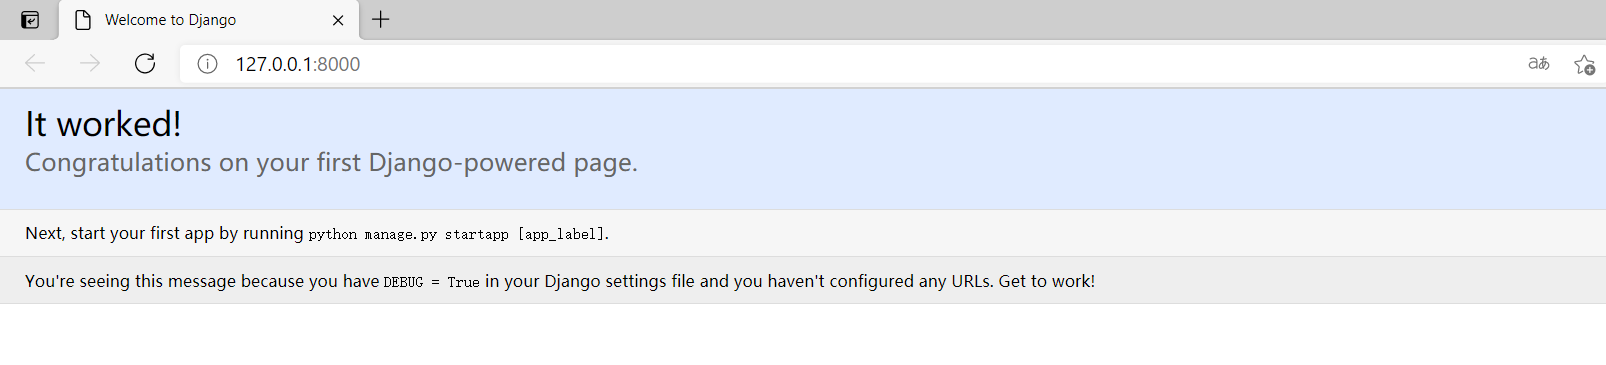
After the creation project is completed: run the program and test results.

[to quickly start the program in pycharm (instead of using the command), add runserver 8000 to the Script parameters in run/Debug Configurations]

2, Configure development environment
The environment of Mido mall project is divided into development environment and production environment.
- Development environment: used to write and debug project code.
- Production environment: used for project line deployment and operation.
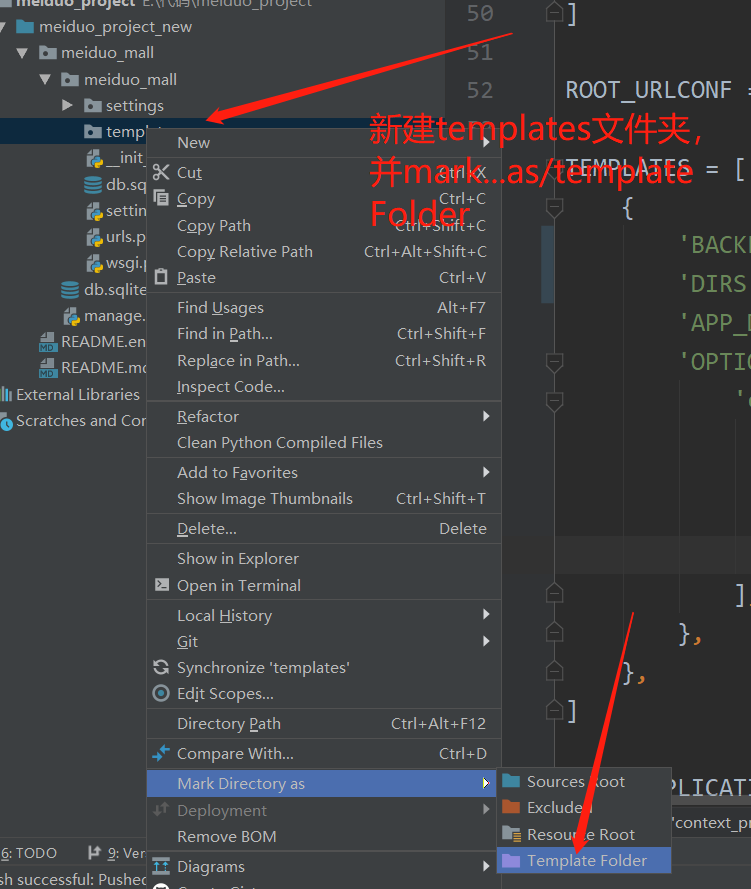
1. Create a new profile
- Prepare profile directory
- Create a new package named settings as the configuration file directory
- Prepare development and production environment profiles
- In configuration package settings, create a new development and production environment configuration file
- Prepare development environment configuration content
- Set the default configuration file settings Copy the contents of Py to dev.py
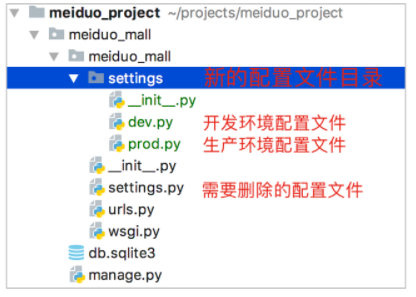
[you need to modify the address in wsgi.py. In fact, you can modify it in manage.py below without changing it]
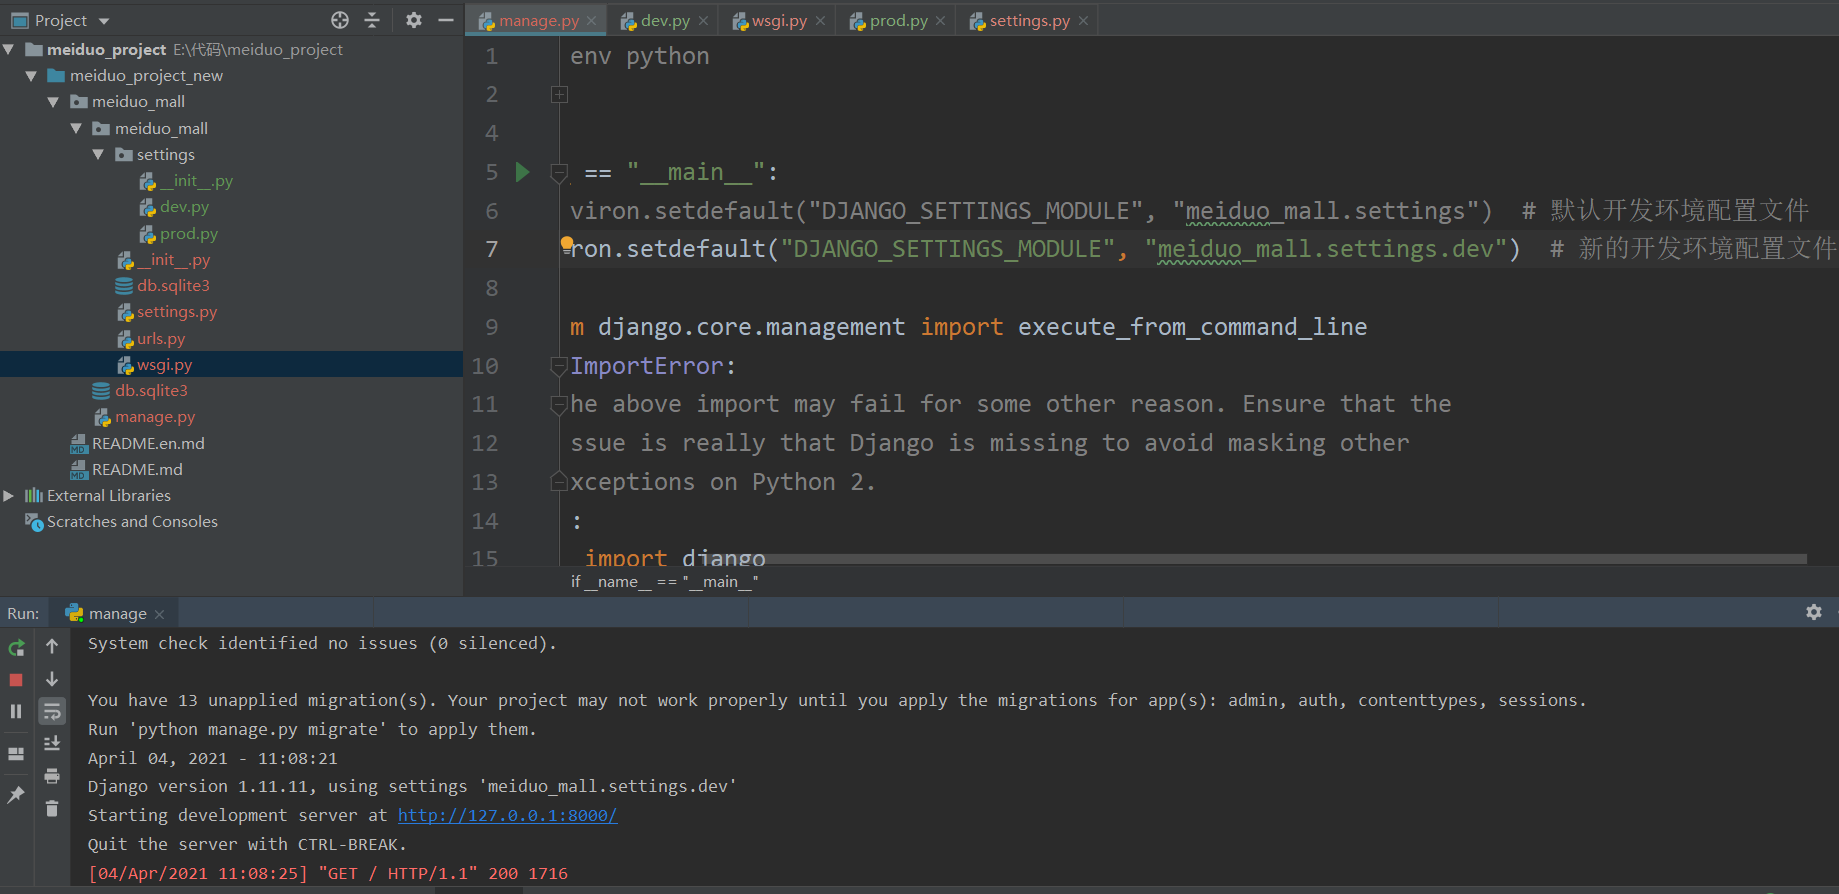
2. Specify the development environment configuration file
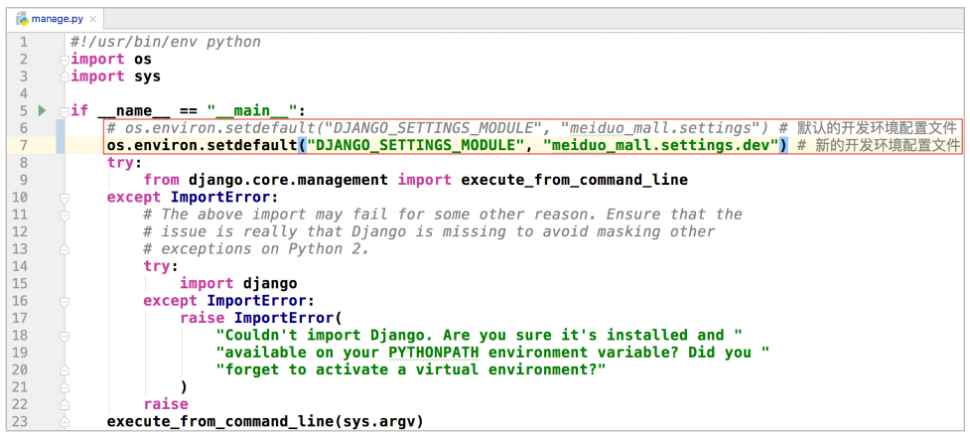
After configuration: run the program and test results.
3. Configure Jinja2 template engine
The template of Mido mall adopts Jinja2 template engine.
1. Install Jinja2 expansion pack
$ pip install Jinja2
2. Configure Jinja2 template engine
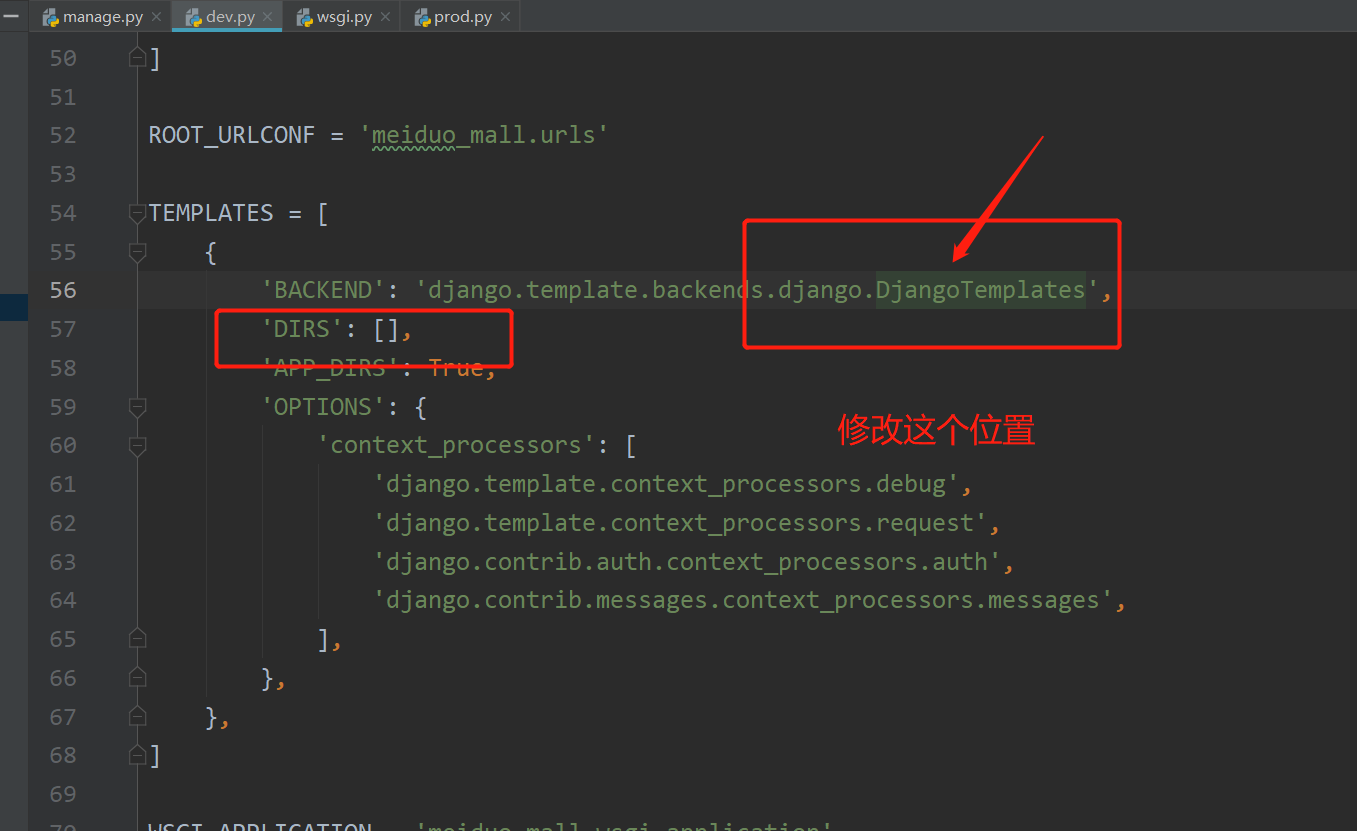
TEMPLATES = [
    {
        'BACKEND': 'django.template.backends.jinja2.Jinja2',  # jinja2 template engine
        'DIRS': [os.path.join(BASE_DIR, 'templates')],  # Configure the loading path of the template file, and create a new templates folder here
        'APP_DIRS': True,
        'OPTIONS': {
            'context_processors': [
                'django.template.context_processors.debug',
                'django.template.context_processors.request',
                'django.contrib.auth.context_processors.auth',
                'django.contrib.messages.context_processors.messages',
            ],
        },
    },
]
3. Supplement Jinja2 template engine environment
1. Create Jinja2 template engine environment configuration file
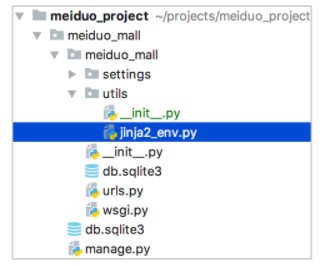
2. Write Jinja2 template engine environment configuration code
from jinja2 import Environment
from django.contrib.staticfiles.storage import staticfiles_storage
from django.urls import reverse
def jinja2_environment(**options): # **options unpacking
env = Environment(**options) # Create environment objects
# Global Update
env.globals.update({
'static': staticfiles_storage.url, # Gets the prefix of the static file
'url': reverse, # Reverse parsing
})
return env
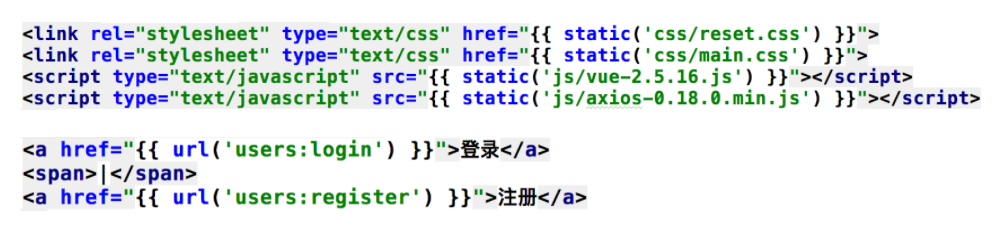
"""
Make sure you can use the in the template engine{{ url('') }} {{ static('') }}Such statements
{{ url('') }}: Routing namespace
{{ static('') }}: Static file relative path
"""
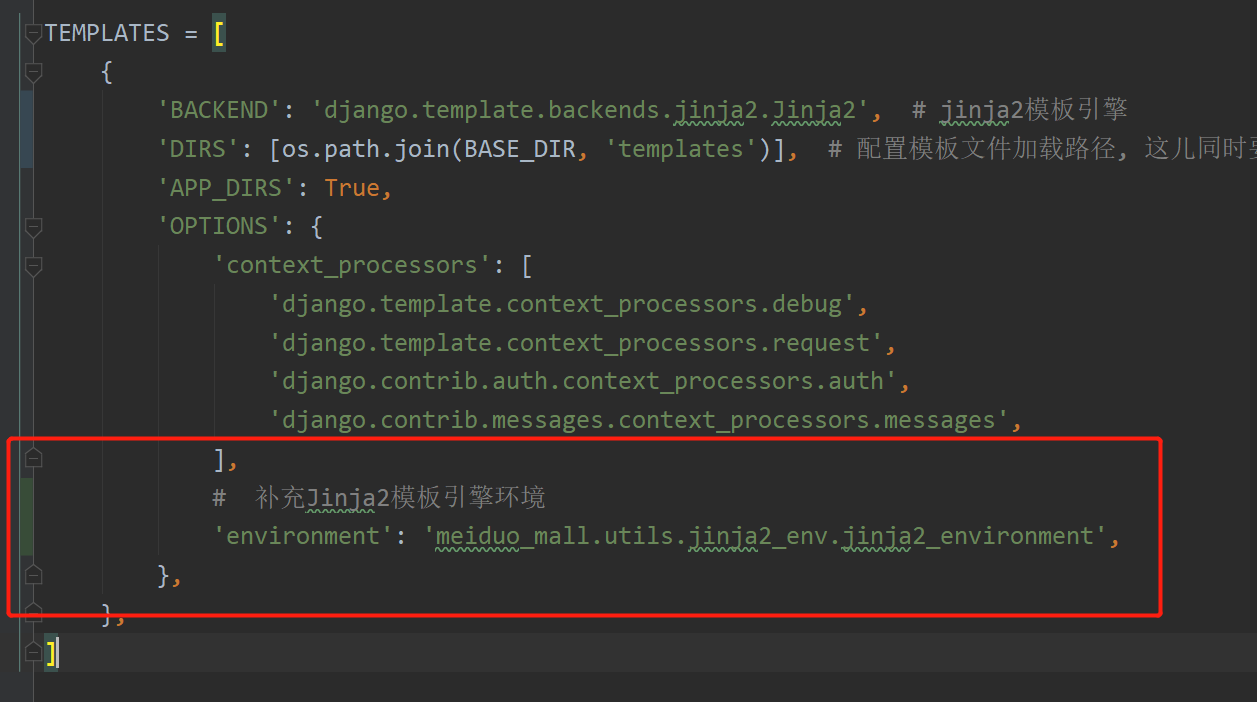
3. Load Jinja2 template engine environment
TEMPLATES = [
    {
        'BACKEND': 'django.template.backends.jinja2.Jinja2',  # jinja2 template engine
        'DIRS': [os.path.join(BASE_DIR, 'templates')],  # Configure the loading path of the template file, and create a new templates folder at the same time
        'APP_DIRS': True,
        'OPTIONS': {
            'context_processors': [
                'django.template.context_processors.debug',
                'django.template.context_processors.request',
                'django.contrib.auth.context_processors.auth',
                'django.contrib.messages.context_processors.messages',
            ],
            #  Supplement Jinja2 template engine environment
            'environment': 'meiduo_mall.utils.jinja2_env.jinja2_environment',
        },
    },
]
After configuration: run the program and test results.
4. Configure MySQL database
The data storage service of Mido mall adopts MySQL database.
1. Create a new MySQL database
1. Create a new MySQL database: meiduo_mall
$ create database meiduo charset=utf8;

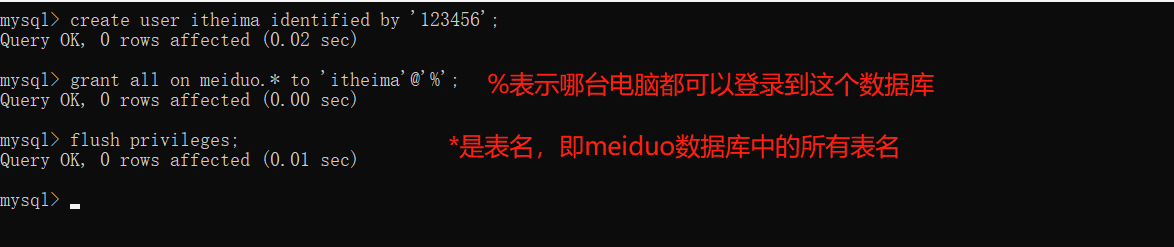
2. Create a new MySQL user
$ create user itheima identified by '123456';
3. Authorize itcast users to access meiduo_mall database
$ grant all on meiduo.* to 'itheima'@'%';
4. Refresh privileges after authorization
$ flush privileges;
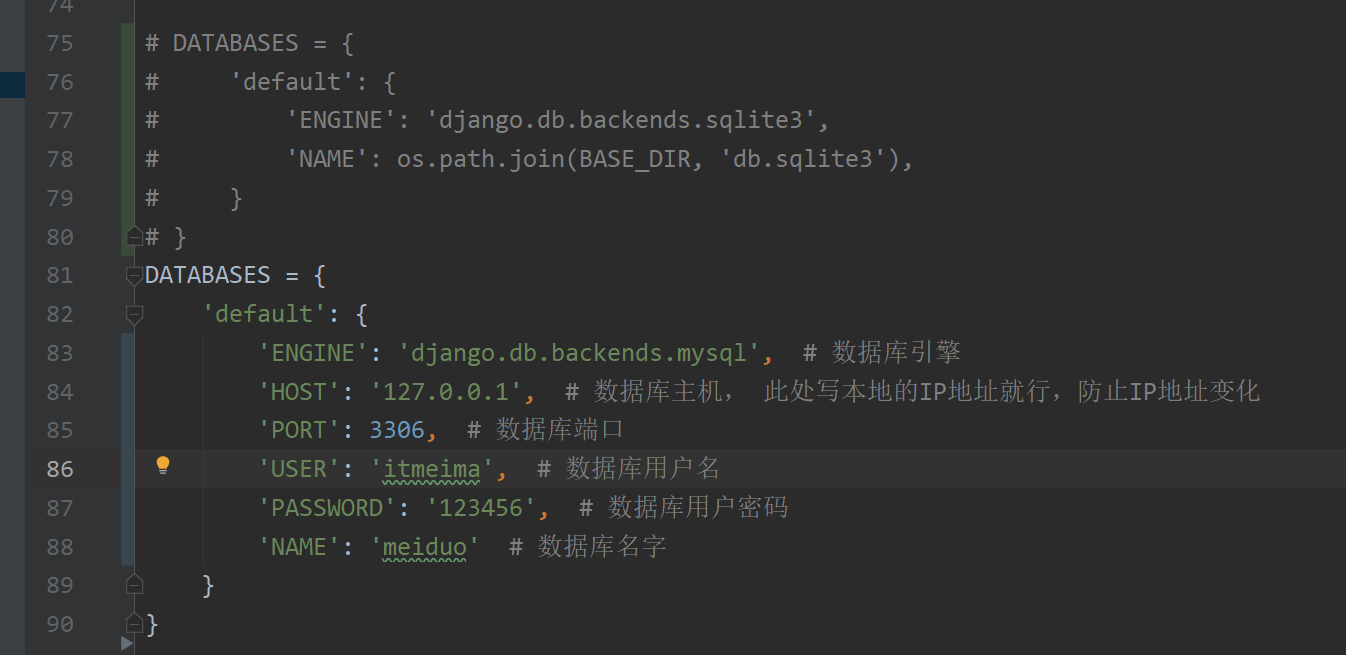
2. Configure MySQL database
DATABASES = {
    'default': {
        'ENGINE': 'django.db.backends.mysql',  # database engine
        'HOST': '127.0.0.1',  # For the database host, just write the local IP address here to prevent the IP address from changing
        'PORT': 3306,  # Database port
        'USER': 'itmeima',  # Database user name
        'PASSWORD': '123456',  # Database user password
        'NAME': 'meiduo'  # Database name
    }
}
Possible errors
- Error loading MySQLdb module: No module named 'MySQLdb'.
Reason for error:
- The driver MySQL DB is required to operate MySQL database in Django
- Currently, there is no driver MySQLdb in the project virtual environment
terms of settlement:
- Install PyMySQL expansion pack
- Because MySQLdb is only applicable to Python 2 X version, python 3 PyMySQL is used instead of MySQL LDB in the version of X
3. Install PyMySQL expansion pack
1. Install driver
$ pip install PyMySQL
2. In the subdirectory with the same name of the project__ init__.py file, add the following code:
from pymysql import install_as_MySQLdb

install_as_MySQLdb()
After configuration: run the program and test results.
5. Configure Redis database
The data cache service of Mido mall adopts Redis database.
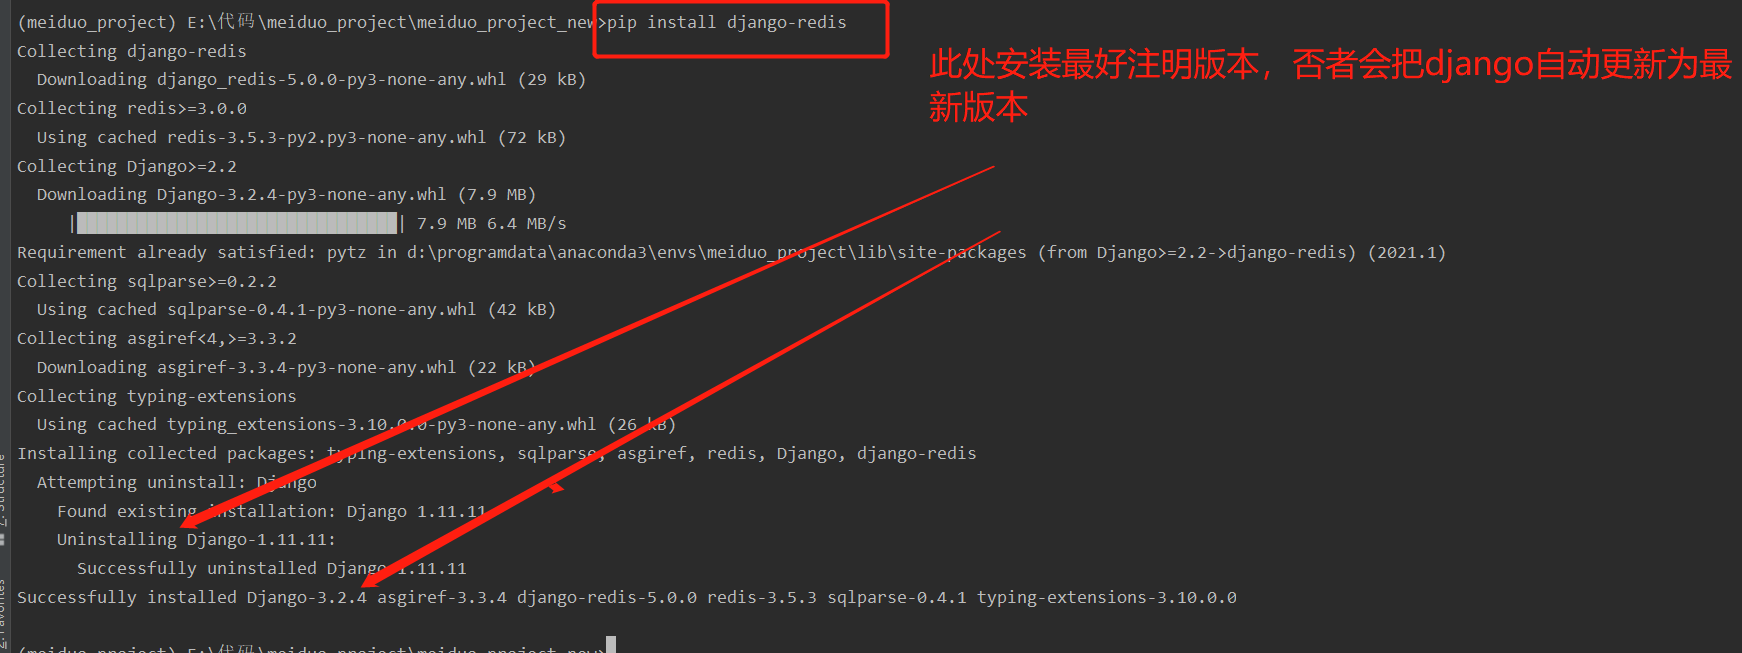
1. Install Django redis expansion pack
1. Install Django redis expansion pack
$ pip install django-redis
2. Django redis instructions
Click to enter the document: https://django-redis-chs.readthedocs.io/zh_CN/latest/
2. Configure Redis database
#  Configure redis database
CACHES = {
    'default': {  # default
        'BACKEND': 'django_redis.cache.RedisCache',
        'LOCATION': 'redid://127.0.0.1:6379/0',
        'OPTIONS': {
            'CLIENT_CLASS': 'django_redis.client.DefaultClient',
        }
    },
    'session': {  # session
        'BACKEND': 'django_redis.cache.RedisCache',
        'LOCATION': 'redis://127.0.0.1:6379/1',
        'OPTIONS': {
            'CLIENT_CLASS': 'django_redis.client.DefaultClient',
        },
    }
}
SESSION_ENGINE = 'django.contrib.sessions.backends.cache'
SESSION_CACHE_ALIAS = 'session'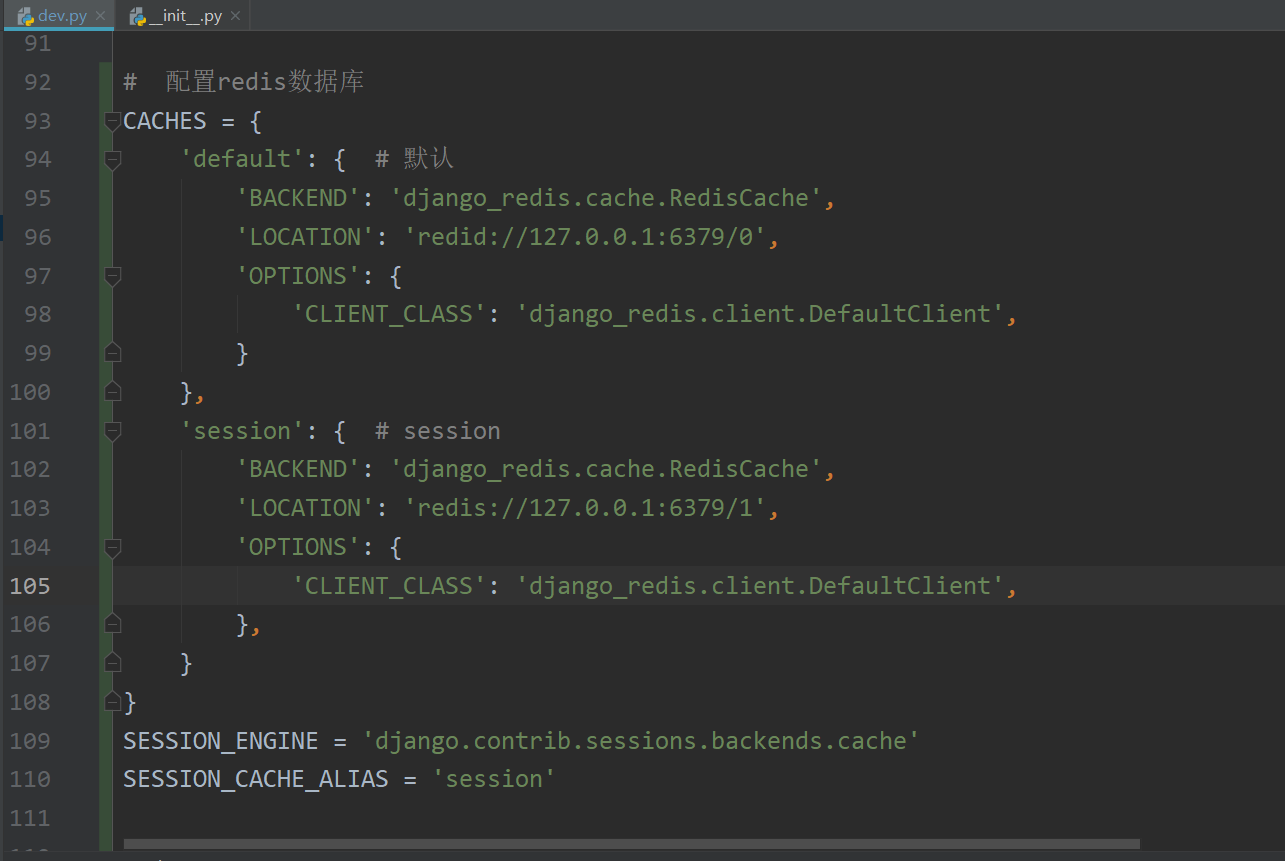
default:
- The default Redis configuration item is Redis library 0.
session:
- Redis configuration item with status maintained adopts redis library 1.
SESSION_ENGINE
- Modify the session storage mechanism and save it using Redis.
SESSION_CACHE_ALIAS:
- The Redis configuration item named "session" is used to store session data.
After configuration: run the program and test results.
This problem may be encountered during project startup:
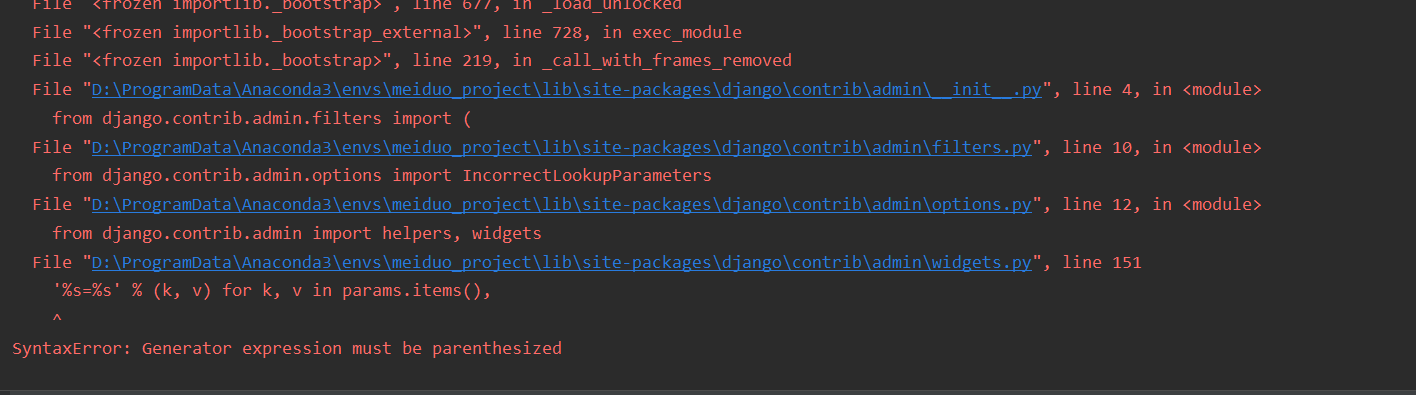
terms of settlement:
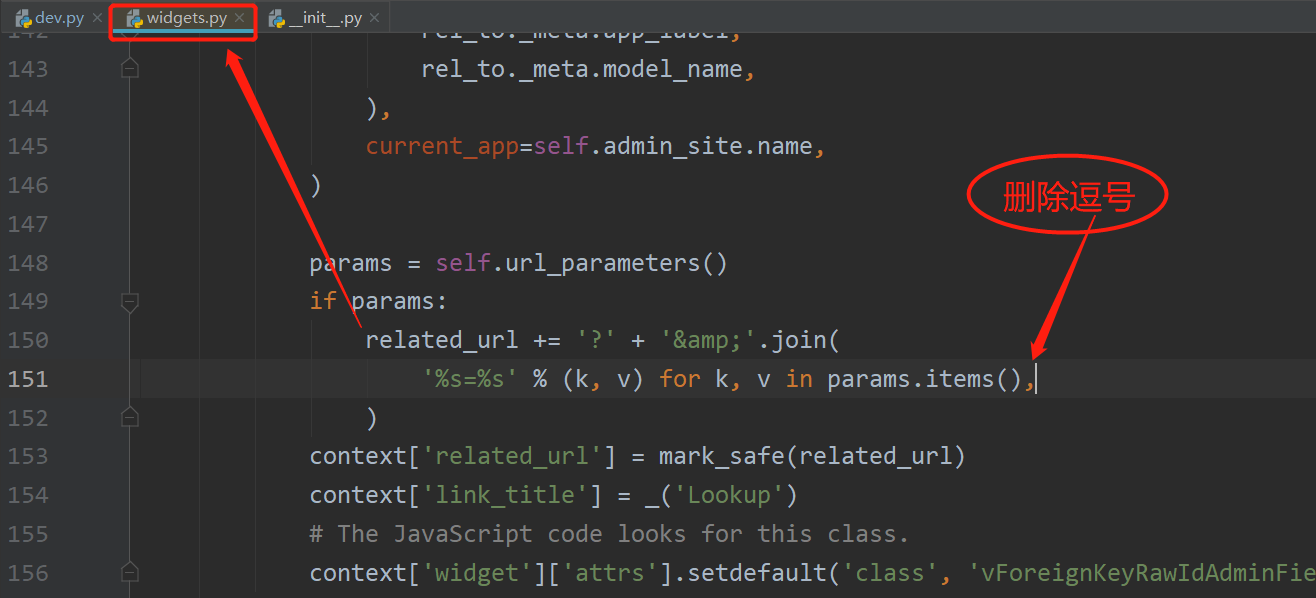
This is caused by version incompatibility.
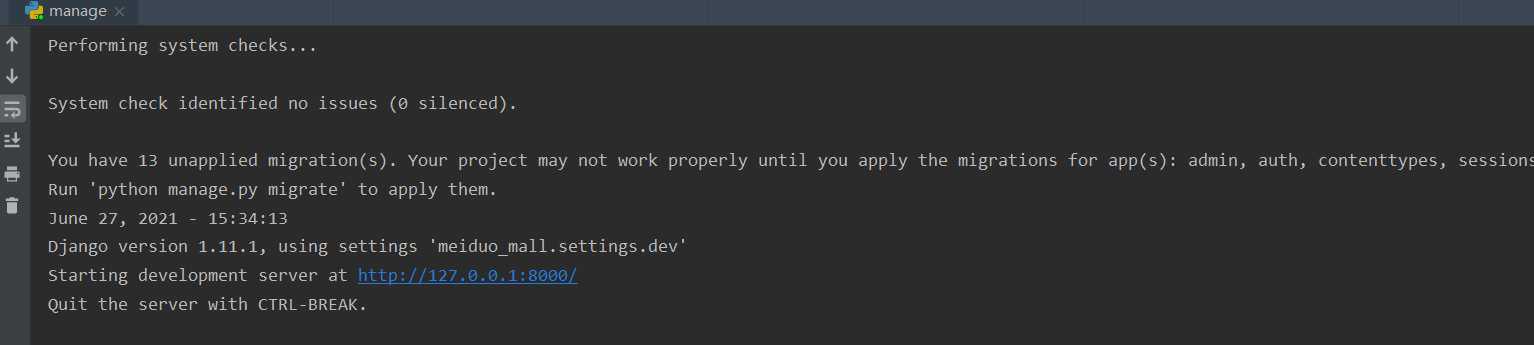
Operation results:
6. Configure engineering log
The logging module is used for the logging of Mido mall.
1. Configure Project Log
#  Configure Project Log
LOGGING = {
    'version': 1,
    'disable_existing_loggers': False,  # Disable existing loggers
    'formatters': {  # Format of log information display
        'verbose': {
            'format': '%(levelname)s %(asctime)s %(module)s %(lineno)d %(message)s'
        },
        'simple': {
            'format': '%(levelname)s %(module)s %(lineno)d %(message)s'
        },
    },
    'filters': {  # Filter logs
        'require_debug_true': {  # django only outputs logs in debug mode
            '()': 'django.utils.log.RequireDebugTrue',
        },
    },
    'handlers': {  # Log processing method
        'console': {  # Output log to terminal
            'level': 'INFO',
            'filters': ['require_debug_true'],
            'class': 'logging.StreamHandler',
            'formatter': 'simple'
        },
        'file': {  # Output log to file
            'level': 'INFO',
            'class': 'logging.handlers.RotatingFileHandler',
            'filename': os.path.join(os.path.dirname(BASE_DIR), 'logs/meiduo.log'),  # Location of log files
            'maxBytes': 300 * 1024 * 1024,  # 300M
            'backupCount': 10,  # Number of log files
            'formatter': 'verbose'
        },
    },
    'loggers': {  # Logger
        'django': {  # A logger named django is defined
            'handlers': ['console', 'file'],  # The log can be output to the terminal and file at the same time
            'propagate': True,  # Continue delivering log information
            'level': 'INFO',  # The minimum log level received by the logger
        },
    }
}
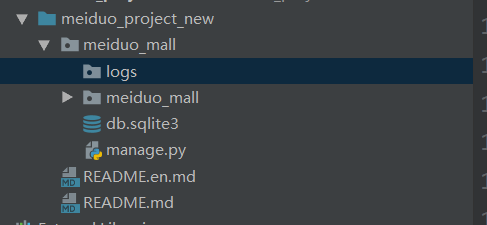
2. Prepare log file directory
3. Use of loggers
import logging

# Create logger
logger = logging.getLogger('django')
# Output log
logger.debug('test logging modular debug')
logger.info('test logging modular info')
logger.error('test logging modular error')
4. Git manages the engineering log
Tip 1:
- In the development process, the log information generated does not need to be managed and recorded in the code warehouse.
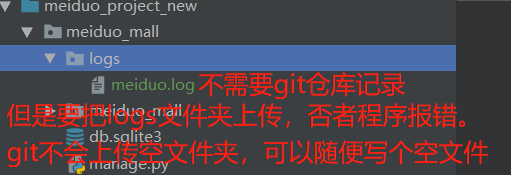
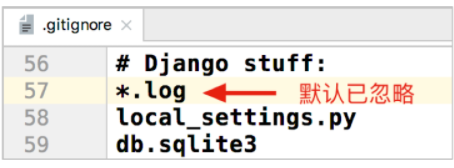
Tip 2:
- When creating a code warehouse, *. Has been ignored by default in the generated ignore file log .
Question:
- logs file directory requirements are recorded and managed by Git warehouse.
- When * After all logs are ignored, the logs file directory is empty.
- However, Git does not allow you to submit an empty directory to the version library.
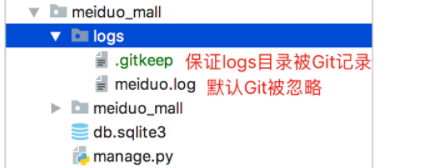
solve:
- Create an empty file directory gitkeep file, and then you can submit it.

After configuration: run the program and test results.
5. Key points of knowledge
- The minimum log level of this project is set as INFO
- How to create a logger:
logger = logging.getLogger('django') - Use of loggers:
logger.info('test logging modular info') - Multiple loggers can be specified in the loggers option
7. Configure front-end static files
Static files, such as css, images, js, etc., need to be used in the Mido mall project.
1. Prepare static files
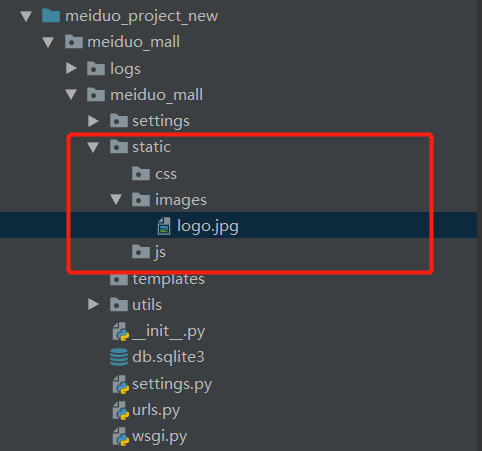
2. Specify the static file loading path
#  Specifies the routing prefix for loading static files
STATIC_URL = '/static/'

#  Configure static file loading path
STATICFILES_DIRS = [os.path.join(BASE_DIR, 'static')]
After configuration: run the program and test results.
Test path: http://127.0.0.1:8000/static/images/logo.jpg