I Deploy PXE remote installation service
PXE (pre boot execution environment, running before the operating system) is a network boot technology developed by Intel. It works in the client/Server mode and allows the client to download the boot image from the remote server through the network and load the installation file or the entire operating system.
1. Advantages of PXE batch deployment
- Scale: assemble multiple servers at the same time
- Automation: install the system and configure various services
- Remote implementation: no installation media such as optical disk and U SB flash disk are required
2. PXE overview
PXE:
- Pre start the execution environment and run it before the operating system
- Pre start the execution environment and run it before the operating system
Server:
- Run DHCP service to assign addresses and locate bootstrappers
- Run TFTP service and provide bootstrap download
client:
- The network card supports PXE protocol
- The motherboard supports network boot
3. To build PXE network system, the following preconditions must be met:
client:
1. The Network card of the client should support PXE protocol (integrated BoorROw chip), and the motherboard supports Network boot. Generally, most server hosts support it. You only need to allow booting from Network or LAN in BIOS settings.
Server:
2. There is a DHCP server in the network to automatically assign addresses and specify boot file locations for clients.
3. The server shall provide the download of system kernel and boot image file through TFTP service (simple file transfer protocol).
II Set up PXE remote installation server
-
PXE remote installation server integrates centos 7 installation source, TFTP service, DHcP service and FTP service, and can send PXE boot program, Linux kernel, boot menu and other data to the client bare metal, as well as provide installation files.
-
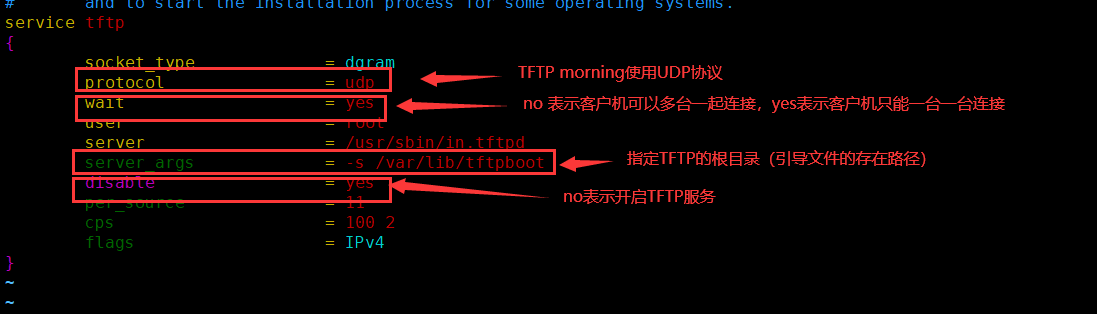
TFTP (simple file transfer protocol) is a protocol based on UDP protocol for simple file transfer between client and server. It is suitable for file transfer applications.
-
TFTP service is managed by xinetd service by default and uses UDP port 69
-
xinetd is a new generation of network daemon service program, also known as super server, which is often used to manage a variety of lightweight Internet services.
1. Install and start TFTP service
[root@localhost ~]# systemctl stop firewalld turn off the firewall
[root@localhost ~]# setenforce 0
[root@localhost yum.repos.d]# Install tftp and xinetd packages using Yum install - y tftp server
[root@localhost yum.repos.d]# vim /etc/xinetd.d/tftp modify TFTP service configuration file
[root@localhost yum.repos.d]# systemctl start tftp start tftp service
[root@localhost yum.repos.d]# systemctl start xinetd start xinetd service
[root@localhost yum.repos.d]# systemctl enable xinetd sets the startup and self startup service
[root@localhost yum.repos.d]# systemctl enable tftp
vim /etc/xinetd. Configuration file in D / TFTP
2. Install and enable DHCP service
[root@localhost yum.repos.d]# Install dhcp package using Yum install -y
[root@localhost doc]# cd /usr/share/doc/dhcp-4.2.5/
[root@localhost dhcp-4.2.5]# ls
dhcpd6.conf.example  dhcpd.conf.example  ldap
[root@localhost dhcp-4.2.5]# cp dhcpd.conf.example  /etc/dhcp/dhcpd.conf
cp: Overwrite"/etc/dhcp/dhcpd.conf"? y
[root@localhost dhcp-4.2.5]# vim /etc/dhcp/dhcpd.conf enter DHCP service configuration file
[root@localhost dhcp-4.2.5]# systemctl start dhcpd start dhcpd service
[root@localhost dhcp-4.2.5]# systemctl enable dhcpd startup and self startup
vim /etc/dhcp/dhcpd. Configuration file in conf


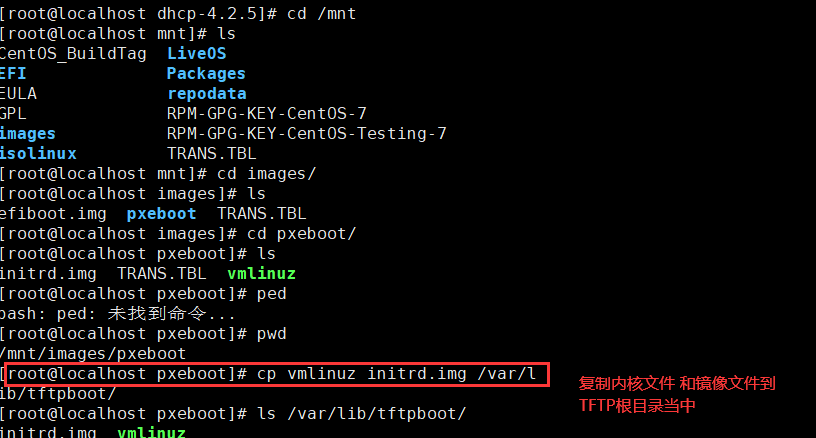
3. Prepare the Linux kernel and initialize the image file
mount /dev/sr0 /mnt
cd /mnt/images/pxeboot
cp vmlinuz /var/lib/tftpboot/				#Copy the kernel file of Linux system to the TFTP root directory
cp initrd.img /var/lib/tftpboot/     		#Copy the initialization image file (linux boot load module) to the TFTP root directory
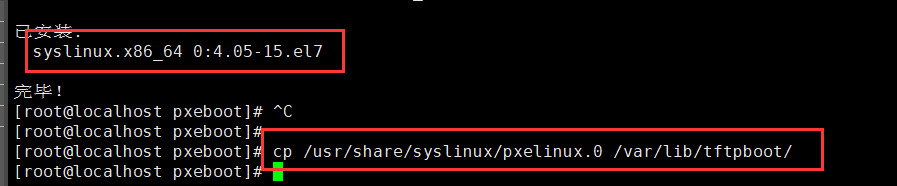
4. Prepare PXE boot program
yum -y install syslinux									#The PXE bootstrap is provided by the software package syslinux
cp /usr/share/syslinux/pxelinux.0 /var/lib/tftpboot/	#Copy the PXE bootstrap to the TFTP root directory
5. Install FTP service and prepare CentOS 7 installation source
yum -y install vsftpd               #Install vsftpd service
mkdir /var/ftp/centos7              #Create the directory centos7 under the ftp root directory
mount /dev/cdrom  centos7/          To set mount, you need to set automatic mount
systemctl start vsftpd              #Open vsftpd service
systemctl enable vsftpd             #Start the vsftpd service and start it automatically
vim /etc/fstab set auto mount

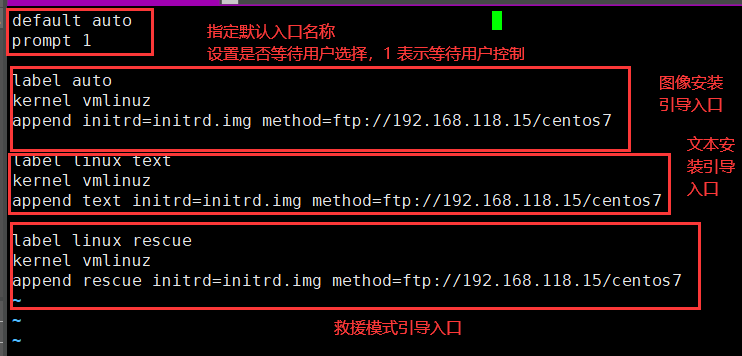
6. Configure Startup menu file
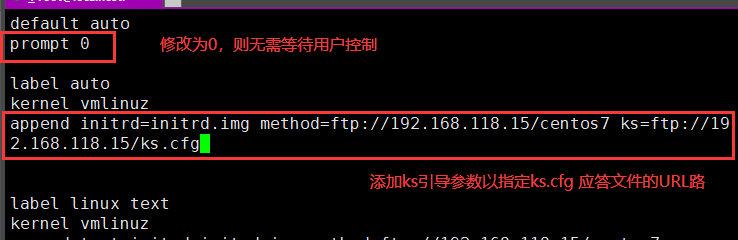
cd /var/lib/tftpboot/
mkdir pxelinux.cfg
vim default

default auto 							#Specifies the default entry name
prompt 1 								#Set whether to wait for user selection. "1" means to wait for user control

label auto								#Graphic installation (default) boot entry. label is used to define startup items
kernel vmlinuz							#The kernel and append parameters are used to define the boot
append initrd=initrd.img method=ftp://192.168.118.15/centos7

label linux text						#Text installation guide entry
kernel vmlinuz
append text initrd=initrd.img method=ftp://192.168.118.15/centos7

label linux rescue						#Rescue mode guidance entrance
kernel vmlinuz
append rescue initrd=initrd.img method=ftp://192.168.118.15/centos7

systemctl stop firewalld.service        #Turn off the system firewall
setenforce 0                            #Turn off system security

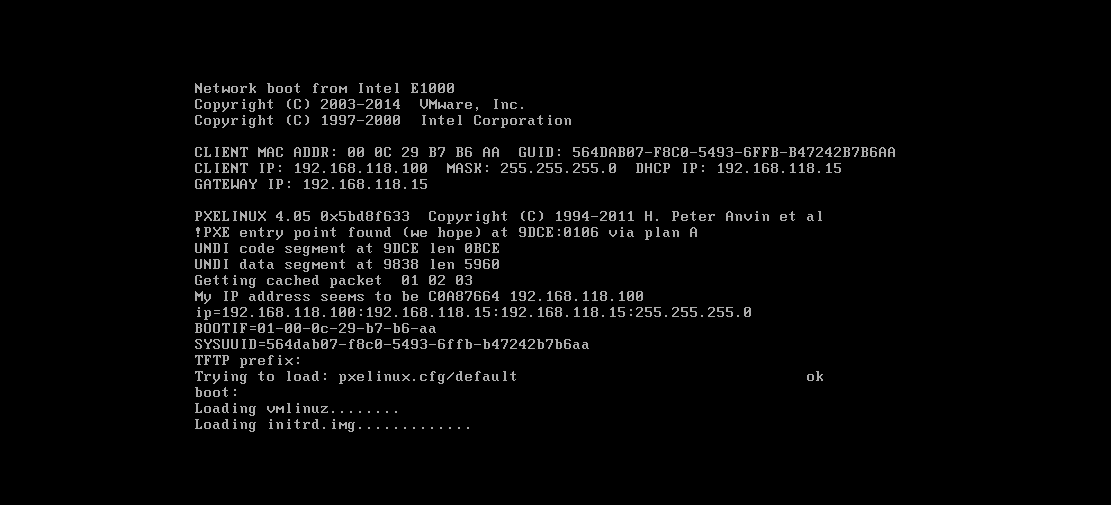
7. Verify PXE network installation
Note: use the virtual machine created by VMware for testing. The memory of the virtual machine needs at least 2GB, otherwise an error may be reported when starting the installation.
Start the virtual machine, press Enter directly after the prompt string "boot:" (or execute the "auto" command), the installation file will be automatically downloaded through the network and Enter the default graphic installation portal;
If the "linux text" command is executed, enter the text installation entry; If you execute the "linux rescue" command, you will enter the rescue mode.
III Implement Kickstart unattended installation
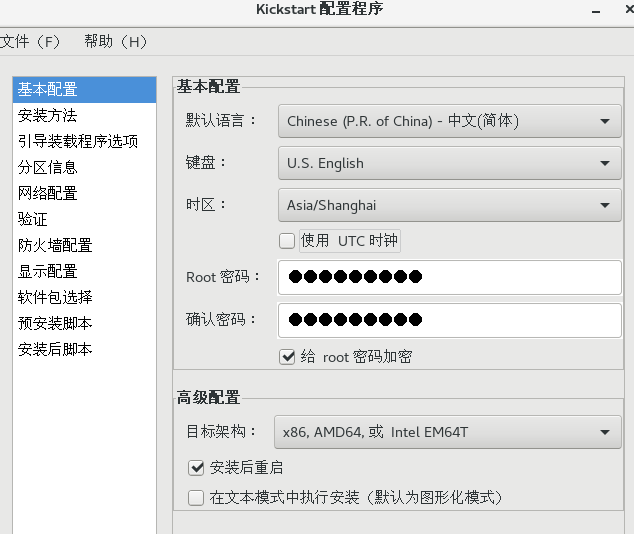
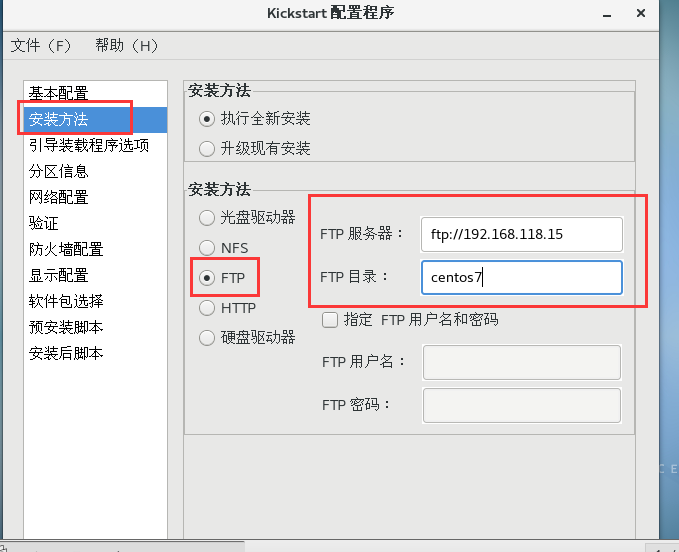
1. Prepare the installation response file
yum install -y system-config-kickstart #Install the system config kickstart tool

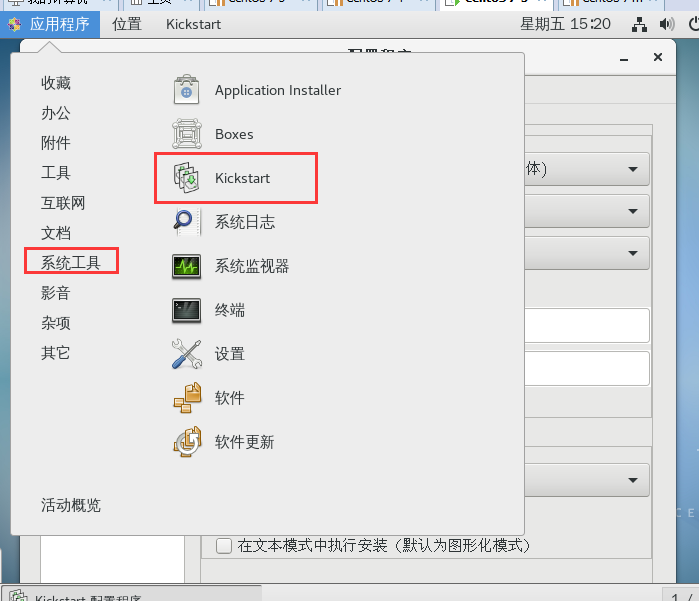
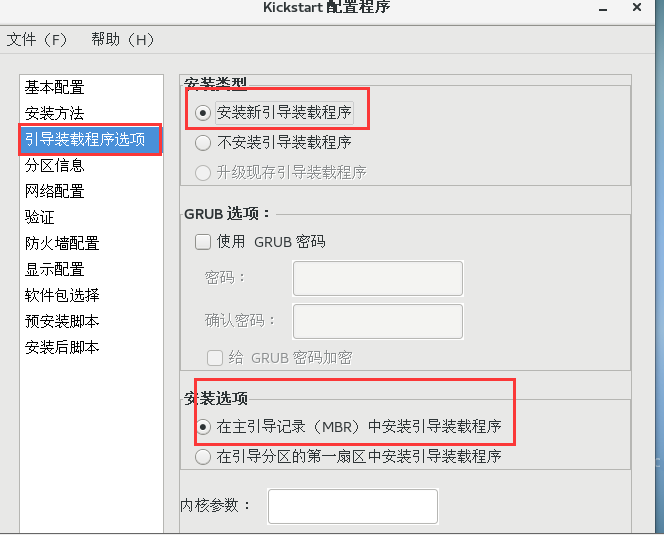
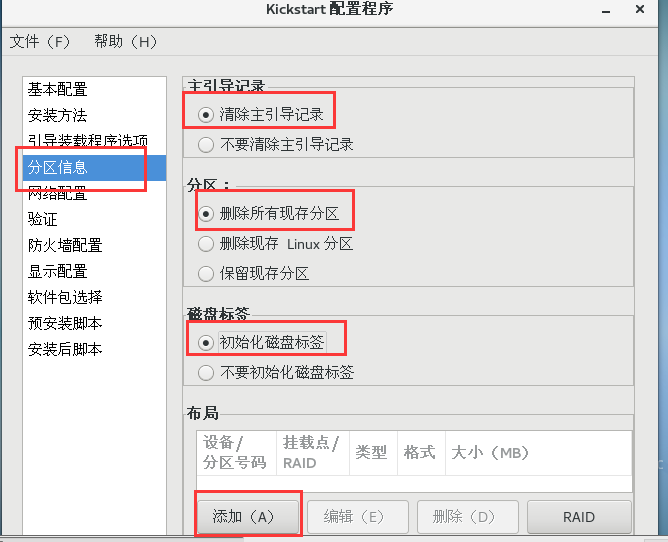
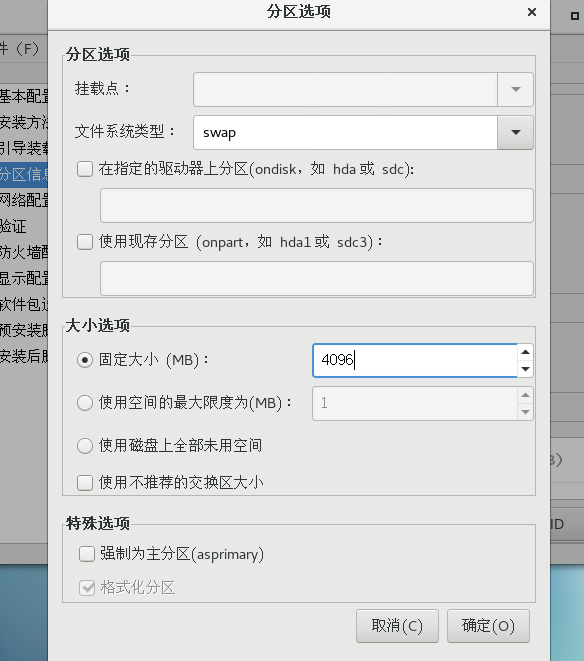
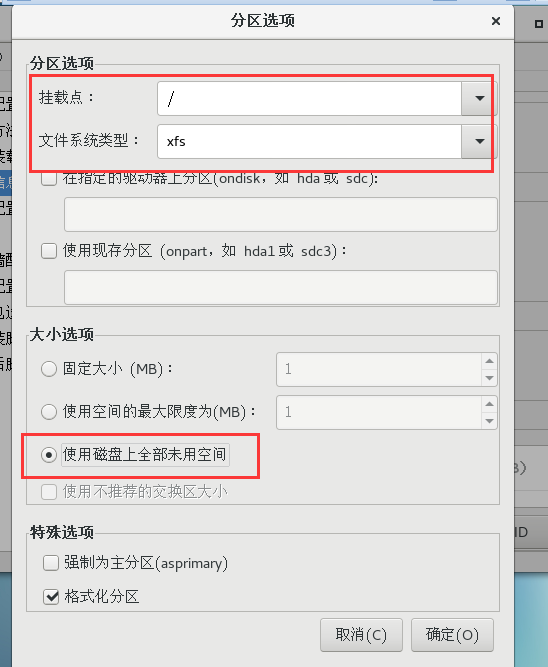
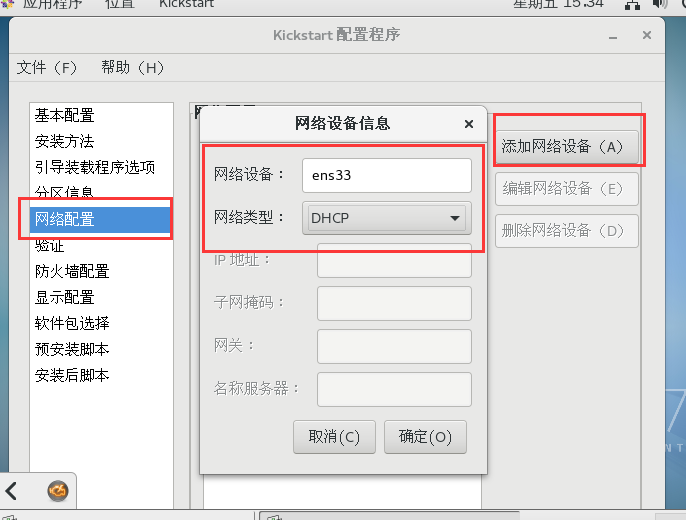
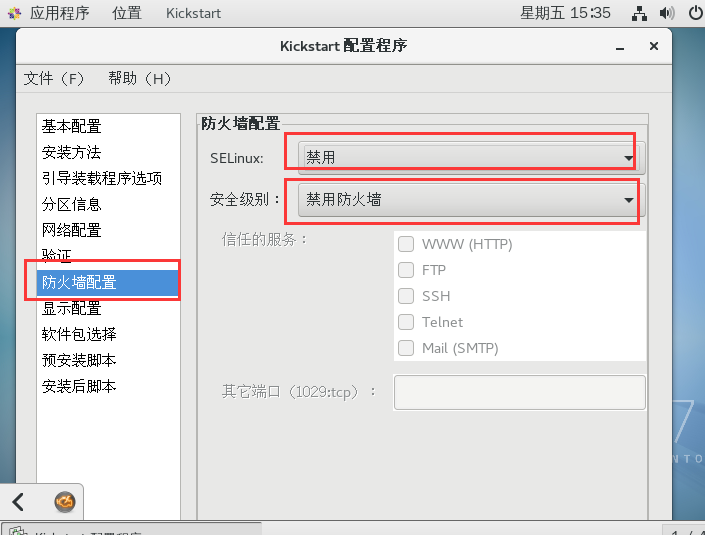
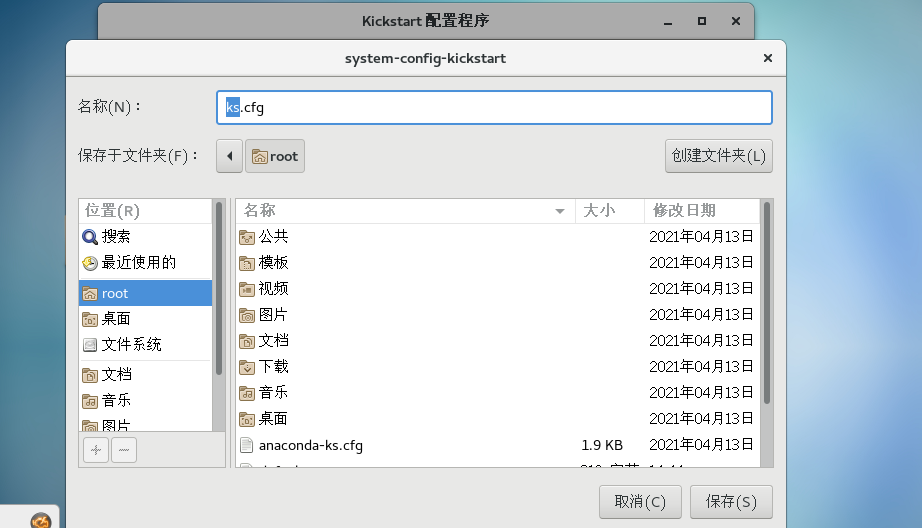
2. Open the Kickstart configurator window
Directly execute the "system config kickstart" command to open

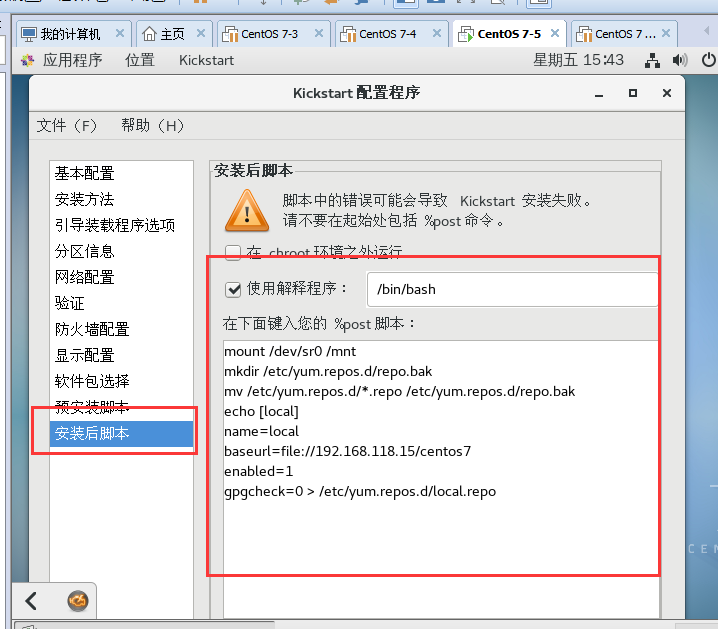
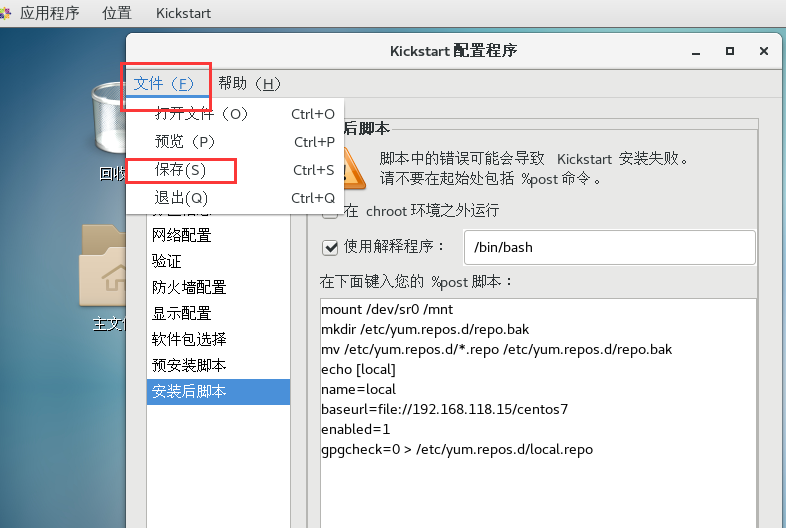
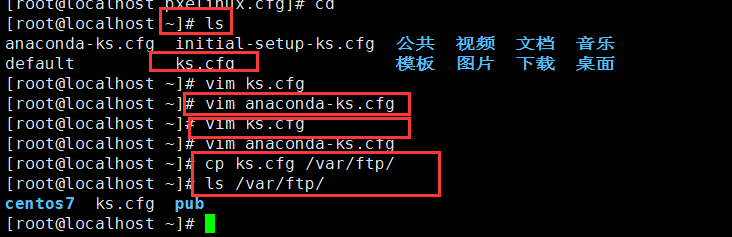
Put VIM Anaconda ks Copy the package in CFG to VIM KS cfg

End, open new virtual machine test