pyqt5- Foundation
PyQt5 is a set of adhesives from Digia's Qt5 application framework and python. Support Python 2 X and python 3 X version.
PyQt5 implements functions in the form of a set of Python modules. It contains more than 620 classes, 600 methods and functions. It is a multi platform tool suite that can run on all major operating systems, including Unix, Windows and Mac OS. PyQt5 adopts dual licensing mode. Developers can choose between GPL and community authorization.
The classes of PyQt5 are divided into several modules, which are listed below:
- QtCore: the module contains the functional design of non GUI. This module is used to implement time, files and directories, different data types, streams, URL s, mime types, threads and processes.
- QtGui: the classes contained in the module are used for windowed system structure, event processing, 2D drawing, basic graphics, font and text.
- QtWidgets: the module contains classes that provide a set of UI elements to create a classic desktop style user interface.
- QtMultimedia: the module contains classes for handling multimedia content and API for linking camera and radio functions.
- QtBluetooth: the module contains classes for scanning Bluetooth devices and establishing connection and interaction with them.
- QtNetwork: the classes contained in the module are used for network programming. These classes make TCP/IP and UDP client / server programming easier and lighter.
- QtPositioning: the class contained in the module is used to limit the location of various available resources, including satellite positioning, Wi Fi, or a text file.
- Enginio: the module is used to solve the problem of client accessing Qt cloud service hosting.
- QtWebSockets: the module is used to solve the problem of client accessing Qt cloud service hosting.
- QtWebKit: contains classes about browsers, which are used to solve the support library based on WebKit 2.
- QtWebKitWidgets: the class about WebKit1 contained in the module basically solves the problem of using QtWidgets based applications in browsers.
- QtXml: the QtXml module contains classes for parsing XML files. This module provides SAX and DOM API solutions.
- QtSvg: the module provides classes to display the contents of SVG files. Scalable Vector Graphics (SVG)
Is a language that uses XML to describe two-dimensional graphics and graphics applications. - QtSql: the module provides classes to drive database work.
- QtTest: the module contains the unit test of PyQt5 application provided by the method.
PyQt5 is not backward compatible with PyQt4; These are some important changes in PyQt5. However, it is not very difficult to migrate old code to a new version. The differences are as follows:
The Python module has been rewritten Some modules are discarded (QtScript), and some modules are divided into sub modules (QtGui, QtWebKit)
New modules were introduced, including QtBluetooth, QtPositioning, and Enginio
PyQt5 only supports the latest style of signal and slot writing The calls of SIGNAL() and SLOT() will not be supported for a long time
PyQt5 does not support any API deprecated or cancelled in Qt 5.0
install
pip install pyqt5
1. Example: simple window
import sys
from PyQt5.QtWidgets import QApplication, QWidget
from PyQt5.QtGui import QIcon
def show_w():
"""Display window"""
app = QApplication(sys.argv) # All PyQt5 applications must create an Application object.
# sys. The argv parameter is a list of parameters from the command line.
w = QWidget() # QWidget component is the basic class of all user interface classes in PyQt5. We provide the default construction method for QWidget.
# The default constructor has no parent class. widget components without a parent class will be used as windows.
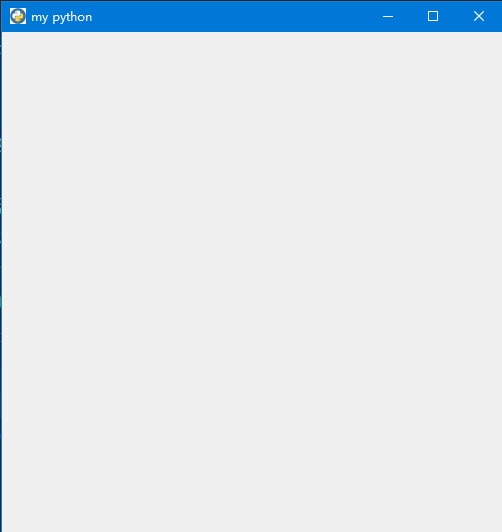
w.resize(500, 500) # The resize() method resizes the widget component. It is now 500px wide and 500px high.
w.move(500, 100) # The move() method moves the widget component to a location where x = 500 and y = 200 are coordinates on the screen.
w.setWindowTitle('my python') # Sets the title of the window. This title is displayed in the title bar.
w.setWindowIcon(QIcon('Icon.png')) # Set the icon of the window. Displayed in the upper left corner.
w.show() # The show() method displays the widget on the screen. A widget object is created here for the first time in memory and then displayed on the screen.
sys.exit(app.exec_()) # The application enters the main cycle. At this point, event handling begins. The main loop is used to receive events triggered from the window,
# And forward them to the widget application for processing. If we call the exit() method or the main widget component is destroyed, the main loop will exit.
# sys. The exit () method ensures an exit without leaving garbage. The system environment will be informed of how the application is ended.
if __name__ == '__main__':
show_w()
effect
2. Example: application icon, button, window closing
Introduce relevant modules
import sys
from PyQt5.QtWidgets import (QWidget, QToolTip, QDesktopWidget, QMessageBox,QTextEdit,QLabel,
    QPushButton, QApplication,QMainWindow, QAction, qApp, QHBoxLayout, QVBoxLayout,QGridLayout,
    QLineEdit)
from PyQt5.QtGui import QFont,QIcon
from PyQt5.QtCore import QCoreApplication
Prompt text
class PromptText(QWidget):

    def __init__(self):
        super().__init__()
        self.initUI()

    def initUI(self):
        QToolTip.setFont(QFont('SansSerif', 10))  # This static method sets the font used for the prompt box.
        # The SansSerif font of 10px size is used here.
        self.setToolTip('This is a <b>QWidget</b> widget')  # Call the setTooltip() method to create a prompt box.
        # You can use rich text formatting in the prompt box.
        btn = QPushButton('Button', self)  # Create button
        btn.setToolTip('This is a <b>QPushButton</b> widget')  # Set button prompt box
        btn.resize(btn.sizeHint())  # Change button size
        btn.move(300, 100)  # Move button position
        self.setGeometry(300, 100, 600, 600)
        self.setWindowTitle('Tooltips')
        self.show()


if __name__ == '__main__':
    app = QApplication(sys.argv)
    ex = PromptText()
    sys.exit(app.exec_())
effect
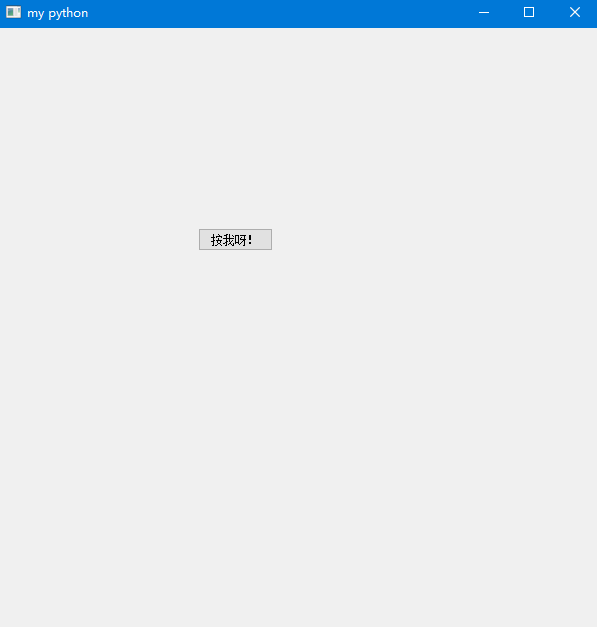
Button:
QPushButton(string text, QWidget parent = None)
# The text parameter is what will be displayed in the button.
# The parent parameter is a component used to place our buttons. In the following example, it will be the QWidget component.
# The components of an application are hierarchical. Within this hierarchy, most components have parent classes. A component without a parent class is a top-level window.
The obvious way to close the window is to click the X mark in the title bar.
# ##***close window***## #
class CloseW(QWidget):

   def __init__(self):
       super().__init__()
       self.initUI()

   def initUI(self):
       qbtn = QPushButton('Quit', self)  # Created a button. A button is an instance of the QPushButton class.
       # The first parameter of the constructor is the label text displayed on the button. The second parameter is the parent component.
       # The parent component is the Example component, which inherits the QWiget class.
       qbtn.clicked.connect(QCoreApplication.instance().quit)
       qbtn.resize(qbtn.sizeHint())
       qbtn.move(500, 50)
       self.setGeometry(300, 100, 600, 600)
       self.setWindowTitle('excise')
       self.show()

if __name__ == '__main__':
   app = QApplication(sys.argv)
   ex = CloseW()
   sys.exit(app.exec_())
Signal slot mechanism
qbtn.clicked.connect(QCoreApplication.instance().quit)
In PyQt5, the event processing system is established by the signal & slot mechanism. If we click the button, the signal clicked is sent. The slot can be a Qt built-in slot or a Python method call. QCoreApplication class contains the main event loop; It processes and forwards all events. The instance() method returns us an instance object. Note that the QCoreAppli class is created by QApplication. Click the signal to connect to the quit() method to end the application. Event communication occurs between two objects: sender and receiver. The sender is the button and the receiver is the application object.
Message Box
By default, if we click the x button on the title bar, the QWidget will be closed. Again, we want to modify this default action. For example, if we have a file open in the editor and we make some changes to the file. We display a message box to confirm this action.
# ##***Message Box***## #
class MessageBox(QWidget):

    def __init__(self):
        super().__init__()
        self.initUI()

    def initUI(self):
        qbtn = QPushButton('Quit', self)  # Created a button. A button is an instance of the QPushButton class.
        # The first parameter of the constructor is the label text displayed on the button. The second parameter is the parent component.
        # The parent component is the Example component, which inherits the QWiget class.
        qbtn.clicked.connect(QCoreApplication.instance().quit)
        qbtn.resize(qbtn.sizeHint())
        qbtn.move(500, 50)
        self.setGeometry(300, 100, 600, 600)
        self.setWindowTitle('excise')
        self.show()

    def closeEvent(self, event):

        reply = QMessageBox.question(self, 'Message',
                                     "Are you sure to quit?", QMessageBox.Yes |
                                     QMessageBox.No, QMessageBox.No)
        if reply == QMessageBox.Yes:
            event.accept()
        else:
            event.ignore()

if __name__ == '__main__':
    app = QApplication(sys.argv)
    ex = MessageBox()
    sys.exit(app.exec_())
If we close a QWidget, the QCloseEvent class event will be generated. To modify component actions, we need to re implement the closeEvent() event handling method.
reply = QMessageBox.question(self, 'Message', "Are you sure to quit?", QMessageBox.Yes |QMessageBox.No, QMessageBox.No)
We implement a message box with two buttons: YES and No buttons. The content of the first string in the code is displayed on the title bar. The second string is the text displayed on the dialog box. The third parameter specifies the set of buttons displayed on the dialog box. The last parameter is the button selected by default. This button gets focus from the beginning. The return value is stored in the reply variable.
if reply == QMessageBox.Yes:
event.accept()
else:
event.ignore()
Here we test the return value. The code logic is that if we click the Yes button, the event we receive will close the event, which will lead to the closing of the component and the end of the application. Otherwise, if we don't click the Yes button, we will ignore the closing event.
Screen centered window
# ##***Screen centered window***## #
class CenterW(QWidget):

    def __init__(self):
        super().__init__()
        self.initUI()

    def initUI(self):
        self.resize(250, 150)
        self.center()  # The code to center the window is in the custom center() method.
        self.setWindowTitle('Center')
        self.show()

    def center(self):

        qr = self.frameGeometry() # Gets a rectangle specific geometry of the main window. This contains the frame of the window.
        cp = QDesktopWidget().availableGeometry().center() # Calculate the absolute value relative to the display.
        # And from this absolute value, we get the center point of the screen.
        qr.moveCenter(cp) # The rectangle has set its width and height. Now let's set the center of the rectangle to the middle of the screen.
        # The size of the rectangle does not change.
        self.move(qr.topLeft()) # The point at the top left of the application window is moved to the point at the top left of the qr rectangle, so it is centered on our screen.


if __name__ == '__main__':
    app = QApplication(sys.argv)
    ex = CenterW()
    sys.exit(app.exec_())
3. Menus and toolbars
A menu is a set of command actions located on the menu bar. Toolbar is a component in the application form, which is composed of buttons and some general command operations.
main window
The QMainWindow class provides an application main window. By default, a classic application window skeleton with status bar, toolbar and menu bar is created.
status bar
The status bar is a component used to display status information. The status bar also helps create the QMainWindow component (depending on the QMainWindow component).
# ##***status bar***## #
class StatusBar(QMainWindow):
    def __init__(self):
        super().__init__()

        self.initUI()

    def initUI(self):
        self.statusBar().showMessage('Ready')

        self.setGeometry(300, 300, 250, 150)
        self.setWindowTitle('Statusbar')
        self.show()


if __name__ == '__main__':
    app = QApplication(sys.argv)
    ex = StatusBar()
    sys.exit(app.exec_())
To get the status bar, we call qtgui The statusBar() method of the qmainwindow class. Calling this method for the first time creates a status bar. The method then returns the status bar object. Then use the showMessage() method to display some information on the status bar.
menu bar
The menu bar is a regular part of GUI applications. It is a set of command operations located in various menus (Mac OS treats the menu bar differently. In order to achieve a consistent effect across the platform, we can add a line to the code: menubar.setnativemeubar (false)).
# ##***menu bar***## #
class MenuBar(QMainWindow):
    def __init__(self):
        super().__init__()

        self.initUI()

    def initUI(self):
        exitAction = QAction(QIcon('t2.jpg'), '&Exit', self)
        exitAction.setShortcut('Ctrl+Q')
        exitAction.setStatusTip('Exit application')
        exitAction.triggered.connect(qApp.quit)

        self.statusBar()

        menubar = self.menuBar()
        fileMenu = menubar.addMenu('&File')
        fileMenu.addAction(exitAction)

        self.setGeometry(300, 300, 300, 200)
        self.setWindowTitle('Menubar')
        self.show()


if __name__ == '__main__':
    app = QApplication(sys.argv)
    ex = MenuBar()
    sys.exit(app.exec_())
In the above example, we created a menu bar with a menu item. This menu item contains an action to interrupt the application when selected.
exitAction = QAction(QIcon('t2.jpg'), '&Exit', self)
exitAction.setShortcut('Ctrl+Q')
exitAction.setStatusTip('Exit application')
QAction is an abstract action behavior used for menu bar, toolbar or custom shortcut keys. In the above three lines, we created a label with the specified icon and text 'Exit'. In addition, a shortcut key is defined for this action. The third line creates a status prompt that will be displayed when we hover over the menu item.
toolbar
Menus can integrate all commands so that we can use these integrated commands in our applications. Toolbars provide a quick way to access commonly used commands.
# ##***toolbar***## #
class ToolBar(QMainWindow):
    def __init__(self):
        super().__init__()

        self.initUI()

    def initUI(self):
        exitAction = QAction(QIcon('t3.jpg'), 'Exit', self)
        exitAction.setShortcut('Ctrl+Q')
        exitAction.triggered.connect(qApp.quit)

        self.toolbar = self.addToolBar('Exit')
        self.toolbar.addAction(exitAction)

        self.setGeometry(300, 300, 300, 200)
        self.setWindowTitle('Toolbar')
        self.show()


if __name__ == '__main__':
    app = QApplication(sys.argv)
    ex = ToolBar()
    sys.exit(app.exec_())
In the above example, we created a simple toolbar. The toolbar has an action. When this exit action is triggered, the application will be interrupted.
Component combination
In the above example, we created the menu bar, toolbar and status bar. Next, we will create a central component.
# ##***Component combination***## #
class Combination(QMainWindow):
    def __init__(self):
        super().__init__()

        self.initUI()

    def initUI(self):
        textEdit = QTextEdit()
        self.setCentralWidget(textEdit)

        exitAction = QAction(QIcon('t2.jpg'), 'Exit', self)
        exitAction.setShortcut('Ctrl+Q')
        exitAction.setStatusTip('Exit application')
        exitAction.triggered.connect(self.close)

        self.statusBar()

        menubar = self.menuBar()
        fileMenu = menubar.addMenu('&File')
        fileMenu.addAction(exitAction)

        toolbar = self.addToolBar('Exit')
        toolbar.addAction(exitAction)

        self.setGeometry(300, 300, 350, 250)
        self.setWindowTitle('Main window')
        self.show()

if __name__ == '__main__':
    app = QApplication(sys.argv)
    ex = Combination()
    sys.exit(app.exec_())
The sample code creates a classic GUI application skeleton with menu bar, toolbar and status bar.
textEdit = QTextEdit()
self.setCentralWidget(textEdit)
Here we create a text edit box component. We set it as the central component of QMainWindow. The central component takes up all the remaining space.
4. Layout management
Layout management is an important aspect of GUI programming. Layout management is a method of how to prevent components on the application window. We can manage the layout in two basic ways. We can use absolute positioning and layout classes.
4.1 absolute positioning
The program specifies the location of components, and the size of each component is measured in pixels. When you use absolute positioning, we need to know the following limitations:
If we change the window size, the position and size of the component will not change.
Applications may look different on different platforms
Changing the font in our application may mess up the application.
If we decide to change our layout, we must completely rewrite our layout, which is very boring and a waste of time.
# ##***Absolute positioning***## #
class AbsPosition(QWidget):
    def __init__(self):
        super().__init__()

        self.initUI()

    def initUI(self):
        lbl1 = QLabel('Zetcode', self)
        lbl1.move(15, 10)

        lbl2 = QLabel('tutorials', self)
        lbl2.move(35, 40)

        lbl3 = QLabel('for programmers', self)
        lbl3.move(55, 70)

        self.setGeometry(300, 300, 250, 150)
        self.setWindowTitle('Absolute')
        self.show()

if __name__ == '__main__':
    app = QApplication(sys.argv)
    ex = AbsPosition()
    sys.exit(app.exec_())
We use the move() method to locate our components. In the above example, we used the move() method to locate some tag components. When using the move() method, we provide the move() method with X and y coordinates as parameters. The coordinate system used by move() is calculated from the upper left corner. The value of x increases from left to right. The value of y increases from top to bottom.
4.2 box layout
The layout management class of the layout manager is very flexible and practical. It is the preferred way to position components on windows. QHBoxLayout and QVBoxLayout are two basic layout management classes, which arrange components horizontally or vertically. Imagine that we need to arrange two buttons in the lower right corner. In order to use the box layout, we will use a horizontal box layout and a vertical box layout. Similarly, in order to use some necessary blanks, we will add some stretching factors.
# ##***Box layout***## #
class BoxLayout(QWidget):
    def __init__(self):
        super().__init__()

        self.initUI()

    def initUI(self):
        okButton = QPushButton("OK")
        cancelButton = QPushButton("Cancel")

        # A horizontal box layout is created, and a stretch factor and two buttons are added. The stretch factor adds a scalable space before two buttons.
        # This pushes the button to the right of the window.
        hbox = QHBoxLayout()
        hbox.addStretch(1)
        hbox.addWidget(okButton)
        hbox.addWidget(cancelButton)

        # To create the necessary layout, place the horizontal layout inside the vertical layout. The stretch factor pushes the horizontal box layout containing two buttons to the bottom edge of the window.
        vbox = QVBoxLayout()
        vbox.addStretch(1)
        vbox.addLayout(hbox)

        self.setLayout(vbox)

        self.setGeometry(300, 300, 300, 150)
        self.setWindowTitle('Buttons')
        self.show()

if __name__ == '__main__':
    app = QApplication(sys.argv)
    ex = BoxLayout()
    sys.exit(app.exec_())
The example places two buttons in the lower right corner. When we change the size of the application window, they will not change their position relative to the application window. In this example, we use QHBoxLayout and QVBoxLayout.
4.3 grid layout
The most commonly used layout class is grid layout. This layout uses rows and columns to divide space. To create a grid layout, we need to use the QGridLayout class.
# ##***Grid layout***## #
class GridLayout(QWidget):
    def __init__(self):
        super().__init__()

        self.initUI()

    def initUI(self):

        grid = QGridLayout() # Instantiate the QGridLayout class
        self.setLayout(grid) # Set the QGridLayout class as the layout of the application window.

        names = ['Cls', 'Bck', '', 'Close',
                 '7', '8', '9', '/',
                 '4', '5', '6', '*',
                 '1', '2', '3', '-',
                 '0', '.', '=', '+']

        positions = [(i, j) for i in range(5) for j in range(4)]

        for position, name in zip(positions, names):

            if name == '':
                continue
            button = QPushButton(name)
            grid.addWidget(button, *position)

        self.move(300, 150)
        self.setWindowTitle('Calculator')
        self.show()


if __name__ == '__main__':
    app = QApplication(sys.argv)
    ex = GridLayout()
    sys.exit(app.exec_())
4.4 example of text review window
In a grid, components can span multiple columns or rows. In this example, we will explain it.
# ##***Text review***## #
class TextReview(QWidget):
    def __init__(self):
        super().__init__()

        self.initUI()

    def initUI(self):
        title = QLabel('Title')
        author = QLabel('Author')
        review = QLabel('Review')

        titleEdit = QLineEdit()
        authorEdit = QLineEdit()
        reviewEdit = QTextEdit()

        grid = QGridLayout()
        grid.setSpacing(10) # A grid layout is created and the spacing between components is set.

        grid.addWidget(title, 1, 0)
        grid.addWidget(titleEdit, 1, 1)

        grid.addWidget(author, 2, 0)
        grid.addWidget(authorEdit, 2, 1)

        grid.addWidget(review, 3, 0)
        grid.addWidget(reviewEdit, 3, 1, 5, 1) # If we add a component to the grid layout, we can provide cross row of components
        # And cross column parameters. In this example, we let the reviewEdit component span five lines.

        self.setLayout(grid)

        self.setGeometry(300, 300, 350, 300)
        self.setWindowTitle('Review')
        self.show()


if __name__ == '__main__':
    app = QApplication(sys.argv)
    ex = TextReview()
    sys.exit(app.exec_())
We created a window with three labels, two single line edit boxes and a text edit box component. The layout uses the QGridLayout layout.
5. Events and signals
5.1 events
All GUI applications are event driven. The event is mainly generated by the user operation of the application. However, the event may be triggered by other conditions, such as a network connection, a window manager and a timer. These actions may trigger the event. When we call the exec of the application_ () method, the application enters the main loop. The main loop is used to detect the generation of events and send them to the object for processing.
In the event model, there are three participants:
Event source
Event object
Event target
An event source is an object whose state has changed. It produced an event. The event object (evnet) encapsulates the state changes in the event source. The event target is the object you want to be notified of. The event source object represents the task of processing an event until the event target responds.
PyQt5 has a unique signal and slot mechanism to handle events. Signals and slots are used for communication between objects. When a specified event occurs, an event signal will be transmitted. Slots can be called by any Python script. When the signal connected to the slot is transmitted, the slot will be called.
5.2 signal & slot
In our example, we show a qtgui Qlcdnumber and a qtgui QSlider class. When we drag the handle of the slider bar, the lcd number will change.
import sys
from PyQt5.QtCore import Qt
from PyQt5.QtWidgets import (QWidget, QLCDNumber, QSlider,
                             QVBoxLayout, QApplication)


class EventsSignals(QWidget):
    def __init__(self):
        super().__init__()

        self.initUI()

    def initUI(self):
        lcd = QLCDNumber(self) # Displays an LCD number.
        sld = QSlider(Qt.Horizontal, self) # A horizontal slider is provided.

        vbox = QVBoxLayout()
        vbox.addWidget(lcd)
        vbox.addWidget(sld)

        self.setLayout(vbox)
        sld.valueChanged.connect(lcd.display) # The valueChanged signal of the slider bar is connected with the display slot of the lcd digital display.
        #A sender is an object that sends a signal. The receiver is an object that receives a signal. Slots are a way to respond to signals.

        self.setGeometry(300, 300, 250, 150)
        self.setWindowTitle('Signal & slot')
        self.show()


if __name__ == '__main__':
    app = QApplication(sys.argv)
    ex = EventsSignals()
    sys.exit(app.exec_())
5.3 rewriting event handling functions
Event handling in PyQt is usually handled by rewriting event handling functions.
import sys
from PyQt5.QtCore import Qt
from PyQt5.QtWidgets import QWidget, QApplication


class Rewrite(QWidget):
    def __init__(self):
        super().__init__()

        self.initUI()

    def initUI(self):
        self.setGeometry(300, 300, 250, 150)
        self.setWindowTitle('Event handler')
        self.show()

    def keyPressEvent(self, e):
        if e.key() == Qt.Key_Escape:
            self.close()


if __name__ == '__main__':
    app = QApplication(sys.argv)
    ex = Rewrite()
    sys.exit(app.exec_())
In our example, we rewrite the keyPressEvent() event handler. If we click the Esc button, the application will be terminated.
5.4 event sender
Sometimes it is convenient to know which component is the signal sender. Therefore, PyQt5 has a sender() method to solve this problem.
import sys
from PyQt5.QtWidgets import QMainWindow, QPushButton, QApplication


class EventSender(QMainWindow):
    def __init__(self):
        super().__init__()

        self.initUI()

    def initUI(self):
        btn1 = QPushButton("Button 1", self)
        btn1.move(30, 50)

        btn2 = QPushButton("Button 2", self)
        btn2.move(150, 50)

        btn1.clicked.connect(self.buttonClicked)
        btn2.clicked.connect(self.buttonClicked)

        self.statusBar()

        self.setGeometry(300, 300, 290, 150)
        self.setWindowTitle('Event sender')
        self.show()

    def buttonClicked(self):
        sender = self.sender()
        self.statusBar().showMessage(sender.text() + ' was pressed')


if __name__ == '__main__':
    app = QApplication(sys.argv)
    ex = EventSender()
    sys.exit(app.exec_())
In our example, we have two buttons. In the buttonClikced() method, we call the sender() method to determine which button we pressed. Both buttons are connected to the same slot.
We call the sender() method to determine which signal source is sending the signal. Then, the label content of the pressed button is displayed on the status bar of the application.
5.5 sending signals
Objects generated from QObejct can send signals. In the following example, we will see how to send custom signals.
import sys
from PyQt5.QtCore import pyqtSignal, QObject
from PyQt5.QtWidgets import QMainWindow, QApplication


class Communicate(QObject):
    closeApp = pyqtSignal() # The signal is created using the pyqtSignal() method and becomes an attribute of the external class communication class.


class SendSignal(QMainWindow):
    def __init__(self):
        super().__init__()

        self.initUI()

    def initUI(self):
        self.c = Communicate()
        self.c.closeApp.connect(self.close) # Connect the custom closeApp signal to the close() slot of QMainWindow.

        self.setGeometry(300, 300, 290, 150)
        self.setWindowTitle('Emit signal')
        self.show()

    def mousePressEvent(self, event):
        self.c.closeApp.emit() # When we click the mouse on the window, the closeApp signal will be transmitted. Application interrupt.


if __name__ == '__main__':
    app = QApplication(sys.argv)
    ex = SendSignal()
    sys.exit(app.exec_())
We create a new signal called closeApp. When the mouse click event is triggered, the signal will be transmitted. The signal is connected to the close() method of QMainWindow.
6. Dialog box
Dialog window or dialog box is an indispensable part of most mainstream GUI applications. A conversation is a conversation between two or more people. In computer applications, dialog box is a window used to talk with applications. Dialog boxes can be used to enter data, modify data, change application settings, and so on.
6.1 input dialog box
QInputDialog provides a simple and convenient dialog box for obtaining only one value from the user. The input value can be a string, a number, or a list item in a list.
import sys
from PyQt5.QtWidgets import (QWidget, QPushButton, QLineEdit,
                             QInputDialog, QApplication)


class InputDialog(QWidget):
    def __init__(self):
        super().__init__()

        self.initUI()

    def initUI(self):
        self.btn = QPushButton('Dialog', self)
        self.btn.move(20, 20)
        self.btn.clicked.connect(self.showDialog)

        self.le = QLineEdit(self)
        self.le.move(130, 22)

        self.setGeometry(300, 300, 290, 150)
        self.setWindowTitle('Input dialog')
        self.show()

    def showDialog(self):
        # This line displays an input dialog box. The first string parameter is the title of the dialog box, and the second string parameter is the message text in the dialog box.
        # The dialog box returns the entered text content and a Boolean value. If we click the Ok button, the Boolean value is true, otherwise the Boolean value is false
        # (the returned text content will have a value only when the Ok button is pressed.).
        text, ok = QInputDialog.getText(self, 'Input Dialog',
                                        'Enter your name:')

        if ok:
            self.le.setText(str(text)) # Set the text we received from the dialog box to be displayed on the single line edit box component.


if __name__ == '__main__':
    app = QApplication(sys.argv)
    ex = InputDialog()
    sys.exit(app.exec_())
In the example, there is a button and a single line edit box component. Pressing the button displays an input dialog box for obtaining a string value. The value entered in the dialog box is displayed in the single line edit box component.
6.2 color selection dialog box
The QColorDialog class provides a dialog component for selecting colors.
import sys
from PyQt5.QtWidgets import (QWidget, QPushButton, QFrame,
                             QColorDialog, QApplication)
from PyQt5.QtGui import QColor


class ColorChoose(QWidget):
    def __init__(self):
        super().__init__()

        self.initUI()

    def initUI(self):
        col = QColor(0, 0, 0) # Initializes the background color of the QtGuiQFrame component.

        self.btn = QPushButton('Dialog', self)
        self.btn.move(20, 20)

        self.btn.clicked.connect(self.showDialog)

        self.frm = QFrame(self)
        self.frm.setStyleSheet("QWidget { background-color: %s }"
                               % col.name())
        self.frm.setGeometry(130, 22, 100, 100)

        self.setGeometry(300, 300, 250, 180)
        self.setWindowTitle('Color dialog')
        self.show()

    def showDialog(self):
        col = QColorDialog.getColor() # Pop up the color selection box.

        if col.isValid():
            # If we select a color and click the ok button, a valid color value will be returned. If we click the Cancel button,
            # The selected color value is not returned. We use style sheets to define the background color.
            self.frm.setStyleSheet("QWidget { background-color: %s }"
                                   % col.name())


if __name__ == '__main__':
    app = QApplication(sys.argv)
    ex = ColorDialog()
    sys.exit(app.exec_())
The example shows a button and a QFrame. Set the background of the QFrame component to black. Using the color selection box class, we can change its color.
6.3 font selection box
QFontDialog is a dialog component used to select fonts.
import sys
from PyQt5.QtWidgets import (QWidget, QVBoxLayout, QPushButton,
                             QSizePolicy, QLabel, QFontDialog, QApplication)


class FontChoose(QWidget):
    def __init__(self):
        super().__init__()

        self.initUI()

    def initUI(self):
        vbox = QVBoxLayout()

        btn = QPushButton('Dialog', self)
        btn.setSizePolicy(QSizePolicy.Fixed,
                          QSizePolicy.Fixed)

        btn.move(20, 20)

        vbox.addWidget(btn)

        btn.clicked.connect(self.showDialog)

        self.lbl = QLabel('Knowledge only matters', self)
        self.lbl.move(130, 20)

        vbox.addWidget(self.lbl)
        self.setLayout(vbox)

        self.setGeometry(300, 300, 250, 180)
        self.setWindowTitle('Font dialog')
        self.show()

    def showDialog(self):
        font, ok = QFontDialog.getFont() # A font dialog box pops up. The getFont() method returns the font name and Boolean value.
        # If the user clicks OK, the Boolean value is True; Otherwise, it is False.
        if ok:
            self.lbl.setFont(font) # If we click the Ok button, the label font will be changed.


if __name__ == '__main__':
    app = QApplication(sys.argv)
    ex = FontChoose()
    sys.exit(app.exec_())
In our example, we have a button and an expression. Through the font selection dialog box, we can change the font of the label.
6.4 file dialog box
The file dialog box is a dialog box for users to select files or directories. You can choose to open and save the file.
import sys
from PyQt5.QtWidgets import (QMainWindow, QTextEdit,
                             QAction, QFileDialog, QApplication)
from PyQt5.QtGui import QIcon


class FileDialog(QMainWindow): # Based on QMainWindow component, because our center needs to set a text edit box component.
    def __init__(self):
        super().__init__()

        self.initUI()

    def initUI(self):
        self.textEdit = QTextEdit()
        self.setCentralWidget(self.textEdit)
        self.statusBar()

        openFile = QAction(QIcon('open.png'), 'Open', self)
        openFile.setShortcut('Ctrl+O')
        openFile.setStatusTip('Open new File')
        openFile.triggered.connect(self.showDialog)

        menubar = self.menuBar()
        fileMenu = menubar.addMenu('&File')
        fileMenu.addAction(openFile)

        self.setGeometry(300, 300, 350, 300)
        self.setWindowTitle('File dialog')
        self.show()

    def showDialog(self):
        # The file selection box pops up. The first string parameter is the title of the getOpenFileName() method. The second string parameter specifies the working directory of the dialog box.
        # By default, the file filter is set to All files (*).
        fname = QFileDialog.getOpenFileName(self, 'Open file', '/home')

        # After selecting the file, read out the contents of the file and set it as the display text of the text editing box component
        if fname[0]:
            f = open(fname[0], 'r')

            with f:
                data = f.read()
                self.textEdit.setText(data)


if __name__ == '__main__':
    app = QApplication(sys.argv)
    ex = FileDialog()
    sys.exit(app.exec_())
The example shows a menu bar with a text edit box component and a status bar in the middle. Clicking the menu item will display qtgui The QFileDialog dialog box is used to select a file. The contents of the file are read and displayed in the text edit box component.