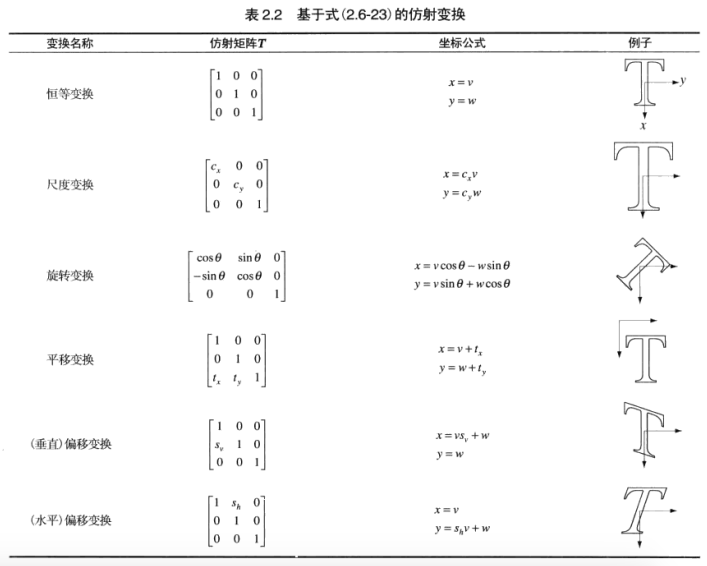
Today let's look at how OpenCV3 operates on images. Image operations are mainly based on various coordinate transformations of images, such as scale transformation, rotation transformation, translation transformation and offset transformation (horizontal or vertical). These transformations are all directed at the coordinates of images, not the pixels of images. They can be collectively called affine transformation. Here's how to use OpenCV to implement them. Now these transformations. The following is the description of several transformations in Gonzalez's Digital Image Processing. The author sets a point on the image as (x,y, gray value) and multiplies it with the transformation matrix to get (new x, new y, invariant gray value). So, for affine transformation, we only need 2X3 matrix, we will not change the gray value of the image.
OpenCV provides resize methods for scaling up or scaling down images. The code is as follows:
#resize
image = cv2.imread(r'pics/lena.png', cv2.IMREAD_GRAYSCALE)
shrink_image = cv2.resize(image, None, fx=0.5, fy=0.5)
zoom_image = cv2.resize(image, None, fx=2, fy=2, interpolation=cv2.INTER_LINEAR)
plt.subplot(131), plt.imshow(image, 'gray'), plt.title('origin')
plt.subplot(132), plt.imshow(shrink_image, 'gray'), plt.title('shrink')
plt.subplot(133), plt.imshow(zoom_image, 'gray'), plt.title('zoom')
plt.show()
The resize can be used to scale the image. If the image is enlarged, because of the increase of the pixels, it is necessary to specify the interpolation method for the increased pixels. Linear interpolation (cv2.INTER_LINEAR) is used here. Then we use matplotlib to plot:
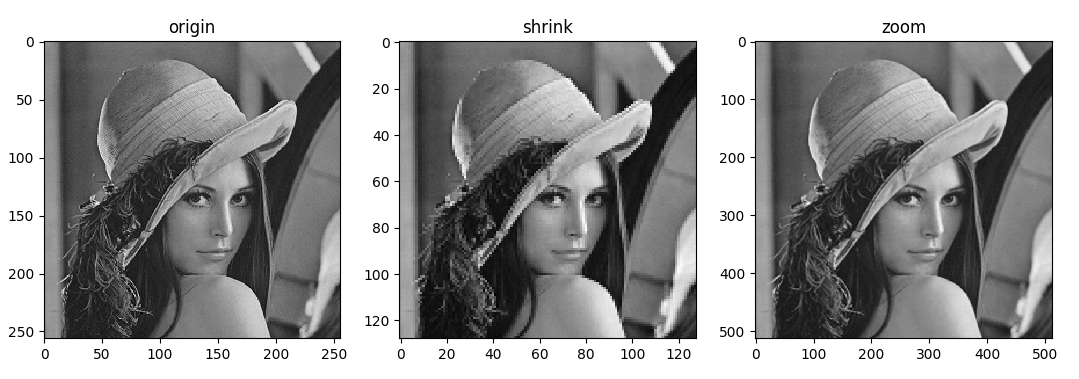
It can be seen that when the reduced image is enlarged to the same size as the original image due to the loss of pixels, there are some distortions in the image. When the enlarged image is enlarged, the inserted pixel value is estimated by its neighbor pixel value after using linear interpolation, so the distorted image has a smooth effect.
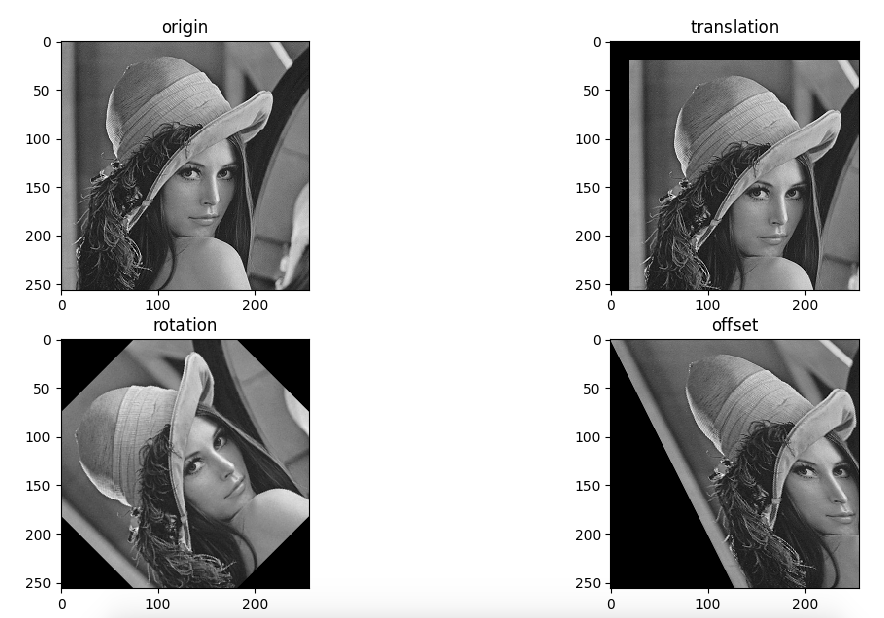
OpenCV provides warpAffine methods for various affine transformations, passing a 2X3 matrix to the function, which can transform the region of interest accordingly. Let's see an example below.
image = cv2.imread(r'pics/lena.png', cv2.IMREAD_GRAYSCALE)

# translation
translation_M = np.array([[1, 0, 20], [0, 1, 20]], dtype=np.float32)
translation_image = cv2.warpAffine(image, translation_M, image.shape)

# rotation
rows, cols = image.shape
rotation_M = cv2.getRotationMatrix2D((cols/2, rows/2), 45, 1)
rotation_image = cv2.warpAffine(image, rotation_M, image.shape)

# offset
offset_M = np.array([[1, 0.5, 0], [0, 1, 0]], dtype=np.float32)
offset_image = cv2.warpAffine(image, offset_M, image.shape)

plt.figure(12)
plt.subplot(221), plt.imshow(image, 'gray'), plt.title('origin')
plt.subplot(222), plt.imshow(translation_image, 'gray'), plt.title('translation')
plt.subplot(223), plt.imshow(rotation_image, 'gray'), plt.title('rotation')
plt.subplot(224), plt.imshow(offset_image, 'gray'), plt.title('offset')
plt.show()
After reading the original image, the translation transformation is carried out. Python's OpenCV needs numpy module. We use numpy to create a 2X3 binary array:
[[1,0,20],
[0,1,20]]
This translates the original image into 20 pixels in the x and y directions, respectively. The following rotation and migration are the same principle, but the constructed matrices are different and the rotation is special. In order to avoid calculating the trigonometric function value of the rotation matrix ourselves, we can use the getRotation Matrix 2D method to construct it. If we look at the interface of the cv2 module, we can also see a getAffineTransform method, which allows us to customize our affine transformation matrix using three points.