Data storage
Two data storage methods are mainly introduced:
- Stored in files, including text files and csv files
- Stored in databases, including MySQL relational database and mongoDB database
Store to txt
title = "First text"
# W create write W + create read + Write
# r read r + read + Write
# A write a + read write attach
with open(r'C:\Users\K1567\Desktop\title.txt', "a+") as f:
    f.write(title)
    f.close()

output = '\t'.join(['name', 'title', 'age', 'gender'])
with open(r'C:\Users\K1567\Desktop\title.txt', "a+") as f:
    f.write(output)
    f.close()

output = '\t'.join(['name', 'title', 'age', 'gender'])

with open(r'C:\Users\K1567\Desktop\title.txt', "r") as f:
    resulf = f.read()
    print(resulf)
Store to csv
# Comma separated rows and newline separated columns
with open(r'C:\Users\K1567\Desktop\test.csv', 'r', encoding='UTF-8') as csvfile:
    csv_reader = csv.reader(csvfile)
    for row in csv_reader:
        print(row)
        print(row[0])

output_list = ['1', '2', '3', '4']
with open(r'C:\Users\K1567\Desktop\test2.csv', 'a+', encoding='UTF-8', newline='') as csvfile:
    w = csv.writer(csvfile)
    w.writerow(output_list)
Store to MySQL database
Install MySQL database
Just search the specific steps. There are two installation methods, one is online installation and the other is offline installation. Online installation is troublesome and has not been successful. I used offline installation.
1. Refer to this online: https://blog.csdn.net/theLostLamb/article/details/78797643
Offline installation:
1. Download the compressed package first: zip package download address: https://dev.mysql.com/downloads/file/?id=476233 , you can not log in after entering the page. Click "No" at the bottom thanks, just start my download.” You can start downloading.
2. Installation: unzip the zip package to the installation directory - configure the initialized my INI file
[mysqld]

# Set 3306 port

port=3306

# Set mysql installation directory

basedir=E:\DownLoad\mysql\mysql-8.0.27-winx64

# Set the storage directory of mysql database data

datadir=E:\DownLoad\mysql\mysql-8.0.27-winx64\data

# Maximum connections allowed

max_connections=200

# Number of connection failures allowed. This is to prevent someone from trying to attack the database system from the host

max_connect_errors=10

# The character set used by the server is UTF8 by default

character-set-server=utf8

# The default storage engine that will be used when creating new tables

default-storage-engine=INNODB

# The "mysql_native_password" plug-in authentication is used by default

default_authentication_plugin=mysql_native_password

[mysql]

# Set the default character set of mysql client

default-character-set=utf8
Note: the data directory does not need to be created. It will be created automatically in the next initialization.
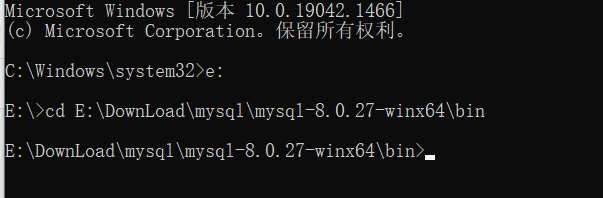
3.cmd enter bin folder
Enter cmd with administrator permission (if it is not administrator permission, there will be a problem), and enter the bin directory of MySQL installation directory
4. Initialize database: mysqld --initialize --console
After execution, the initial default password of root user will be printed
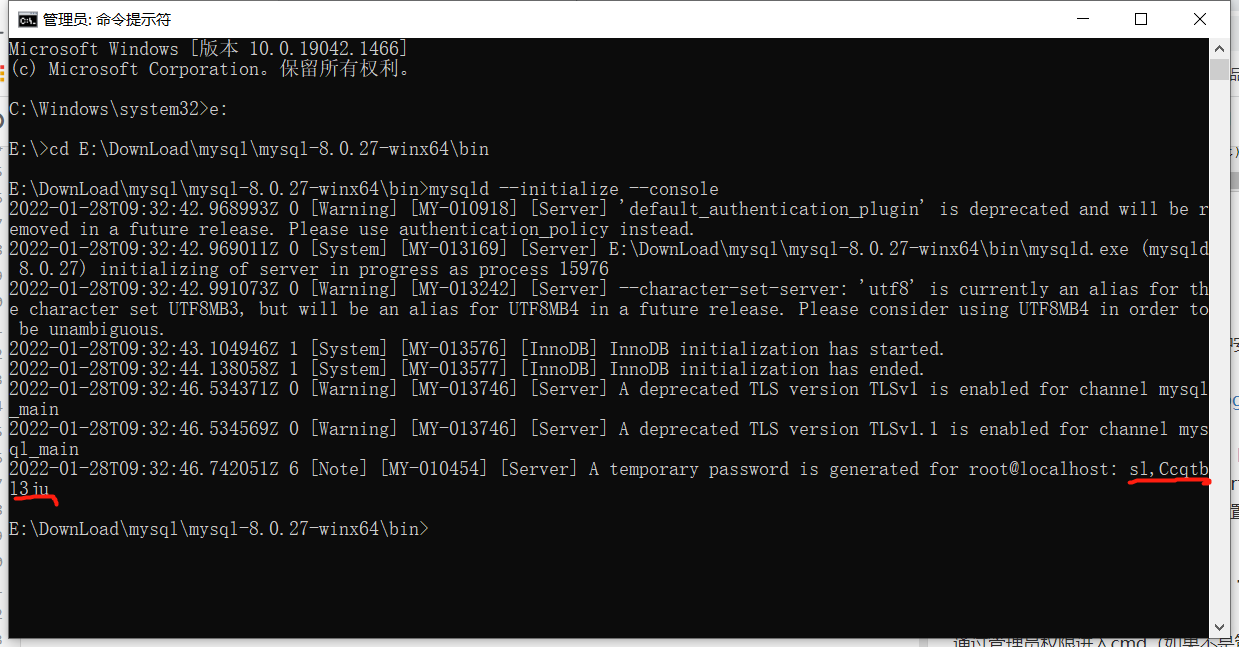
If you are cheap, close fast, or don't remember, it's okay. Delete the initialized datadir directory and execute the initialization command again, and it will be regenerated again.
5. Install Service: mysqld -- the service name after install [service name] may not be written. The default name is mysql. Of course, if you need to install multiple MySQL services on your computer, you can distinguish them by different names, such as mysql5 and mysql8. After the installation is completed, you can start the MySQL service through the command net start mysql. Stop the service through the command net stop mysql. Uninstall the MySQL service with the command sc delete MySQL/mysqld -remove
6. Change Password: mysql -u root -p
At this time, you will be prompted to enter the password. After remembering the password in step 3.1 above, you can log in successfully and enter the MySQL command mode.
Execute commands in MySQL:
ALTER USER 'root'@'localhost' IDENTIFIED WITH mysql_native_password BY 'new password';
You can use the command to view the database installed by default:
show databases;
use mysql;
show tables;
Create database
-- Create database
CREATE DATABASE scraping
-- Switch database
USE scraping
-- Create table
CREATE TABLE urls(id int not null auto_increment,
url varchar(1000) not null,
content varchar(4000) not null,
created_time timestamp default current_timestamp,
primary key (id)
)
Connection operation MySQL
# Create database connection
conn = MySQLdb.Connection(host='localhost', user='root', passwd='123456', db='scraping')
# Create cursor
cur = conn.cursor()
# Write pure SQL statement
cur.execute("insert  into urls (url,content)VALUES('www.baidu.com','Baidu')")
# Close cursor
cur.close()
# Execute SQL
conn.commit()
# Close connection
conn.close()
Connect MongoDB
Install mongdb
1. Download the installation package with the executable file of the installation version. You can install it until Next. The installation free version should be decompressed to the local computer. Create a new data and logs folder under the extracted directory, and create a new Mongo Config file, create a new db folder under the data file, Mongo The configuration information added to the conf file is as follows:
dbpath=E:\DownLoad\MongoDB\mongodb-win32-x86_64-2012plus-4.2.18-rc0-12-gbe2c559\data\db #Database path
logpath=E:\DownLoad\MongoDB\mongodb-win32-x86_64-2012plus-4.2.18-rc0-12-gbe2c559\logs\mongo.log #Log output file path
logappend=true #The error log adopts the append mode
journal=true #Enable log file, enabled by default
quiet=true #This option can filter out some useless log information. If you need to debug, please set it to false
port=27017 #The default port number is 27017
2. Start mongdb
Open the command line window (cmd open) -- cd jumps to mongodb's bin directory -- execute the command to tell mongodb where to store the data, and enter: mongod -dbpath E:\mongodbFiles\db\data (according to the data folder path you just created, here is the actual path I created)
The default connection port of mongodb is 27017. If the situation as shown in the figure occurs, access it in the browser: http://localhost:27017
3. Open a new cmd command line window and do not close the previous one.
cd the new command line to the bin directory of mongodb, and then enter the command: mongod -- config D: \ software \ professional \ mongodb \ Mongo config --install -serviceName "MongoDB"
This step is to tell mongodb how to configure the file and start mongodb as a system service.
In the command line window (cmd), enter services MSc command - view the service, you can see the MongoDB service, and click to start it.
The pop-up window is as follows: find the MongoDB service, double-click the MongoDB item (here mine has been started), click start in the pop-up window, and set the start type to automatic: so far, the configuration has been completely completed.
Operation mongdb
1. There are two ways to start mongodb. One is to open it in the form of program, and the other is to open it in the form of window service
//View all databases
show dbs
Using python to operate mongdb
client = MongoClient('localhost', 27017)
db = client.blog_database
collection = db.blog

link = "http://www.santostang.com/"
headers = {
    'User-Agent': 'Mozilla/5.0 (Windows NT 10.0; Win64; x64) AppleWebKit/537.36 (KHTML, like Gecko) Chrome/96.0.4664.110 Safari/537.36'
}

r = requests.get(link, headers=headers)
soup = BeautifulSoup(r.text, "html.parser")
title_list = soup.find_all('h1', class_="post-title")
for h in title_list:
    url = h.a['href']
    title = h.a.text.strip()
    post = {
        "url": url,
        "title": title,
        "date": datetime.datetime.utcnow()
    }
    collection.insert_one(post)
MongoDB crawler practice: Tiger flutter Forum
Using mongodb class, you can easily connect to the database, extract the contents of the database, add data to the database and update the data in the database.
# coding=utf-8
from pymongo import MongoClient


class MongoAPI(object):
	def __init__(self, db_ip, db_port, db_name, table_name):
		self.db_ip = db_ip
		self.db_port = db_port
		self.db_name = db_name
		self.table_name = table_name
		self.conn = MongoClient(host=self.db_ip, port=self.db_port)
		self.db = self.conn[self.db_name]
		self.table = self.db[self.table_name]

# Get the first data in the database
def get_one(self, query):
    return self.table.find_one(query, projection={"_id": False})

# Obtain all data that meet the conditions of the database
def get_all(self, query):
    return self.table.find(query)

# Adding data to a collection
def add(self, kv_dict):
    return self.table.insert_one(kv_dict)

# Delete data from collection
def delete(self, query):
    return self.table.delete_many(query)

# Check whether the collection contains data that meets the conditions. If found, return True. If not, return False
def check_exist(self, query):
    ret = self.table.find_one(query)
    return ret != None

# Update the data in the collection. If it cannot be found in the collection, a piece of data will be added
def update(self, query, kv_dict):
    self.table.update_one(query, {"$set": kv_dict}, update=True)
from MongoAPI import MongoAPI
# Connect to the post collection in the database hupu.
hupu_post = MongoAPI("localhost", 27017, "hupu", "post")
for i in range(1, 11):
    link = "https://bbs.hupu.com/bxj" + "-" + str(i)
    headers = {
        'User-Agent': 'Mozilla/5.0 (Windows NT 10.0; Win64; x64) AppleWebKit/537.36 (KHTML, like Gecko) Chrome/96.0.4664.110 Safari/537.36'
    }
    r = requests.get(link, headers=headers)
    suop = BeautifulSoup(r.text, "html.parser")

    li_list = suop.find_all("li", class_="bbs-sl-web-post-body")
    for li in li_list:
        title = li.find('div', class_="post-title").a.text.strip()
        title_link = li.find('div', class_="post-title").a["href"]
        datum = li.find("div", class_="post-datum").text.strip()
        reply = datum.split('/')[0]
        browse = datum.split('/')[1]
        author = li.find("div", class_="post-auth").text.strip()
        start_date = li.find("div", class_="post-time").text.strip()
        # data = datetime.datetime.strptime(start_date, '%Y-%m-%d').date()
        # Add data
        hupu_post.update(
            {"title": title, "title_link": title_link, "reply": reply, "browse": browse, "author": author,
             "data": start_date})
        print(title, title_link, reply, browse, author, start_date)
    time.sleep(1)