-
Install Virtual Box, Download from official website
-
Install Vagrant, Download from official website
-
There are multiple Linux system images in the Vagrant image warehouse. We can use Vagrant to connect to the Virtual Box and quickly install the Linux image. Mirror Box warehouse
-
Use vagrant init centos/7 to initialize a cantos7 virtual machine.
vagrant init centos/7 #vagrant init is followed by the name of the image in the vagrant image Box warehouse
A Vagrantfile file will be created in the current directory to manage the virtual machine information
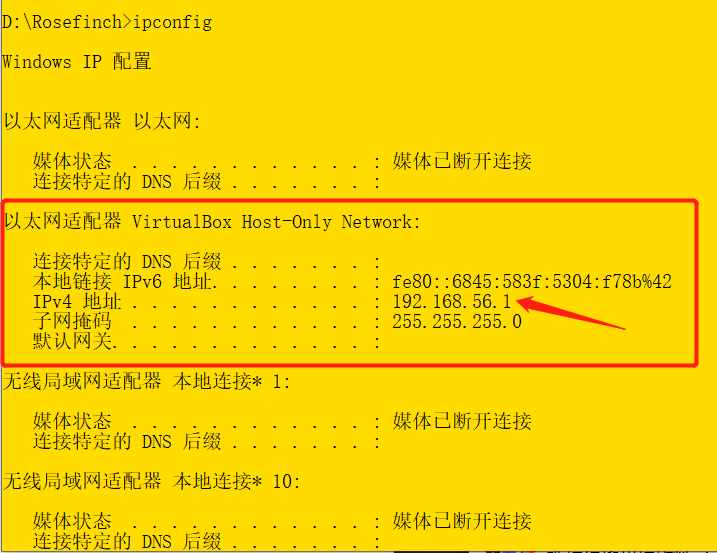
You can change config. In Vagrantfile vm. Network "private_network", ip: "192.168.56.10" statement to change the IP address of the virtual machine and the IP address of the local virtual machine network card in the same network to ensure mutual ping.

Then restart the virtual machine using vagrant reload
-
The virtual machine can be started through vagrant up
vagrant up				#Start the virtual machine
vagrant ssh				#Log in to the virtual machine
su root					#Switch to root and the password will be vagrant
- By default, only ssh login mode is allowed. For the convenience of later operation and file upload, we can configure to allow account and password login
vagrant ssh After logging into the system
vi /etc/ssh/sshd_config
 modify PasswordAuthentication yes/no
 Restart service service sshd restart
- You can connect directly later using the ssh connection tool
-
Each container is isolated from each other based on the virtual image technology, and the docker can be installed in each container. Each container can run in a complete virtual environment. For example, it can help us quickly install mysql, redis, ES and other related containers.
-
The installation steps can be operated according to the official website documents, which can be referred to Official website document , you can also refer to Rookie tutorial - CentOS Docker installation
-
Uninstall old version
sudo yum remove docker \ docker-client \ docker-client-latest \ docker-common \ docker-latest \ docker-latest-logrotate \ docker-logrotate \ docker-engine -
Set docker warehouse
-
Install the required packages. Yum utils provides Yum config manager, and the device mapper storage driver requires device mapper persistent data and lvm2.
sudo yum install -y yum-utils device-mapper-persistent-data lvm2
-
Set the image source installed by docker (the official source is used in the official document, and some domestic image sources can also be added). If the official source is set here, you can see the last step at the end of the article. The last step at the end of the article supplements the tutorial on how to add Alibaba cloud image source, so there is no need to worry about installing the official source here
Official source
sudo yum-config-manager --add-repo https://download.docker.com/linux/centos/docker-ce.repo
Alicloud image source
sudo yum-config-manager --add-repo http://mirrors.aliyun.com/docker-ce/linux/centos/docker-ce.repo
Image source of Tsinghua University
sudo yum-config-manager --add-repo https://mirrors.tuna.tsinghua.edu.cn/docker-ce/linux/centos/docker-ce.repo
-
-
Install docker engine docker CE and docker operation client docker CE CLI and docker container containerd io
sudo yum install docker-ce docker-ce-cli containerd.io
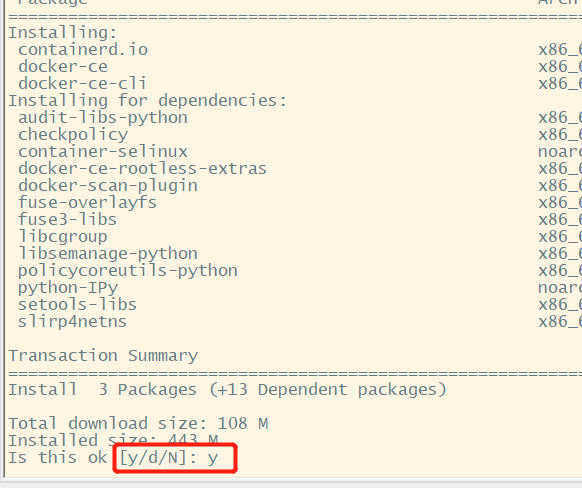
If the following prompt appears, select y

If prompted whether to accept the GPG key, select y.
-
Start docker
sudo systemctl start docker
docker -v							#View docker version
sudo docker images					#View docker image
sudo systemctl enable docker		#Set docker to start automatically with the virtual machine
-
Students who have configured the official source in step 3.2 above can use Alibaba cloud container image service - Image Tool - image accelerator Configure according to the operation document and add alicloud image source
sudo mkdir -p /etc/docker

sudo tee /etc/docker/daemon.json <<-'EOF'
{
  "registry-mirrors": ["https://22ywpcr4.mirror.aliyuncs.com"]
}
EOF

sudo systemctl daemon-reload
sudo systemctl restart docker
-
The lesson of virtual machine resource loss caused by insufficient backup preparation for system reinstallation is recorded this time