1. Introduction
- This tutorial will show you how to use the PaddleClas suite to export inference models and use webai JS deployed to the front end of the web page
Link from AI Studio project https://aistudio.baidu.com/aistudio/projectdetail/3482001
2. Derive the paddy reasoning model
-
The export script for PaddleClas is located in PaddleClas/tools/export_model.py
-
For more detailed usage, please refer to PaddleClas official document
-
As a demonstration, the sample model provided in the official document is used for model export. The specific steps are as follows:
- Clone PaddleClas code
!git clone https://github.com/PaddlePaddle/PaddleClas --depth 1
- Switch working directory
%cd ./PaddleClas
- Download the official ResNet50 pre training model
!wget -P ./cls_pretrain/ https://paddle-imagenet-models-name.bj.bcebos.com/dygraph/legendary_models/ResNet50_vd_pretrained.pdparams
- Derive the reasoning model in Paddle format
!python tools/export_model.py \
        -c ./ppcls/configs/ImageNet/ResNet/ResNet50_vd.yaml \
        -o Global.pretrained_model=./cls_pretrain/ResNet50_vd_pretrained \
        -o Global.save_inference_dir=./deploy/models/class_ResNet50_vd_ImageNet_infer \
        -o Global.device=cpu
3. Convert to ONNX model
- Installing Paddle2ONNX
!pip install paddle2onnx
- Model transformation
!paddle2onnx \
        --model_dir=./deploy/models/class_ResNet50_vd_ImageNet_infer \
        --model_filename=inference.pdmodel \
        --params_filename=inference.pdiparams \
        --save_file=./deploy/models/class_ResNet50_vd_ImageNet_infer/model.onnx \
        --opset_version=12
4. Generate configuration file
-
Use profile converter
-
WebAI experience website Contains a profile conversion generator
-
This program can quickly convert the configuration file of PaddleClas into webai Configuration files required for JS reasoning
-
The converter is still under continuous development and may not be compatible with all PaddleClas configuration files at present
-
The default PaddleClas inference configuration file is located in PaddleClas / deploy / configs / information_ cls. yaml
-
The content of the converted default configuration file is as follows:
// configs.json
{
    "Preprocess": [
        {
            "type": "Decode",
            "mode": "RGB"
        },
        {
            "type": "Resize",
            "interp": 1,
            "keep_ratio": true,
            "limit_max": false,
            "target_size": [256, 256]
        },
        {
            "type": "Crop",
            "crop_size": [224, 224]
        },
        {
            "type": "Normalize",
            "is_scale": true,
            "mean": [0.485, 0.456, 0.406],
            "std": [0.229, 0.224, 0.225]
        },
        {
            "type": "Permute"
        }
    ],
    "label_list": [
        "0 tench, Tinca tinca",
        "1 goldfish, Carassius auratus",
        "2 great white shark, white shark, man-eater, man-eating shark, Carcharodon carcharias",
        "...",
        "997 bolete",
        "998 ear, spike, capitulum",
        "999 toilet tissue, toilet paper, bathroom tissue"
    ]
}
-
-
Write the configuration file manually. The example is as follows:
// configs.json
{
    "Preprocess": [
        {
            "type": "Decode", // Image decoding
            "mode": "RGB" // RGB or BGR
        },
        {
            "type": "Resize", //  Image scaling
            "interp": 1, // Interpolation mode
            "keep_ratio": false, // Maintain aspect ratio
            "limit_max": false, // Limit the maximum size of the picture
            "target_size": [300, 300] // Target size [H, W]
        },
        /*
        {
            "type": "Crop", // Image center cutting
            "crop_size": [224, 224] // Target size [H, W]
        },
        */
        {
            "type": "Normalize", // normalization
            "is_scale": false, // Zoom or not (img /= 255.0)
            "mean": [127.5, 127.5, 127.5], // mean value
            "std": [127.5, 127.5, 127.5] // standard deviation
        },
        {
            "type": "Permute" // Transpose (HWC - > CHW)
        }
    ],
    "label_list": [
        "aeroplane", "bicycle", "bird", "boat", "bottle", "bus", "car",
        "cat", "chair", "cow", "diningtable", "dog", "horse", "motorbike",
        "person", "pottedplant", "sheep", "sofa", "train", "tvmonitor"
    ] // Tag list
}
5. Rapid deployment
-
Clone webai JS examples project:
$ git clone https://github.com/AgentMaker/WebAI.js-Examples
-
Switch to the sample Directory:
$ cd ./ppcls
-
Directory structure:
- public # Server public directory - pplcnet_x0_25_imagenet # Model file directory - configs.json # configuration file - model.onnx # Model file - index.html # Webpage - main.js # Function code - package.json # Project profile -
Project details:
-
The web page contains the following simple components:
-
Image upload button: used to upload images
-
Image: used to display images
-
Result text area: used to display the result text
-
Function code: used to realize functions
-
-
Web page features:
-
Load image classification model
-
Classify uploaded images
-
Display the result probability text output to the web page
-
-
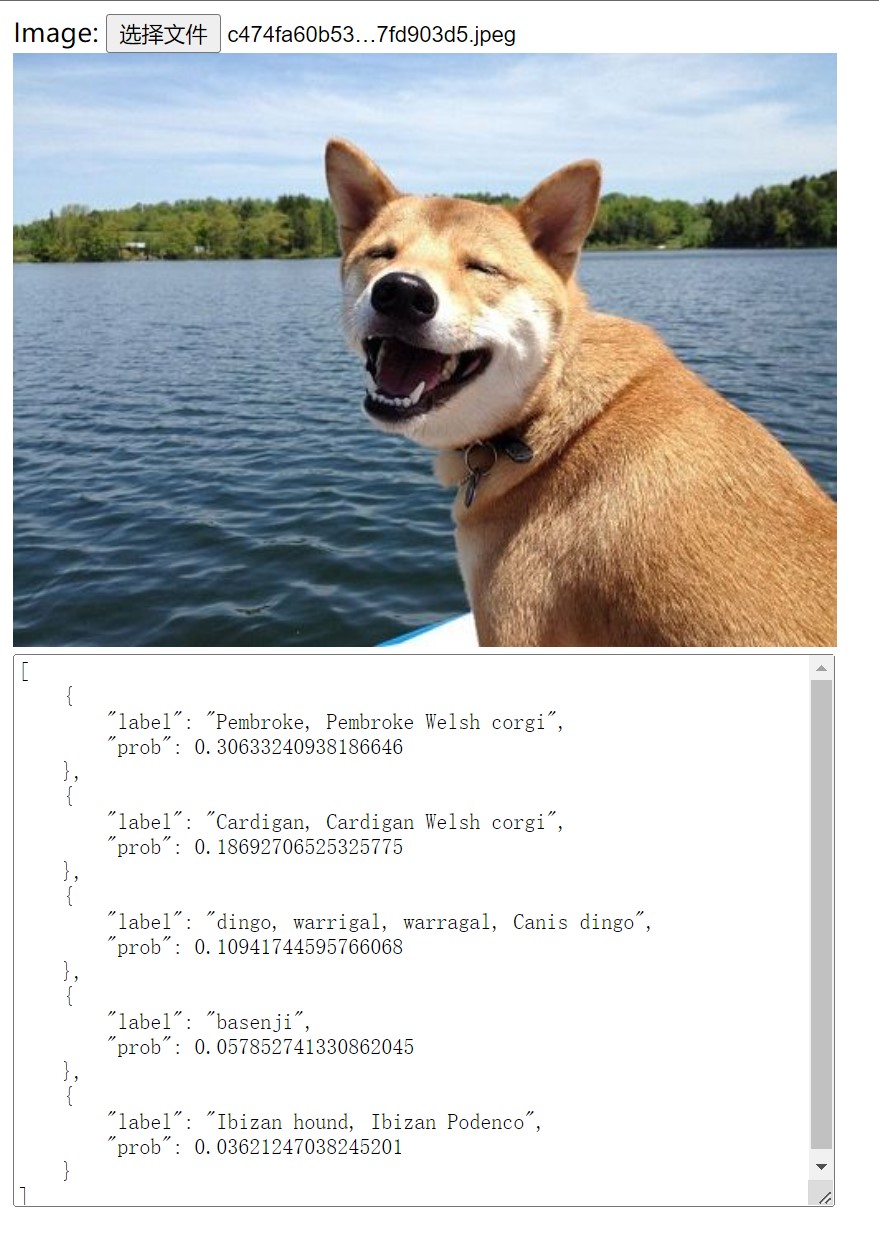
Web page preview:
-
For more details, please refer to the code implementation: index.html / main.js
-
-
Modify the model path in the code (if necessary):
// main.js
// The model and configuration files are recommended to be placed in the 'public' directory. The files in this directory can be referenced by using the path '/ *'

...
const modelURL = "/class_ResNet50_vd_ImageNet_infer/model.onnx"
const modelConfig = "/class_ResNet50_vd_ImageNet_infer/configs.json"
...
-
Installation dependency:
$ npm install
-
Develop web pages:
$ npm run dev

# Access via browser http://localhost:3000 To view and test web pages
-
To build a web page:
$ npm run build
-
Preview the built page:
$ npm run preview

# Access via browser http://localhost:5000 To preview the completed web page
-
Build web pages into the '... / docs' Directory:
$ npm run build:docs
-
Deploy web page to Github/Gitee Page:
-
fork this project
-
Complete web development
-
Build web pages into the '... / docs' directory
-
Enable the Page function of the project
-
Set '... / docs' directory as the source directory of Page function
-