Shangsi Valley Learning notes-8 RabbitMQ advanced features
8.1 reliable delivery of messages
When using RabbitMQ, the message sender wants to eliminate any message loss or delivery failure scenarios. RabbitMQ provides us with two ways to control the delivery reliability mode of messages.
·confirm mode
·Return return mode
rabbitmq the delivery path of the whole message is:
producer—>rabbitmq broker—>exchange—>queue—>consumer
l if the message goes from producer to exchange, a confirmCallback will be returned.
l if the message fails to be delivered from exchange – > queue, a returnCallback will be returned.
We will use these two callback s to control the reliable delivery of messages
8.1.1 provider code implementation (this part of code is implemented on the producer side)
Create MqAckConfig in rabbit MQ module
@Component
public class MqAckConfig implements RabbitTemplate.ConfirmCallback, RabbitTemplate.ReturnCallback {

    @Resource
    RabbitTemplate rabbitTemplate;

    @PostConstruct
    public void init() {
        rabbitTemplate.setConfirmCallback(this);
        rabbitTemplate.setReturnCallback(this);
    }


    @Override
    public void confirm(@Nullable CorrelationData correlationData, boolean ack, @Nullable String error) {
        System.out.println("Message sending");
    }

    @Override
    public void returnedMessage(Message message, int code, String codeMessage, String exchange, String routing) {
        System.out.println("Delivery of messages");
    }
}
Add configuration in rabbit test test service
application.properties
spring.rabbitmq.publisher-returns=true
spring.rabbitmq.publisher-confirm-type=simple
8.1.2 summary of reliable delivery of messages
·Set publisher confirms = "true" of ConnectionFactory to enable confirmation mode.
·Use rabbittemplate Setconfirmcallback sets the callback function. When the message is sent to exchange, the confirm method is called back. Judge the ack in the method. If it is true, the sending succeeds. If it is false, the sending fails and needs to be handled.
·Set publisher returns = "true" of ConnectionFactory to enable return mode.
·Use rabbittemplate Setreturncallback sets the return function. When the message fails to be routed from exchange to queue, if rabbittemplate is set Setmandatory (true) parameter, the message will be returned to producer and the callback function returnedMessage will be executed
8.1.3 Consumer Ack (message transaction)
ack refers to knowledge, which is confirmed. Indicates the confirmation method after the consumer receives the message.
There are two confirmation methods:
·Automatic confirmation: acknowledge = "none" default
·Manual confirmation: acknowledge = "manual"
Automatic acknowledgement means that once a message is received by the Consumer, it will be automatically acknowledged and the corresponding message will be removed from the message cache of RabbitMQ. However, in the actual business processing, it is likely that the message will be lost if there is an exception in the business processing after the message is received.
If manual validation is established, channel. is required after successful business processing. Basicack(), manually sign in. If there is an exception, call channel Basicnack() method to automatically resend the message.
8.1.3.1 automatic confirmation
application.properties
spring.rabbitmq.listener.simple.acknowledge-mode=auto
spring.rabbitmq.listener.direct.acknowledge-mode=auto
8.1.3.2 manual confirmation
application.properties
spring.rabbitmq.listener.simple.acknowledge-mode=manual
spring.rabbitmq.listener.direct.acknowledge-mode=manual
Related code
public void a(Channel channel , Message message, String messageStr){
    System.out.println(messageStr);
    String s = new String(message.getBody());
    // After consumption, confirm the commit
    channel.basicAck(message.getMessageProperties().getDeliveryTag(),false);
}
Consumer Ack summary
commit submission confirmation:
If there is no exception on the consumer side, call channel basicAck(deliveryTag,true); Method to confirm the sign in message. If an exception occurs
Rollback message:
Call basicNack in catch, refuse the message, and let MQ resend the message.
8.2 current limiting at consumer end
application.properties
spring.rabbitmq.listener.simple.prefetch=1
spring.rabbitmq.listener.direct.prefetch=1
Summary:
prefetch = 1, which means that the consumer will pull a message from mq every time to consume, and will not continue to pull the next message until the consumption is manually confirmed
8.3 TTL
The full name of TTL is Time To Live.
When the message reaches the survival time and has not been consumed, it will be automatically cleared.
RabbitMQ can set the expiration time for messages or for the entire Queue.

8.3.1 control background presentation message expiration
① Modify the management background interface and add queues
Parameter: indicates expiration time, in milliseconds; 10000 indicates 10 seconds
② Add switch
③ Bind queue
④ Send message
Delivery mode: 2-Persistent indicates that persistence is required
⑤ When you view the message, you can see the message, but after ten seconds, the message will disappear automatically, because we set the ten second message expiration
8.3.2 code implementation
     /**
     * TTL: Expiration time
     *  1. Queue unified expiration
     *  2. Messages expire individually
     * If the expiration time of the message is set, the expiration time of the queue is also set, whichever is shorter.
     */
    @Test
    public void testMessageTtl() {
        // The message post-processing object sets some message parameter information
        MessagePostProcessor messagePostProcessor = new MessagePostProcessor() {

            @Override
            public Message postProcessMessage(Message message) throws AmqpException {
                //1. Set message
                // The second method: the expiration time of the message, which expires after 5 seconds
                message.getMessageProperties().setExpiration("5000");
                //2. Return this message
                return message;
            }
        };

        //Messages expire individually
        rabbitTemplate.convertAndSend("test_exchange_ttl","ttl.hehe","message ttl....",messagePostProcessor);
    }
Run the program to view the background management system
8.4 dead letter queue
Dead letter queue, English abbreviation: DLX. Dead letter exchange (dead letter exchange). When the message becomes Dead message, it can be re sent to another switch, which is DLX.
What is a dead letter queue
Generally speaking, the meaning of "queue" can not be directly explained from the name of "queue" in some messages, If there is no subsequent processing for such a message, it will become a dead letter. If there is a dead letter, there will naturally be a dead letter queue;

There are three situations when a message becomes a dead letter:
-
The number of queued messages reaches the limit; For example, the queue can only store 10 messages at most, while 11 messages are sent. According to the first in first out, the first message will enter the dead letter queue.
-
The consumer rejects the consumption message, basicNack/basicReject, and does not put the message back into the original target queue, request = false;
-
The message expiration setting exists in the original queue, and the message arrival timeout is not consumed;
Handling of dead letter
Since the generation of dead letters is inevitable, it is necessary to carry out subsequent processing of these dead letters from the perspective of actual business and scenarios. The common processing methods are roughly as follows,
① Discard. If it is not very important, you can choose to discard it
② Record dead letter receipt, and then conduct subsequent business analysis or processing
③ Through the dead letter queue, it is processed by the application responsible for listening for dead letters
On the whole, the third method is more commonly used, that is, through the dead letter queue, route the generated dead letter to the specified dead letter queue through the configuration of the program, and then apply the dead letter queue to monitor the dead letter queue for subsequent processing of the received dead letter,
Queue bound dead letter switch:
Set parameters for the queue: x-dead-letter-exchange and x-dead-letter-routing-key
8.4.1 code implementation
Create a new configuration file (class), DeadLetterMqConfig

@Configuration
public class DeadLetterMqConfig {

    public static final String exchange_dead = "exchange.dead";
    public static final String routing_dead_1 = "routing.dead.1";
    public static final String routing_dead_2 = "routing.dead.2";
    public static final String queue_dead_1 = "queue.dead.1";
    public static final String queue_dead_2 = "queue.dead.2";

    /**
     * Other queues can be bound on the RabbitListener
     *
     * @return
     */

    @Bean
    public DirectExchange exchange() {

        return new DirectExchange(exchange_dead, true, false, null);
    }

    @Bean
    public Queue queue1() {
        Map<String, Object> arguments = new HashMap<>();
        arguments.put("x-dead-letter-exchange", exchange_dead);
        arguments.put("x-dead-letter-routing-key", routing_dead_2);
        return new Queue(queue_dead_1, true, false, false, arguments);
    }

    @Bean
    public Binding binding() {
        return BindingBuilder.bind(queue1()).to(exchange()).with(routing_dead_1);
    }

    @Bean
    public Queue queue2() {
        return new Queue(queue_dead_2, true, false, false, null);
    }

    @Bean
    public Binding deadBinding() {
        return BindingBuilder.bind(queue2()).to(exchange()).with(routing_dead_2);
    }
}
Send dead message queue and set ttl time. Add method in MqServiceImpl class
@Override
public void sendDeadMsg(String exchange_dead, String routing_dead_1, String test) {
    System.out.println("Send dead letter message");
    rabbitTemplate.convertAndSend(exchange_dead,routing_dead_1,test,p->{
        // Setting of dead letter message, setting ttl(time to live)
        p.getMessageProperties().setExpiration("3000");//3 second ttl
        return p;
    });
}
Call dead letter method
@Override
public void sendDeadMsg() {
    mqService.sendDeadMsg(DeadLetterMqConfig.exchange_dead,"1111","test");
}
Summary of dead letter queue
-
Dead letter switch and dead letter queue are no different from ordinary ones
-
When a message becomes a dead letter, if the queue is bound to the dead letter switch, the message will be rerouted to the dead letter queue by the dead letter switch
-
There are three situations when a message becomes a dead letter:
- The queue message length (number) reaches the limit;
- The consumer rejects the consumption message and does not return to the queue;
- The message expiration setting exists in the original queue, and the message arrival timeout is not consumed;
8.5 delay queue
The object stored in the delay queue must be the corresponding delay message. The so-called "delay message" refers to that when the message is sent, the consumer does not want to get the message immediately, but waits for a specified time before the consumer gets the message for consumption.
Scenario: in the order system, a user usually has 30 minutes to pay after placing an order. If the payment is not successful within 30 minutes, the order will be cancelled. At this time, you can use the delay queue to send the order information to the delay queue.
Requirements:
-
If the order is not paid within 30 minutes after placing the order, the order shall be cancelled and the inventory shall be rolled back.
-
After 30 minutes of successful registration of new users, send SMS greetings.
Implementation method:
- Delay queue

Unfortunately, the delay queue function is not provided in RabbitMQ.
However, TTL + dead letter queue combination can be used to achieve the effect of delay queue.
8.5.1 code implementation
configuration file
@Configuration
public class DelayedMqConfig {

    public static final String exchange_delay = "exchange.delay";
    public static final String routing_delay = "routing.delay";
    public static final String queue_delay_1 = "queue.delay.1";

    /**
     * Do not bind the queue on the RabbitListener, otherwise it will not succeed. For example, queue 2 must be bound here
     *
     * @return
     */

    @Bean
    public Queue delayQeue1() {
        // The first parameter is the name of the created queue, and the second parameter is whether persistence is supported
        return new Queue(queue_delay_1, true);
    }

    @Bean
    public CustomExchange delayExchange() {
        Map<String, Object> args = new HashMap<String, Object>();
        args.put("x-delayed-type", "direct");
        return new CustomExchange(exchange_delay, "x-delayed-message", true, false, args);
    }

    @Bean
    public Binding delayBbinding1() {
        return BindingBuilder.bind(delayQeue1()).to(delayExchange()).with(routing_delay).noargs();
    }

}
8.5.1.1 producers
producer
    @Override
    public void sendDelayMessage(String exchange, String routingKey, String message, int time, TimeUnit seconds) {
        rabbitTemplate.convertAndSend(exchange,routingKey,message,processer->{
            // Set the delay time of the message
            processer.getMessageProperties().setDelay(1*1000*time);// ttl time, default milliseconds
            return processer;
        });
    }
8.5.1.2 consumers
consumer
    @SneakyThrows
    @RabbitListener(queues = "queue.delay.1")
    public void d(Channel channel, Message message, String c) throws IOException {
        System.out.println("Delay queue listening");
        long deliveryTag = message.getMessageProperties().getDeliveryTag();
        channel.basicAck(deliveryTag, false);
    }
9. The message was delivered 100% successfully
When it comes to the reliable delivery of messages, it is unavoidable and often encountered in practical work. For example, some core businesses need to ensure that messages are not lost. Next, let's look at a flow chart of reliable delivery to explain the concept of reliable delivery:
Step 1: first, store the message information (business data) in the database. Then, we also store the message record in a message record table (or the message record table of another homologous database)
Step 2: Send a message to the MQ Broker node (send it in confirm mode, and there will be asynchronous return results)
Step 3 and 4: the producer side accepts the Confirm message result returned by the MQ Broker node, and then updates the message status in the message record table. For example, the default status is 0. When the message is received and confirmed successfully, it can be updated to 1!
Step 5: however, in the process of message confirmation, the loopback message may fail or be abnormal due to network flash off, MQ Broker side exception and other reasons. At this time, the sender (producer) needs to deliver the message reliably to ensure that the message is not lost and 100% of the delivery is successful! (there is a limit case where the Broker returns a successful confirmation message, but the production side does not receive the network flash, so redelivery at this time may cause duplicate messages, which requires the consumer to do idempotent processing). Therefore, we need to have a scheduled task, (for example, pull messages in the middle status every 5 minutes. Of course, this message can set a timeout time. For example, if Status = 0 for more than 1 minute, it means that our messages are not confirmed in the time window of 1 minute, they will be pulled out by scheduled tasks)
Step 6: next, we re deliver the message in the intermediate state to retry send and continue to send the message to MQ. Of course, there may be many reasons for the sending failure
Step 7: we can set the maximum number of attempts. For example, if it is delivered three times and still fails, we can set the final status to Status = 2, and finally hand it over to the manual to solve this kind of problem (or dump the message into the failure table).
9.1 database files
-- ----------------------------
-- Table structure for broker_message_log
-- ----------------------------
DROP TABLE IF EXISTS `broker_message_log`;
CREATE TABLE `broker_message_log` (
  `message_id` varchar(255) NOT NULL COMMENT 'Unique message ID',
  `message` varchar(4000) NOT NULL COMMENT 'Message content',
  `try_count` int(4) DEFAULT '0' COMMENT 'retry count',
  `status` varchar(10) DEFAULT '' COMMENT 'Message delivery status 0 is in delivery,1 Successful delivery,2 Delivery failed',
  `next_retry` timestamp NOT NULL DEFAULT '0000-00-00 00: 00: 00' ON UPDATE CURRENT_TIMESTAMP COMMENT 'Next retry time',
  `create_time` timestamp NOT NULL DEFAULT '0000-00-00 00: 00: 00' ON UPDATE CURRENT_TIMESTAMP,
  `update_time` timestamp NOT NULL DEFAULT '0000-00-00 00: 00: 00' ON UPDATE CURRENT_TIMESTAMP,
  PRIMARY KEY (`message_id`)
) ENGINE=InnoDB DEFAULT CHARSET=utf8;

-- ----------------------------
-- Table structure for t_order
-- ----------------------------
DROP TABLE IF EXISTS `t_order`;
CREATE TABLE `t_order` (
  `id` int(11) NOT NULL AUTO_INCREMENT,
  `name` varchar(255) DEFAULT NULL,
  `message_id` varchar(255) DEFAULT NULL,
  PRIMARY KEY (`id`)
) ENGINE=InnoDB AUTO_INCREMENT=2018091102 DEFAULT CHARSET=utf8;
10 message idempotency guarantee
Idempotency refers to one or more requests for a resource, which should have the same result for the resource itself. In other words, the impact of any multiple execution on the resource itself is the same as that of one execution.

In MQ, it refers to consuming multiple identical messages and getting the same result as consuming the message once.
Idempotency
concept
The results of one request or multiple requests initiated by the user for the same operation are consistent, and there will be no side effects due to multiple clicks. The simplest example is payment. The user pays after purchasing goods, and the payment is deducted successfully. However, when the result is returned, the network is abnormal. At this time, the money has been deducted. The user clicks the button again, and the second deduction will be made. The result is returned successfully. The user queries the balance and finds that more money has been deducted, and the daily record has become two. In the previous single application system, we only need to put the data operation into the transaction and roll back immediately when an error occurs, but there may be network interruption or exceptions when responding to the client
Message repeated consumption
When the consumer consumes the message in MQ, MQ has sent the message to the consumer. When the consumer returns ack to MQ, the network is interrupted, so MQ does not receive the confirmation information. The message will be sent to other consumers again, or sent to the consumer again after the network is reconnected, but in fact, the consumer has successfully consumed the message, Causing consumers to consume repeated messages.
Solution ideas
The idempotency of MQ consumers is generally solved by using the global id or writing a unique id, such as timestamp or UUID or order. Consumers can also use the id of MQ to judge whether they consume messages in MQ, or they can generate a global unique id according to their own rules. Each time they consume a message, they use the id to judge whether the message has been consumed.
Idempotent guarantee of consumer end
During the business peak of massive order generation, messages may occur repeatedly at the production end. At this time, the consumer must realize idempotency, which means that our messages will never be consumed many times, even if we receive the same message. The mainstream idempotency in the industry has two operations: a. unique ID + fingerprint code mechanism, which uses the database primary key to remove duplication, and b. It is realized by using the atomicity of redis
Unique ID + fingerprint code mechanism
Fingerprint code: the unique information code given by some of our rules or time stamps plus other services. It is not necessarily generated by our system. It is basically spliced from our business rules, but we must ensure the uniqueness. Then we use the query statement to judge whether this id exists in the database. The advantage is to realize a simple splicing, Then query and judge whether it is repeated; The disadvantage is that in case of high concurrency, if it is a single database, there will be a write performance bottleneck. Of course, we can also use database and table to improve performance, but it is not our most recommended way.
Redis atomicity
Using redis to execute setnx command is naturally idempotent. So as to realize non repeated consumption
Priority queue
Usage scenario
In our system, there is a scene of urging payment of orders. Taobao will push the orders placed by our customers on tmall to us in time. If they fail to pay within the time set by the user, they will push a text message reminder to the user. It's a simple function, right? But tmall businesses must be divided into large customers and small customers for us, right, For example, big businesses such as apple and Xiaomi can create great profits for us at least a year, so of course, their orders must be given priority. Once, our back-end system used redis to save
As we all know, redis can only use List as a simple message queue and can not achieve a priority scenario,
Therefore, after the order volume is large, RabbitMQ is used for transformation and optimization. If it is found that the order of a large customer is given a relatively high priority, otherwise it is the default priority.
Message idempotency guarantee optimistic locking mechanism
Message sent by producer:
id=1,money=500,version=1
Consumer receives message
id=1,money=500,version=1
id=1,money=500,version=1
Consumers need to ensure idempotency: execute SQL statements for the first time
First execution: version=1
update account set money = money - 500 , version = version + 1
where id = 1 and version = 1
Consumers need to ensure idempotency: execute the SQL statement for the second time
Second execution: version=2
update account set money = money - 500 , version = version + 1
where id = 1 and version = 1
11 RabbitMQ cluster construction
Absrtact: the clustering scheme of message queue will be adopted in practical production applications. If RabbitMQ is selected, it is necessary to understand its clustering scheme principle
Generally speaking, if it is only to learn RabbitMQ or verify the correctness of business engineering, it is OK to use its single instance deployment in the local environment or test environment. However, considering the reliability, concurrency, throughput and message stacking capacity of MQ middleware, RabbitMQ clustering scheme is generally considered in the production environment.
11.1 principle of cluster scheme
RabbitMQ, a message queuing middleware product, is written based on Erlang. Erlang language is naturally distributed (realized by synchronizing magic cookie s of each node of Erlang cluster). Therefore, clustering MQ supports. This makes it unnecessary for RabbitMQ to implement the HA scheme and save the metadata of the cluster through ZooKeeper like ActiveMQ and Kafka. Clustering is a way to ensure reliability. At the same time, it can increase message throughput through horizontal expansion.
11.2 single machine multi instance deployment
Due to the limitation of some factors, sometimes you have to build a rabbitmq cluster on one machine, which is a bit similar to the stand-alone version of zookeeper. The real generation environment still needs to be configured into a multi machine cluster. For how to configure a multi machine cluster, you can refer to other materials. Here we mainly discuss how to configure multiple rabbitmq instances in a single machine.
Main reference official documents: https://www.rabbitmq.com/clustering.html
First, make sure RabbitMQ is running without problems
[root@atguigu ~]# systemctl start rabbitmq-server.service
[root@atguigu ~]# systemctl status rabbitmq-server.service
Stop rabbitmq service
[root@atguigu ~]# systemctl stop rabbitmq-server.service
Start three nodes for cluster demonstration:
Since the web management plug-in port is occupied, you should also specify the port number occupied by its Web plug-in.
[root@atguigu ~]# RABBITMQ_NODE_PORT=5672 RABBITMQ_NODENAME=rabbit1 RABBITMQ_SERVER_START_ARGS="-rabbitmq_management listener [{port,15672}]"  rabbitmq-server -detached
[root@atguigu ~]# RABBITMQ_NODE_PORT=5673 RABBITMQ_NODENAME=rabbit2 RABBITMQ_SERVER_START_ARGS="-rabbitmq_management listener [{port,15673}]"  rabbitmq-server -detached
[root@atguigu ~]# RABBITMQ_NODE_PORT=5674 RABBITMQ_NODENAME=rabbit3 RABBITMQ_SERVER_START_ARGS="-rabbitmq_management listener [{port,15674}]"  rabbitmq-server -detached
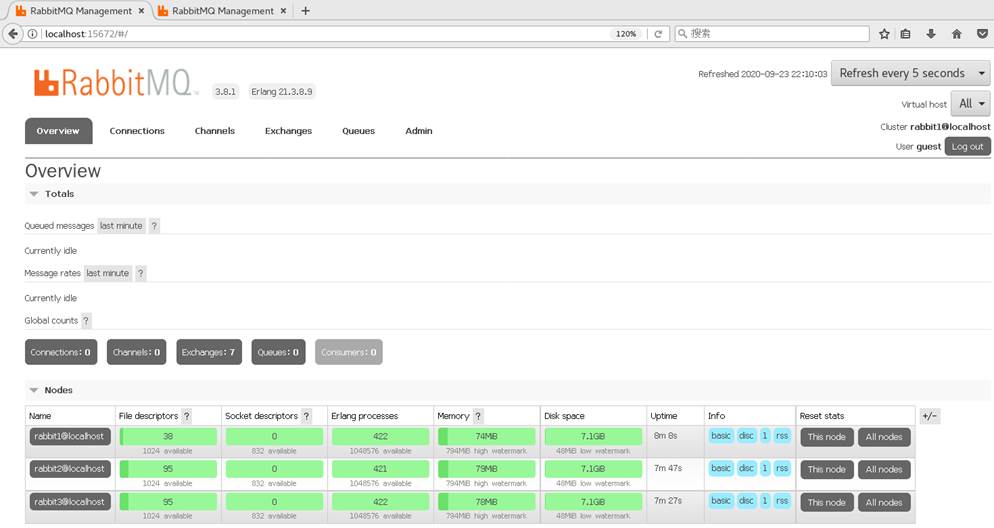
After starting the three nodes, visit the three nodes and the background management page to see if they are OK
Stop service command:
rabbitmqctl -n rabbit1 stop
rabbitmqctl -n rabbit2 stop
rabbitmqctl -n rabbit3 stop
rabbit1 operation as master node:
[root@atguigu ~]# rabbitmqctl -n rabbit1 stop_app
Stopping node rabbit1@localhost ...
[root@atguigu ~]# rabbitmqctl -n rabbit1 reset
Resetting node rabbit1@localhost ...
[root@atguigu ~]# rabbitmqctl -n rabbit1 start_app
Starting node rabbit1@localhost ...
rabbit2 operates as a slave node:
[root@atguigu ~]# rabbitmqctl -n rabbit2 stop_app
Stopping node rabbit2@localhost ...
[root@atguigu ~]# rabbitmqctl -n rabbit2 reset
Resetting node rabbit2@localhost ...
[root@atguigu ~]# rabbitmqctl -n rabbit2 join_cluster rabbit1
Clustering node rabbit2@localhost with rabbit1 ...
[root@atguigu ~]# rabbitmqctl -n rabbit2 start_app
Starting node rabbit2@localhost ...
rabbit3 operates as a slave node:
[root@atguigu ~]# rabbitmqctl -n rabbit3 stop_app
Stopping node rabbit3@localhost ...
[root@atguigu ~]# rabbitmqctl -n rabbit3 reset
Resetting node rabbit3@localhost ...
[root@atguigu ~]# rabbitmqctl -n rabbit3 join_cluster rabbit1
Clustering node rabbit3@localhost with rabbit1@super ...
[root@atguigu ~]# rabbitmqctl -n rabbit3 start_app
Starting node rabbit3@localhost ...
View cluster status:
[root@atguigu ~]# rabbitmqctl -n rabbit1 cluster_status
Cluster status of node rabbit1@localhost ...
Basics

Cluster name: rabbit1@localhost

Disk Nodes

rabbit1@localhost
rabbit2@localhost
rabbit3@localhost

Running Nodes

rabbit1@localhost
rabbit2@localhost
rabbit3@localhost

Versions

rabbit1@localhost: RabbitMQ 3.8.1 on Erlang 21.3.8.9
rabbit2@localhost: RabbitMQ 3.8.1 on Erlang 21.3.8.9
rabbit3@localhost: RabbitMQ 3.8.1 on Erlang 21.3.8.9
Alarms
(none)
Network Partitions
(none)
Listeners
Node: rabbit1@localhost, interface: [::], port: 25672, protocol: clustering, purpose: inter-node and CLI tool communication
Node: rabbit1@localhost, interface: [::], port: 5672, protocol: amqp, purpose: AMQP 0-9-1 and AMQP 1.0
Node: rabbit1@localhost, interface: [::], port: 15672, protocol: http, purpose: HTTP API
Node: rabbit2@localhost, interface: [::], port: 25673, protocol: clustering, purpose: inter-node and CLI tool communication
Node: rabbit2@localhost, interface: [::], port: 5673, protocol: amqp, purpose: AMQP 0-9-1 and AMQP 1.0
Node: rabbit2@localhost, interface: [::], port: 15673, protocol: http, purpose: HTTP API
Node: rabbit3@localhost, interface: [::], port: 25674, protocol: clustering, purpose: inter-node and CLI tool communication
Node: rabbit3@localhost, interface: [::], port: 5674, protocol: amqp, purpose: AMQP 0-9-1 and AMQP 1.0
Node: rabbit3@localhost, interface: [::], port: 15674, protocol: http, purpose: HTTP API

Feature flags

Flag: drop_unroutable_metric, state: enabled
Flag: empty_basic_get_metric, state: enabled
Flag: implicit_default_bindings, state: enabled
Flag: quorum_queue, state: enabled
Flag: virtual_host_metadata, state: enabled
web monitoring:
 rabbitmqctl -n rabbit1 add_user admin admin

rabbitmqctl -n rabbit1 set_user_tags admin administrator

rabbitmqctl -n rabbit1 change_password admin 123456
11.3 cluster management (independent commands can be understood)
rabbitmqctl join_cluster {cluster_node} [–ram]
Join the node to the specified cluster. Before executing this command, you need to stop the RabbitMQ application and reset the node.
rabbitmqctl cluster_status
Displays the status of the cluster.
rabbitmqctl change_cluster_node_type {disc|ram}
Modify the type of cluster node. The RabbitMQ application needs to be stopped before this command is executed.
rabbitmqctl forget_cluster_node [–offline]
Delete the node from the cluster and allow offline execution.
rabbitmqctl update_cluster_nodes {clusternode}
Before starting the node application in the cluster, consult the latest information of the clusternode node and update the corresponding cluster information. This and join_ Unlike cluster, it does not join the cluster. Consider this situation. Node A and node B are both in the cluster. When node a goes offline, node C forms a cluster with node B, and then node B leaves the cluster. When a wakes up, it will try to contact node B, but this will fail because node B is no longer in the cluster. rabbitmqctl update_cluster_nodes -n A C can solve this scenario.
rabbitmqctl cancel_sync_queue [-p vhost] {queue}
Cancels the queue synchronization mirror operation.
rabbitmqctl set_cluster_name {name}
Set the cluster name. The cluster name will be notified to the client when the client connects. Federation and Shovel plug-ins will also be useful where cluster names are. The cluster name defaults to the name of the first node in the cluster. You can reset it with this command.
11.4 RabbitMQ image cluster configuration
The default cluster mode of RabbitMQ has been completed above, but the high availability of the queue is not guaranteed. Although the switches and bindings can be copied to any node in the cluster, the contents of the queue will not be copied. Although this mode solves the node pressure of a project group, the queue can not be applied directly due to the downtime of the queue node and can only wait for restart. Therefore, in order to apply normally in case of downtime or failure of the queue node, it is necessary to copy the queue content to each node in the cluster and create a mirror queue.
The image queue is based on the normal cluster mode, and then some policies are added, so you still have to configure the normal cluster before setting the image queue. Let's continue with the above cluster.
The image queue can be set through admin - > policies on the management side of the open web page, or through the command.
·Name: policy name
·Pattern: the matching rule. If it matches all queues, it is ^
·Definition: use all in Ha mode mode mode, that is, synchronize all matching queues. Question mark links to help documents.

11.5 load balancing - HAProxy
HAProxy provides high availability, load balancing and proxy based on TCP and HTTP applications. It supports virtual hosts. It is a free, fast and reliable solution used by many well-known Internet companies, including Twitter, Reddit, StackOverflow and GitHub. HAProxy implements an event driven, single process model that supports a very large number of concurrent connections.
https://www.haproxy.org/
11.5.1 installing HAProxy
  //Download dependent packages
  yum install gcc vim wget
  //Upload haproxy source package- Extract C to the specified directory
  tar -zxvf haproxy-2.3.14.tar.gz -C /usr/local
  //Enter the directory, compile and install
  cd /usr/local/haproxy-2.3.14
  // make means compile; TARGET=linux31 indicates CentOS7 system;
  PREFIX=/usr/local/haproxy Specify the installation path
  // TARGET=linux310, kernel version. Use uname -r to view the kernel, such as 3.10.0-514.0 EL7, the parameter is linux310;
  make TARGET=linux310 PREFIX=/usr/local/haproxy
  make install PREFIX=/usr/local/haproxy
  mkdir /etc/haproxy
  //Add user group: - r create a system group- g group ID
  groupadd -r -g 149 haproxy
  //Add user: -g the name of the new account group- r create a system user- s login shell of the new user- U user ID of the new account
  useradd -g haproxy -r -s /sbin/nologin -u 149 haproxy
  //Create haproxy profile
  vim /etc/haproxy/haproxy.cfg
11.5.2 configuring HAProxy
Configuration file path: / etc / haproxy / haproxy cfg
#Global configuration
global
    #Log output configuration. All logs are recorded on the local machine and output through local0
    log 127.0.0.1 local0 info
    #maximum connection
    maxconn 5120
    #Change current working directory
    chroot /usr/local/haproxy
    #Run the haproxy process with the specified UID
    uid 99
    #Run the haproxy process with the specified GID
    gid 99
    #Running haproxy as a daemon
    daemon
    quiet
    nbproc 20
    #Current process PID file
    pidfile /var/run/haproxy.pid
#Default configuration
defaults
    #Apply global log configuration
    log global
    #The default mode is mode{tcp|http|health}
    mode tcp
    #Log category
    option tcplog
    #Do not record inspection log information
    option dontlognull
    #Three failures will make the service unavailable
    retries 3
    option redispatch
    #Maximum number of connections available per process
    maxconn 2000
#Binding configuration
listen rabbitmq_cluster
    bind *:5677
    #Configure TCP mode
    mode tcp
    #balance url_param userid
    #balance url_param session_id check_post 64
    #balance hdr(User-Agent)
    #balance hdr(host)
    #balance hdr(Host) use_domain_only
    #balance rdp-cookie
    #balance leastconn
    #balance source //ip
    #Simple polling
    balance roundrobin
    #server rabbit1 defines the internal ID of the service,
    #127.0.0.1:5672 service connection IP and port,
    #check inter 5000 defines how many milliseconds to check whether the service is available,
    #rise 2 how many checks are required after a service failure to be reconfirmed for availability,
    #fall 2 haproxy will not stop using this service until it has experienced multiple failed checks
    #weight 1 defines the service weight
    server rabbit1 192.168.137.118:5672 check inter 5000 rise 2 fall 2 weight 1
    server rabbit2 192.168.137.118:5673 check inter 5000 rise 2 fall 2 weight 1
    server rabbit3 192.168.137.118:5674 check inter 5000 rise 2 fall 2 weight 1
#haproxy monitoring page address
listen stats
    bind 192.168.137.118:8100
    mode http
    option httplog
    stats enable
    stats uri /rabbitmq-stats
    stats refresh 5s
Start HAproxy payload
/usr/local/haproxy/sbin/haproxy -f /etc/haproxy/haproxy.cfg
//Viewing haproxy process status
ps -ef | grep haproxy
Visit the following address to monitor the mq node
http://192.168.137.118:8100/rabbitmq-stats
springboot yml Access in file mq Cluster address:
spring:
  rabbitmq:
    host: 192.168.137.118
    port: 5677
    username: admin
    password: 123456
virtual-host: /
#addresses: 192.168.137.118:5672,192.168.137.118:5673,192.168.137.118:5674
